
Social proof is a great way to use marketing psychology to increase sales or engagement. Personyze can add a variety of types of social proof content to your website, and although it’s especially popular for ecommerce, it can also be used on any type of website.
This guide will take you step-by-step through the process of setting up a typical social proof campaign; based on your package, you can also ask your account manager to set it for you, with our included Campaigns-Built-for-You service.
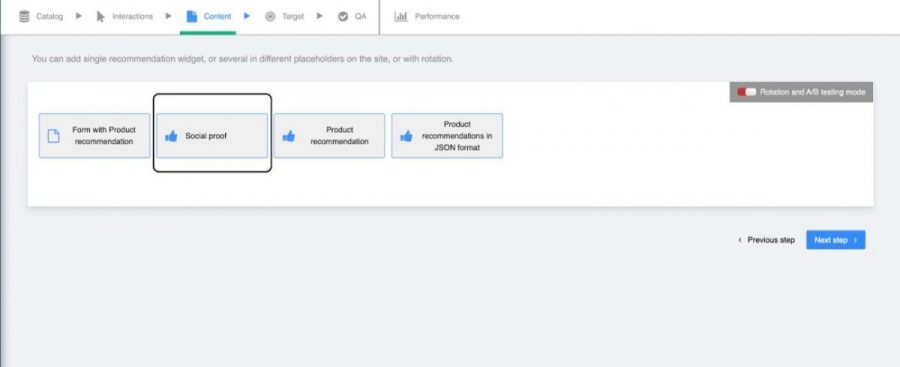
Setting Up a Social Proof Widget
The look and feel are fully customizable, including inheriting the CSS styling from your site, and/or directly editing the HTML.
On the back end, the social proof widget must have:
- Product feed (for ecommerce)
- Product interaction tracking
- Personyze needs to have run on your site for at least 2 hours, tracking interactions with your products.
- If you want to display more user-specific information, such as including the name of someone who purchased something, of course, this will need to exist in some form in Personyze, probably by having your CRM synchronized to Personyze with the relevant variables present. This is not required for more general social proof content, however, such as “X number of customers from your area bought this today.”
Preliminaries:
Start by setting up a new product recommendations campaign, which requires:
- Product feed
- Product interaction tracking
- If you have existing recommendations, this part will have already been done
Setting the social proof widget:
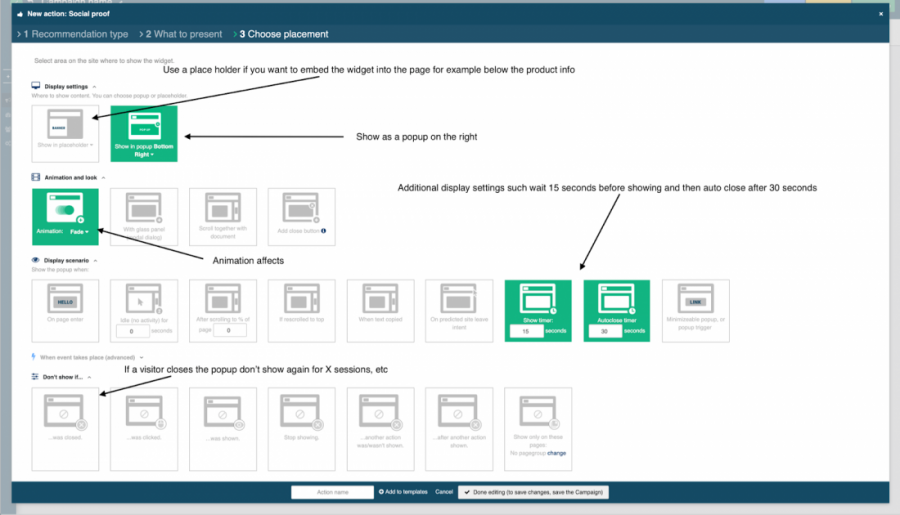
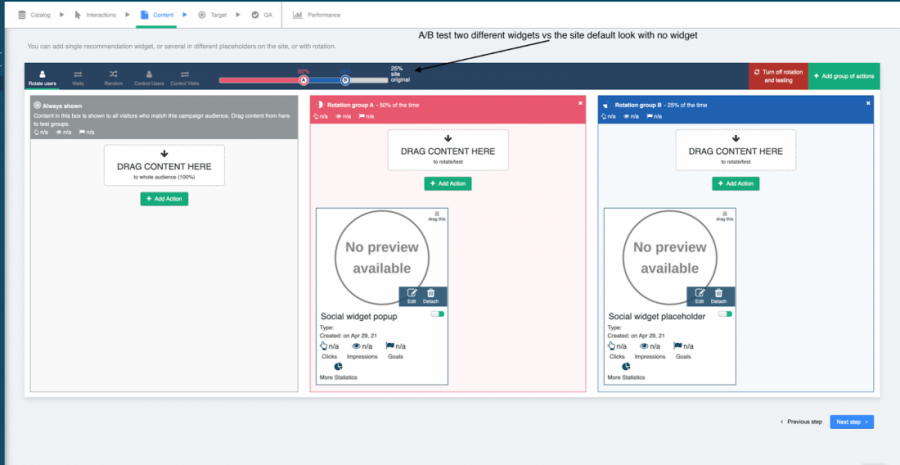
- Set your targeting (who should see the widget?)
For example, if you want to show the widget only on the homepage, and for returning visitors show only a widget with the last item they viewed and its popularity, you might use targeting like this:
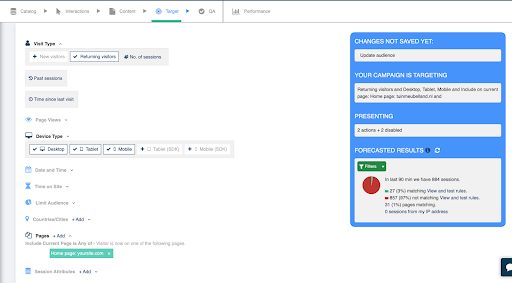
*However, whether or not a visitor sees the widget will ultimately depend on the widget’s algorithm, and display settings. For example, if your algorithm is set to show the popularity of items the visitor already viewed, then it will start showing only after a visitor viewed a product, regardless of whether your targeting is not limited to only visitors who viewed a product. - Select the widget
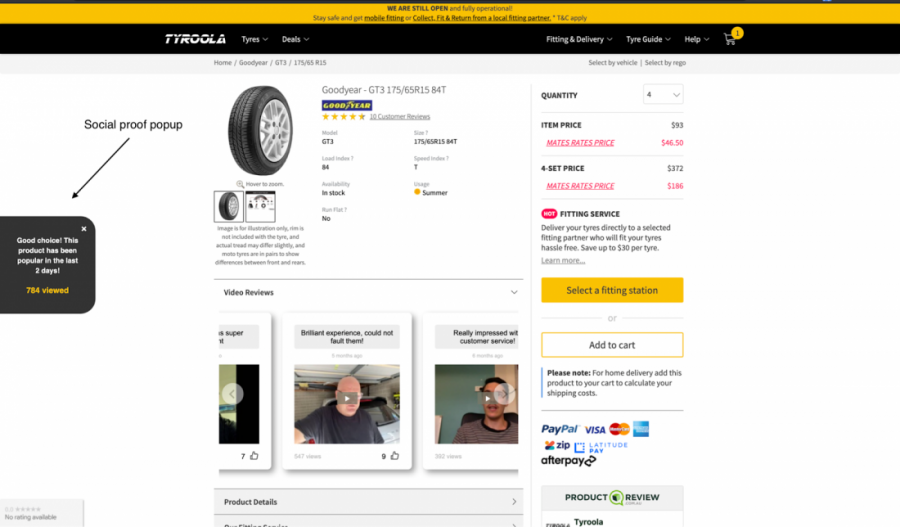
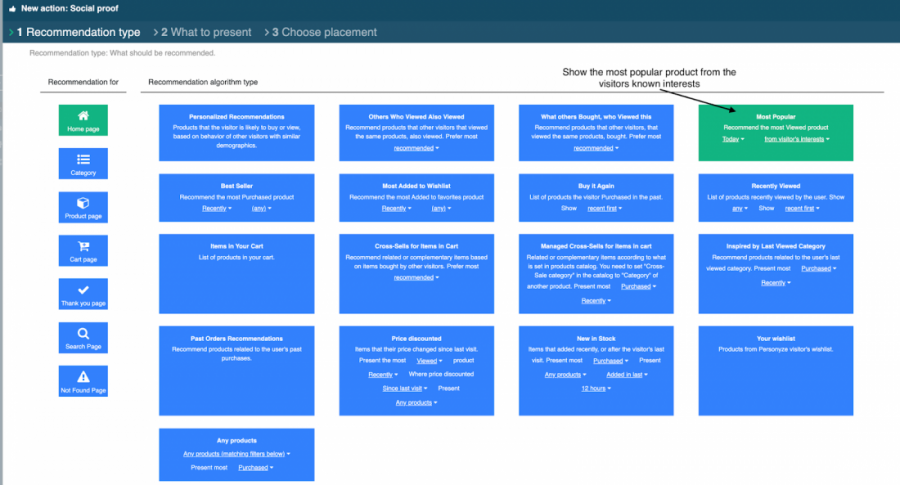
- Set the algorithm. One of the most common uses is to show how popular the product currently being viewed is, for example.
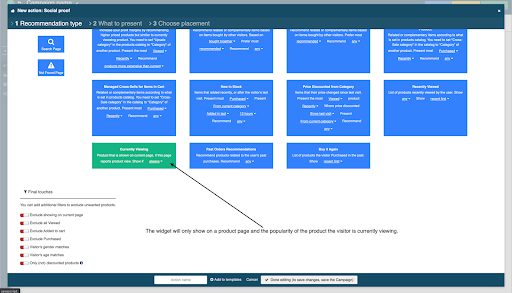
- You can also select another algorithm, such as the most recently viewed product or recently added to cart, or the most popular item on the site for today.
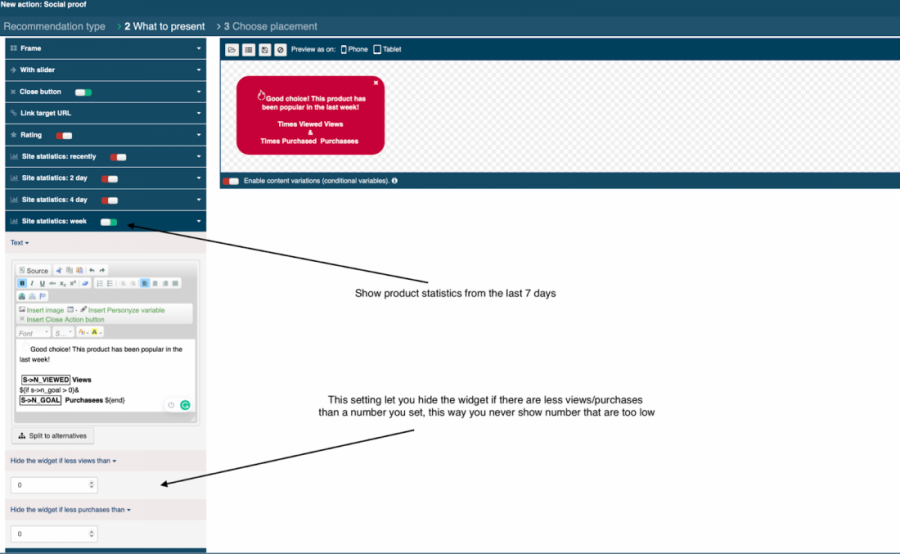
- Set the display and what statistic to print
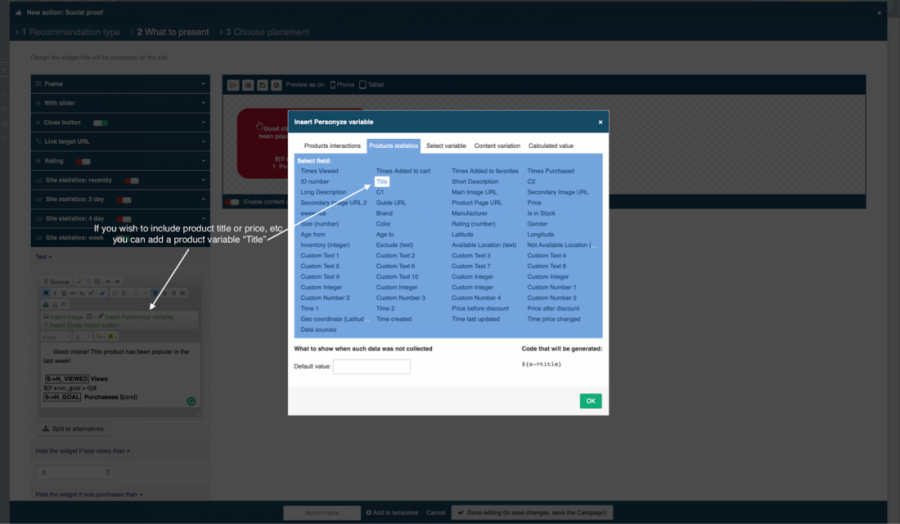
- You can include additional product data
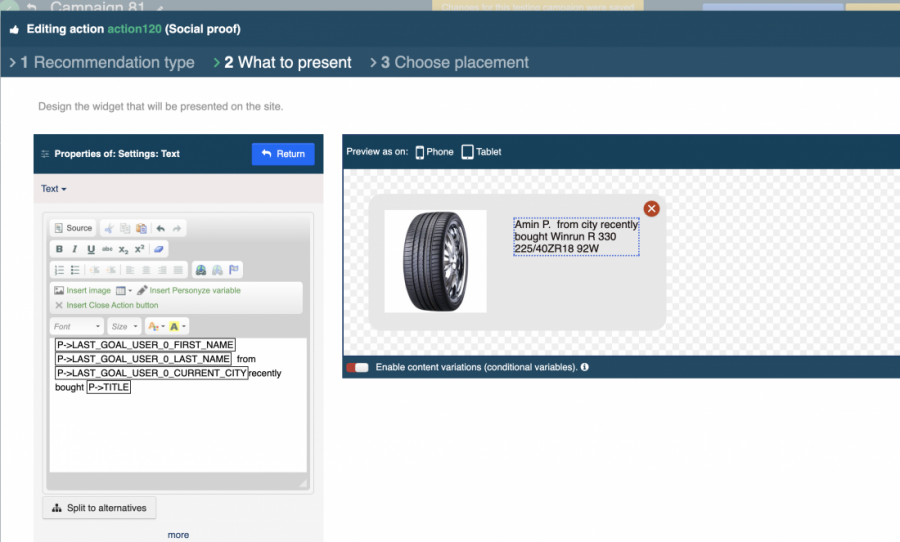
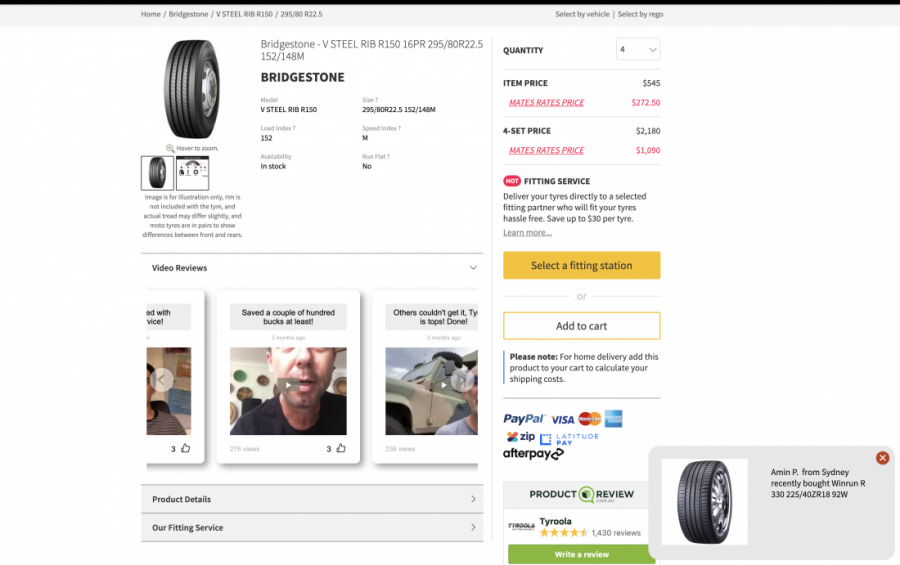
 For more user-specific content, such as showing the name of someone who purchased something recently, it’s much the same but just using different variables:
- Display options
- Save in testing mode, and preview on the site (will work for the IP of whoever edited the campaign)
- Publish it live, and view it live on the site.