This wizard guides you through the process of using the Get Code for inserting Personyze recommendations into Third-Party applications, such as mobile apps.
This code is to be inserted into the third-party application at the location where you want the recommendations to appear, and then when the user loads it, will call from Personyze the most relevant recommendations for them, based on their most recent visits to the site, and/or your synchronized CRM data.
However, it’s important to understand that this is a one-way communication, from Personyze to your app, to tell it what to show in the recommendation, via the Get Code. This means Personyze’s recommendation algorithms will only be utilizing this individual’s interactions data from their browsing sessions on the website, because it has no way of knowing what they’re interacting with on the app.
If you do want Personyze to know the interactions that are happening on the app to feed the recommendations, you have a couple of options:
- Synchronize Personyze’s recommendation engine with the database where information about those transactions is stored, via API. Ask your Personyze Success Manager if you’d like to use this method.
- Fire data about those transactions back to Personyze in real time, directly from the app via API.
However, if the product/content interactions from the website are sufficient to show good (enough) recommendations in the app, then you don’t need to set up this App > Personyze line of communication; all you need to do is set up the recommendation look, feel, and algorithm, and insert the code into your app.
Steps to Set Up Third-Party Application Recommendations
App Recommendations Catalog
Here is where you upload your product catalog (if not already uploaded). Your account only has one catalog for products and one for content, so if you’ve already done this, you don’t need to worry about it. You’ll only be setting this up if you’ve not already done recommendations on your website and/or emails, so far; in other words, if these are your first recommendations with Personyze.
Personyze uses raw data to synchronize with your product catalog/feed, so it doesn’t matter what product management platform you use. All you need is a spreadsheet with your product/content data, or a live feed such as an RSS feed or a spreadsheet URL.

If your product data changes frequently, you’ll want to use a feed. If it doesn’t, then a single spreadsheet upload will work.
The most essential things to include for a product feed are:
- Product Title
- Product Listing URL
- Product Image URL
- Price
- Product Description
- Interest Categories for each product (click here to read more about interests)
- Product ID (SKU, or similar unique ID)
Some additional product data that are helpful to have are:
- Sale Price
- Cross-Sale SKUs
- Up-Sale SKUs
- Brand
- Secondary Interest Categories
- Seasonal product associations (sells more in the Summer/Winter)
- Availability (In Stock or not)
You’ll also need to tell Personyze which column corresponds to which value, in your Personyze feed. The process for setting up a content feed is very similar, although the variables to be included in the feed are slightly different (such as author, publication date, etc.). You can read about setting up content recommendations here.
Interaction Event Tracking
How does Personyze know what a visitor is interested in? The answer is by tracking interaction events. This allows Personyze to know both what individual visitors are interested in, as well as the general trends among all visitors, or visitors of various demographics, etc. These two categories of information, individual and crowd data, are combined in various ways by the Personyze algorithms to present relevant recommendations.
Individual interactions + total interactions + user data + algorithm = recommendations
What is an interaction event? They are different for content and products, for instance, views, favoriting or saving, and adding to cart and checking out for products, as well as custom events.
In order for Personyze to track these events, you have to tell it how to know when a visitor is viewing a product, when a visitor is adding to cart, etc.
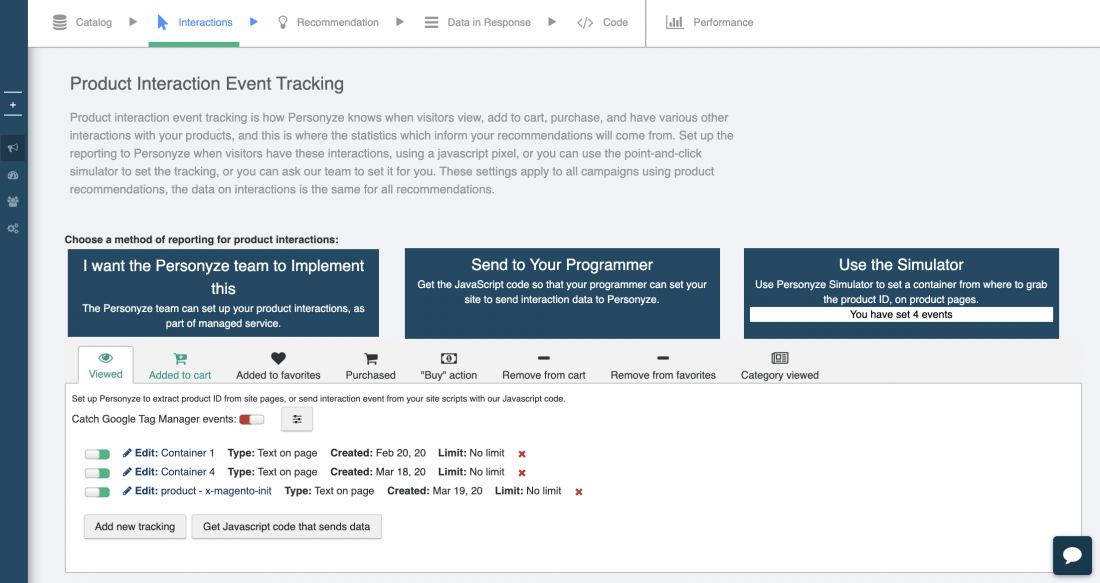
Note: You only have to do this once, and then the same logic is applied to all of your product pages. You can also request that the Personyze team do it for you, as part of onboarding with any package.
If you want to set this up yourself, you can read more about setting up interaction event tracking here. Again, tracking interactions in your app requires extra steps, as described in the first part of this wiki page.
App Recommendations Content
This is where you create the actual display widget design which you will use to show the recommendations in your app. The wizard includes templates, which you can then customize to whatever extent is necessary to match your site and branding, using the template editor.
When recommendations are being loaded into an app, they will be loaded as images, and these images will be according to the design you create here. What the user actually sees in the app will be an image, but by designing the image, you ensure that it looks like it belongs in your app.
The first thing you’ll see here are the URLs which need to be dynamically populated by your app in order to fetch the images for each recommendation. The URL will function essentially like an image URL that would be used to fetch an image in a CMS like wordpress.
Here is where you can obtain the query recommendations for a user in Personyze database, make GET request to the following URL providing user’s email, internal ID, or Personyze user ID.
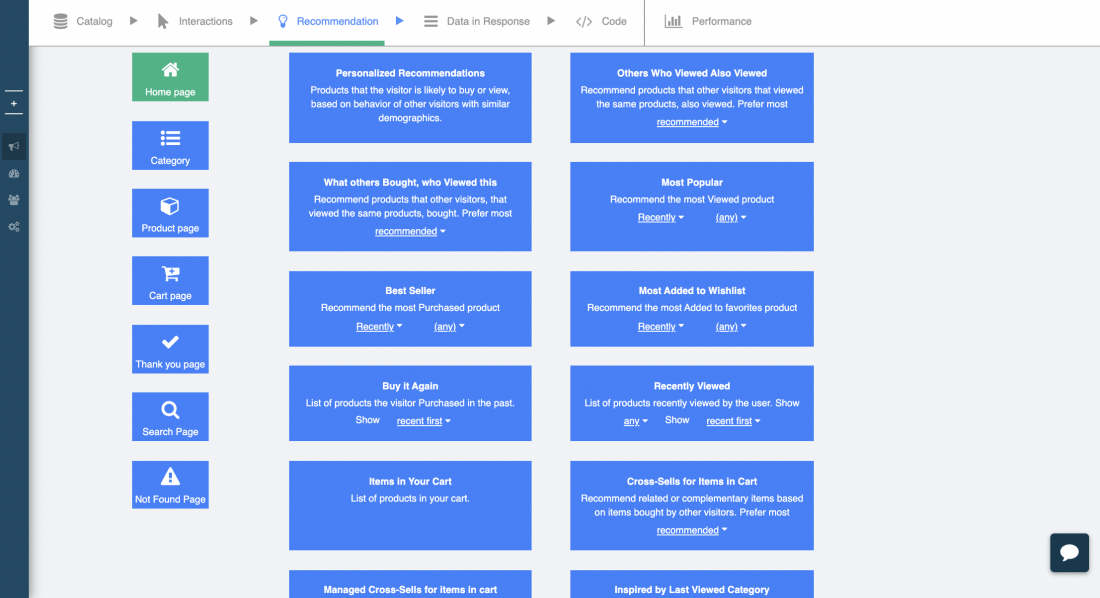
Next, you’ll also be prompted here to choose the algorithm which makes the most sense for your current application. You can read more about the various product recommendation algorithms here.
Once you create the recommendation design(s) that look good on your site, they can be used to show any algorithm on any page, with the same design.
You can also set fallback recommendations, in case not enough data exists for relevant recommendations at any given point in the user’s journey, as well as add filters based on CRM data or email interactions:
Next is where you’ll be presented with the code to embed into your app.
Once you have it, you can click next.
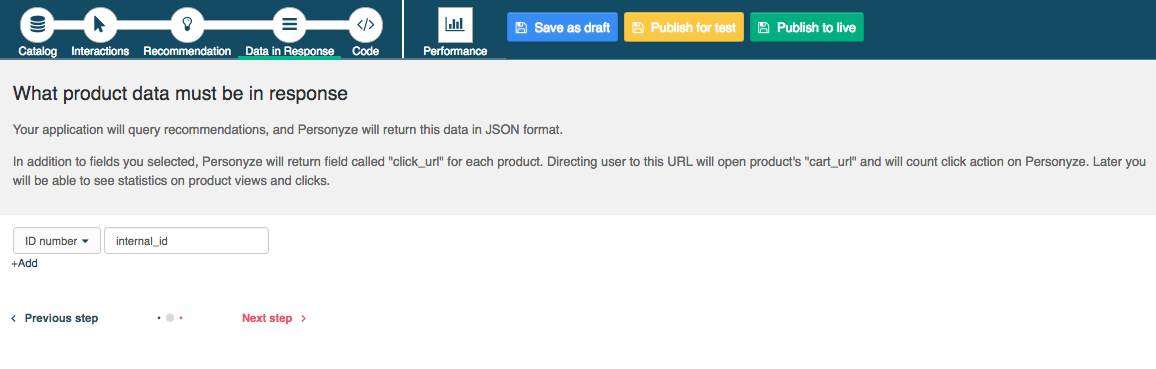
Data in Response
Here is where you set how your app will query Personyze, and also how it will tell Personyze when a visitor clicked through on a particular product to arrive at your site.