Boost confidence with various social proof widgets to encourage visitors to engage or buy, by showing that others like them did. Social proof and urgency messaging allow you to use the power of persuasion to sell better and faster in your ecommerce store.
Social Proof Setup Process:
STEP 1: Preliminaries: required feeds and setup
PRODUCT/CONTENT FEED – For social proof widgets to work, you’ll need to have your feed uploaded/synced. This is required for all recommendations, so it will usually be a part of your onboarding.
INTERACTIONS TRACKING – Personyze needs to be tracking the interactions that users are having with your products/content. This is standard onboarding setup for any account using recommendations. Read more here
USER DATA – This is only relevant if you plan to display specific info about a given user, such as their name, as in: “{name} bought this product in the last hour!” If the data is in a CRM, it will need to be integrated.
STEP 2: Social Proof Content strategy and metrics to display
Social proof content, like all other Personyze content, can be either embedded in the page or presented as a popup. It can also utilize a variety of different types of metrics, such as how many customers are viewing, have purchased, etc.
You can present information about specific users who purchased a product, such as their first name and first later of their last name if you have set Personzye to have first and last name of you site visitors. These can also be filtered by location, gender, or any known data on the visitor. For instance, show them how many nearby them purchased it recently.
Choose which data you’d like to show as social proof, such as total number who purchased or read the item being viewed, and if any more specific information should be shown, such as location or name of those who purchased.
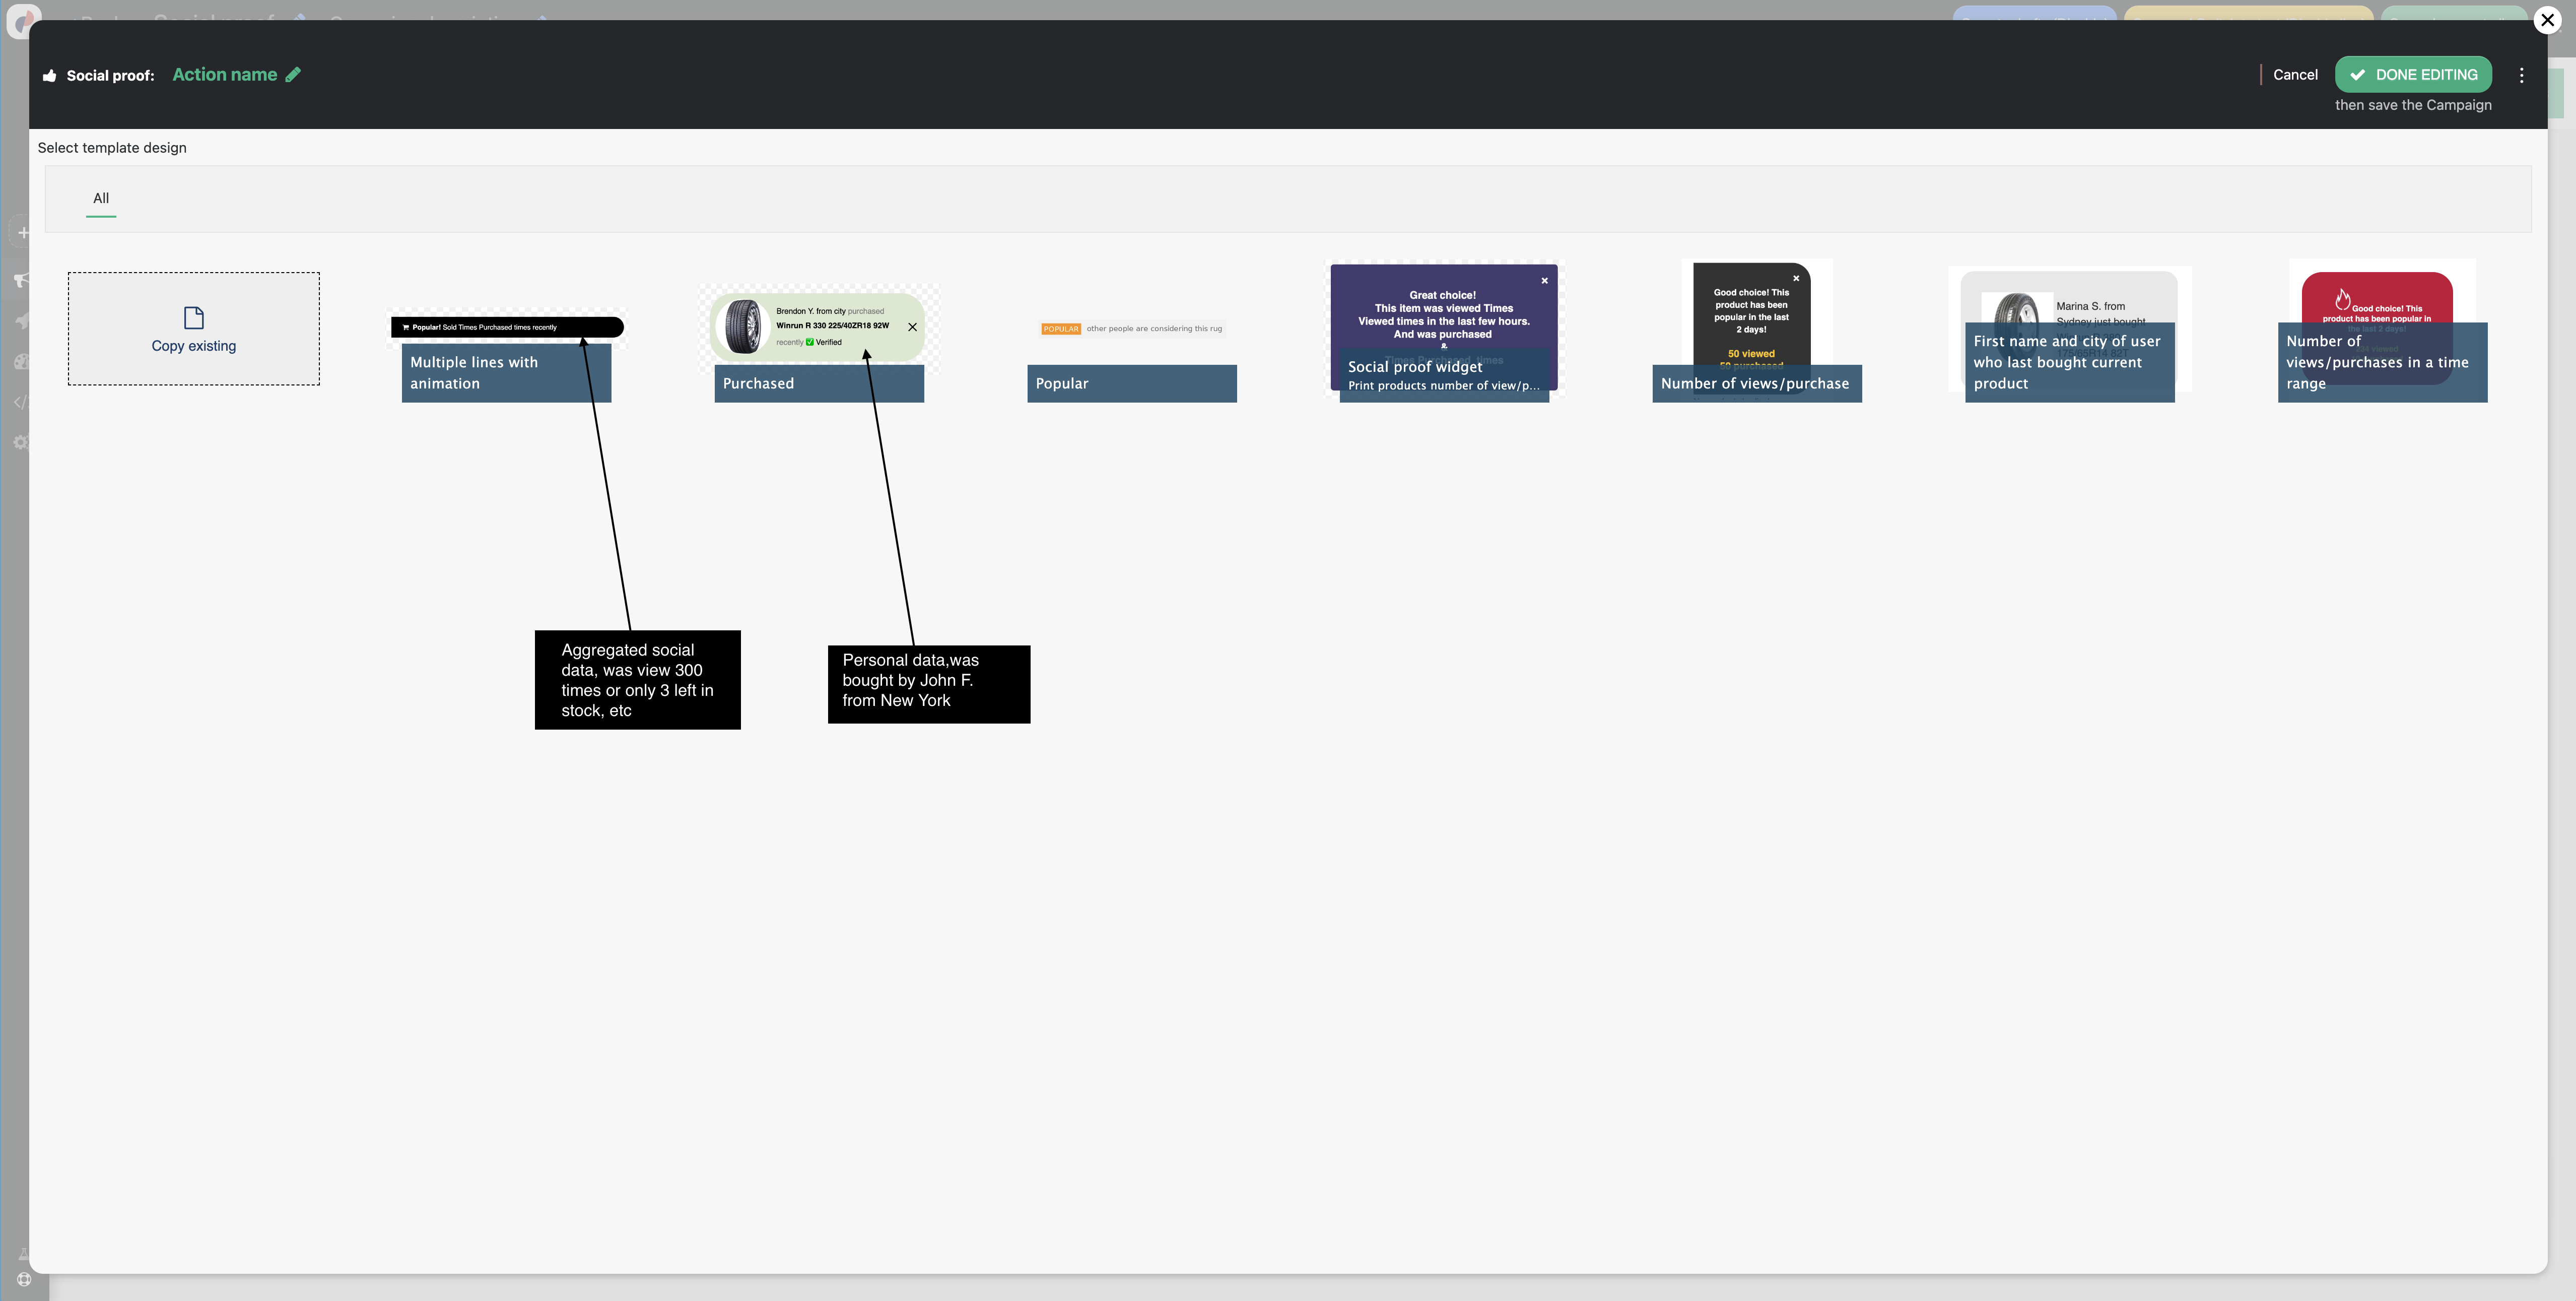
STEP 3 :Algorithm, design and metrics
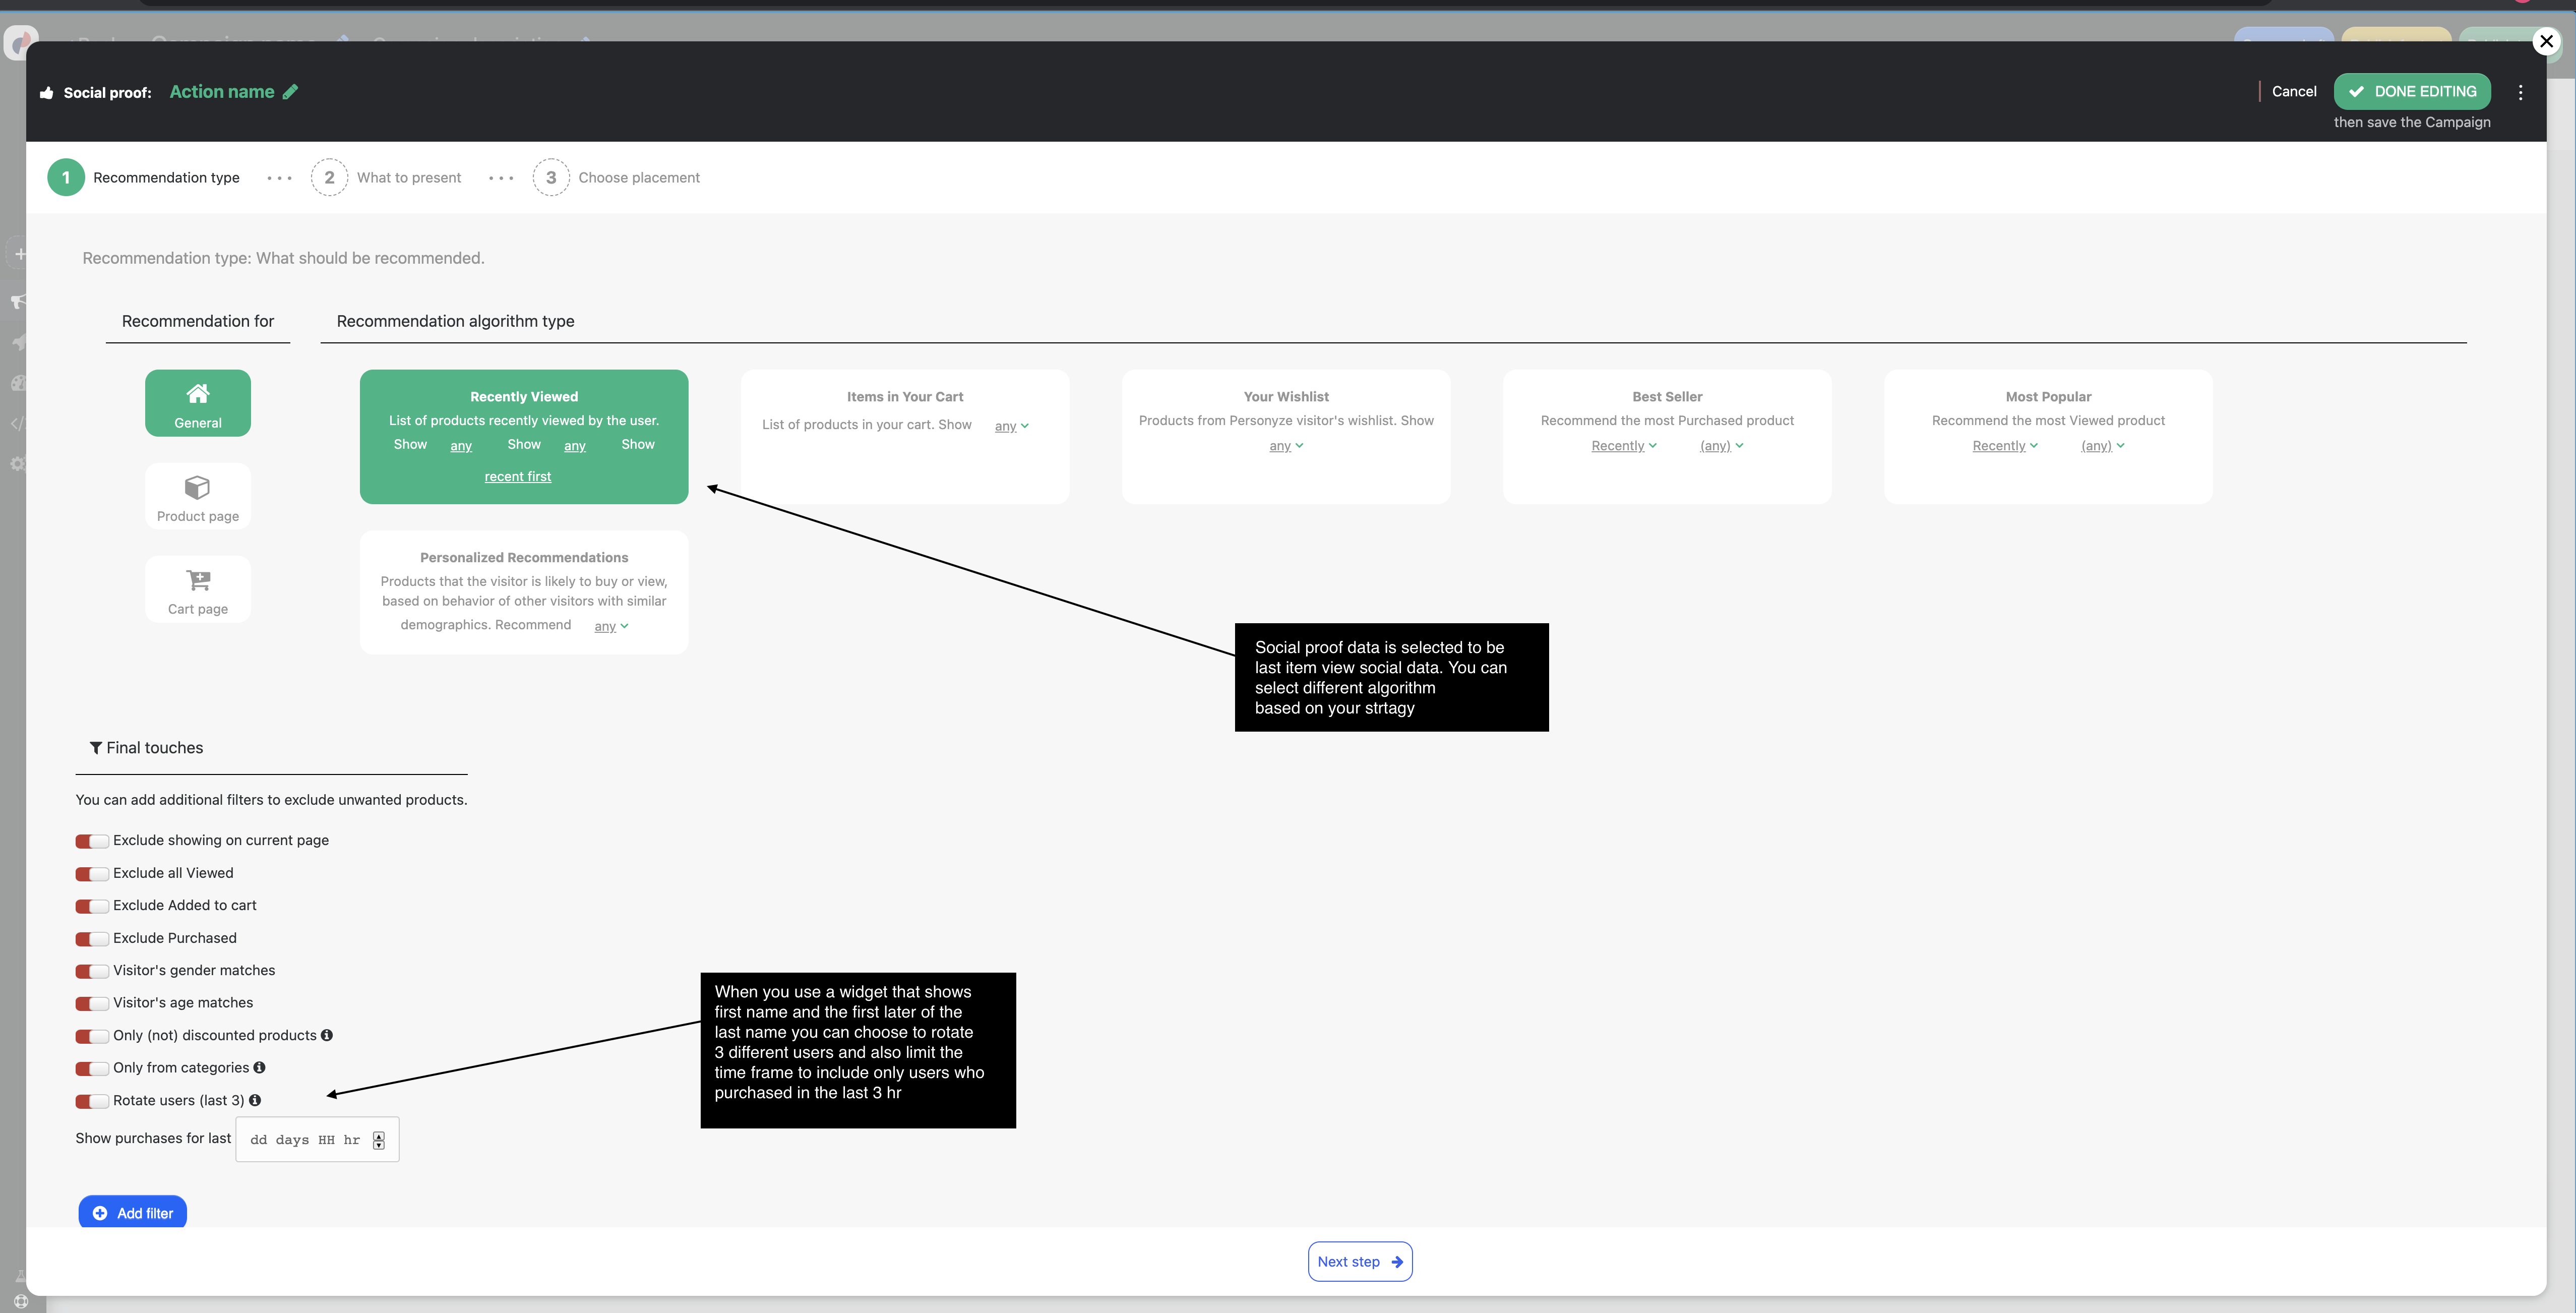
Select algorithm which will determine the social proof data, Depending on where you want to show the widget and what messaging, for instance on Product page a message showing “number of items sold for this item” you need to select recently viewed item, while if you want to show on homepage recommended items with the first and last name of users who purchased them you need to select personalized recommendations.
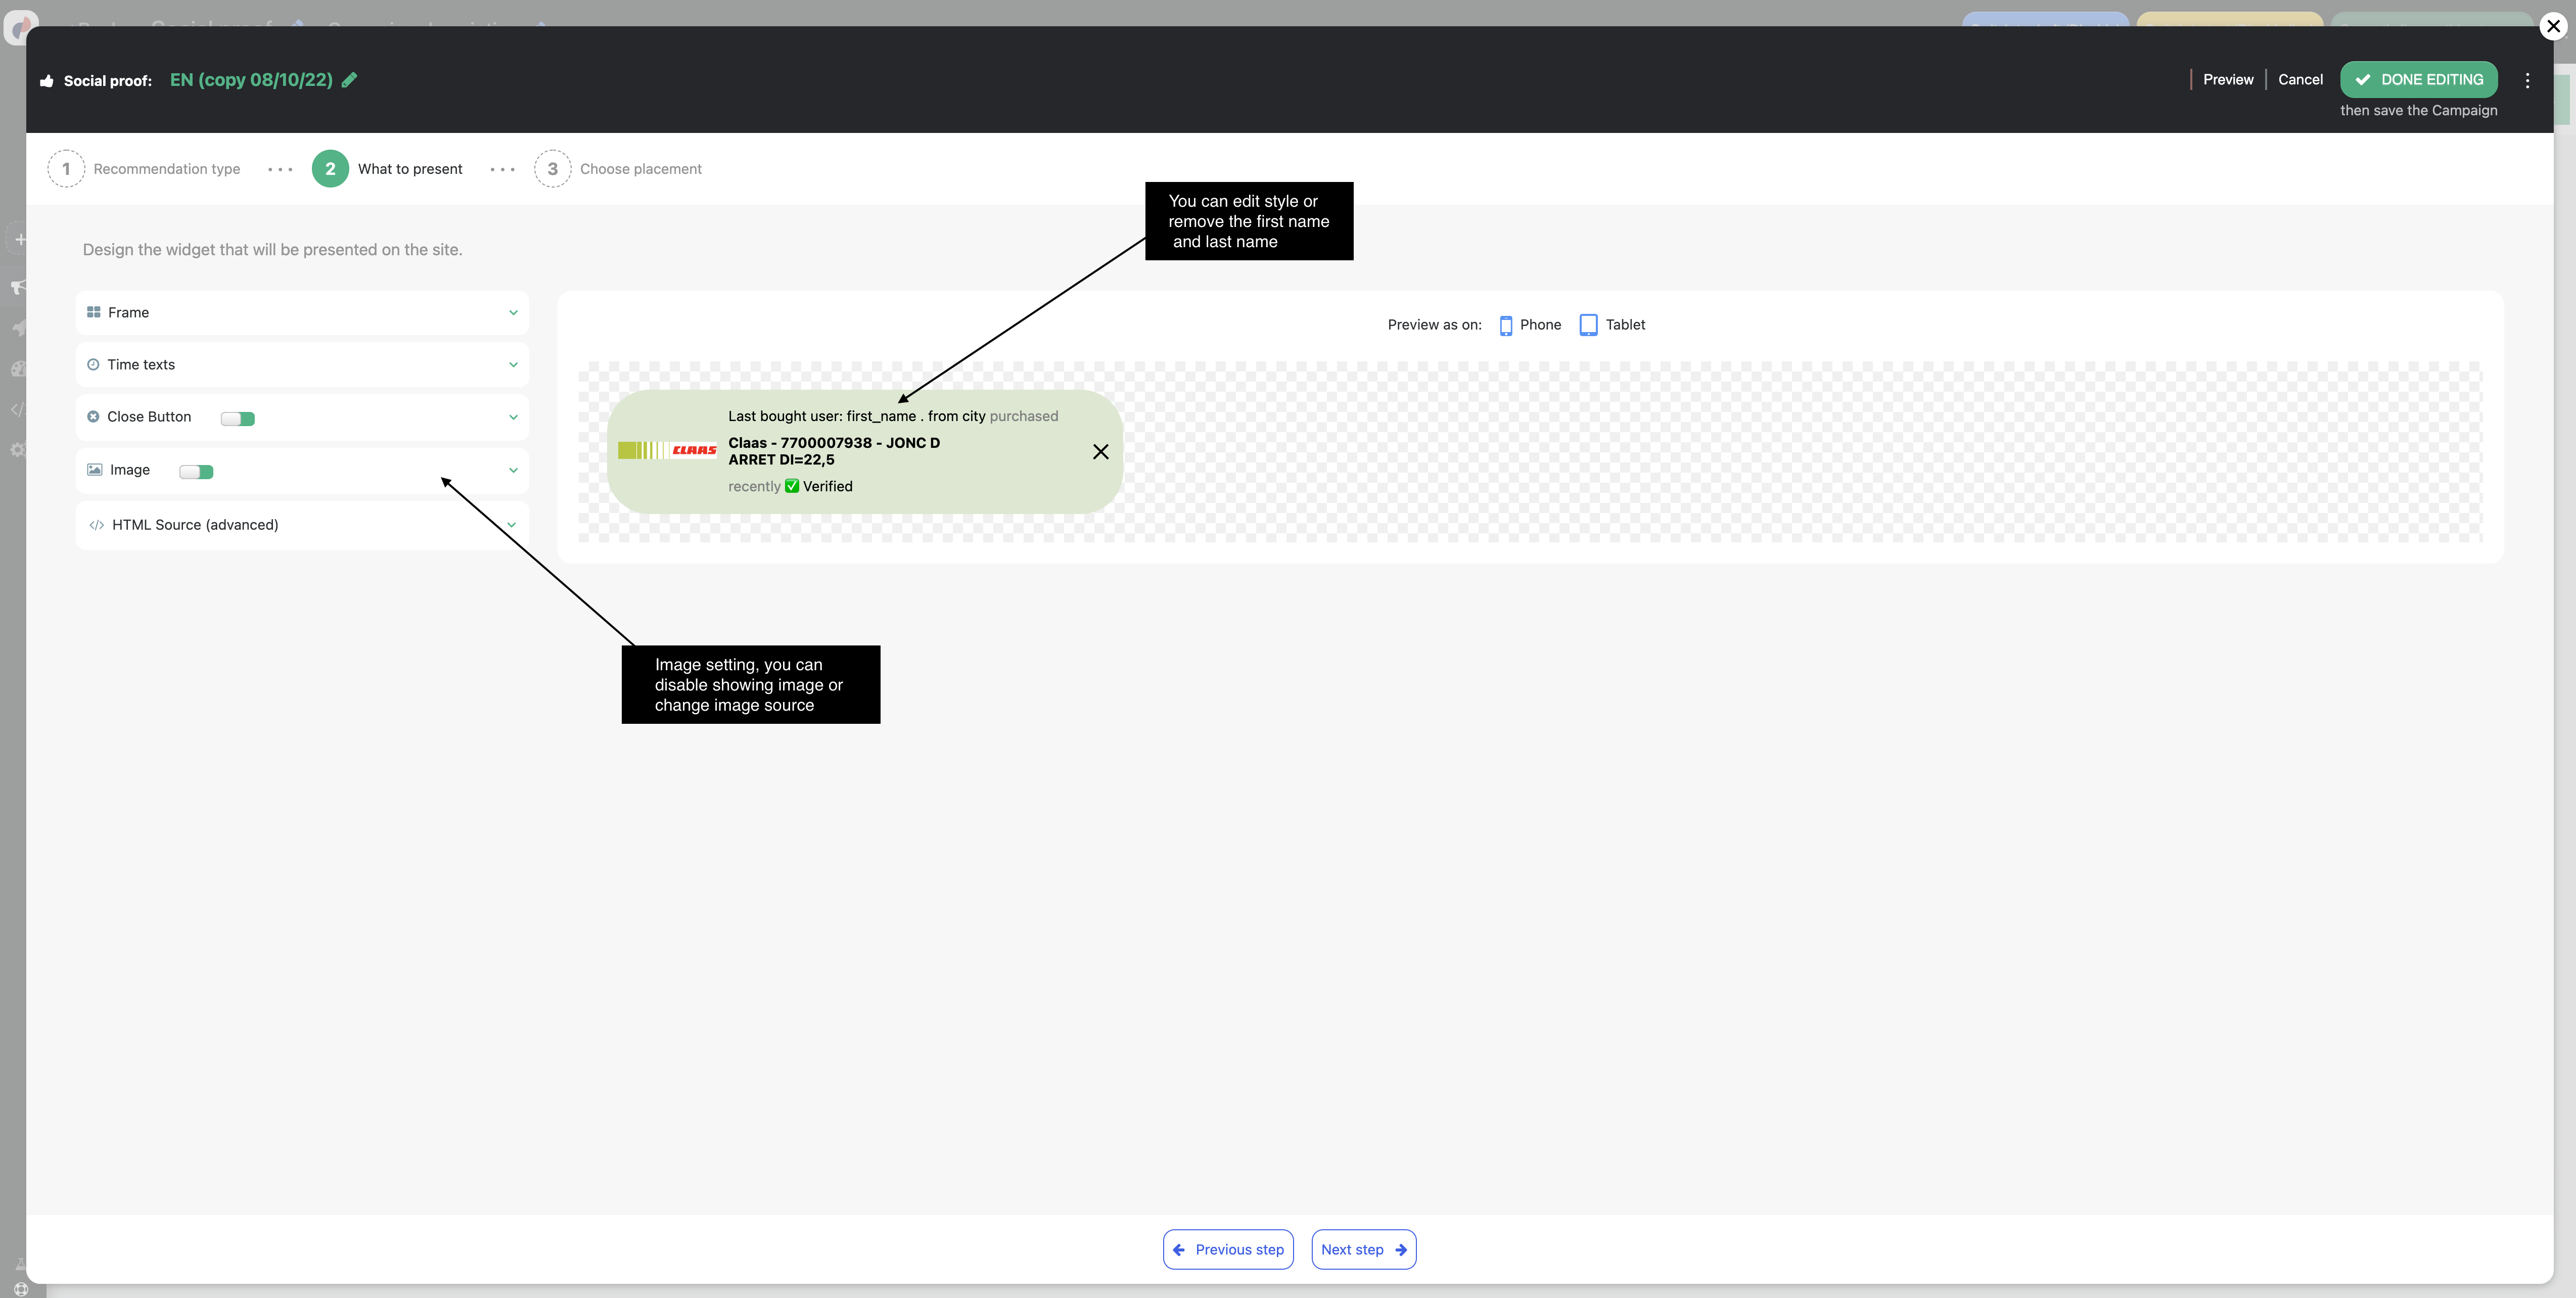
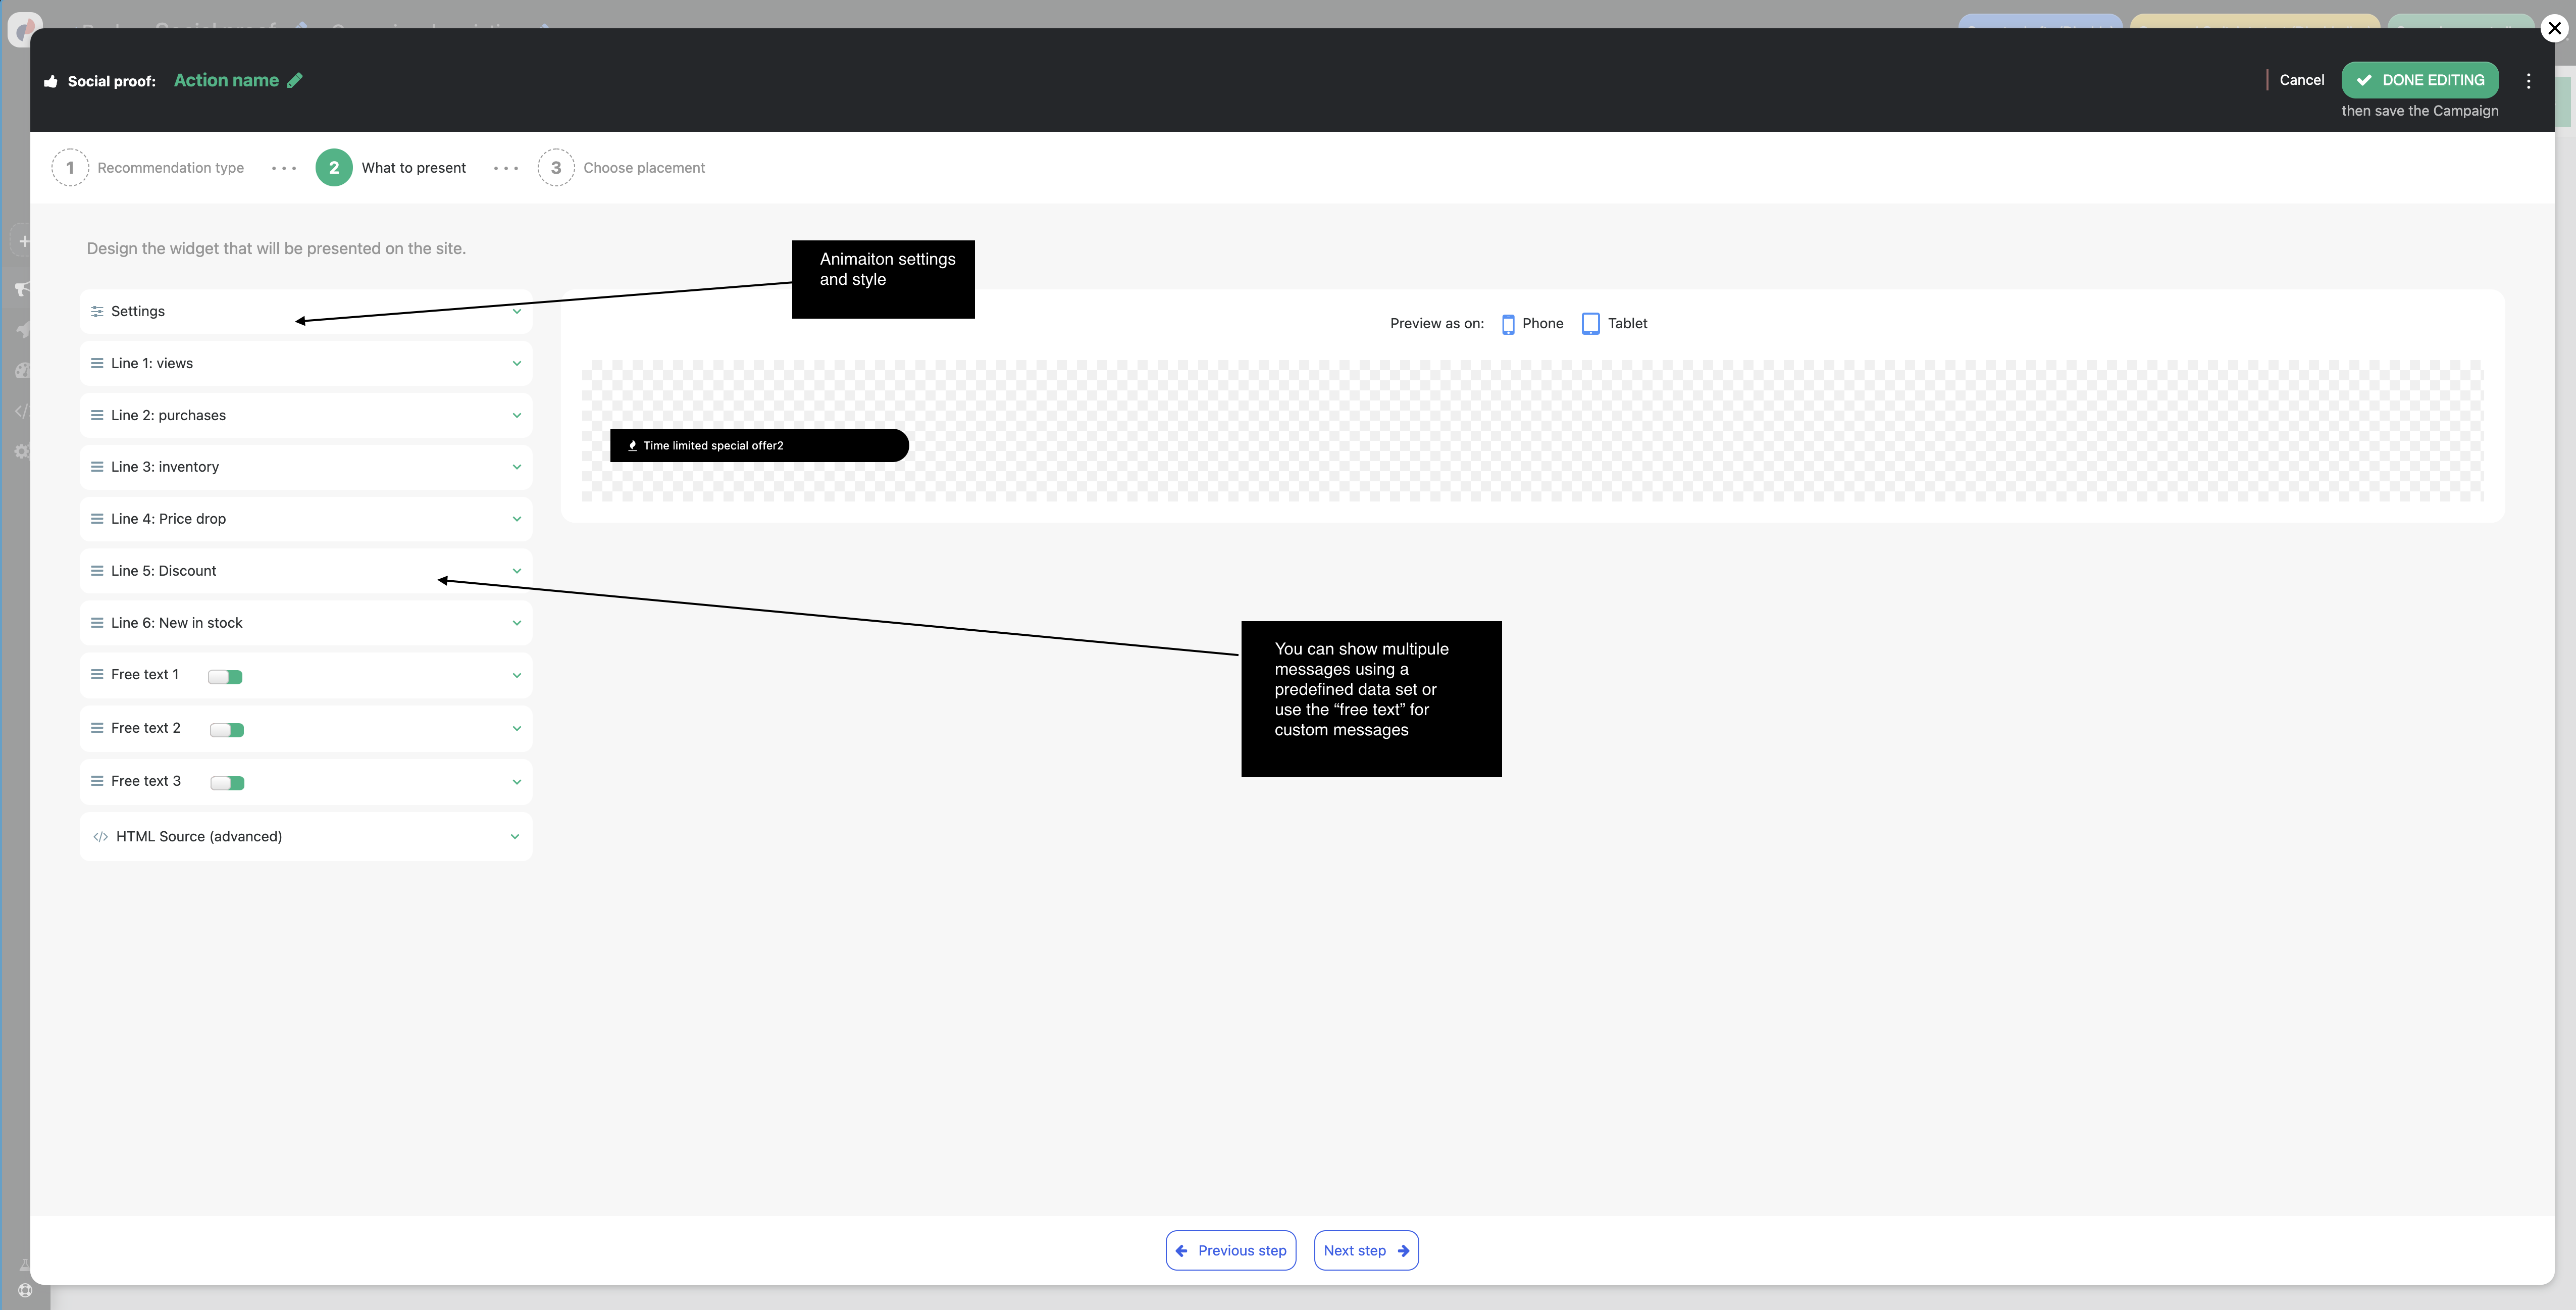
You can point and click to edit the text or style, Insert these social proof variables directly in the content editor menu, as Personyze variables.
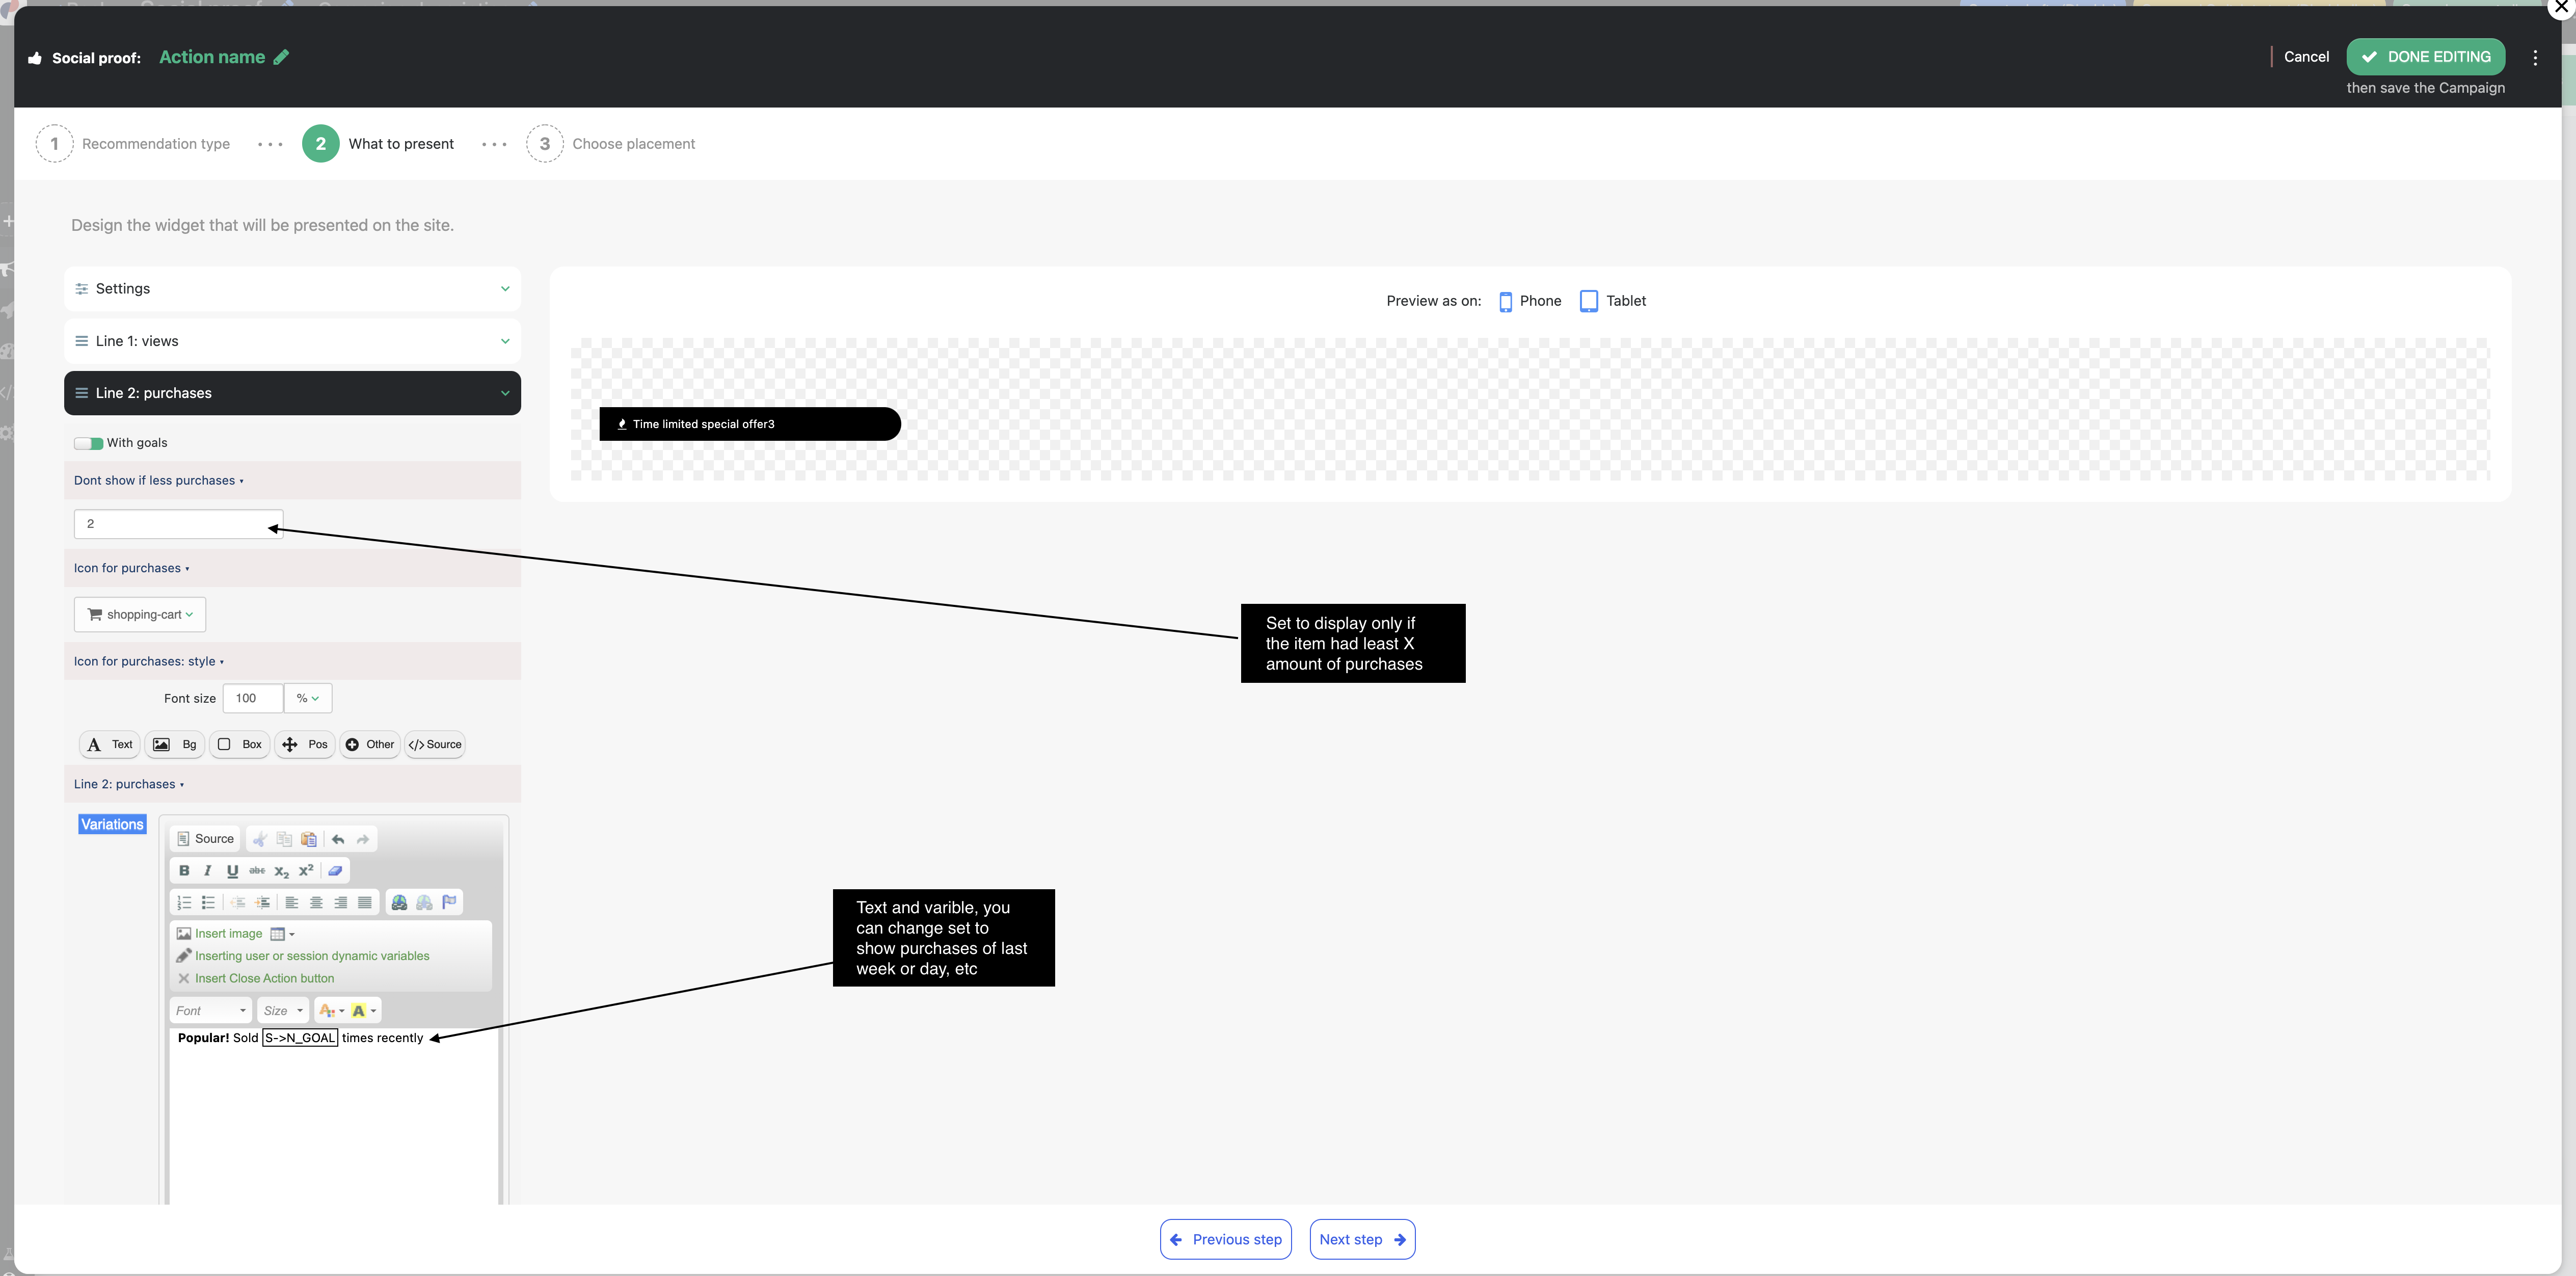
With some templates, the different metrics will appear as separate menu items in the HTML editor, particularly metrics such as how many bought.
You can also limit it, so that if the metrics are too low to be persuasive, they won’t display, or a different metric will display
For templates that have multiple messages in animation you can set what condition needs to be met in order for this message to show. You can also set custom text message that can be shown based on variation conditions for example you can say if the item is from the brand name that the user has purchase in the past then show message “You have purchased this brand before”
Targeting (optional)
Targeting is an option on social proof campaigns. You may want to limit your campaign to show for only certain segments, such as new visitors who have been on the site for more than one minute, who are currently viewing a product page, as in this example screenshot.
