Campaign Overview: Targeting
Targeting Campaigns in Personyze are those which involve setting certain content or changes to the site which will be seen by a defined audience. Essentially, you are creating a different version of your site for a certain audience segment.
How does Personyze know that any given visitor is a part of the segment? We use over 70 audience parameters, which Personyze knows from various types of tracking on the visitor, including behavioral, referral, CRM data, interests, etc.
Personyze checks these parameters in real time, to know whether the visitor is a part of the defined segment, and will immediately show them the content when they are recognized.
The 3 Steps of a Targeting Campaign
Each targeting campaign consists of 3 steps:
- IF: Define the audience who you want to see this content, using rules
- THEN: Choose the content or actions to show them (new content, changes to current content, or other actions)
- TEST: QA the campaign, using the simulator, test URLs, and Save in Testing Mode
Target
In this step, you’ll put together the audience parameters that qualify someone as part of the target segment and therefore should trigger the campaign content for them.
Personyze is constantly tracking various data about visitors, and there are a total of 70+ possible parameters that can be used for targeting. These can be broadly categorized into:
- Behavioral
- Referral
- Device/Browser Characteristics
- Geographic Location
- Weather
- Site Dynamic Data
- CRM and other User Profile Data
- Interests, and other Campaigns and Audiences
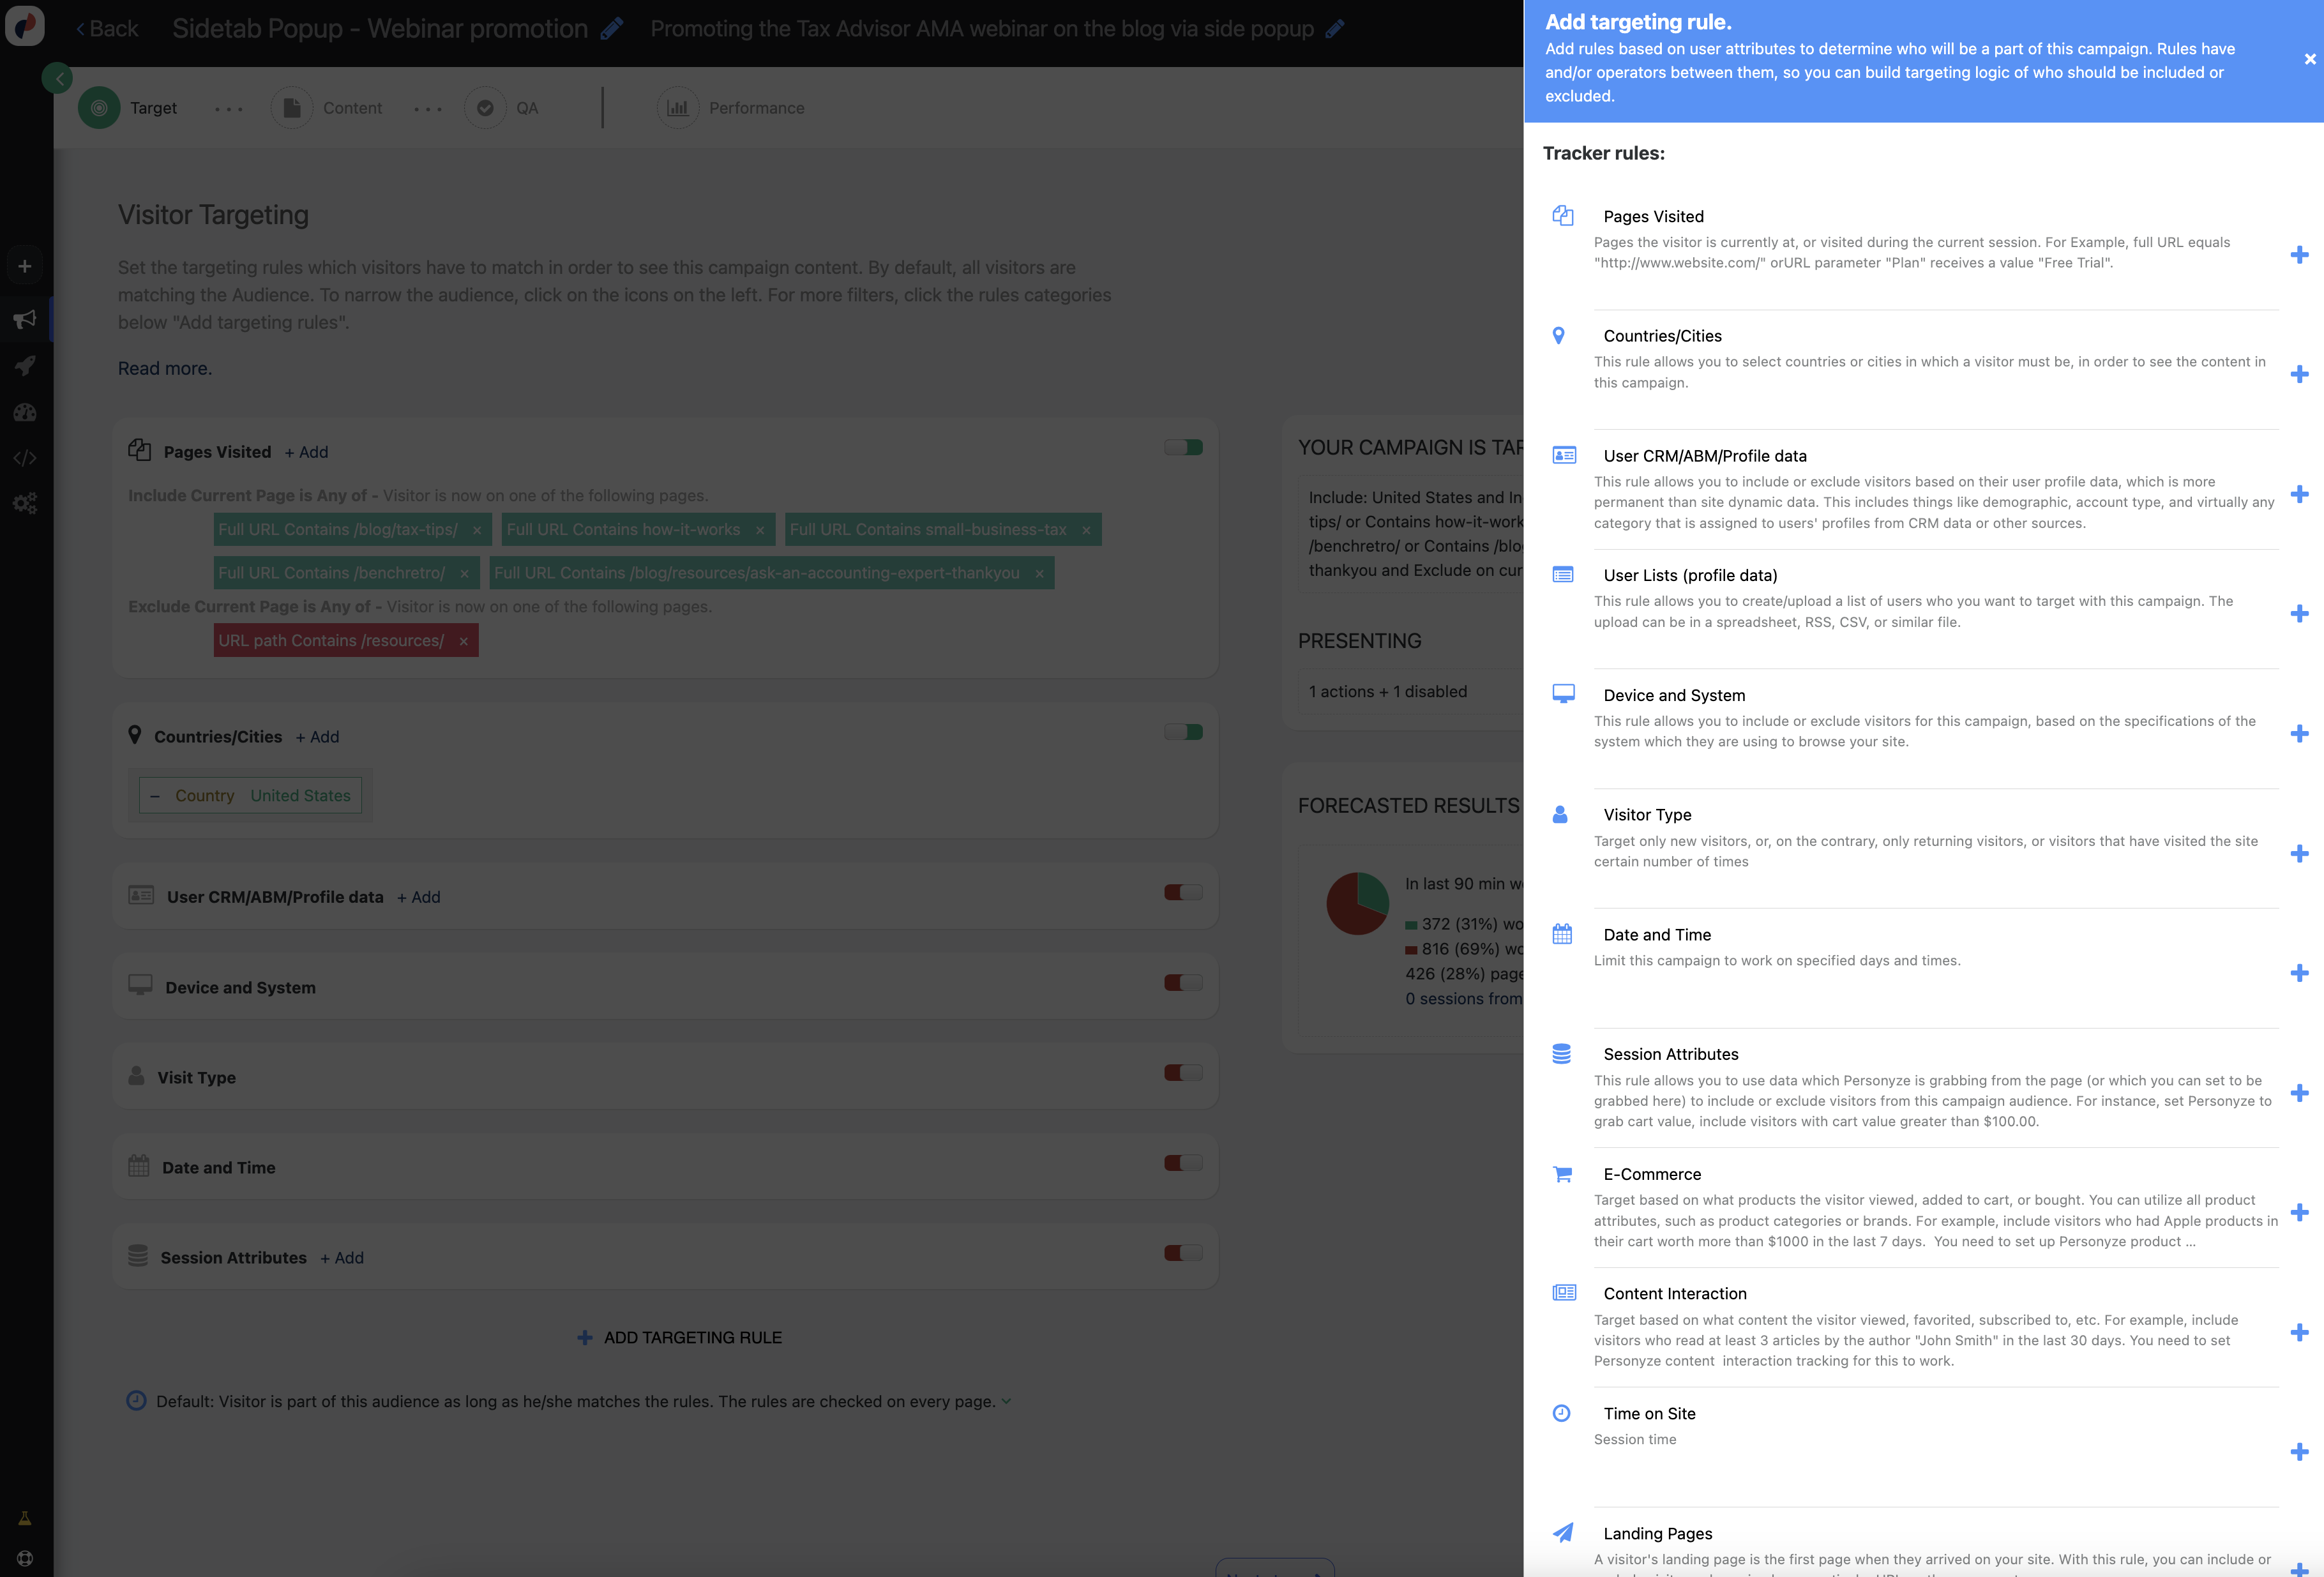
How you use these parameters to define a segment is by selecting rules in this portion of the campaign. If the visitor on the site matches the rules, then they will see the content or other actions you create in Step 2.
If you don’t select any rules, then your content will be shown to 100% of visitors. So, every rule that you add is narrowing your audience.
Targeting Logic
The targeting settings are set up to work like a logical statement:
IF the visitor is [Rule 1] AND [Rule 2] AND [Rule 3] OR [Rule 4] AND {Rule 5}
THEN execute the actions in Step 2
So, depending on the rules you select, your campaign targeting might look something like this:
IF the visitor is [A New Visitor] AND [Arrived from Ad Campaign X] OR [Arrived on Landing Page Y] OR [Their Most Frequently Visited Page was X], THEN show them the actions in Step 2.
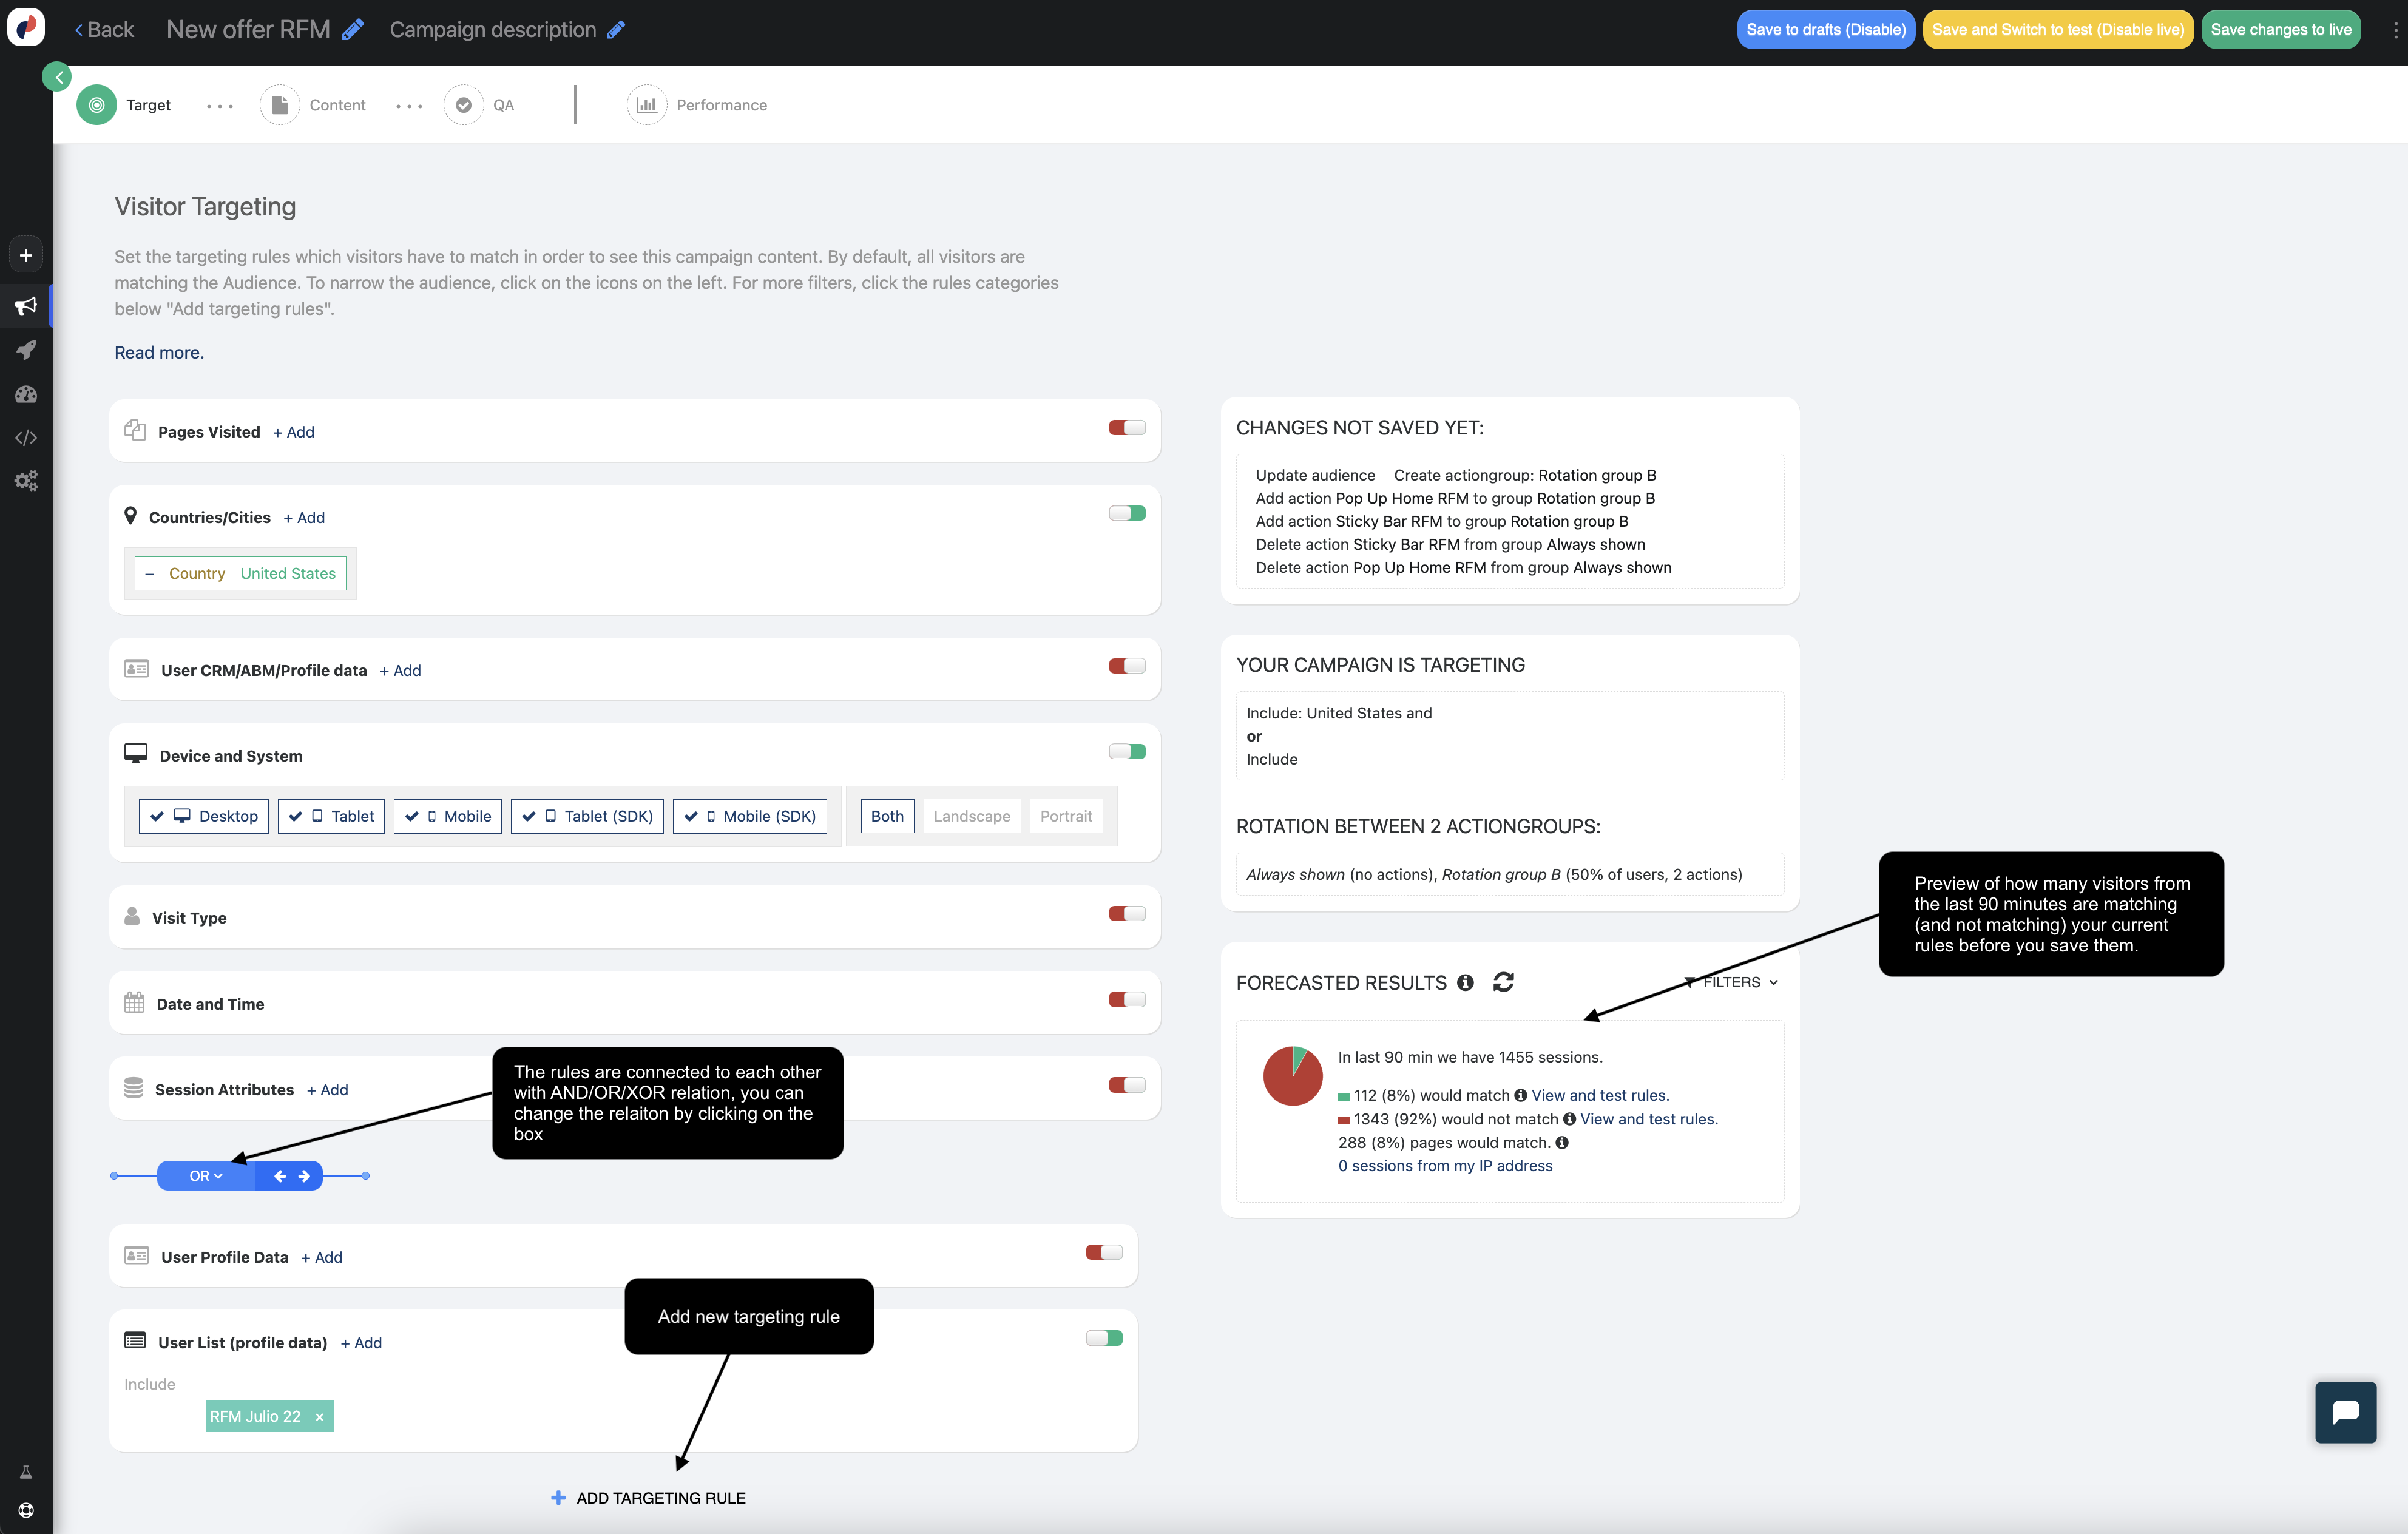
Advanced Settings
Below the targeting rules, you’ll also see some advanced settings. These allow you to choose how long a visitor should remain matched to a particular audience, once they are matched, as well as to create audience groups, and assign them priority.
The purpose of audience groups is that in some cases, you may not want your audiences to overlap, when they otherwise would. If you give a higher priority to a particular campaign’s audience, then if both campaigns are matched, only the prioritized one will be the content they see.
Content
This is the step in which you will determine which content or Actions should be executed, for your targeted audience. These Actions can be new content Personyze will add to your site, changes to current content, or other actions such as sending email, reporting to analytics, or executing your own javascript code.
To accomplish this, we have 20+ Action Widgets, which allow you to make just about any change you can imagine to the site.
These tools allow you to:
- Change existing content
- WYSIWYG editor to make visual edits to pages
- Replace image/text/number to replace content everywhere that it appears on the site.
- Add new content
- Banner/Popup/HTML Manager
- Lead Management form
- Slider, Countdown, etc.
- Execute other actions
- Redirect to another URL
- Execute javascript
- Send Email
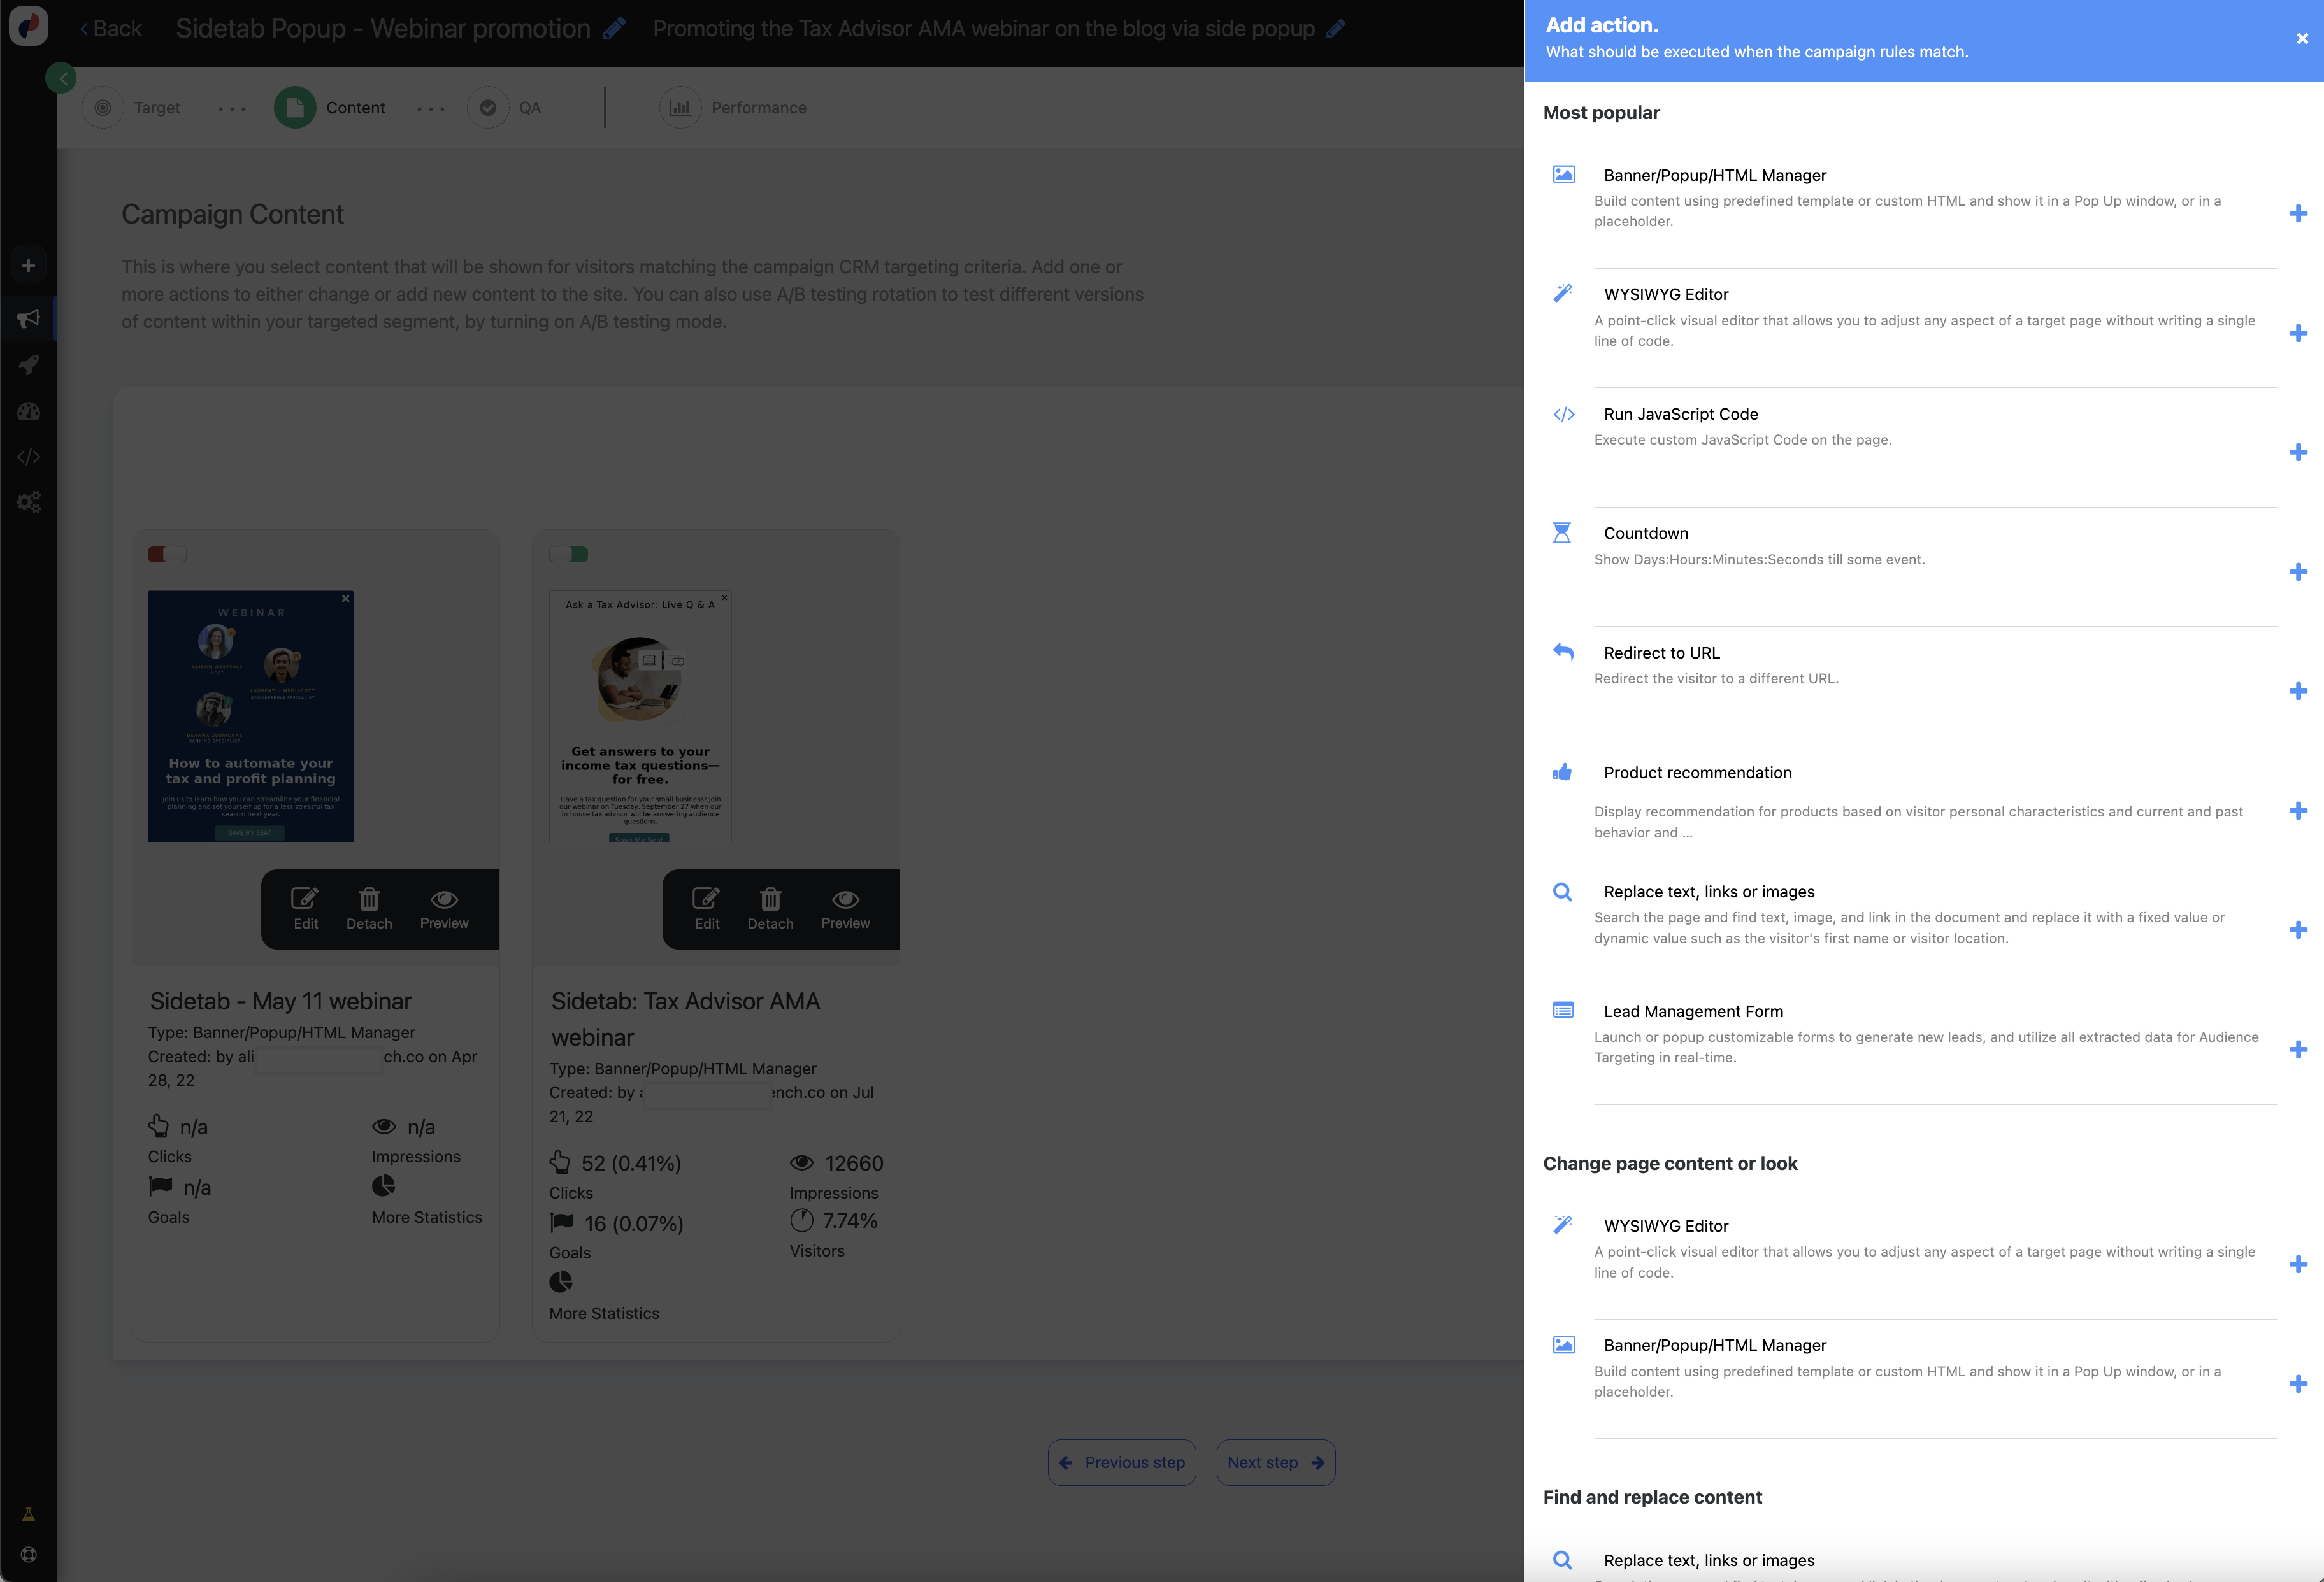
A/B Testing Mode
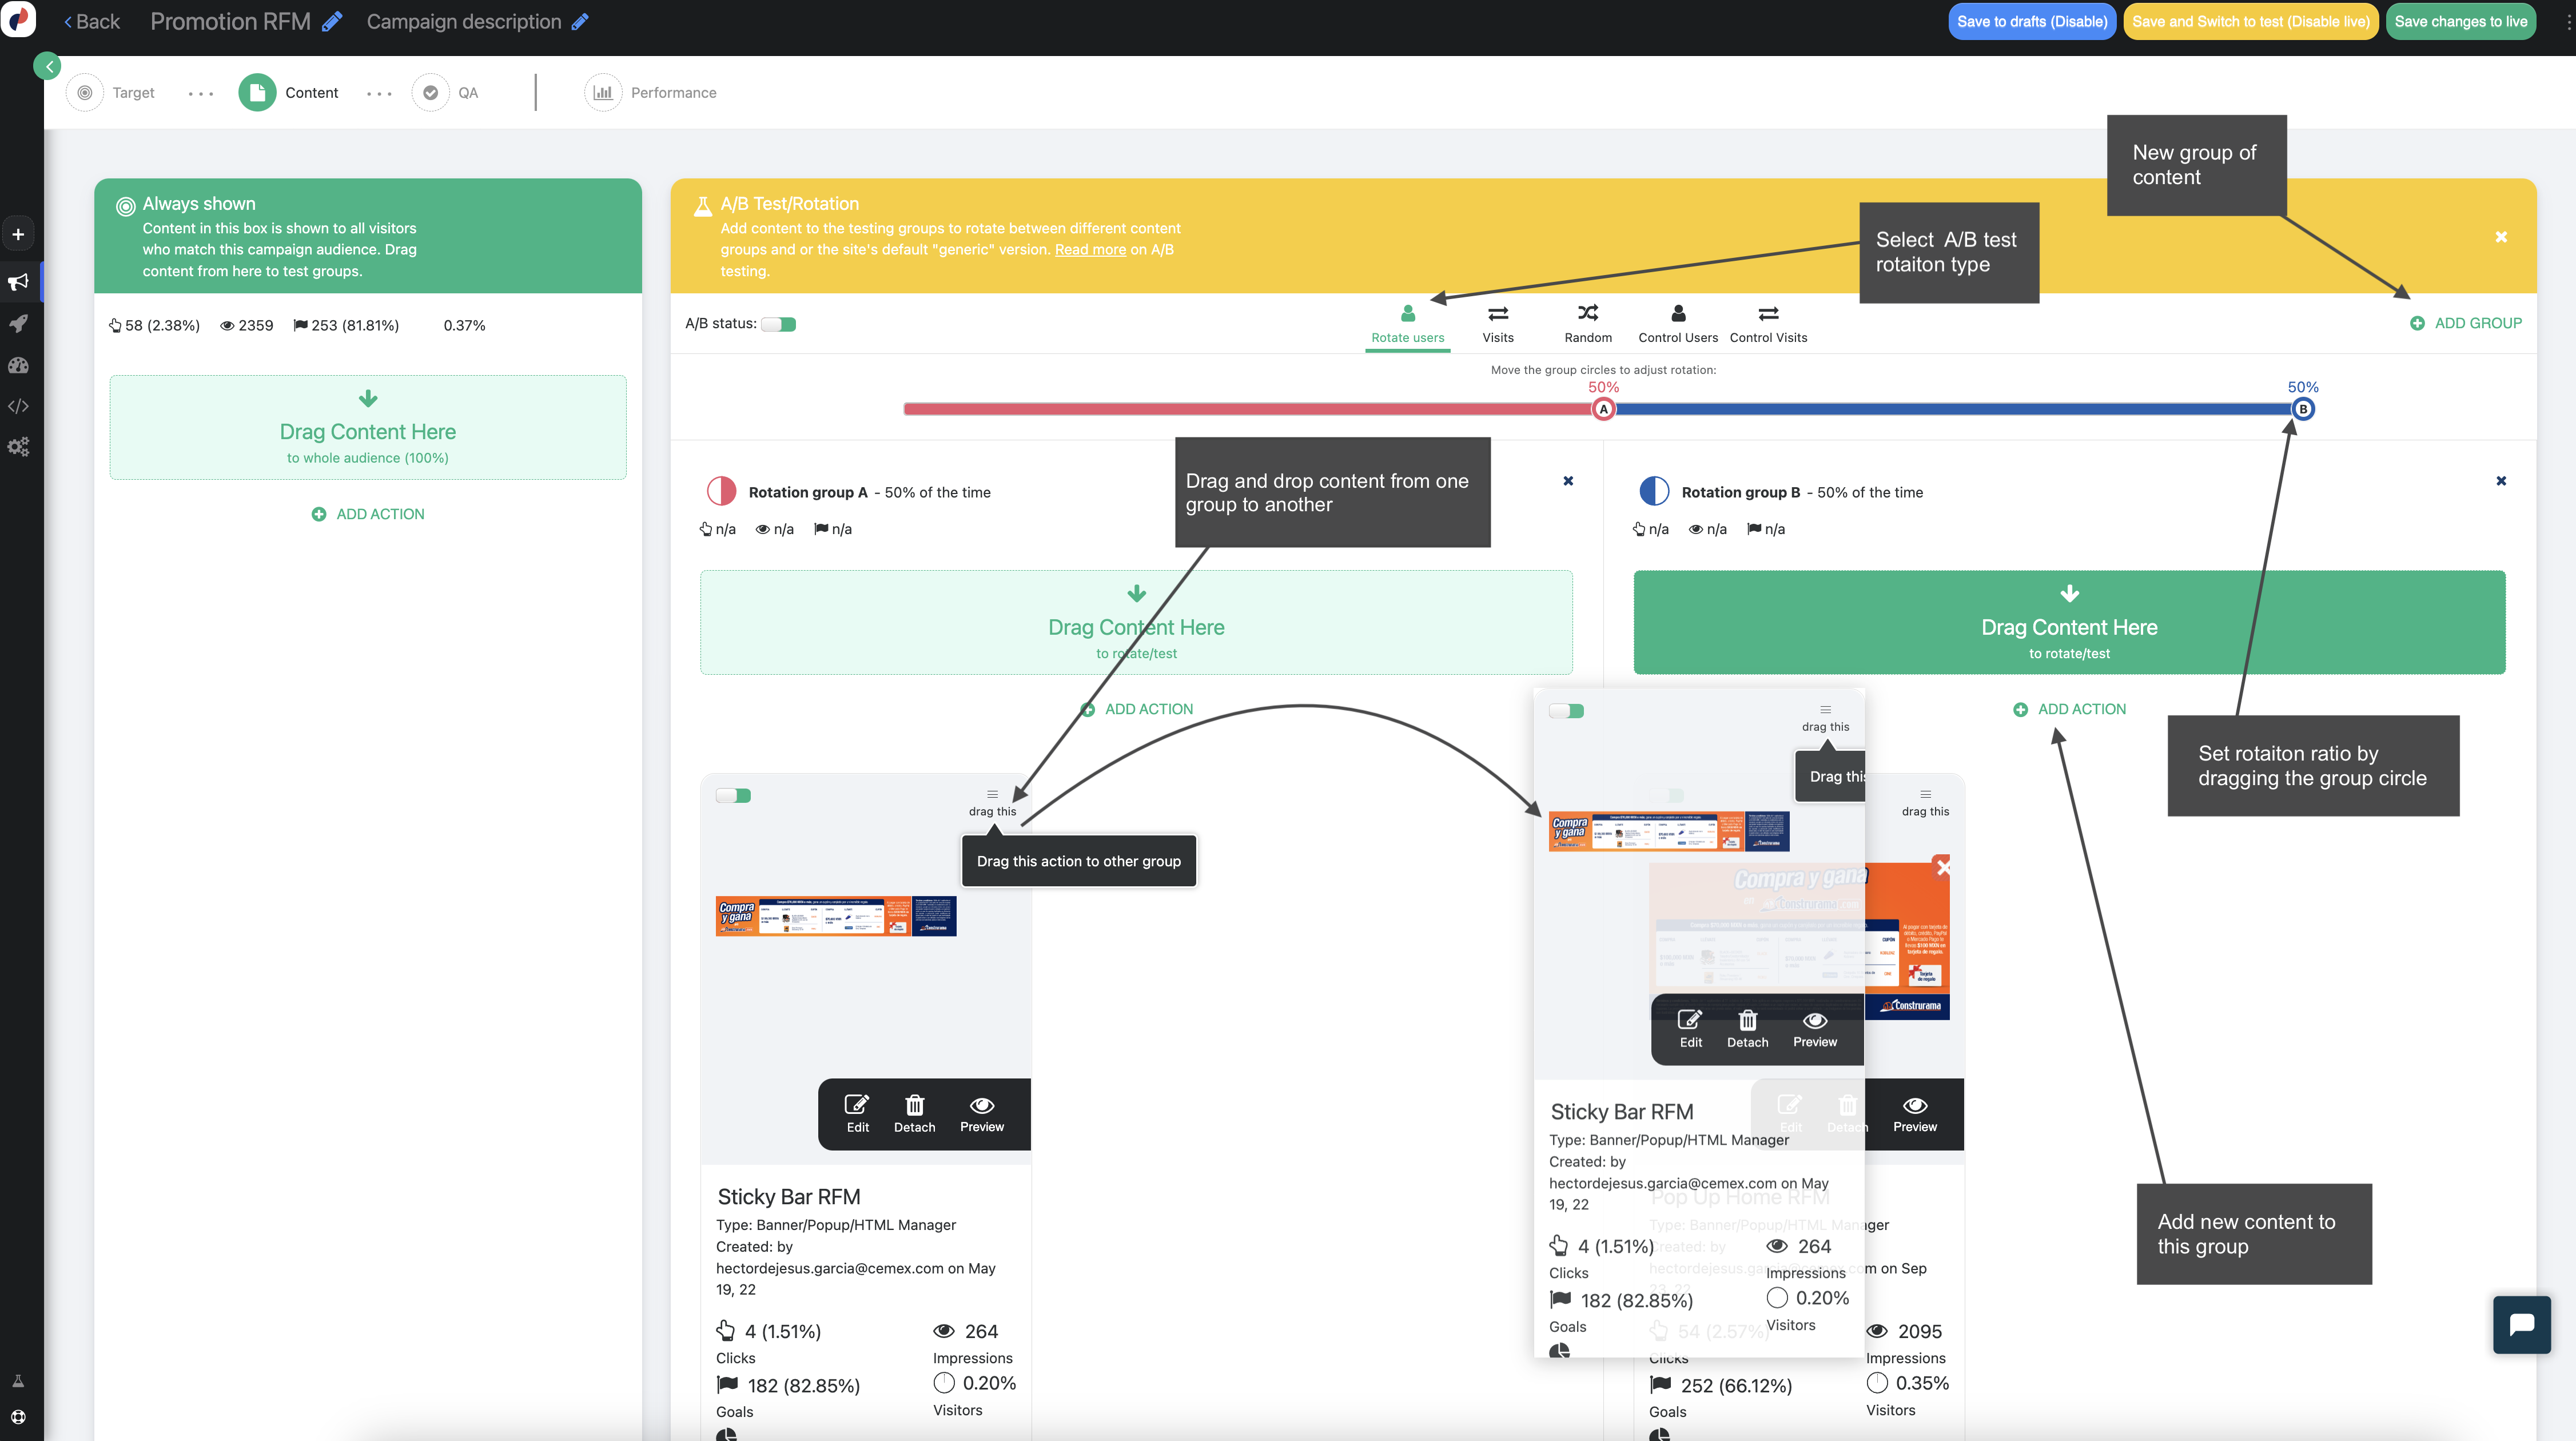
The content Step is also where you can set A/B testing for this particular campaign. A/B testing allows you to test various actions within this defined targeted audience, to see what is most effective.
QA Campaign
The last step in any targeting campaign is to QA (Quality Assurance). This is a process of ensuring that your campaign settings are correct and that the campaign will behave as you intend it to, before publishing it live.
There are 3 primary ways to QA a campaign:
The Simulator
Personyze simulator allows you to open a copy of your website in Proxy Mode (not live) and run your campaigns on this duplicate. This allows you to see exactly how Personyze will behave on your site, without it being live on your site, even in testing mode.
Not only will you preview the campaign’s behaviors, but you will also find detailed information about which rules you’re matching, which actions are executing, and what exactly Personyze knows about you, as a visitor. You even have the ability to impersonate other users, by overriding your own visitor data, to see how the campaign will behave for them.
Save in Testing Mode
When you save the campaign in testing mode, your campaign will technically be live on your site, but not for visitors. It will only be visible to the IP of the person who saved the campaign, who appends the testing mode URL parameter onto the URL. This allows you to go to the site and view the campaign live, without showing any real visitors.
Create Test Links
Testing links allow you to create a specific URL with a unique parameter, and to make the campaign only visible to those who go to the site with that link. This is an aspect of testing mode.
This link can then be sent to your colleagues, or whoever might want to see the campaign in action, before it actually goes live for visitors. All they have to do is click the link, and they will see the campaign live on the real site. Note, however, that it will behave according to the rules you have set, so they will need to actually match the rules for the content to be seen.

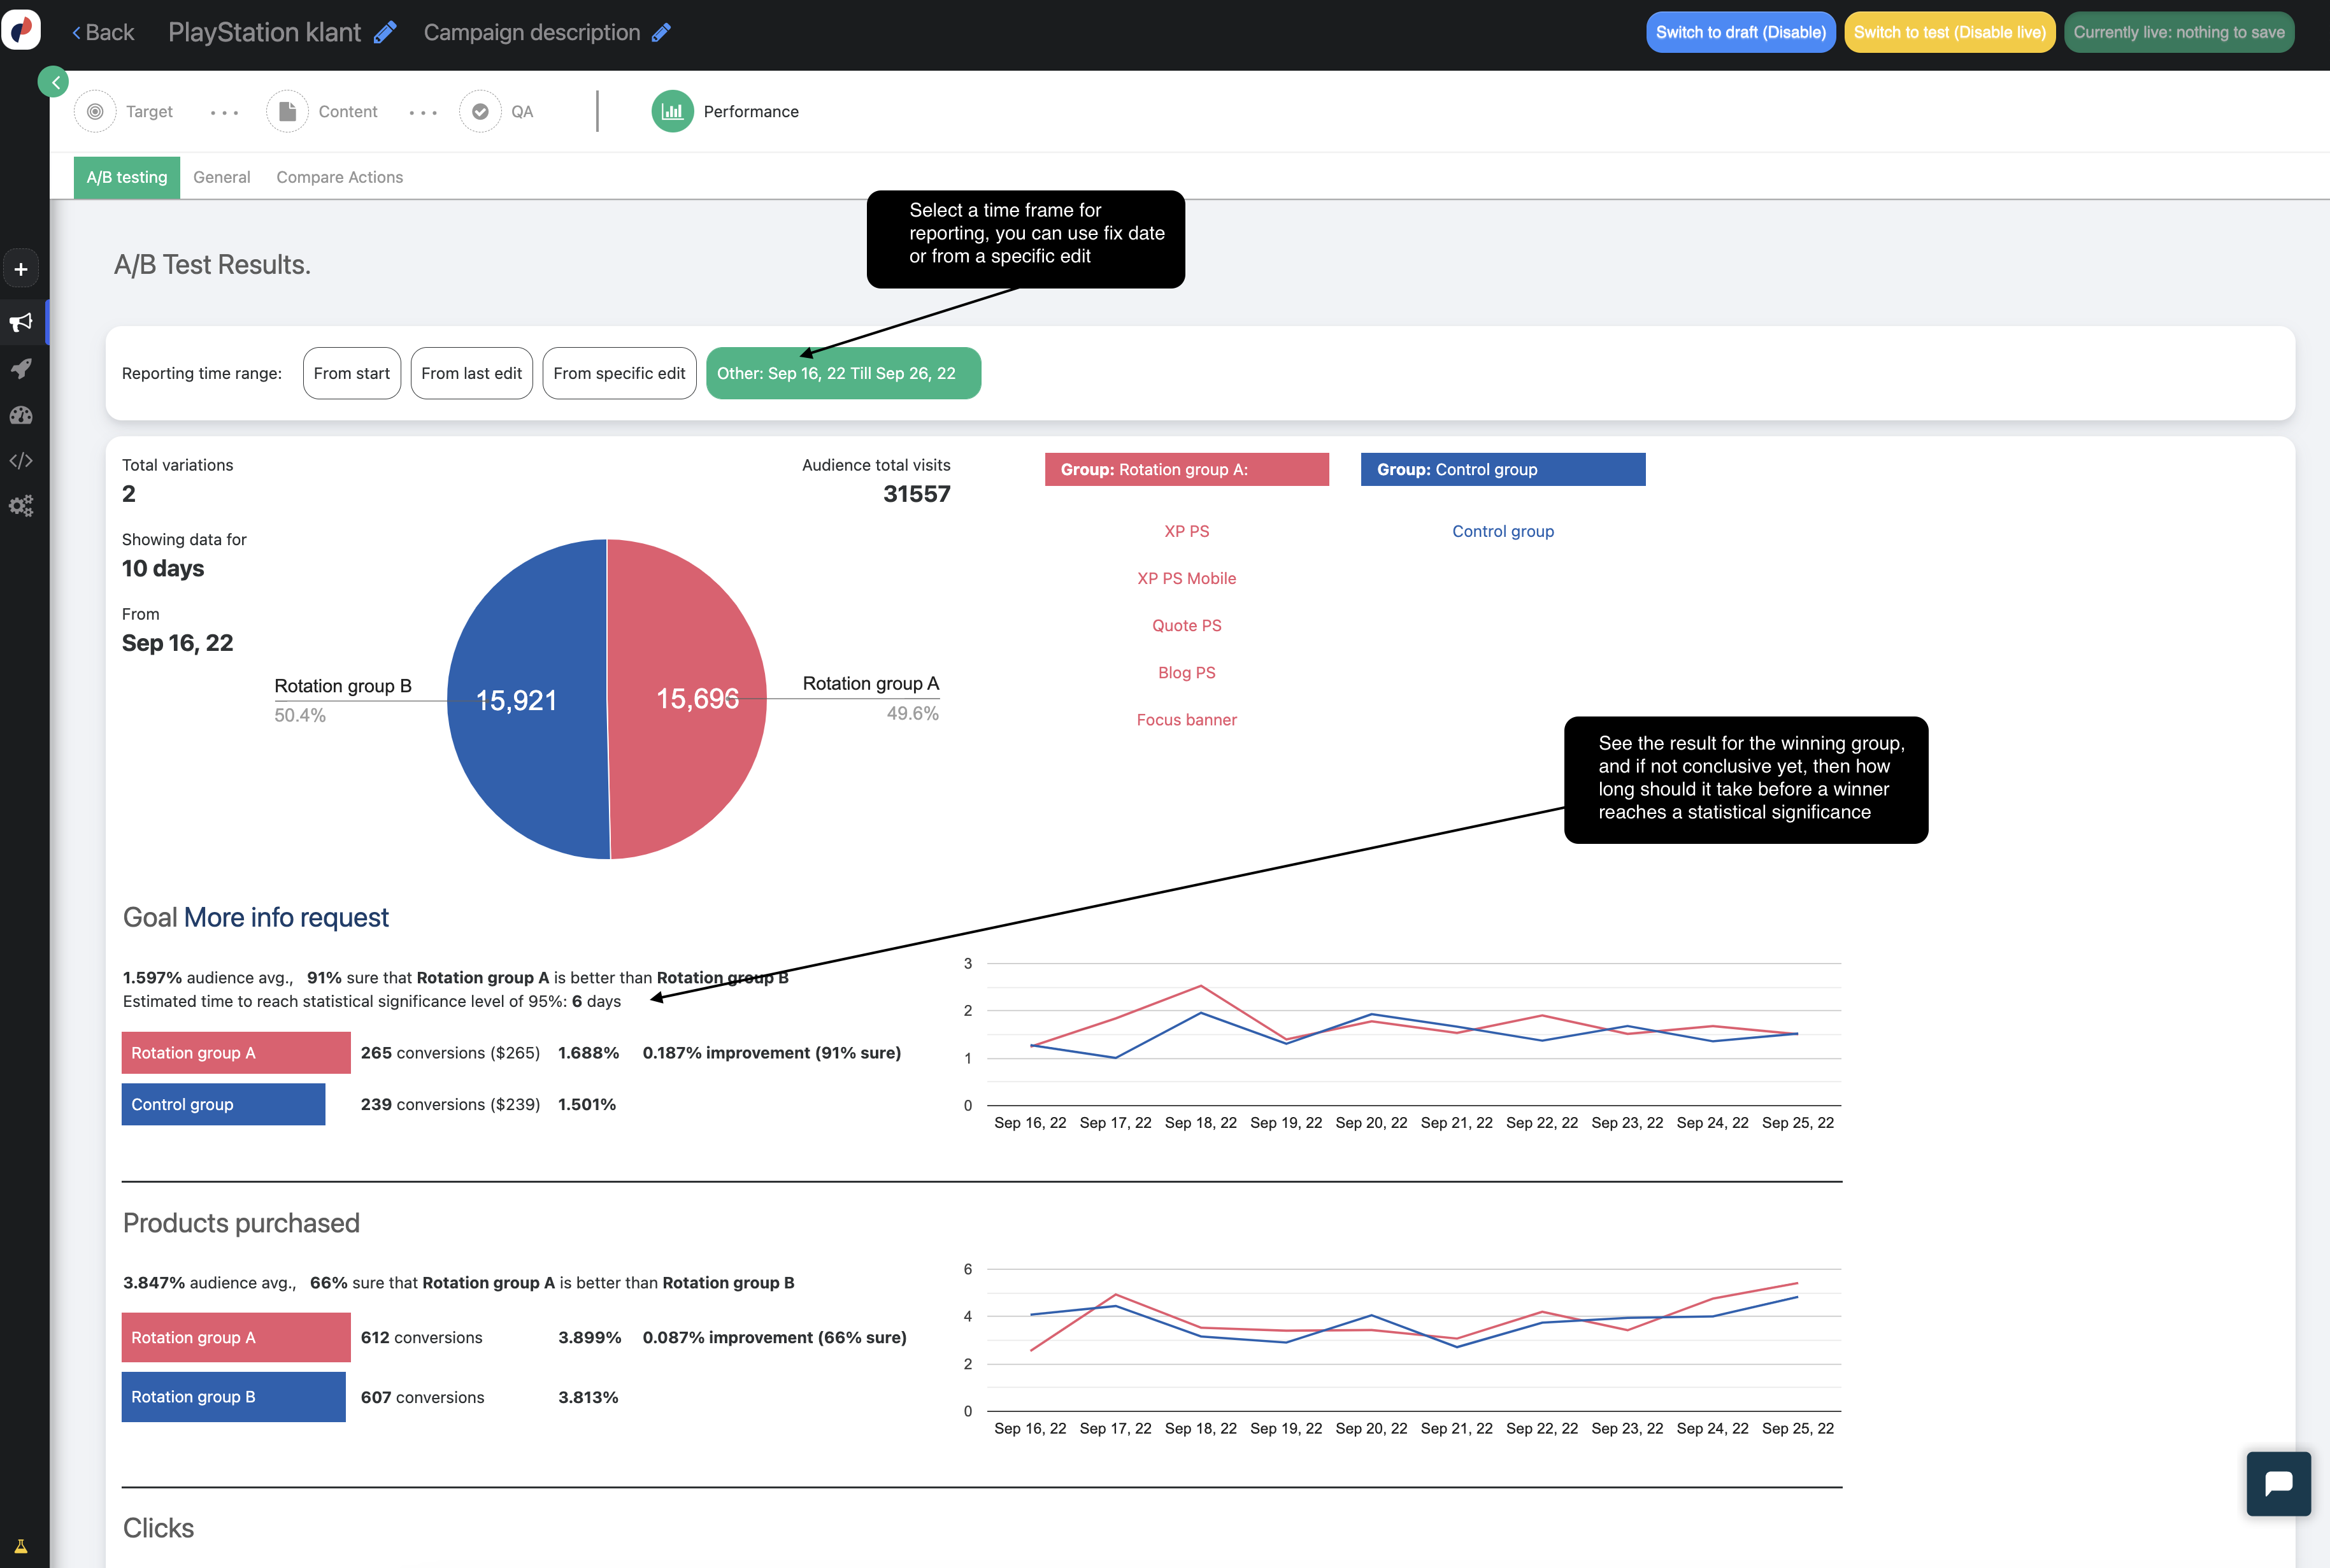
Statistics
After your campaign goes live, you can review detailed campaign statistics by clicking the Statistics icon, next to the save button, at the top of the page.
