
Tealium’s Customer Data Hub carries the audiences, badges and visitor attributes you have built across your stack. Connected to Personyze, those become live targeting and personalization inputs: show an offer only to a Tealium audience, insert a Tealium attribute into your copy, or feed it to the recommendation filters.
Watch the 2:03 walkthrough: what Personyze reads from Tealium on the page, AudienceStream sending an audience from Tealium’s servers, and a campaign that rewrites the home page headline for the people in it.
The connection works three ways: Personyze reads Tealium on the page (this article), receives audiences and attributes from Tealium’s servers (server-side audiences), and sends campaign events back to Tealium (below).
Setting up the integration
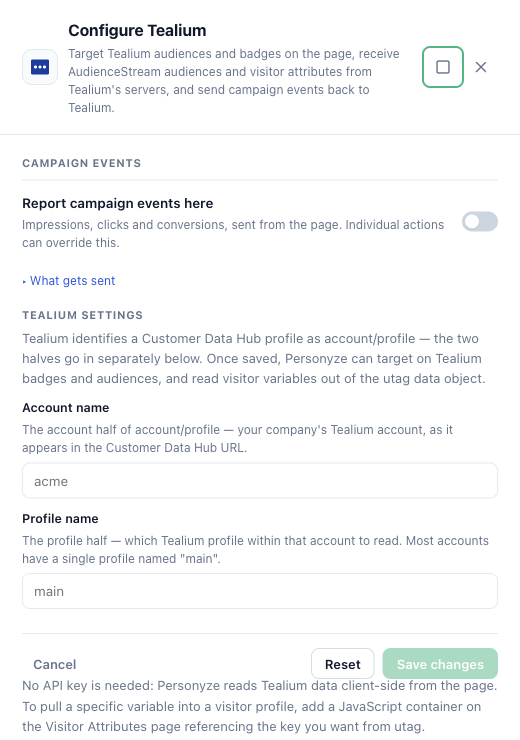
- Open the Personyze drawer. In the panel go to Settings → Integrations, find Tealium and click Configure.
- Enter the two halves of your Tealium profile id. Tealium identifies a Customer Data Hub profile as
account/profile:- Account name — your company’s Tealium account, as it appears in the Customer Data Hub URL.
- Profile name — which profile within that account to read. Most accounts have a single profile named
main.
- Save changes. No API key is needed for this part — Personyze reads Tealium data client-side from the page, out of the
utagdata object.
Targeting on Tealium audiences and badges
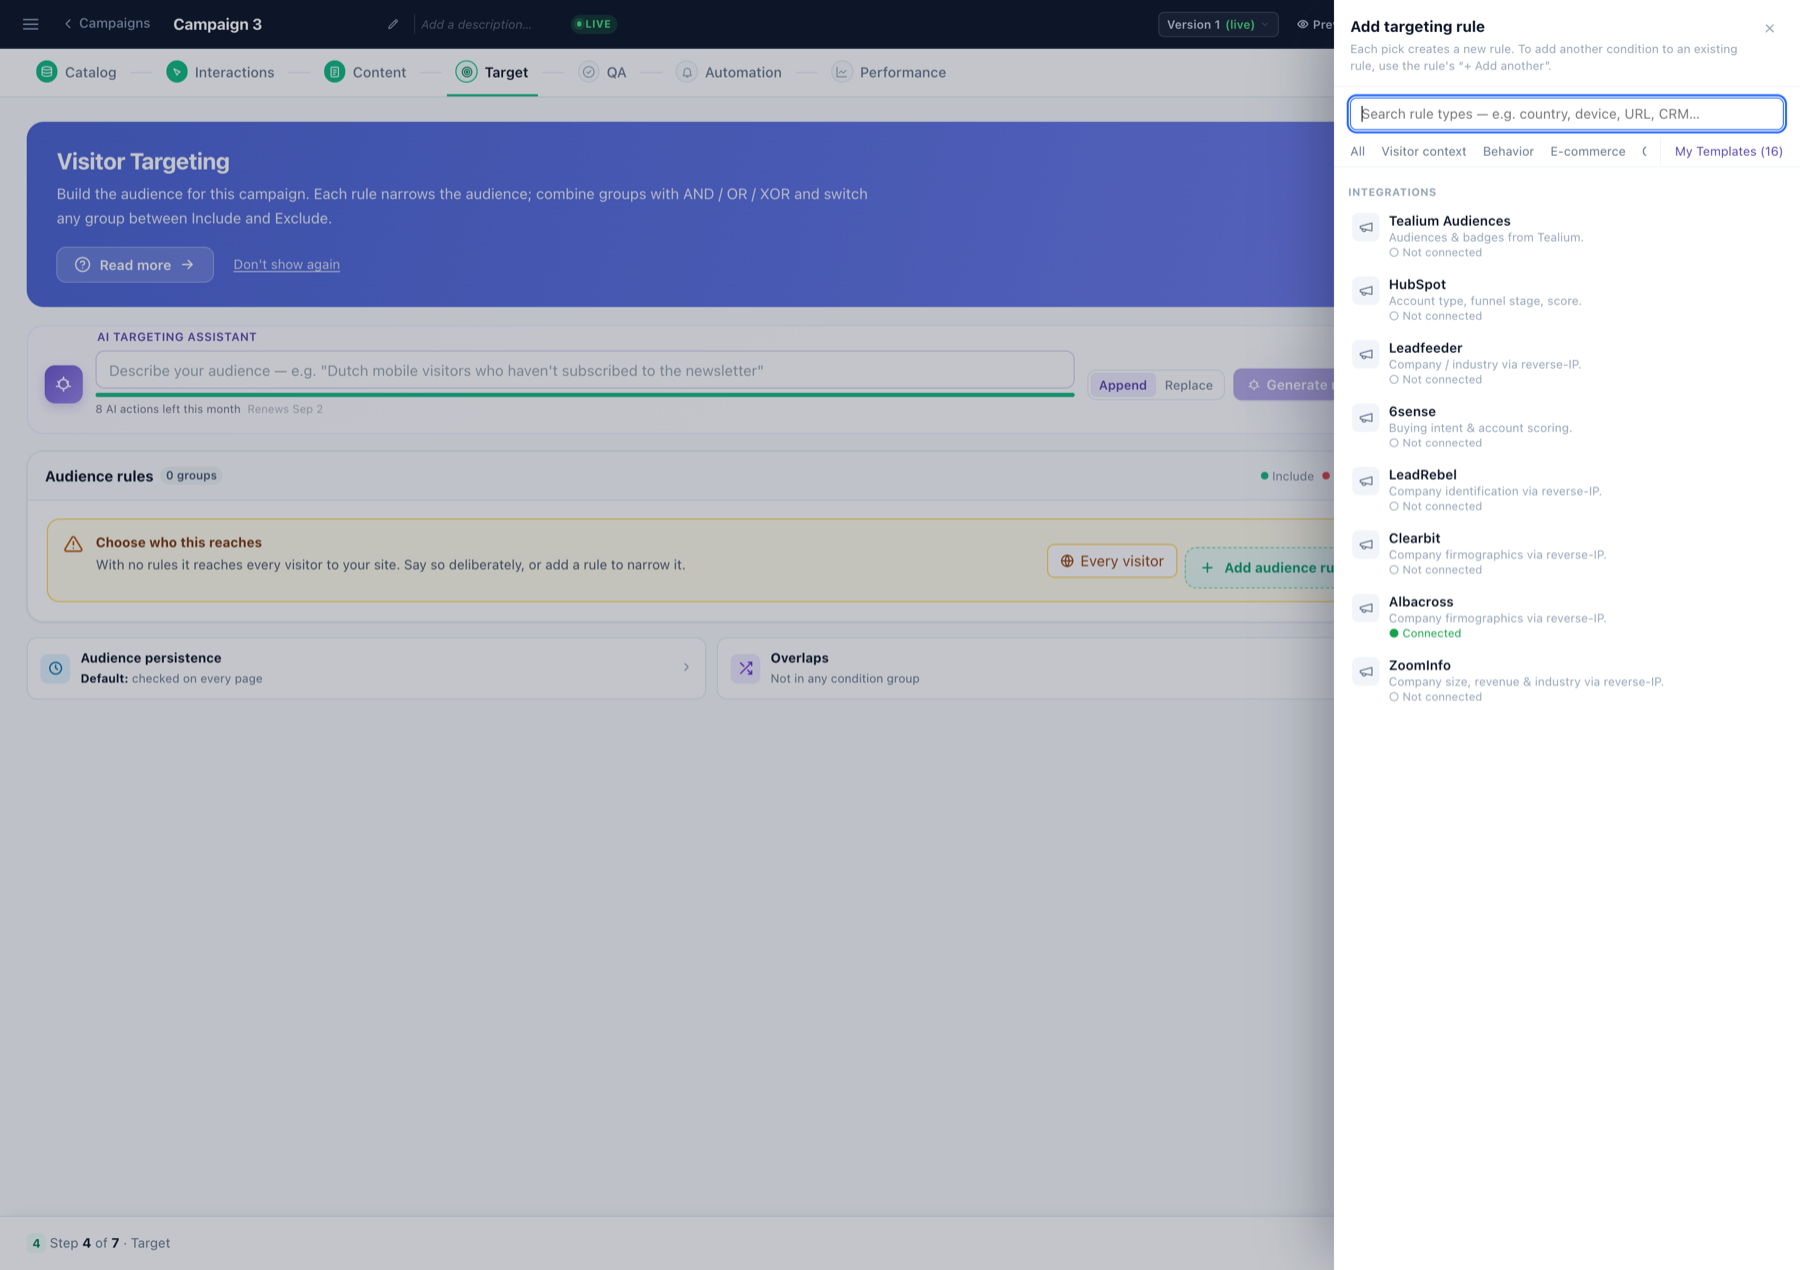
In any campaign’s Target step, click Add audience rule and open the Integrations category — Tealium Audiences is listed there. Pick it and choose the audience or badge the rule should match. Combine it with any other rule (pages, behaviour, device, weather…) with AND / OR, and flip the group between Include and Exclude.
Pulling a specific Tealium variable into the profile
To use one particular utag variable in targeting or as a dynamic content variable:
- Go to Settings → Visitor attributes.
- Add a JavaScript container that references the key you want from the
utagdata object — e.g.utag_data.customer_tier. - Save. The value is grabbed on every page view and stored on the visitor, so it can drive audience rules and be inserted into creatives as a dynamic variable.
Audiences from Tealium’s servers (server-side)
The browser side sees a Tealium audience only while the visitor is on your page. With the server-side connection, Tealium’s own servers tell Personyze when a person joins or leaves an AudienceStream audience, even when they are not on your site. Each audience becomes an audience list named “Tealium: <audience name>” that any campaign can target — website, email or offline — and the attributes you send update the visitor’s profile. It uses Tealium’s standard Webhook connector; see Tealium audiences in Personyze, server-side.
Sending campaign events back to Tealium
On pages that load Tealium, Personyze can report its campaign events — impressions, clicks and conversions — through utag.link. Switch on Report campaign events here in the Tealium drawer to send them for every campaign, or tick Tealium under Send this event to in an action’s events to send one action’s events. Personyze never loads utag itself; on a page without it, nothing is sent.
On the Personyze site
- Website personalization — the targeting and content engine behind it.