
The Personyze System Integration plugin is the bridge between a WordPress site and a Personyze
account. It does four things:
- Installs the tracker on every page, with no theme edits.
- Feeds the catalog — posts, pages and WooCommerce products — so recommendations, the
AI chat agent and AI search have something to work with. - Reports what the visitor is reading, by post ID rather than by URL.
- Hosts the Personyze AI agent inside wp-admin, so campaigns can be built without leaving
WordPress.
Campaigns, recommendations, A/B tests and designs are still built in Personyze. The plugin connects the two and puts
the agent where the content is.
Requires WordPress 5.6 or later and PHP 7.0 or later. Tested to WordPress 7.0.3.
Get it from the
WordPress plugin directory.
Connecting, in one click
The plugin comes first now. There is no account number to copy, no tracking code to paste, no API
key, and no application password to create by hand.
- Plugins → Add Plugins, search for Personyze, install and activate.
- Personyze → Settings, then Connect to Personyze.
- Approve on the WordPress screen, then confirm the account on the Personyze screen.
WordPress issues the application password itself during approval and hands it to Personyze. You need to be signed in
to Personyze for the confirmation step.
WordPress 5.6 floor is the same reason: application passwords arrived in that release.
What happens underneath
Worth knowing if you are reviewing the integration:
- The plugin sends you to WordPress’s own
authorize-application.phpwith a stable app id and a
one-time state, stored for thirty minutes and checked when Personyze posts the account back — so
a third party cannot bind your site to an account of their own. - WordPress redirects to Personyze with the site URL, user login and the new password in the query string.
Personyze immediately moves those into a short-lived HttpOnly cookie and redirects to a clean URL, so
the password does not stay in the address bar or in browser history. - The connection is never made on that redirect alone. Personyze shows what is about to be connected
— the site, the WordPress user, the Personyze account — and waits for a confirmation click.
Manual setup, still supported
Unchanged: create an application password under Users → Profile, then enter the site URL,
username and password in Personyze under Settings → Integrations → WordPress.
Where the plugin lives
A top-level “Personyze” menu in the WordPress admin sidebar, with two screens. Both
require the manage_options capability, so administrators only.
| Screen | What it is |
|---|---|
| AI Agent | The Personyze AI agent, full width, with room to work. |
| Settings | Connection status, the feed switches, the feed URLs, and disconnect. |
options-general.php?page=personyze-config and is now admin.php?page=personyze-config. Oldbookmarks and any internal documentation pointing at the old address will break.
The AI agent inside WordPress
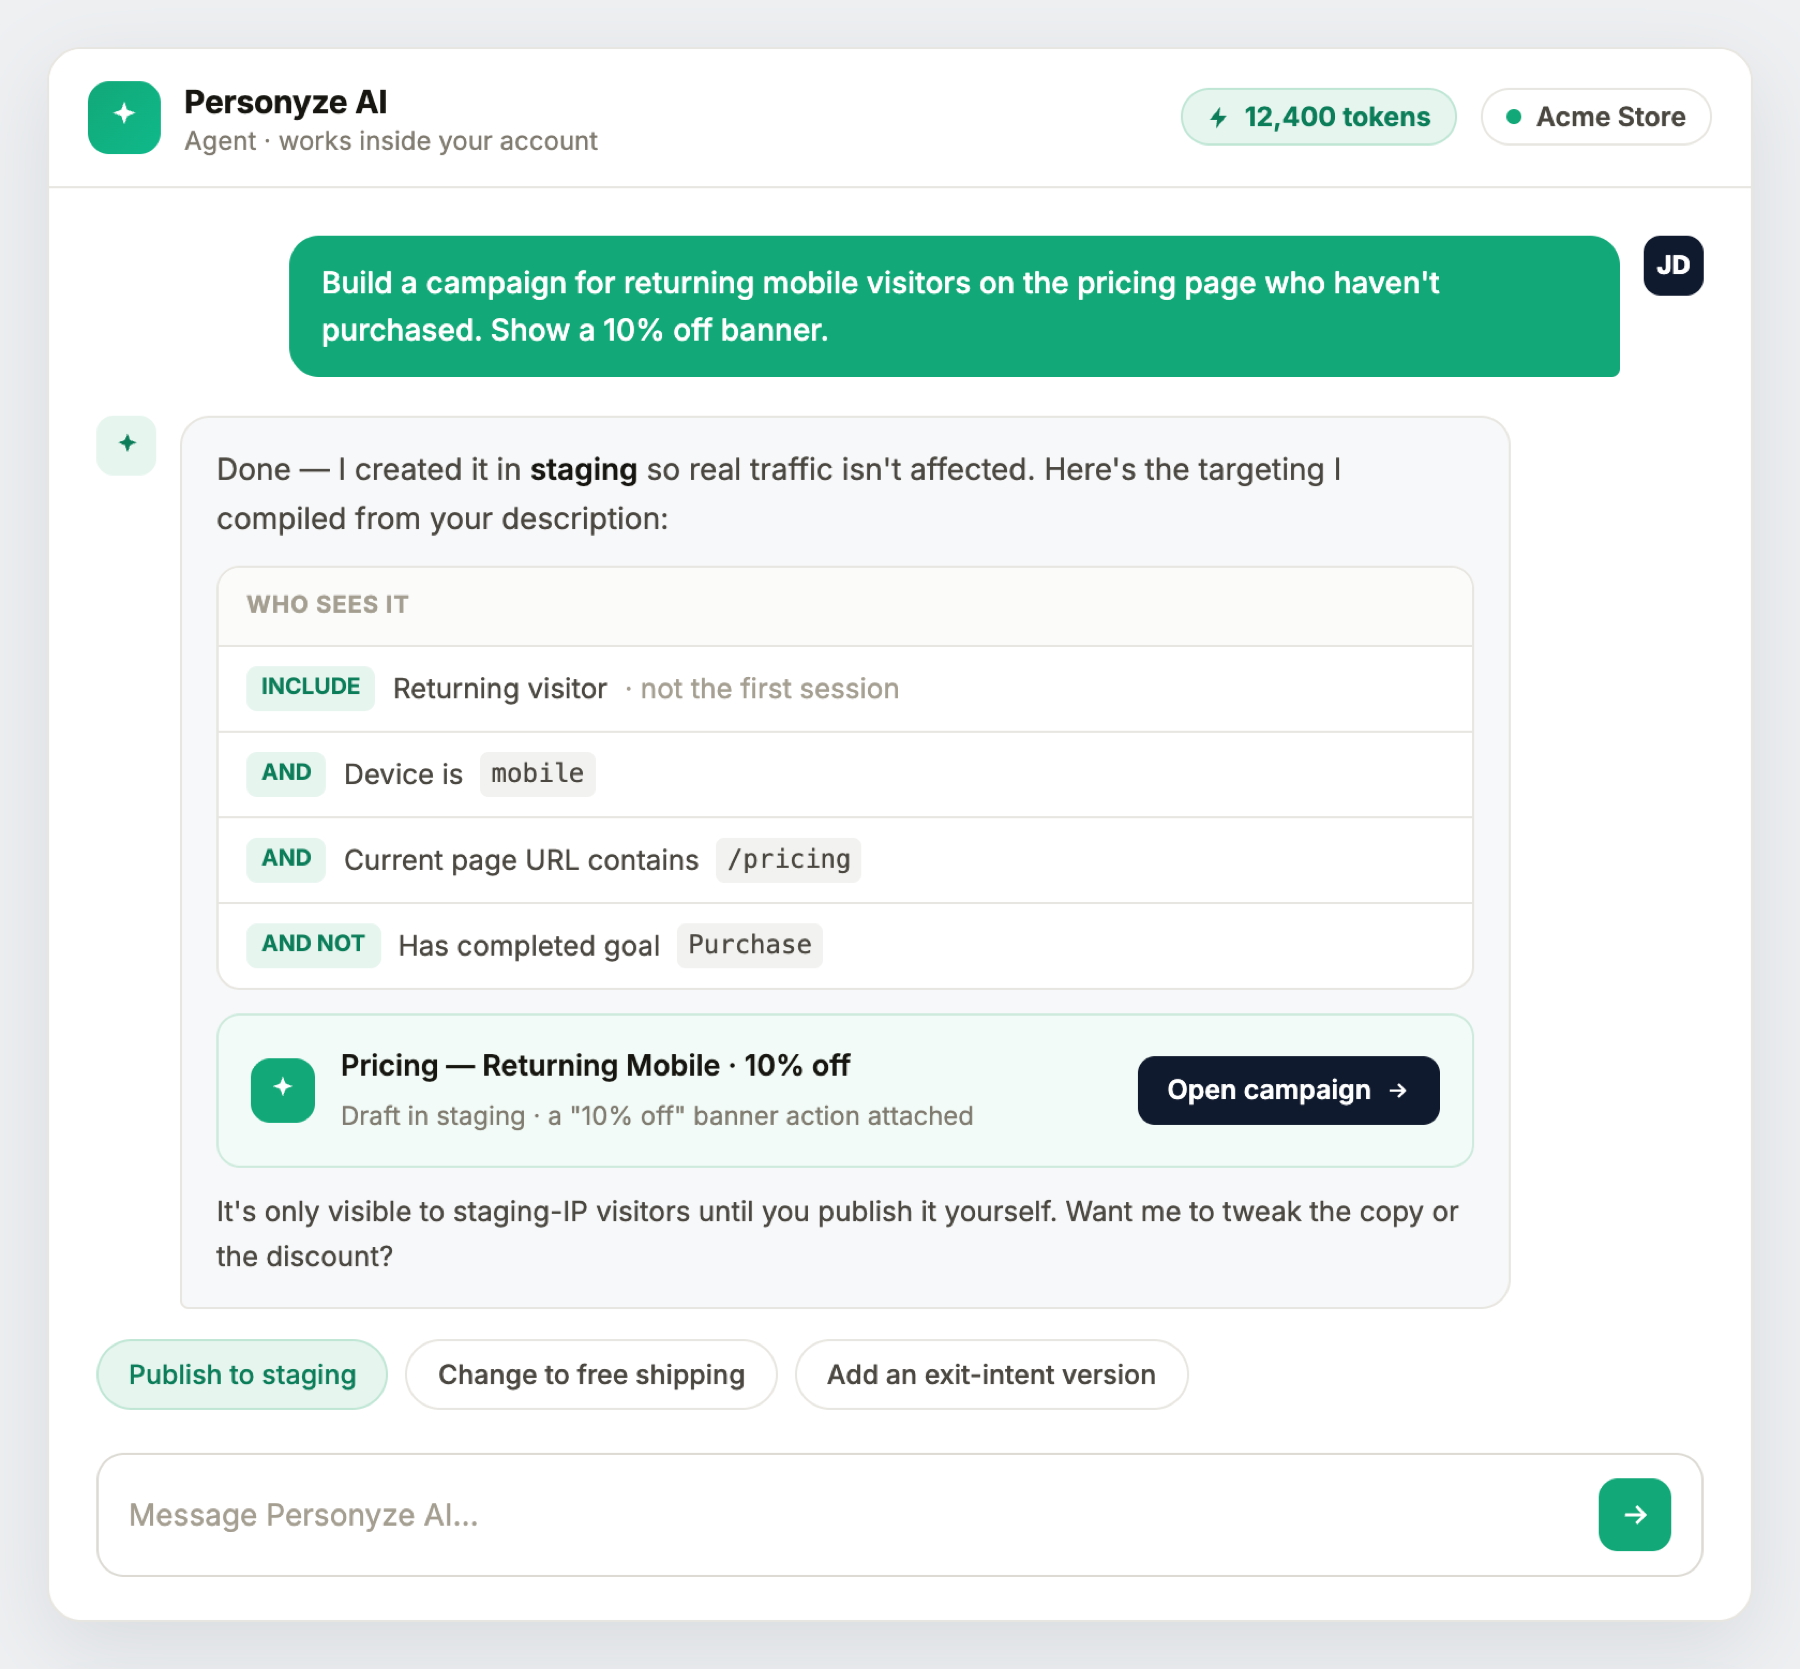
The same agent as in the Personyze panel, on the same account — not a cut-down version. It appears in three
places:
- Personyze → AI Agent — a full-width screen.
- A launcher in the bottom-right corner of every wp-admin screen.
- A launcher on your own site’s front end, while you are signed in as an administrator —
also reachable from the WordPress toolbar as Personyze AI.
so “what should I personalize on this page?” and “here” have something to
refer to. That is the whole reason the front-end launcher exists.
The AI actions meter
Under the prompt box, mirroring the panel. It counts AI actions — never tokens, never
dollars — and has five states:
- Normal: “42 AI actions left this month · renews Sep 1”.
- Under a quarter remaining: amber.
- Out on a paid plan: “Monthly AI allowance used — further AI is added to your invoice.”
- Out on a free plan: red, with an Add AI credits link.
- No allowance configured: the meter hides itself entirely.
How it behaves
- The conversation is built when you first open it, not on page load — it may be sitting on a visitor-facing
page, and most page views never open it. - Open or closed is remembered. Esc closes it; Enter sends and
Shift+Enter makes a new line. - Multi-step answers show what is being consulted while they work, rather than a blank wait.
- It is never visible to visitors. It renders only for signed-in users with
manage_options.
What it can and cannot do
It can build a campaign from a description and style it to your brand, compile targeting from plain
words and read it back to you, suggest what to improve from your own traffic, answer performance questions from real
numbers, manage existing campaigns, and open a support ticket. New campaigns are created in staging,
shown only to visitors arriving from a staging IP — publishing stays your own act.
change what a design looks like (the panel’s action editor does that), or edit your WordPress content.
third-party cookies and no CORS — so the agent works in Safari and Firefox, where an embedded panel would
not.
The feeds
Both are on by default, and the product feed appears only where WooCommerce is active. They are
controlled from Personyze → Settings → Feeds in WordPress, not from the Personyze
panel — whatever WordPress says wins, and Personyze adopts it.
They are re-read once a day, each account in its own hour, so posts you publish or edit reach
recommendations without anyone pressing anything. Flipping a switch tells Personyze immediately rather than waiting for
the next pass; if Personyze cannot be reached at that moment the setting is still saved, picked up on the next run, and
the screen says so.
What each feed carries
Content — published posts and pages, excluding password-protected ones:
id (the WordPress post ID) · title · description (the excerpt)
· publish_date (last modified, GMT) · name (slug) · author
· type · comment_count · categories ·
interests (tags) · content_url (the permalink) · thumbnail (the
featured image)
Products — published products, with the same fields plus price (regular) ·
sale_price · is_in_stock · inventory (stock count).
Looking at what Personyze reads
The settings screen shows the two Feed URLs. Opening one is the fastest way to answer “is it
picking up my posts?”, and you can point another system at the same catalog.
https://SITE/?rest_route=/personyze/v1/sitemap     content
https://SITE/?rest_route=/personyze/v1/products    products
Add &limit=20 to look at the first few rows. They page with id-from and
limit, 100 rows at a time.
authenticate with an application password over HTTPS. They expose only what is already published — titles,
excerpts, permalinks, thumbnails, prices, stock.
Knowing what the visitor is reading
This is the part most personalization tools make you configure, and here there is nothing to configure. On a single
post, page or product the plugin tells Personyze the WordPress post ID directly:
personyze.push(['Article Viewed', 123]); // or ['Product Viewed', 55]The feed exports that same id, so the catalog key and the view event match exactly. No
page groups, no URL patterns, and no container scraping the address bar.
It is deliberately silent everywhere else: category and tag archives, the posts index, search results, and post types
neither feed exports. Turning a feed off also stops its view reporting.
as though it were a post id — which meant a real article’s id, usually belonging to something else
entirely. If your recommendations looked oddly wrong on category pages before 0.27, that was why.
WooCommerce
- Product sync — on by default wherever WooCommerce is active.
- Add-to-cart tracking — cart changes are reported as Product Added to cart with the
quantity, and Products Removed from cart on a clear. - Purchase tracking — on the order-received page, each line becomes Product Purchased
with its quantity. - Add to cart from a Personyze campaign — a recommendation widget or popup can add a product to
the real WooCommerce cart, through an endpoint the plugin exposes for it.
Unlike the two feeds, add-to-cart and purchase tracking are switched in the Personyze panel.
To also bring a WooCommerce store’s past orders and customers into Personyze, and make coupon codes in the store, connect it by API: WooCommerce integration. Use one product source, not both.
Your own templates, through shortcodes
Personyze can ask your site to render a WordPress shortcode and use the result inside a campaign. Personalized blocks
can therefore use your own templates and page-builder output and match the theme exactly, instead of being rebuilt in
Personyze.
It is also how the connection tests itself: after connecting, Personyze sends a token through the shortcode route and
checks it comes back — so “connected” means the whole path works, not merely that credentials were
stored.
Changing accounts, and disconnecting
Personyze → Settings → “Connect to a different account, or disconnect”.
Disconnecting:
- Revokes the application password Personyze was using, so the old account can no longer read the
site. Only passwords this plugin created are touched — another integration’s are left alone. - Stops the Personyze tag being served.
- Clears the stored account, feeds and key.
- Leaves everything built in Personyze untouched. It unlinks the two, nothing more.
clear the WordPress page, so without disconnecting here the site goes on naming an account it is no longer connected
to.
Caching plugins: exclude Personyze
We recommend excluding Personyze from every caching and optimisation plugin you run. The
personalization library has to load and decide before the visitor sees the page. A plugin that delays it,
minifies it into a bundle, or serves a cached copy of its output turns personalization into something that arrives
late — or does not arrive at all.
delay-JavaScript rule, not a broken tag. Most optimisation plugins hold all JavaScript until the first interaction, and
a visitor who bounces never interacts — so exactly the people you most wanted to reach see the unpersonalized
page.
WP Rocket
File Optimization → Delay JavaScript Execution → Excluded JavaScript Files, one per
line:
_S_T
stat-track-lib
counter.personyze.com| Entry | What it covers |
|---|---|
_S_T |
The inline snippet, matched by its content. This is the one that actually matters — the other two are external files and would never be requested without it. |
stat-track-lib |
Belt and braces on the tracker library itself. |
counter.personyze.com |
Everything the tracker injects afterwards from that host — your account’s compiled bundle and the chat widget. |
While you are in there
- Excluded from Minify/Combine — if JavaScript minification is on, add
counter.personyze.comthere too. Combining a third-party tracker into a bundle is a common way to
break it silently. - Do not add these to Lazy Load or Remove Unused CSS. They are irrelevant there and only add
noise.
How to check it worked
Open the page in a fresh tab and, without touching anything, run this in the browser console:
window._S_T && _S_T.uidundefined until you move the mouse. After it, a numberimmediately. That is the whole test — and the reason to do it without touching the page first, since any
interaction releases the delayed scripts and makes a broken setup look fine.
Other caching plugins name these settings differently — look for “delay JavaScript”, “defer”, “combine” or “minify” and exclude the same three strings. The same guidance for every platform is on Activating Personyze.
When something looks broken
- The agent shows a link out instead of the chat. A site connected before 0.27 has no API key until
Personyze’s next configure run. Clicking Test in the panel’s WordPress widget fixes it
immediately. - A new post is not in recommendations yet. Feeds are re-read daily, not instantly — normally
live within 24 hours. Sync sitemap in the panel forces it now. - The agent launcher does nothing. A full-page cache that caches pages for signed-in administrators
leaves the security nonce embedded in the page stale. Most caches bypass signed-in users and are unaffected. - Nothing personalizes until the visitor moves the mouse. A caching plugin is delaying the library — see Caching plugins above.
- The one-click button is missing. The site is on HTTP; use the manual steps.
- No product feed or switch. WooCommerce is not active.
Reference
REST routes, under personyze/v1
| Route | Method | Who may call it | Purpose |
|---|---|---|---|
/config |
GET, POST | Personyze only (IP + capability) | Read or write the account id, tracking domains, feed switches and API key |
/content |
POST | Personyze only (IP + capability) | Render shortcodes for campaign content |
/sitemap |
GET | Any administrator | The content feed |
/products |
GET | Any administrator | The product feed |
/stats |
GET | Any administrator | Counts — posts, pages, products |
/assistant |
POST, GET | Any administrator | Relays the AI agent — POST is a turn, GET is the AI allowance |
/config and /content additionally require the caller to resolve to
personyze.com, because they change settings and execute shortcodes. The read-only feeds are gated on the
capability alone, which is what makes their URLs usable by you and by other systems.
Options stored in WordPress
personyze_account_id · personyze_tracking_domains ·
personyze_api_key · personyze_sync_articles ·
personyze_sync_products · personyze_track_add_to_cart ·
personyze_track_purchase
Staging
The personyze_connect_url filter overrides where the one-click connection sends its credentials, for
non-production environments.
What you can build on a WordPress site
Everything Personyze can put on a page works here, using the catalog the plugin feeds it. Four of the most
common:
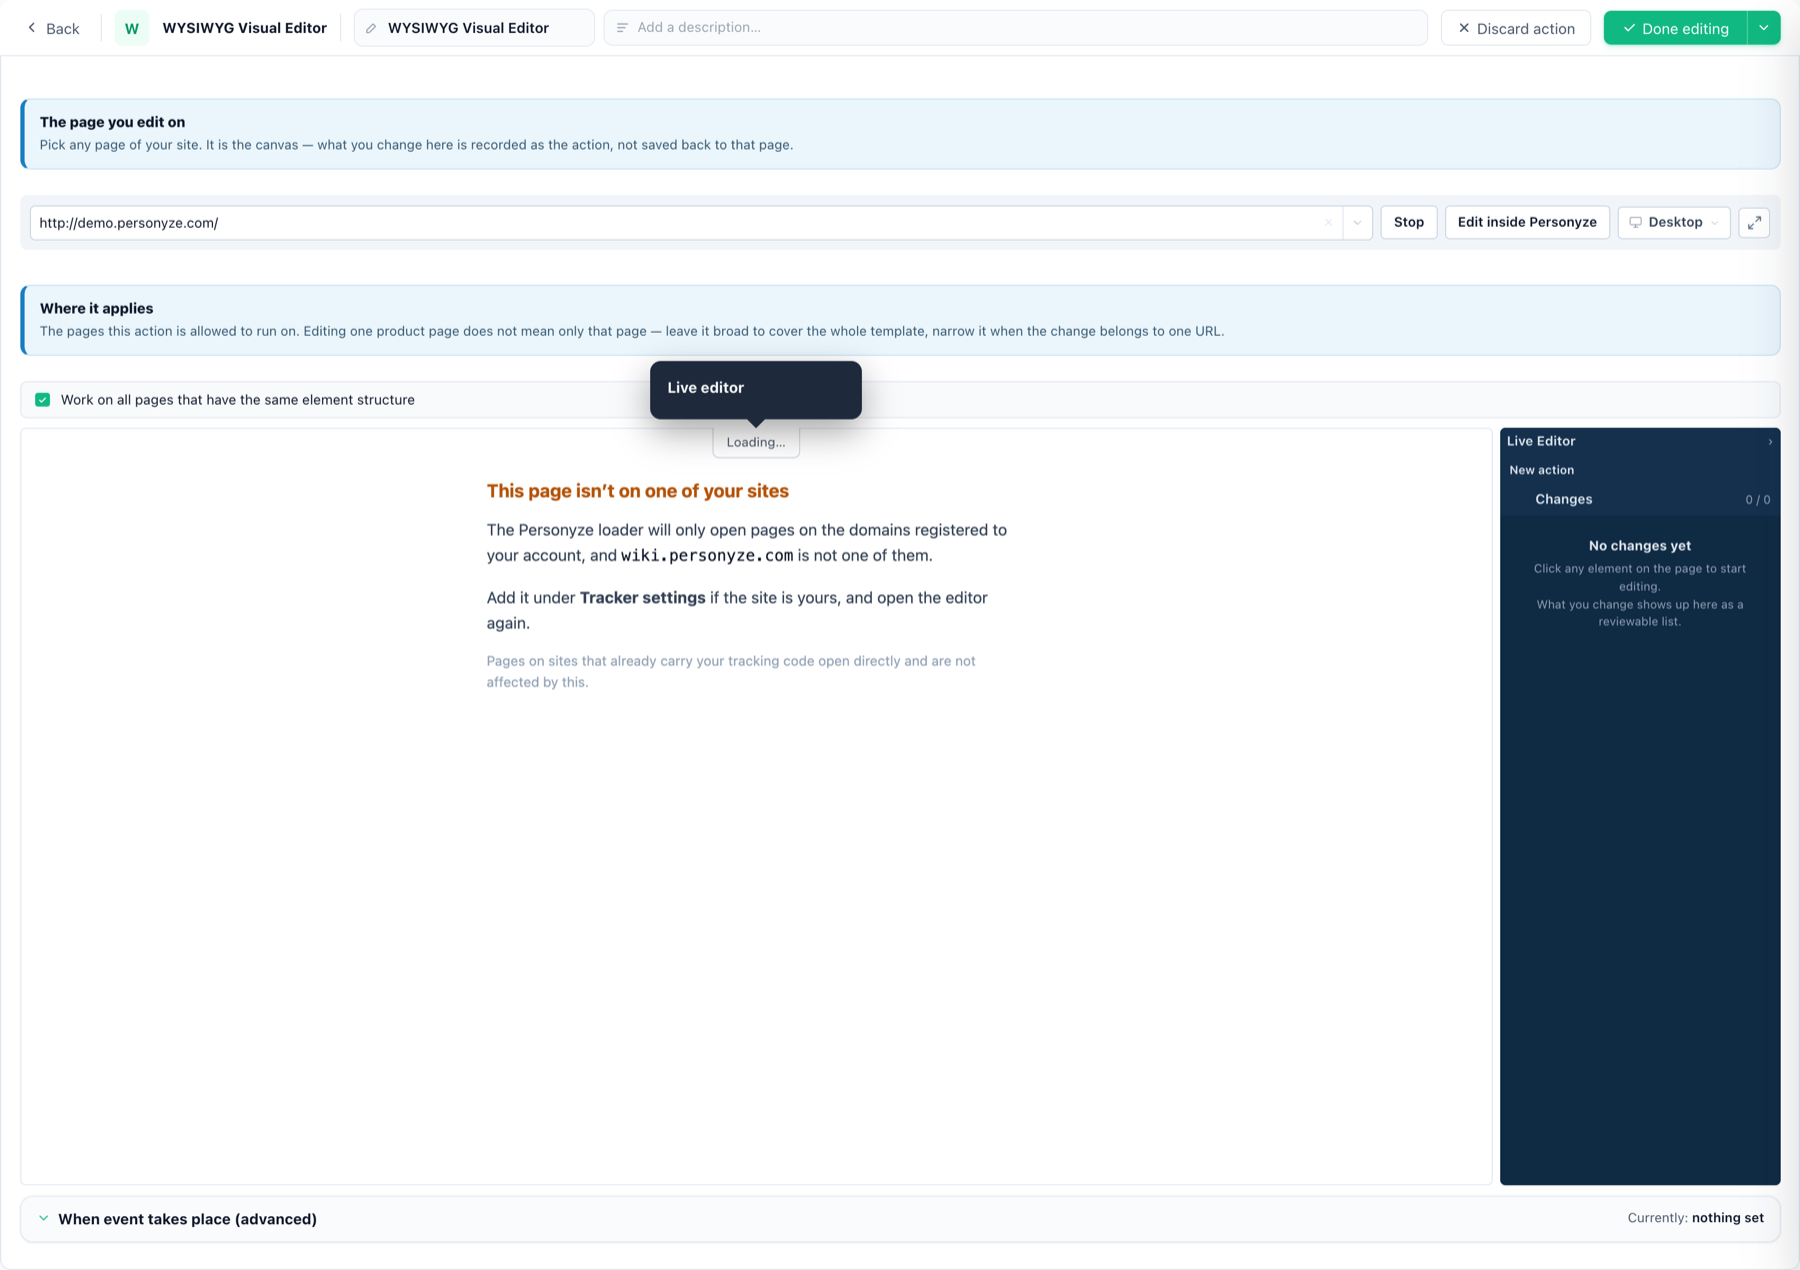
Edit the page you already have
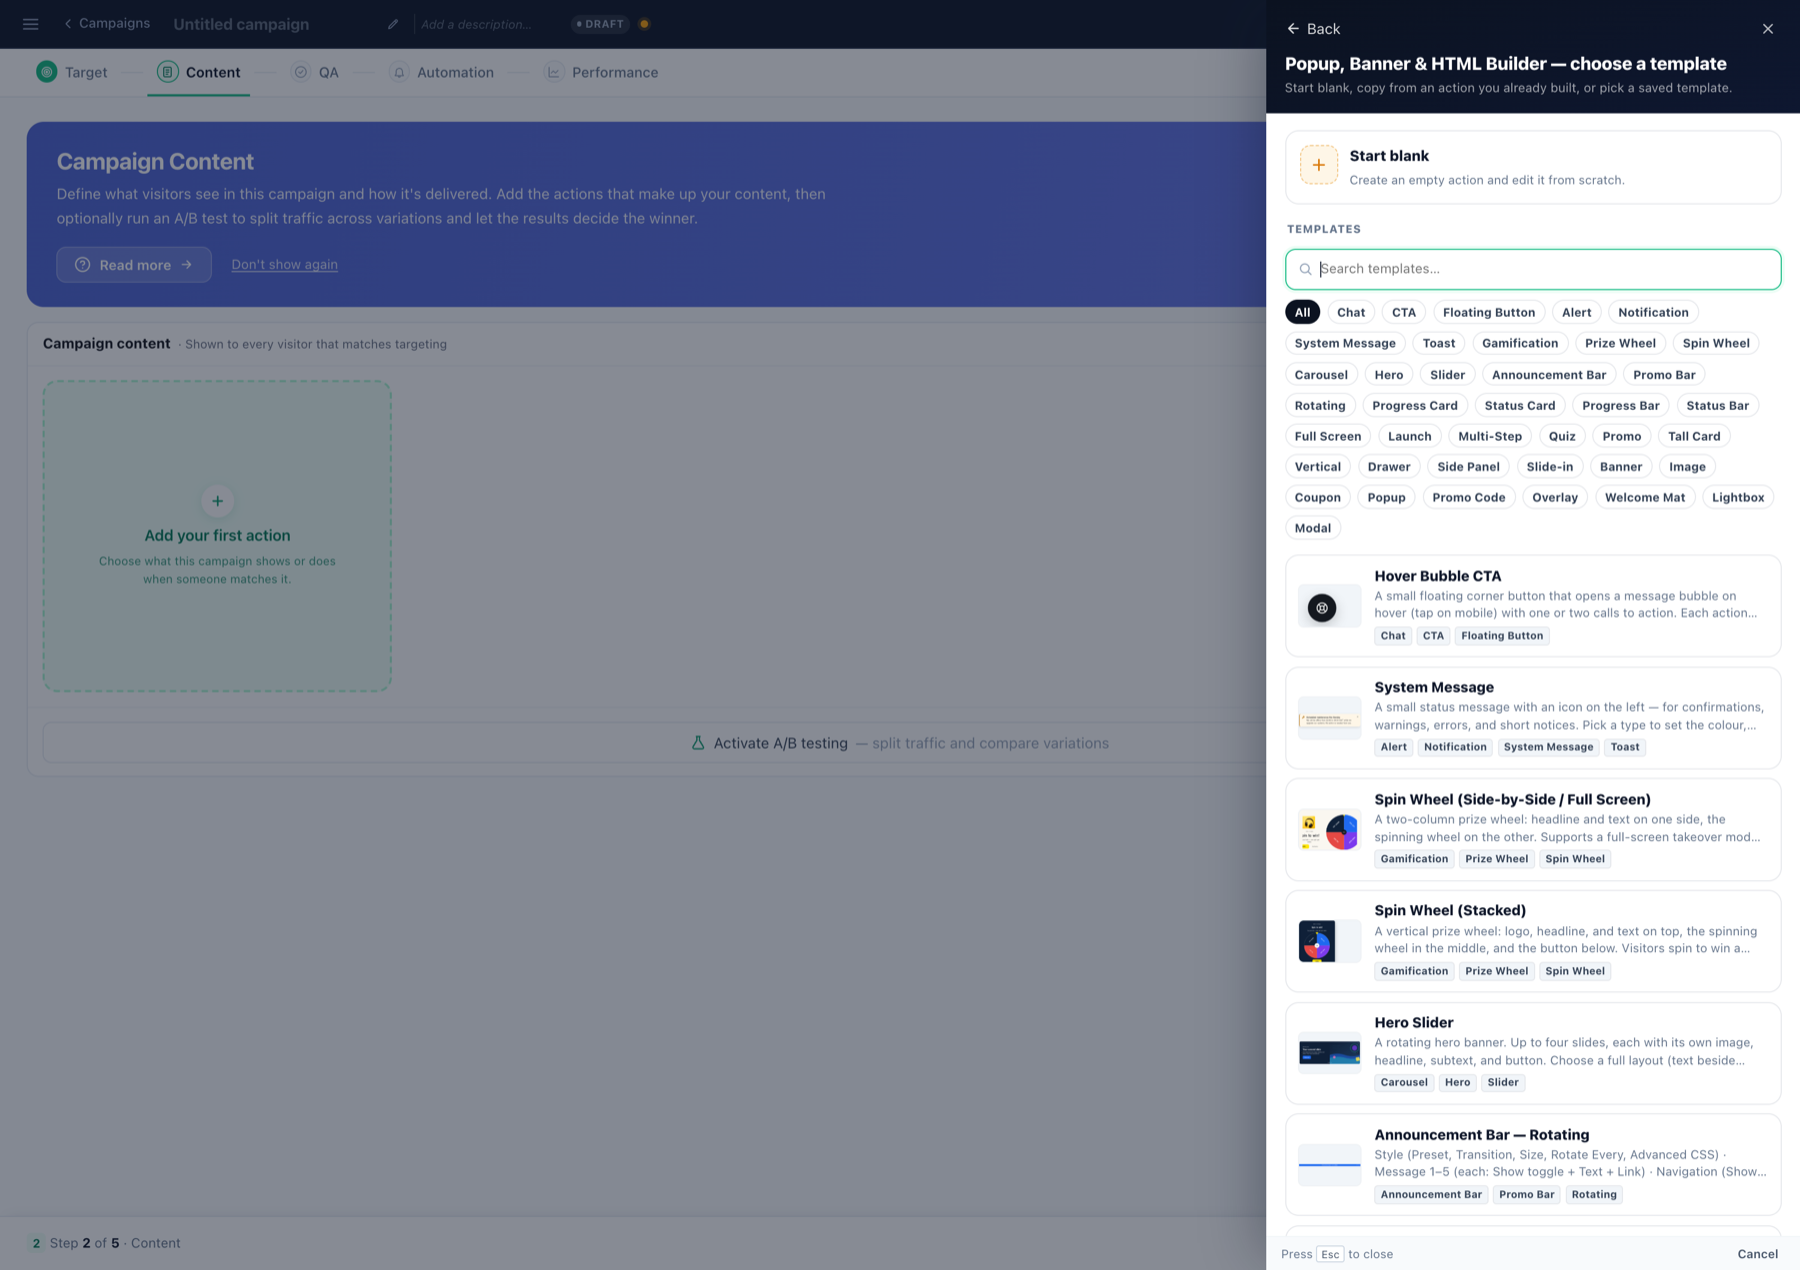
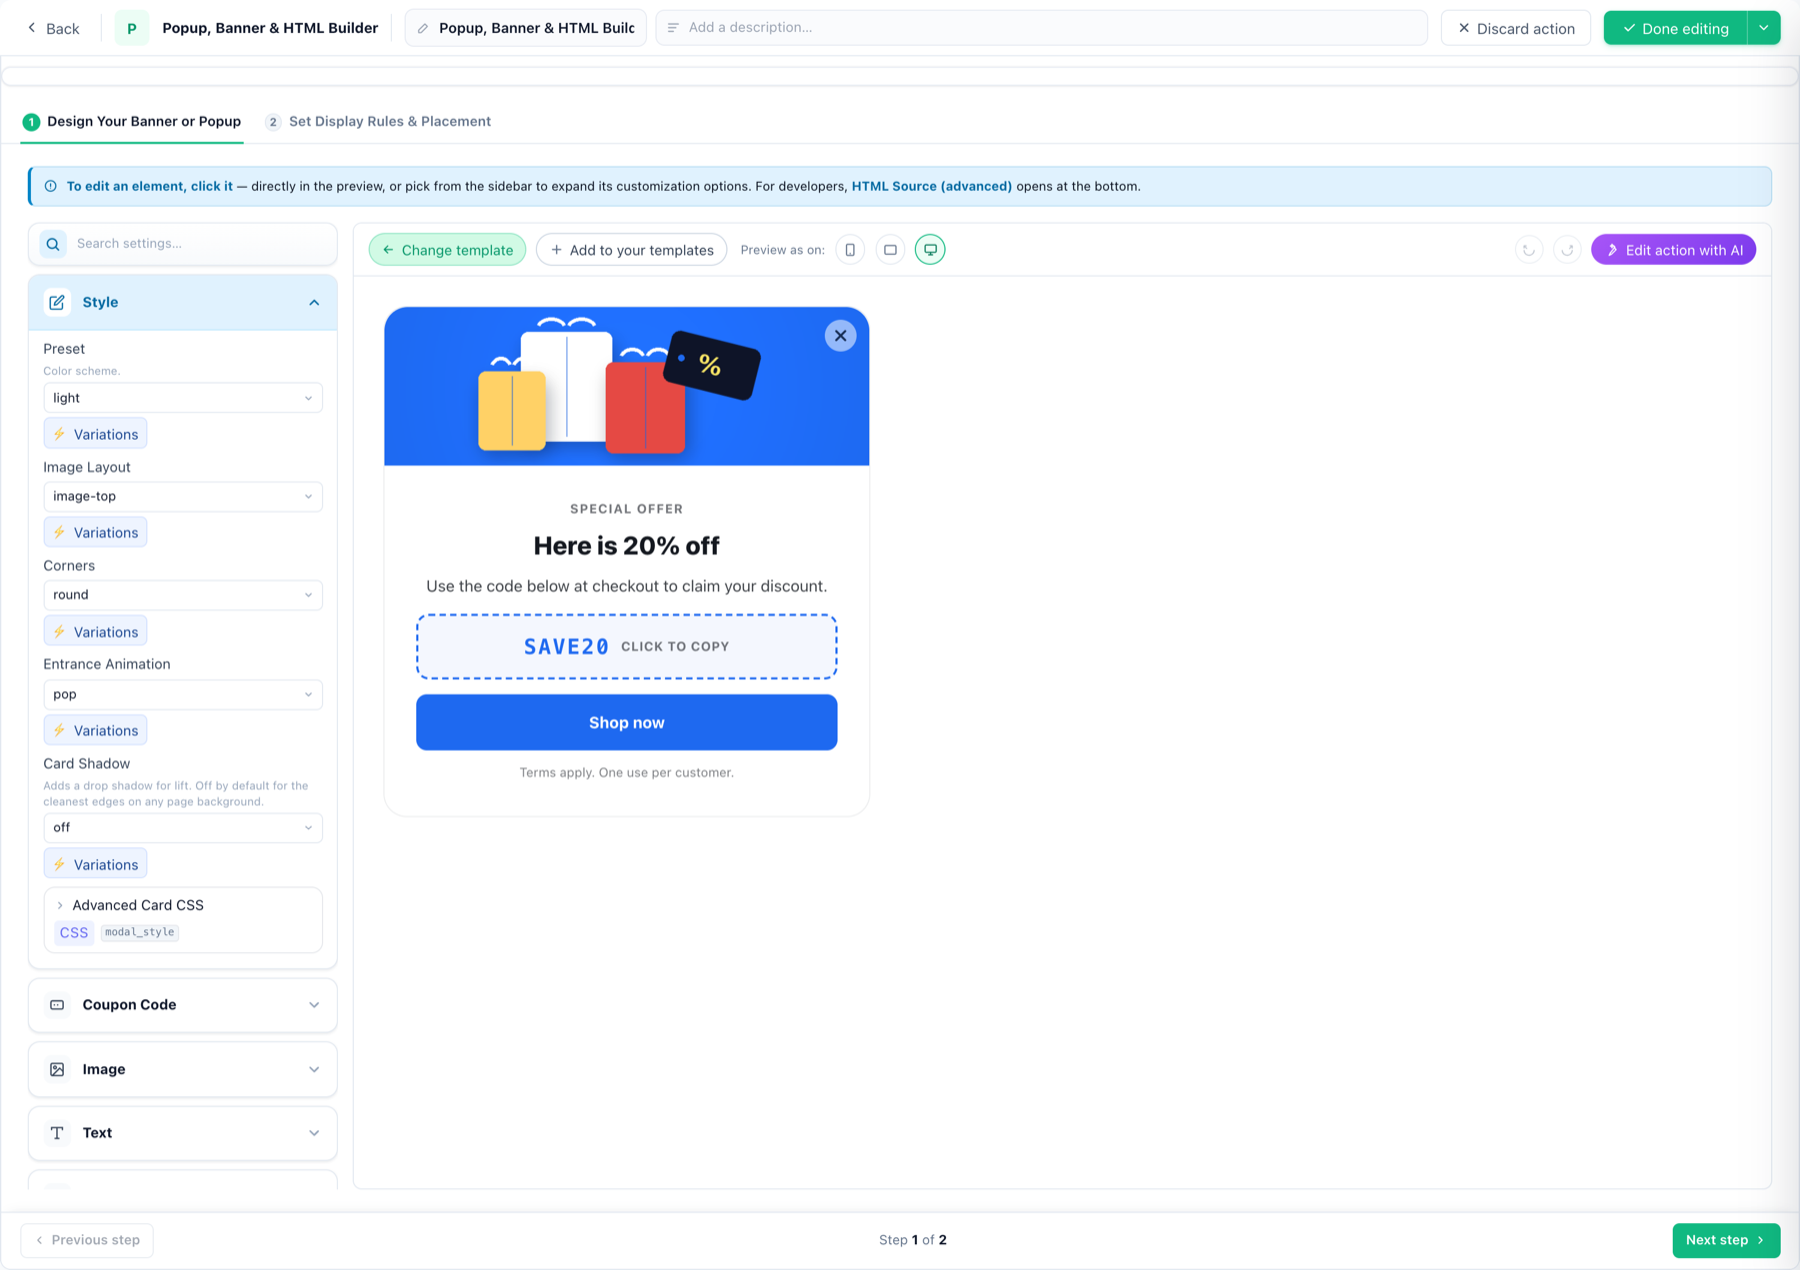
A popup or banner from a template
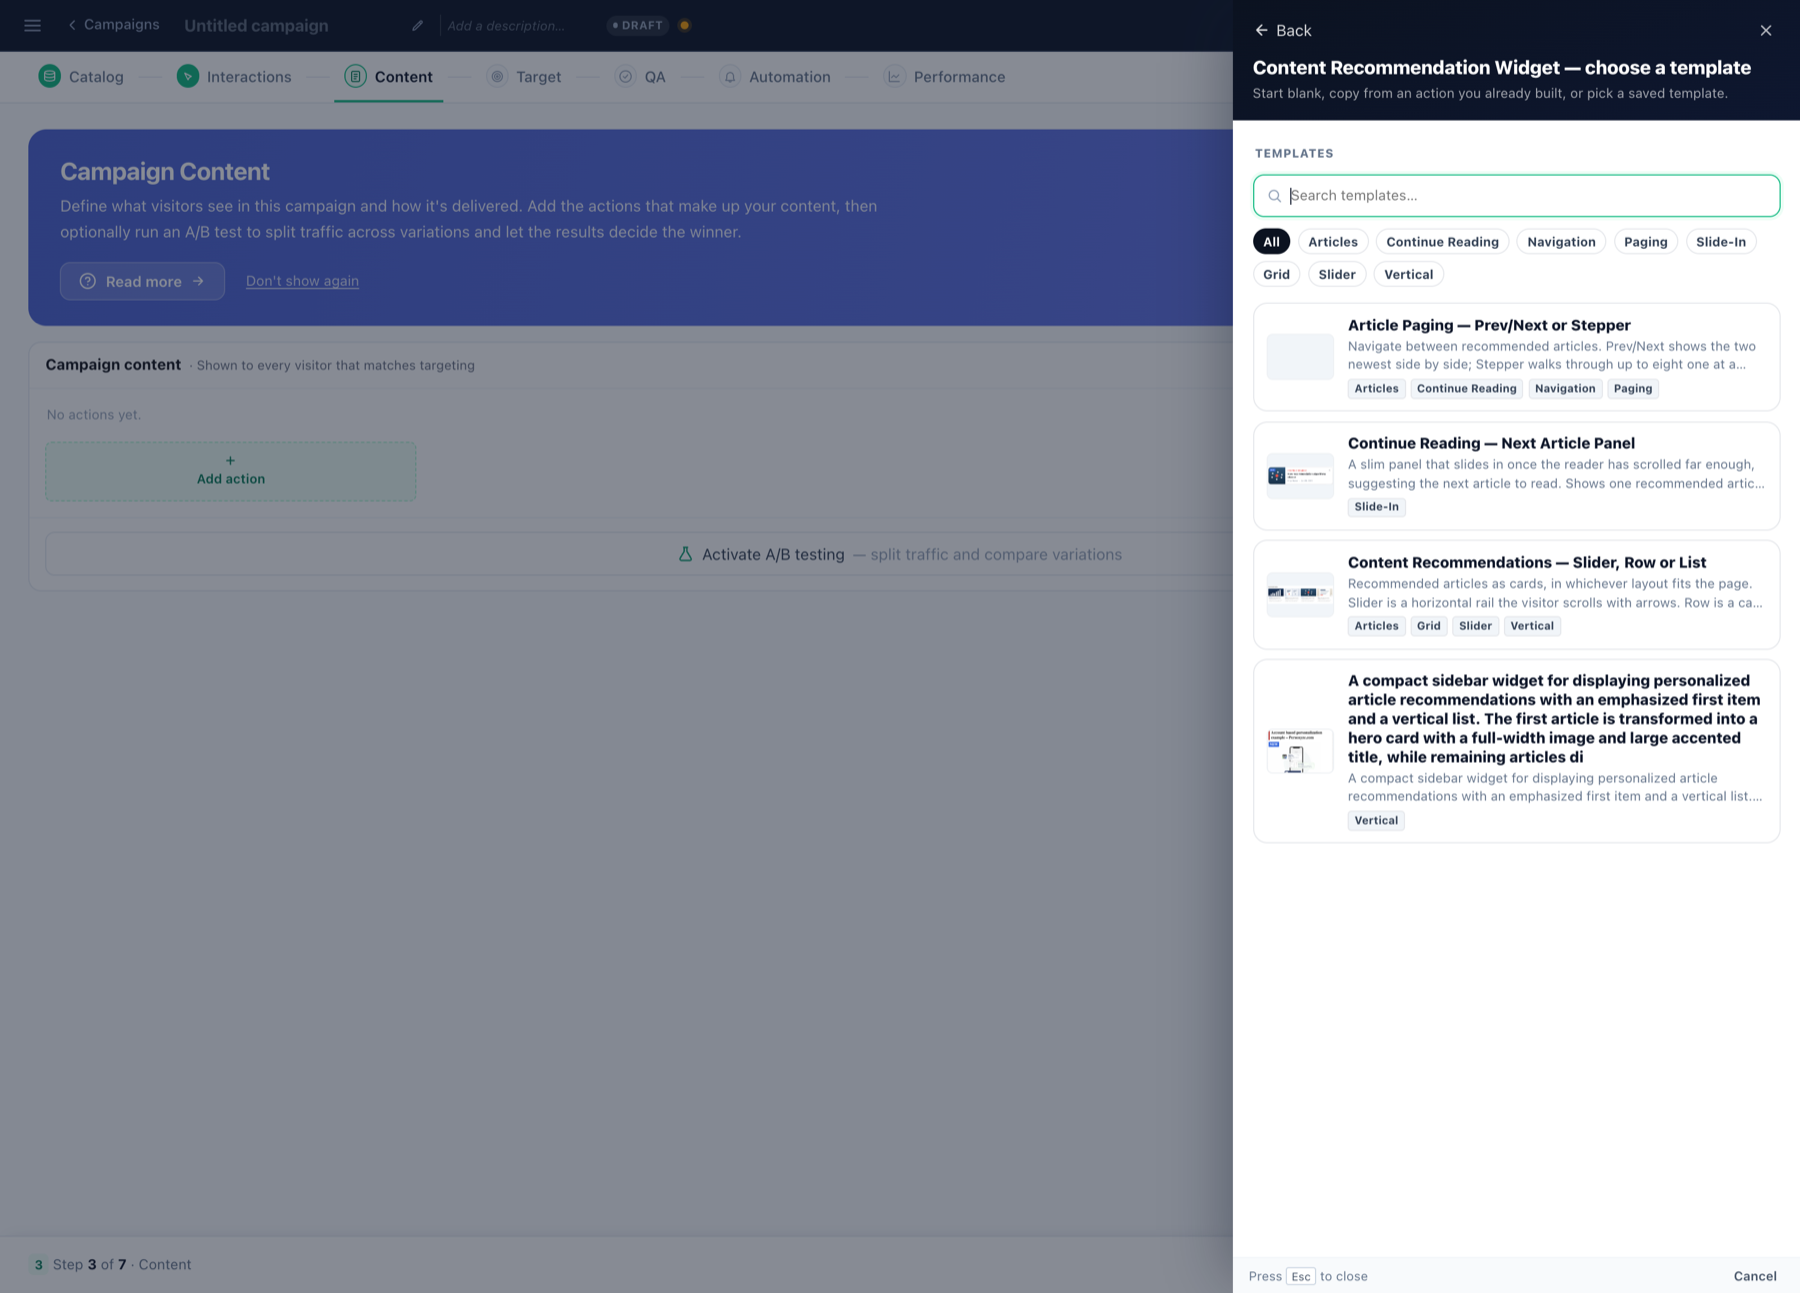
Recommendations from your own posts
Or build the design yourself
The Canvas Builder assembles a popup, banner or inline block from
elements — headline, image, countdown, form, recommendation strip — when no template is close enough.
Related
- Start here — the other ways to install Personyze.
- Product / content feeds — what
Personyze does with what the plugin sends. - AI chat agent and AI search — they answer from these
feeds with no separate indexing step. - Personyze AI agent — the same agent, in the panel and from Claude or
ChatGPT.