Personyze Test Mode Overview
Personyze’s Test Mode allows you to preview and QA your personalization campaigns on your website before making them live for all visitors. You can also monitor real-time campaign actions and data directly through your browser’s console.
Entering Test Mode
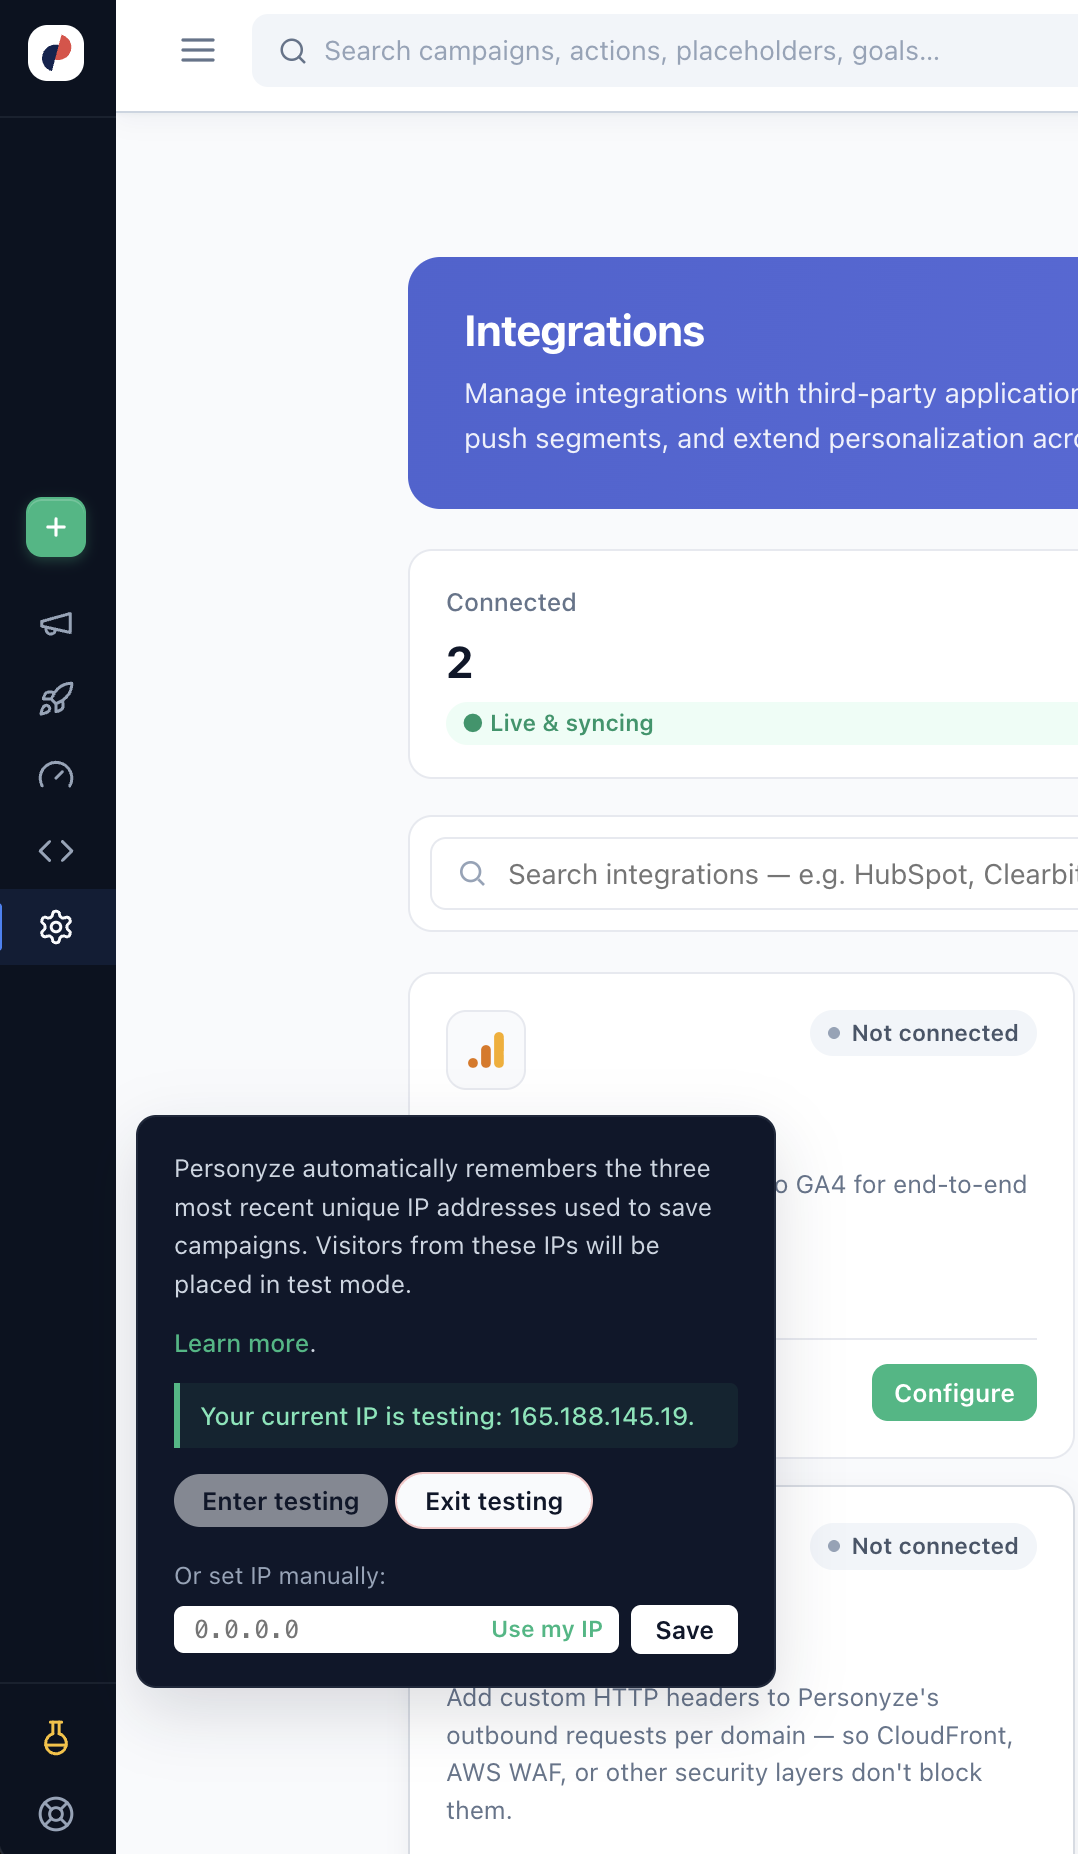
Personyze puts you in test mode automatically: it remembers the three most recent unique IP addresses used to save campaigns, and visitors from these IPs are placed in test mode by default. So whenever you save a campaign, you’re already a tester from that connection.
When your session is in test mode, the indicator icon in the Personyze left menu turns yellow. Click it to open the test mode menu, where you can:
- Enter testing or Exit testing for your current session,
- see which IP is currently in testing,
- or register a different IP manually — type it (or click Use my IP) and Save.
You can also switch test mode on your site directly:
- Add this parameter to any URL on your site: ?_S_T=testing
- To exit, add: ?_S_T=production
Campaigns saved in test mode only display for users recognized as testers by their IP addresses or via special testing links.
Note: Visitors with existing sessions must refresh or navigate to a different page to see newly saved campaign changes, due to caching.
Test Mode via Browser Console
You can also enter test mode by running this JavaScript command in your browser console:
_S_T.te(1)
In your browser’s console, you’ll see detailed information about Personyze tracking, including visitor data, activated campaigns, and executed actions. This provides valuable insight into how your campaigns operate in real-time.
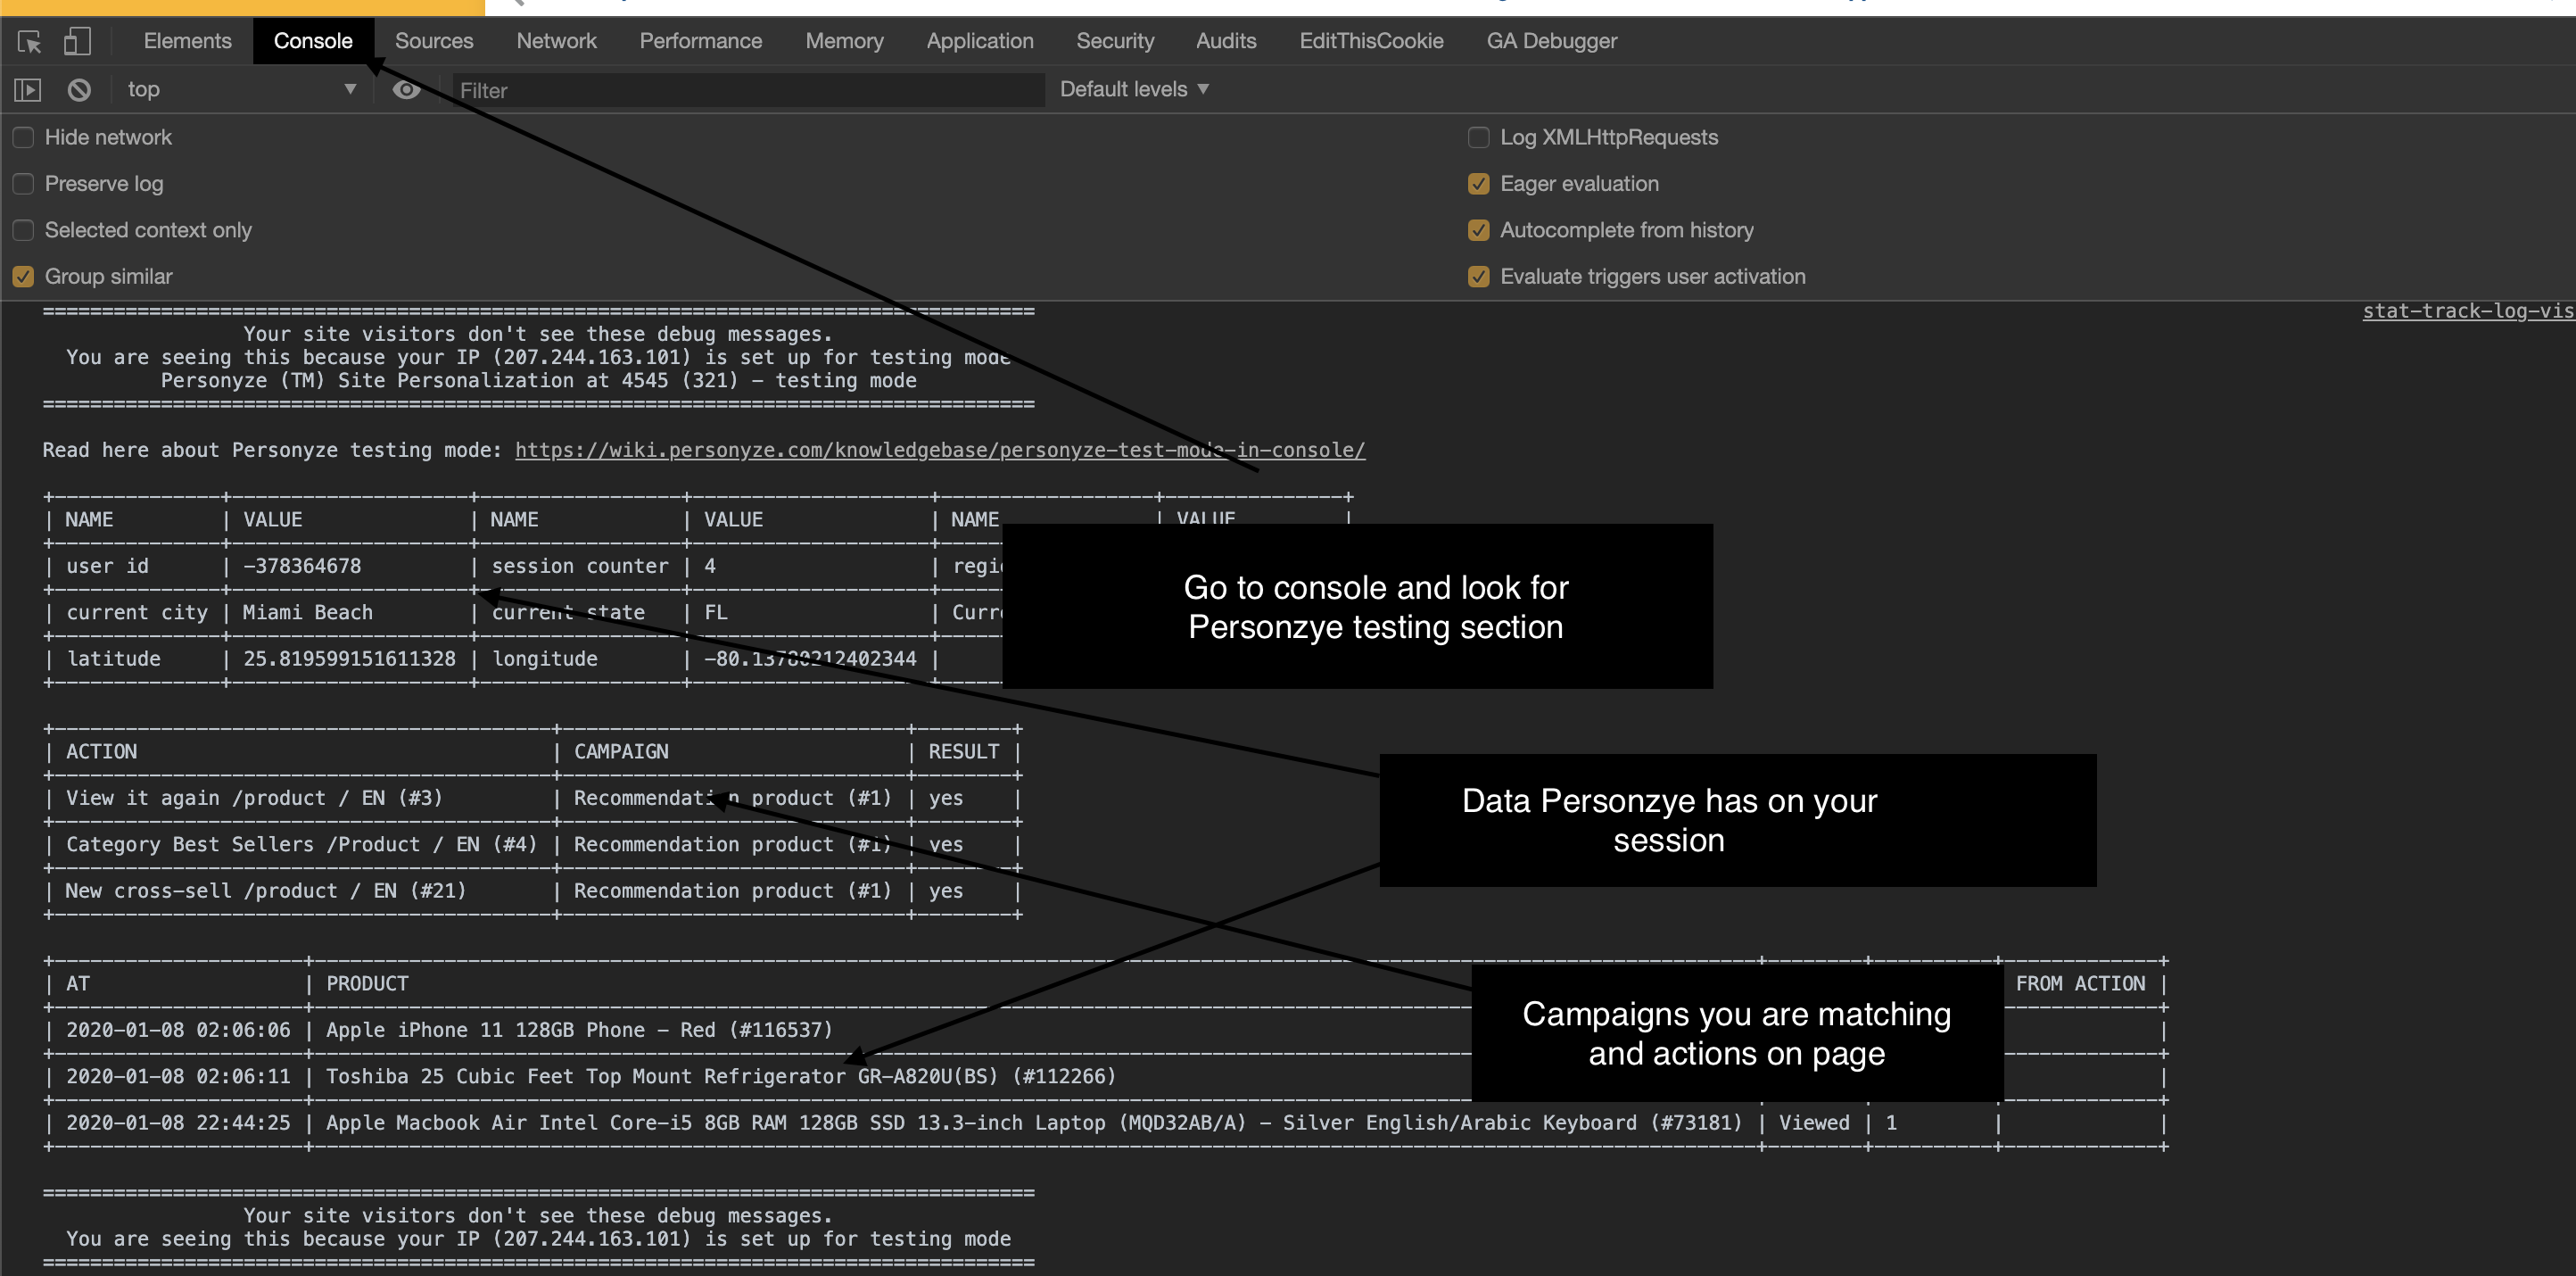
This method provides functionality similar to the Personyze Simulator, offering comprehensive feedback during your testing sessions.
Quality Assurance (QA) for Campaigns
Before publishing campaigns to your live audience, ensure they function and appear exactly as intended using Personyze’s QA options:
1. QA Campaigns Using Testing Links
This generates a unique testing URL containing a special parameter. Sharing this link allows colleagues to view the campaign without exposing it to other visitors.
2. QA Campaigns by Saving to “Testing Mode”
Campaigns saved in testing mode only appear for designated test users whose IP addresses have been registered through Personyze settings or via a testing link.
3. Preview Campaign Through Simulator
The Personyze Simulator enables you to see exactly which audience criteria you match, which actions are executing, and lets you impersonate different users to test campaign behavior under various conditions. It also allows you to directly execute specific actions for quick preview.
For the full QA workflow — preview links, the Simulator, audience forecast, and action delivery checks — see QA Campaigns.
Campaign Statistics in Test Mode
Sessions occurring in test mode are intentionally excluded from campaign analytics to prevent test activity from skewing your performance data.