
This wizard guides you through uploading your product catalog, setting up product interaction tracking to identify visitor interests, and designing the appearance and placement of your recommendation widgets.
These product recommendations can be embedded anywhere on your site. You can place multiple widgets on the same page, each using a different recommendation algorithm tailored to the visitor and context.
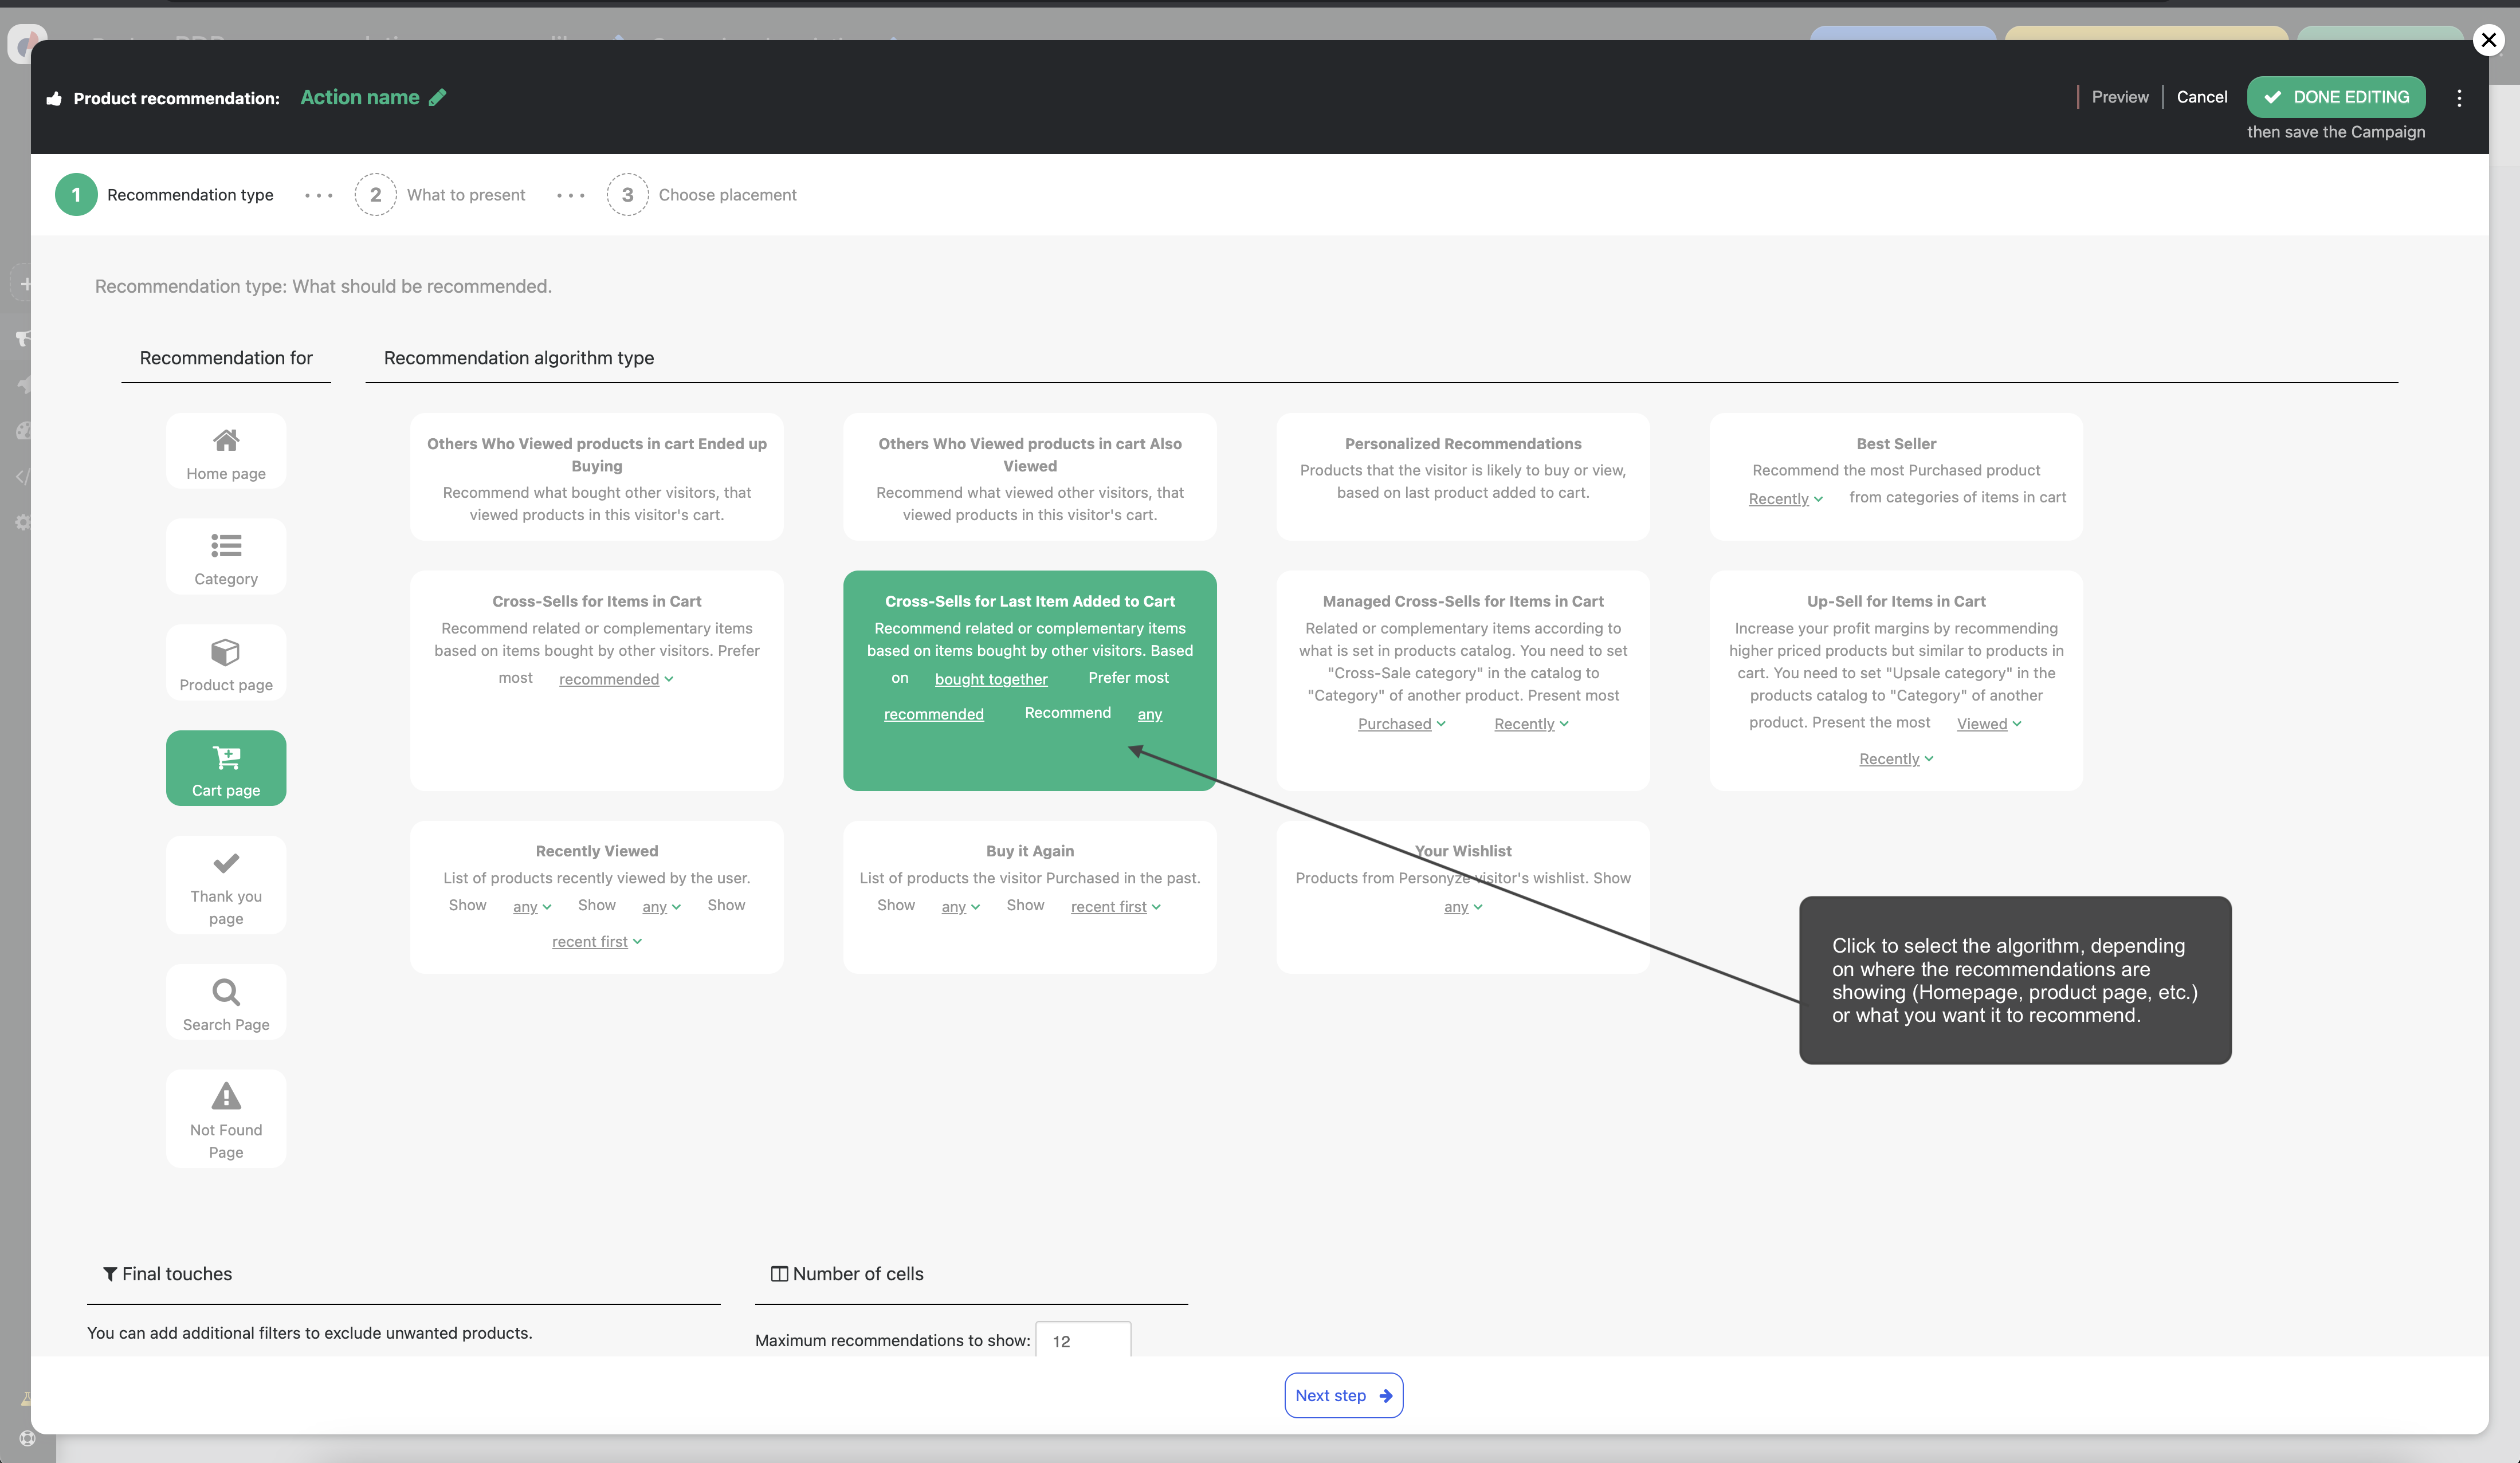
Personyze includes a wide array of algorithms to meet all your recommendation needs—cross-sells, up-sells, recently viewed products, lowest-priced items in a category, trending products, and more—all with flexible filtering.
If you require an algorithm not currently available in Personyze, contact your account manager or support@personyze.com to request a custom implementation.
Steps
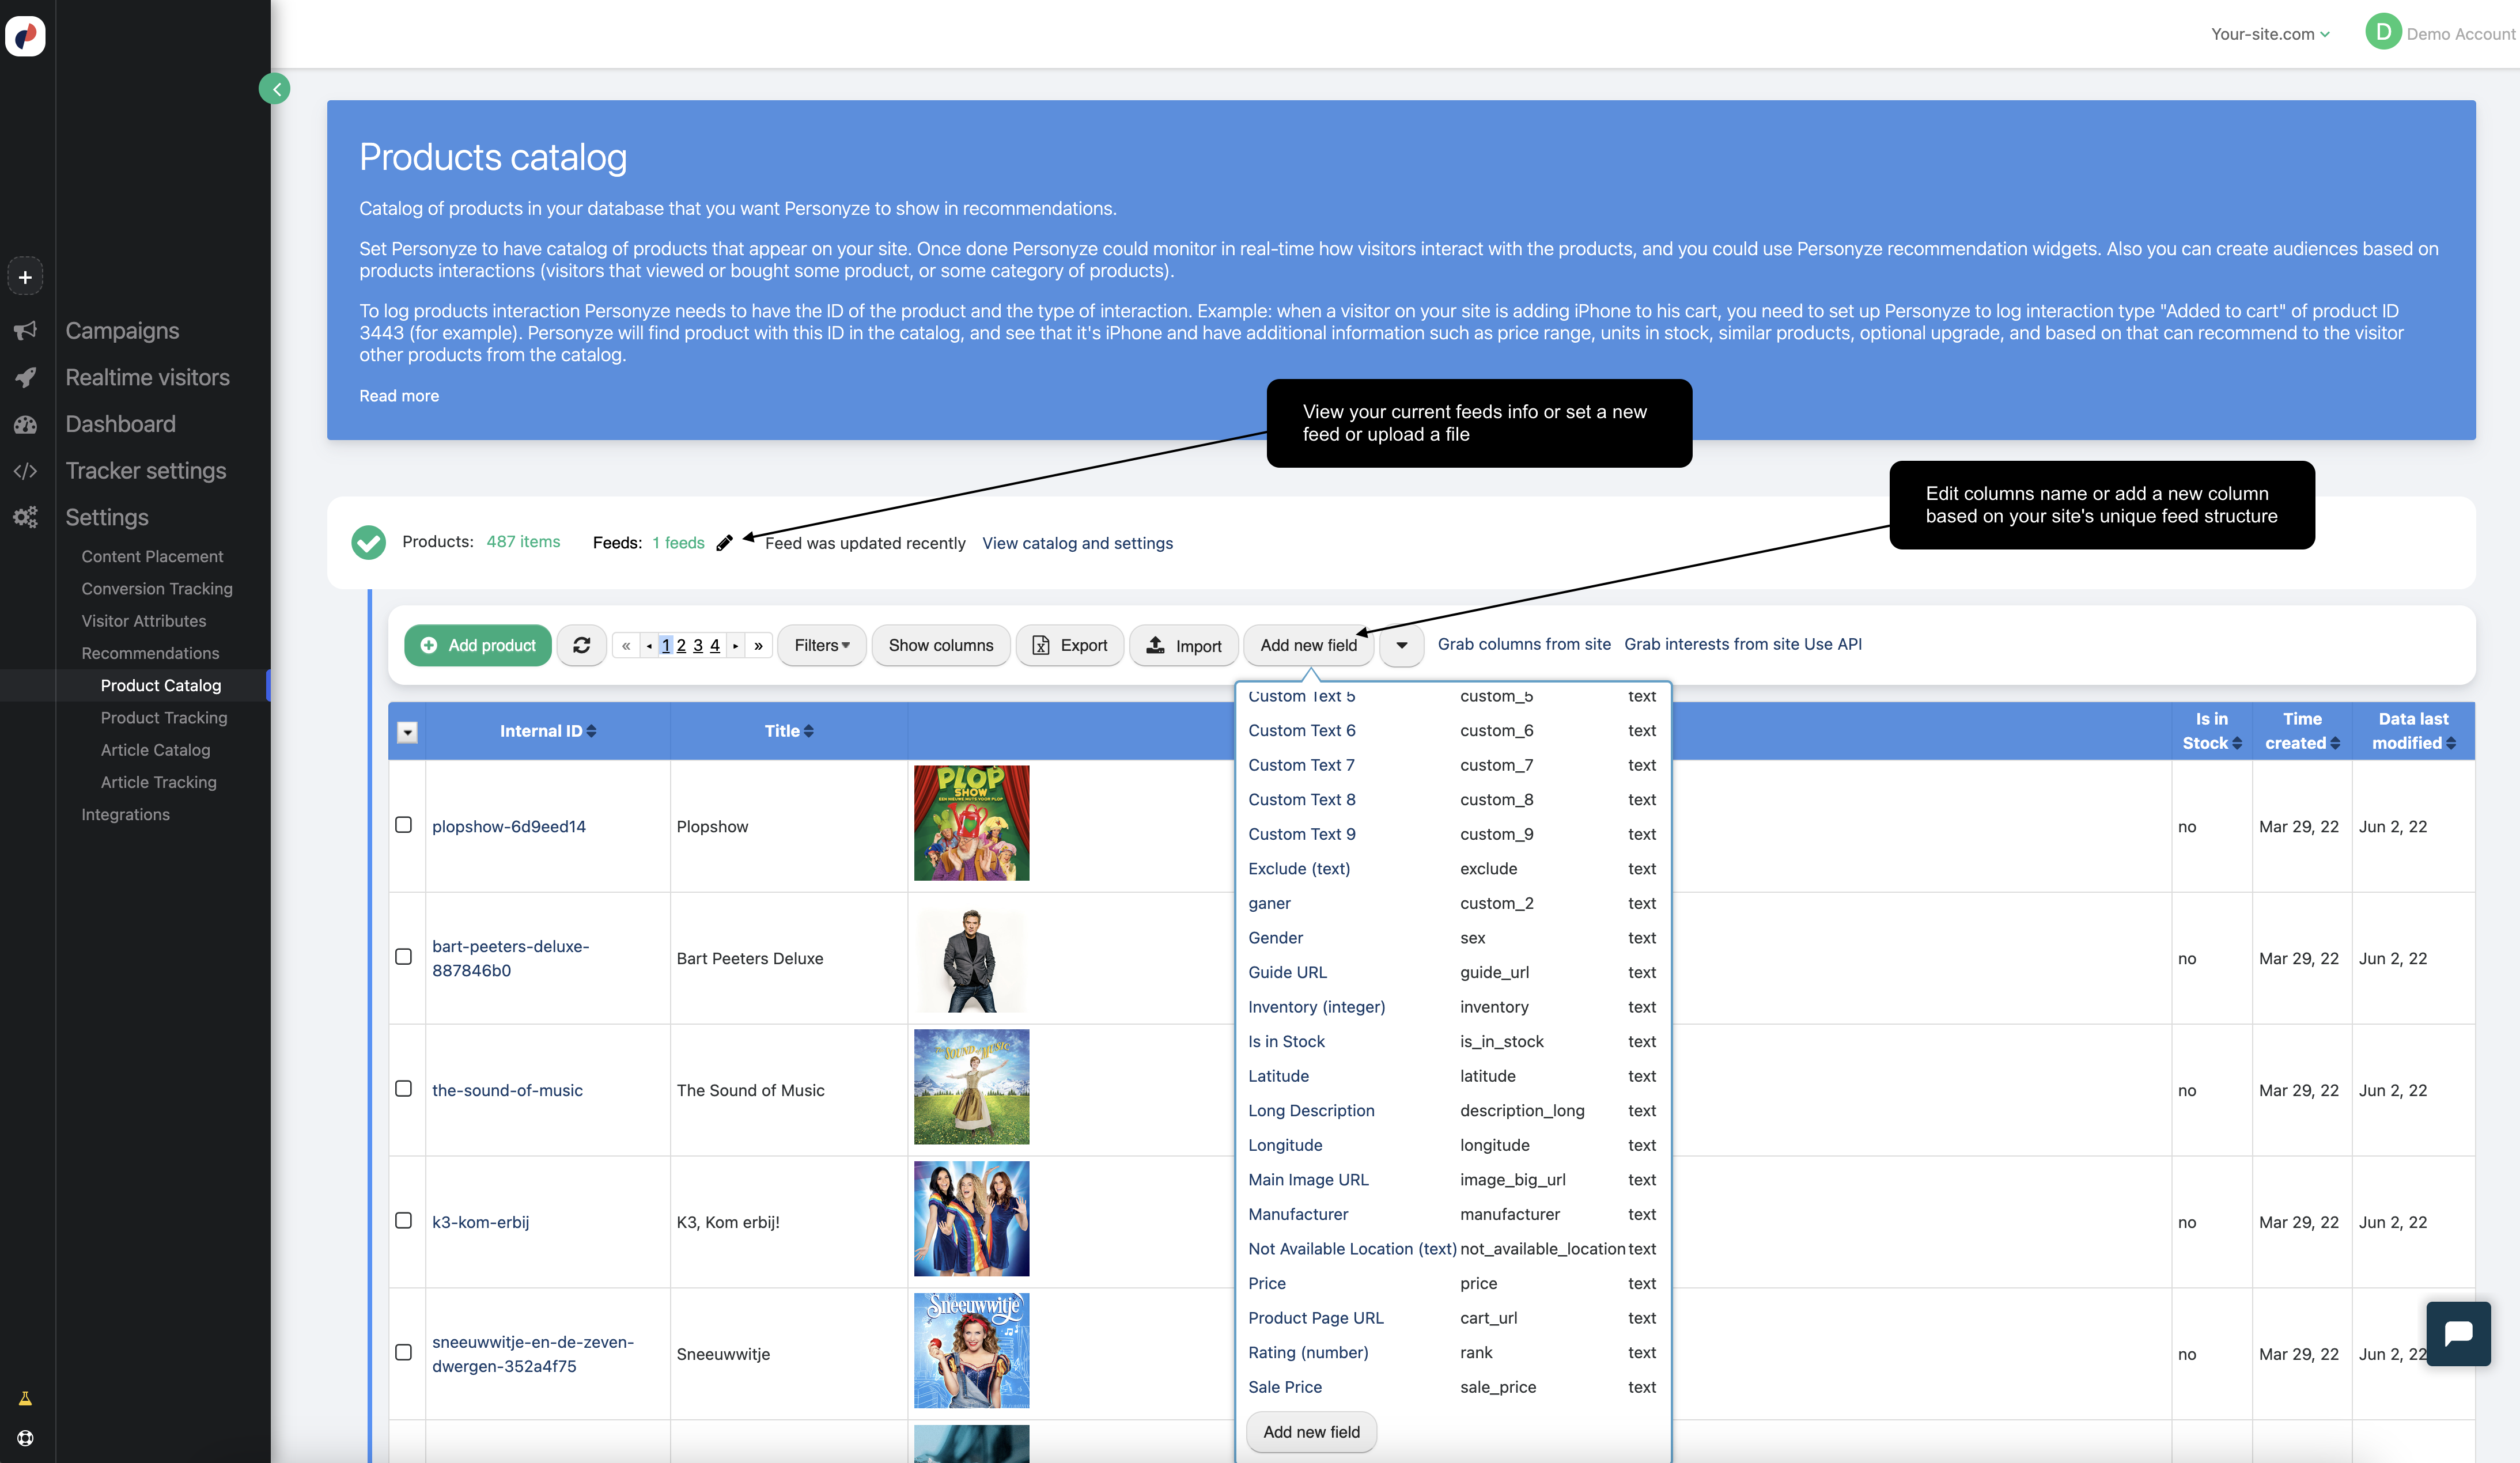
Product Catalog
This is where you upload your product catalog (if not already uploaded).
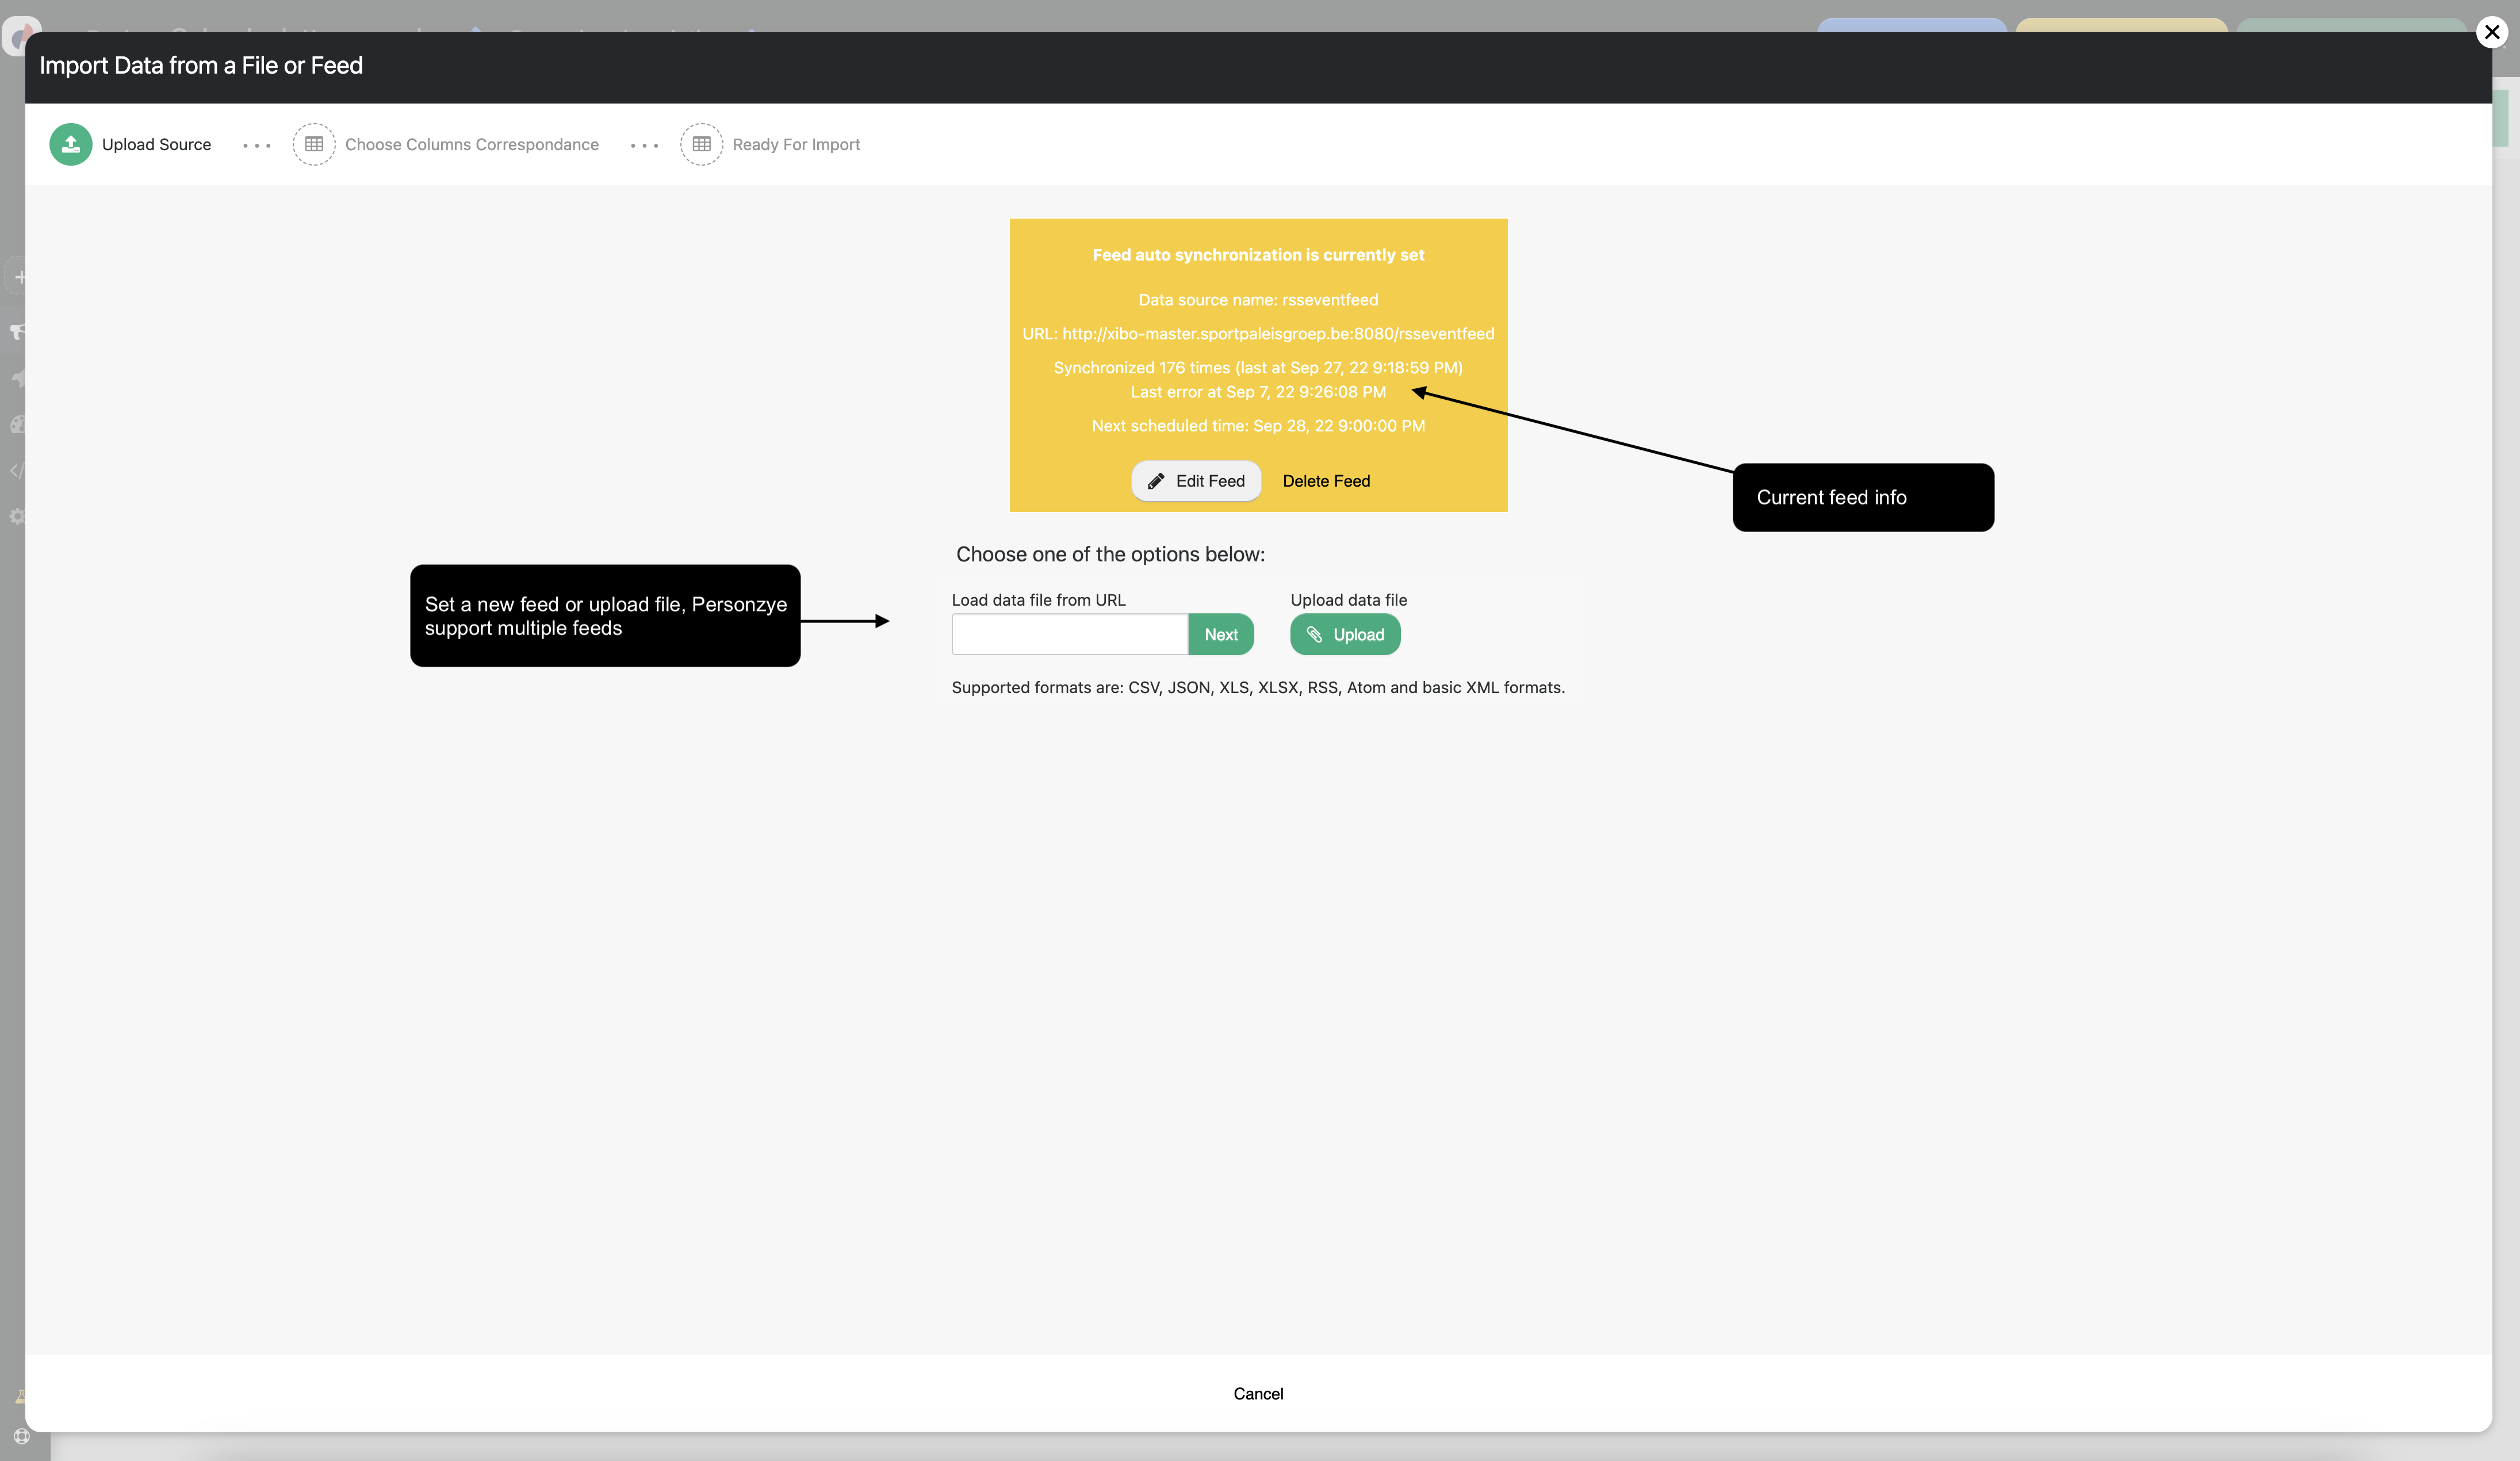
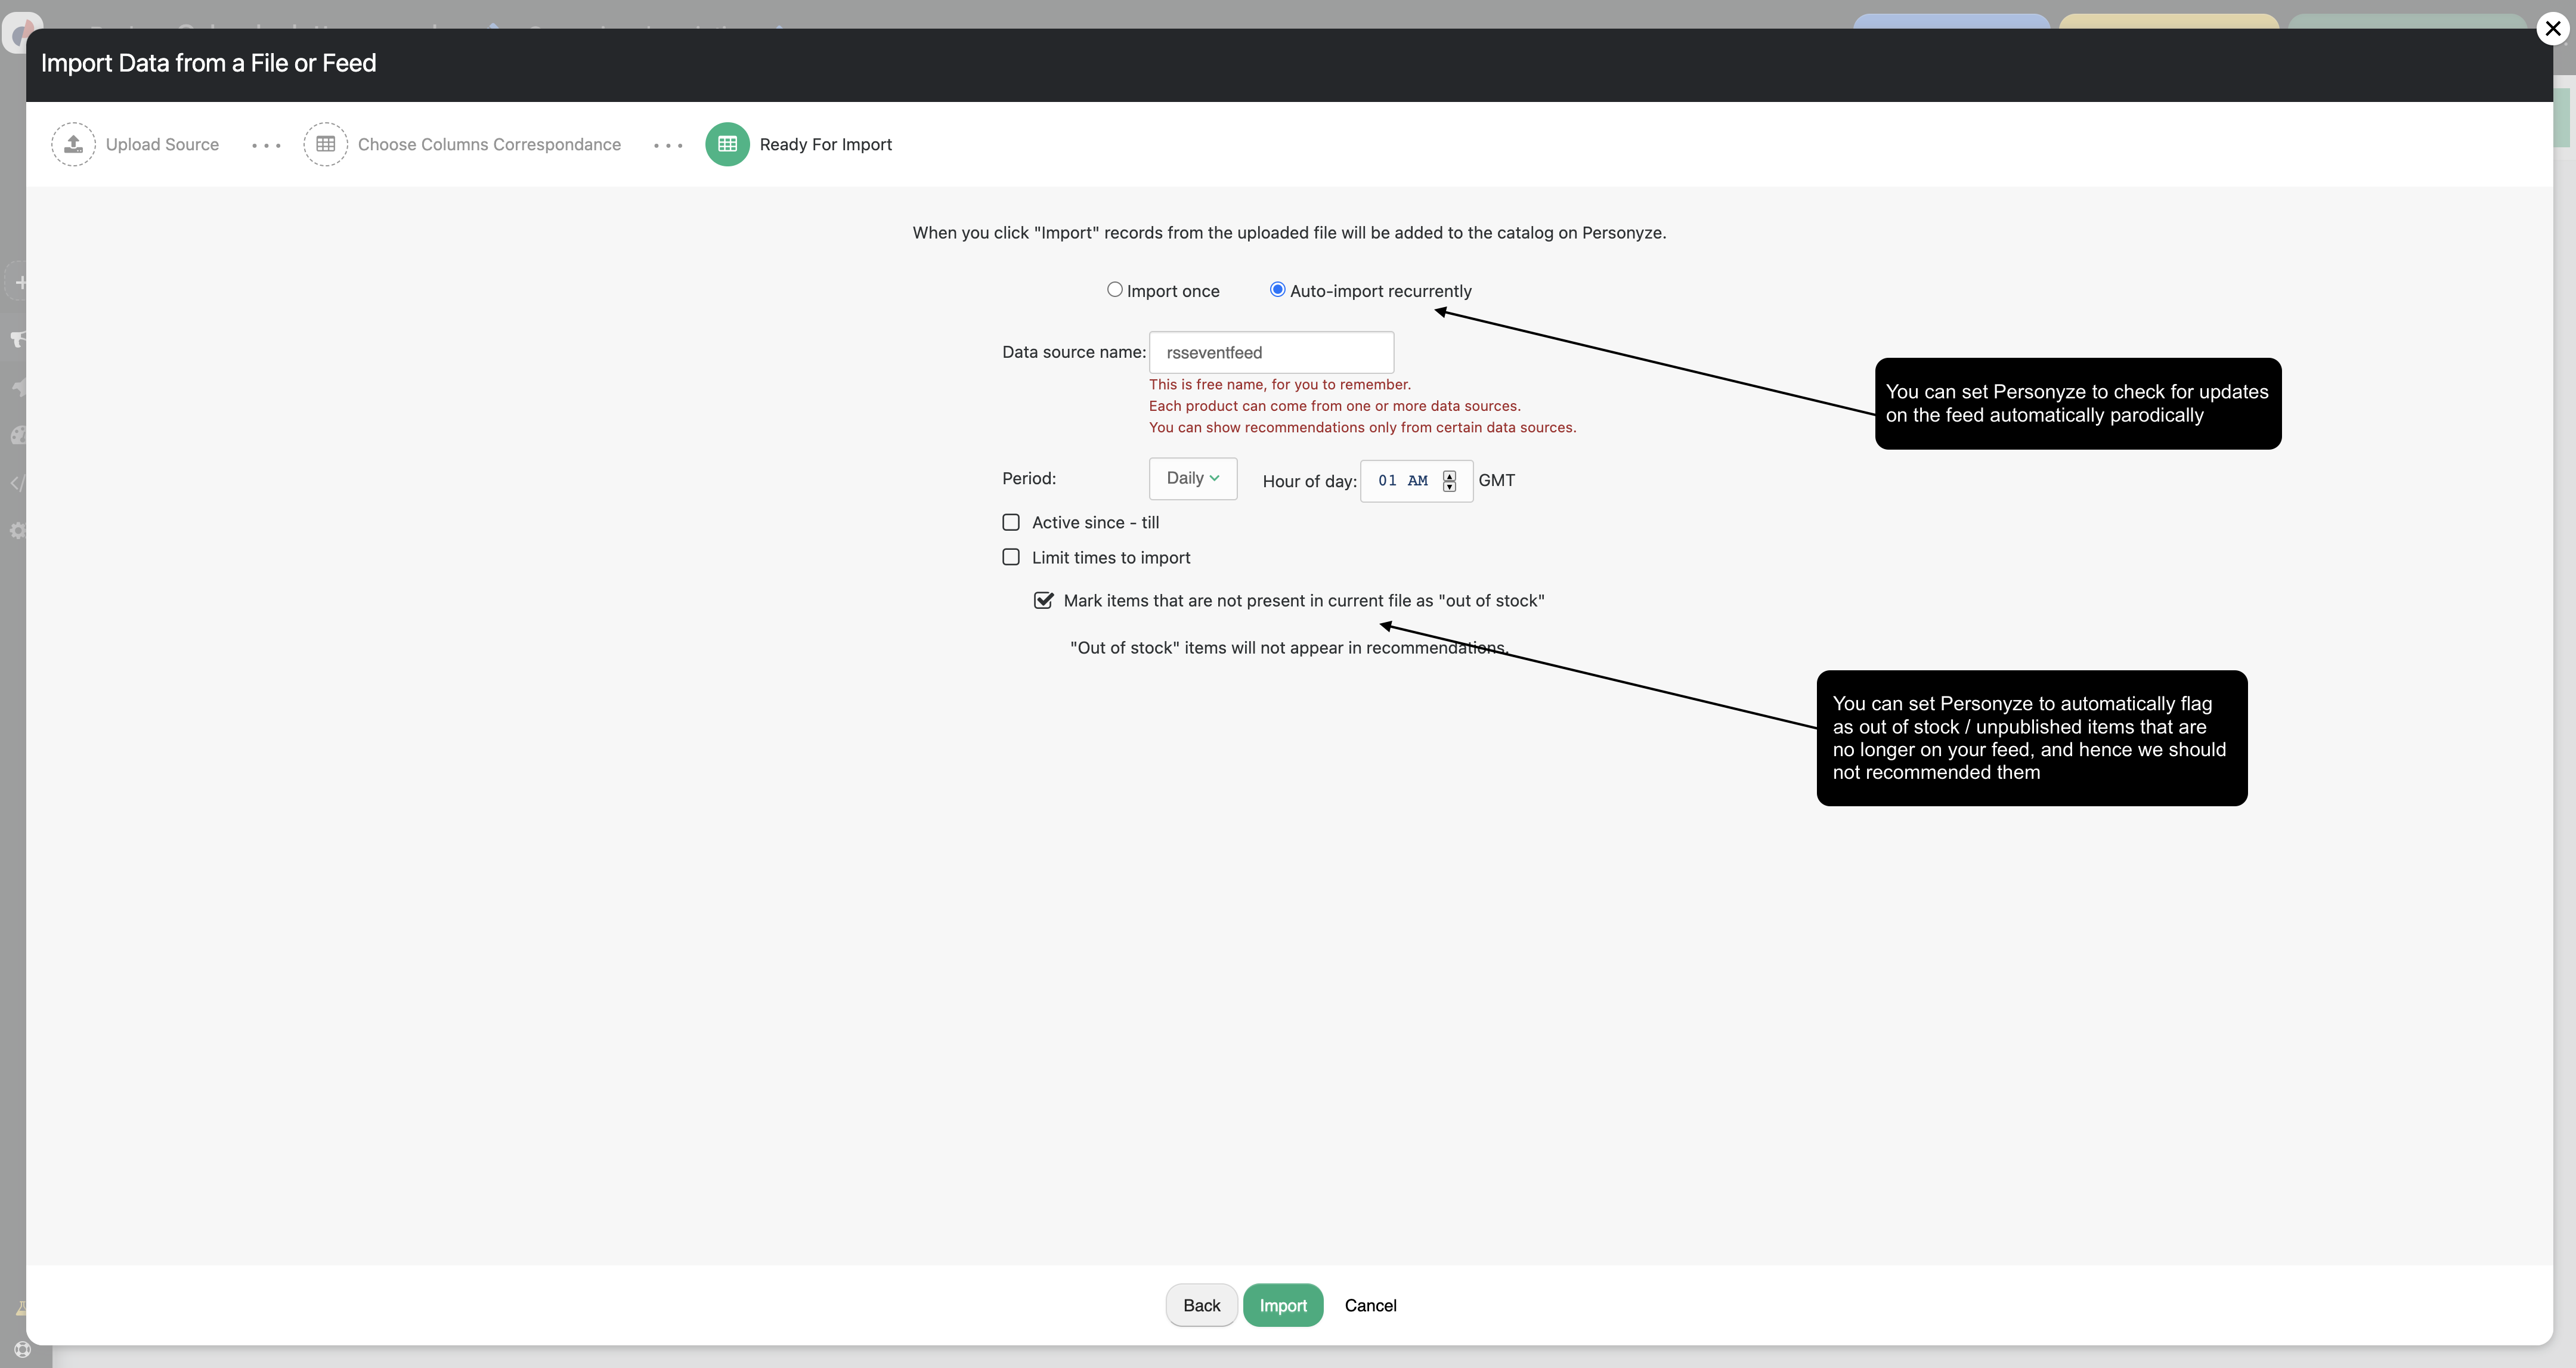
Personyze can sync with your catalog regardless of your eCommerce platform. All you need is a structured data feed—spreadsheets, Google Merchant feeds, and SFTP feeds are all supported. SFTP is ideal for fast updates.
If you don’t have a catalog feed, Personyze can crawl your site to create one. Please reach out to your account manager or support@personyze.com to request this service.
The more product attributes you include, the richer your recommendations will be. We recommend including the following fields:
- Product Title
- Product URL
- Product Image URL
- Price
- Description
- Interest Categories (What are interest categories?)
- Product ID (SKU or unique identifier)
Additional recommended fields include:
- Sale Price
- Cross-Sell SKUs
- Up-Sell SKUs
- Brand
- Secondary Categories
- Seasonality Tags (e.g., winter/summer)
- Availability (In Stock/Out of Stock)
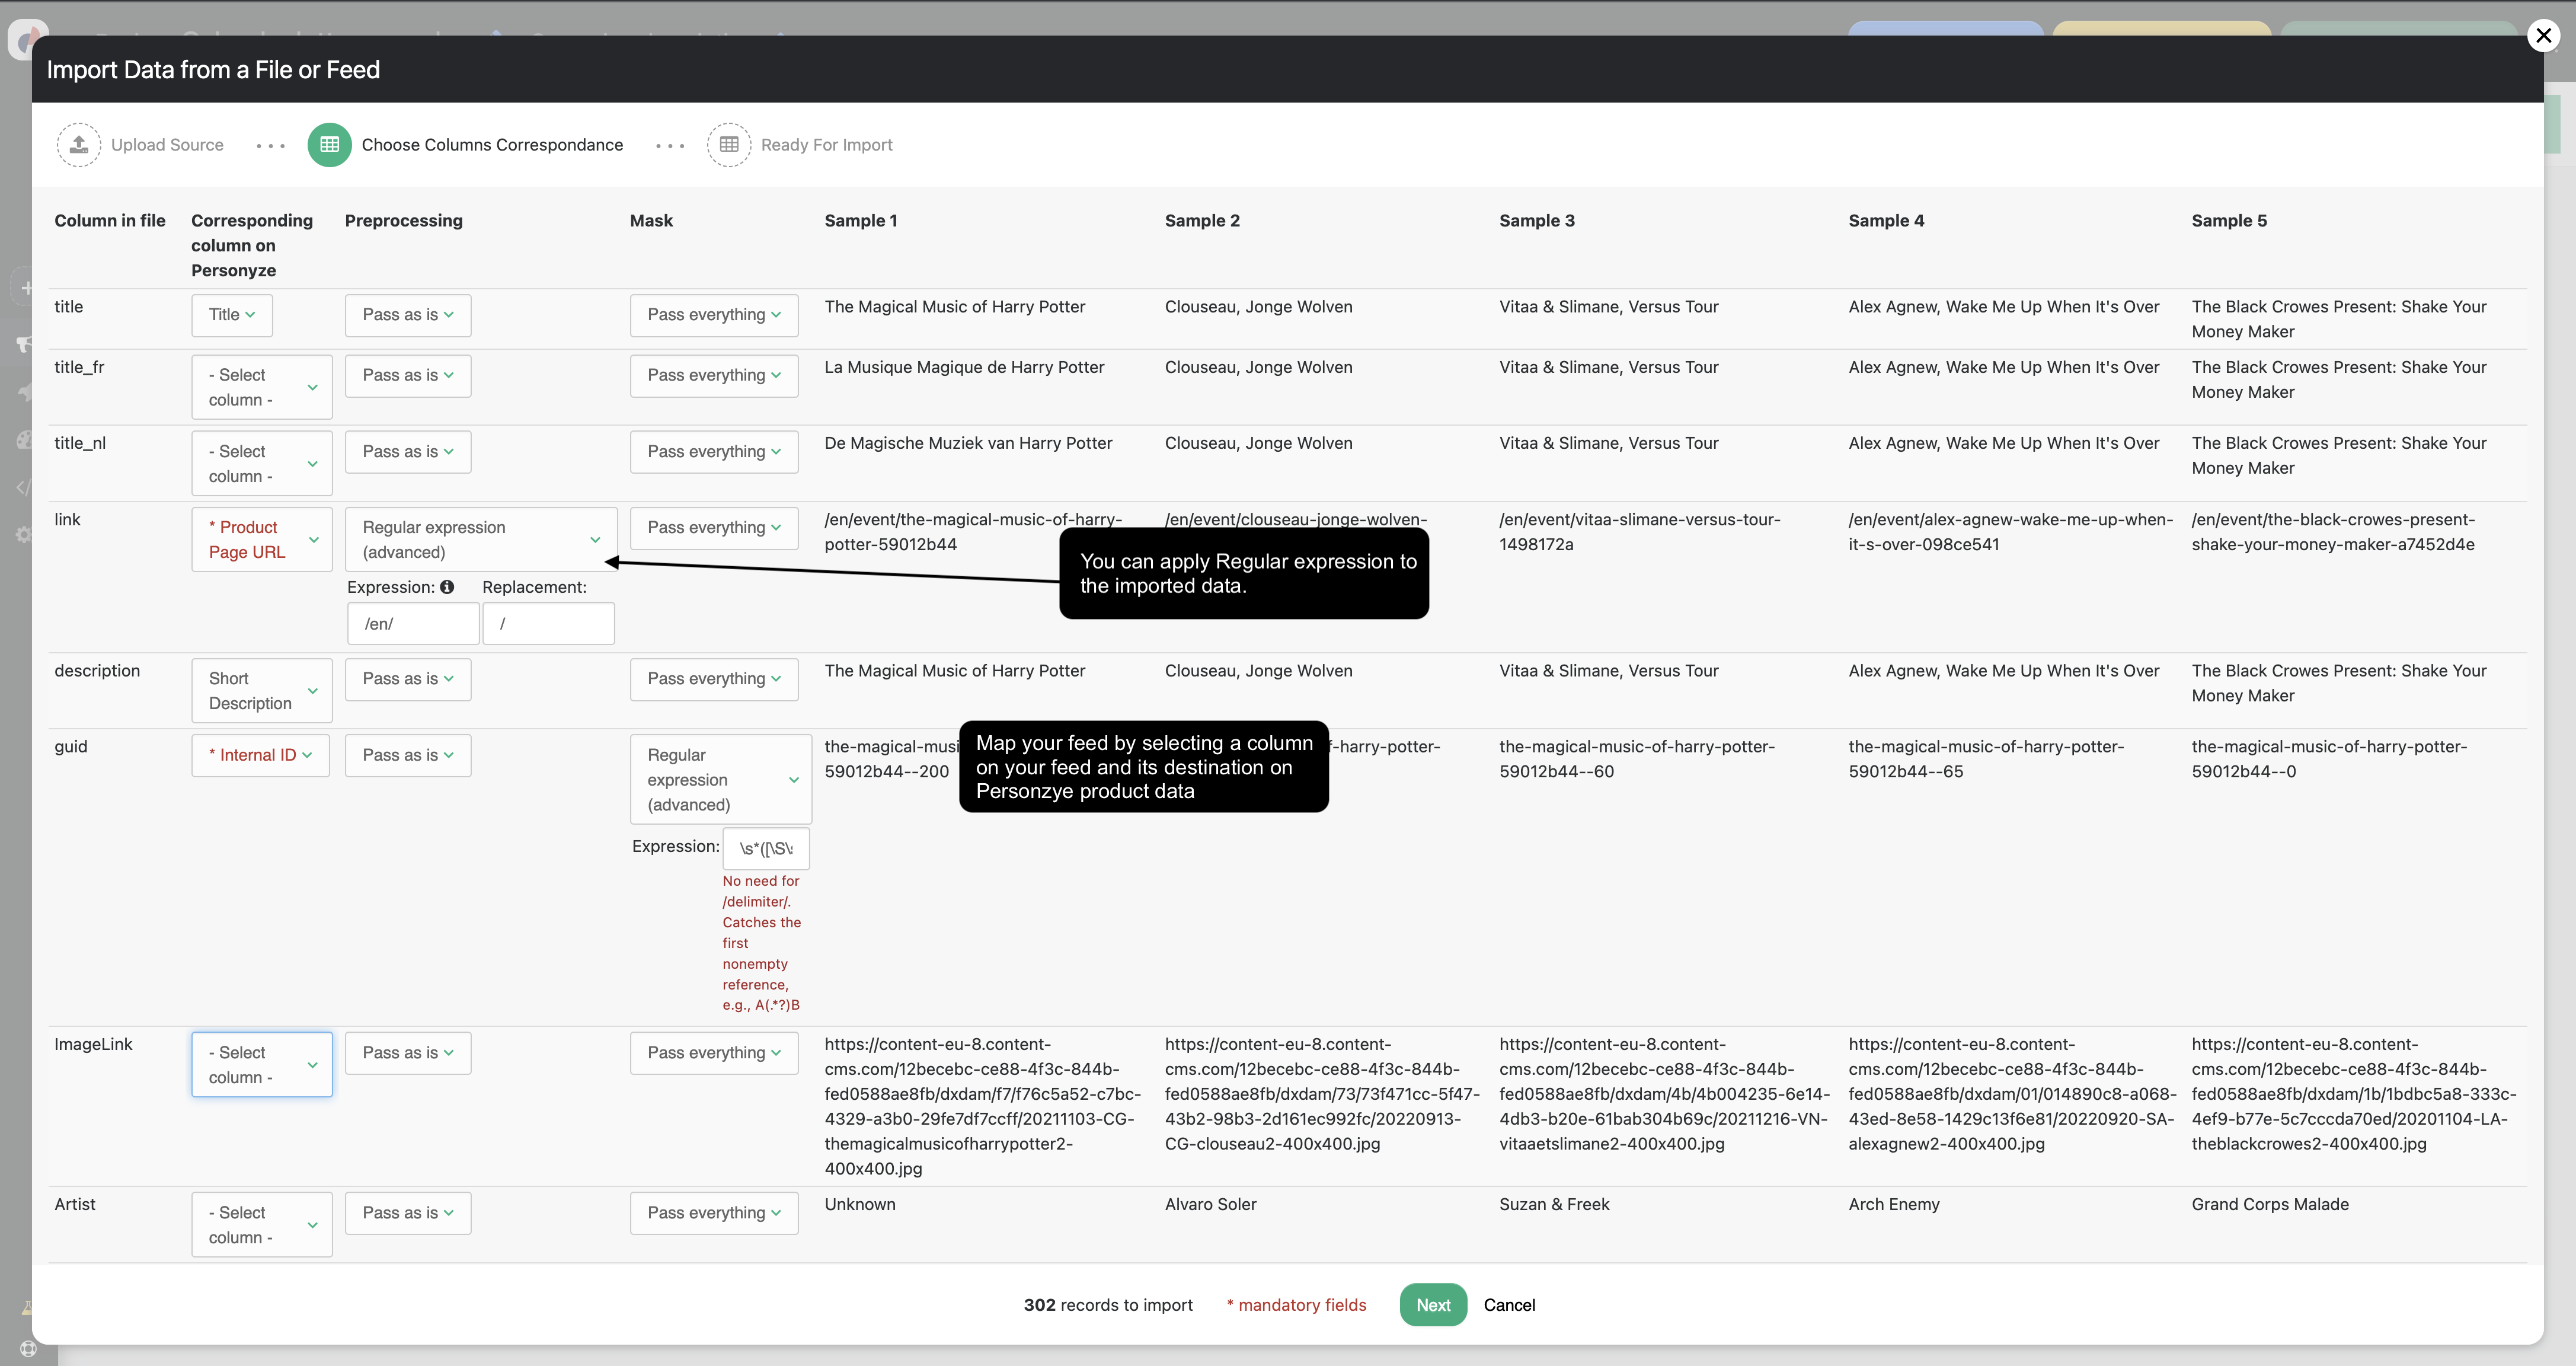
Once uploaded, you’ll map each column in your data feed to its proper value in Personyze.
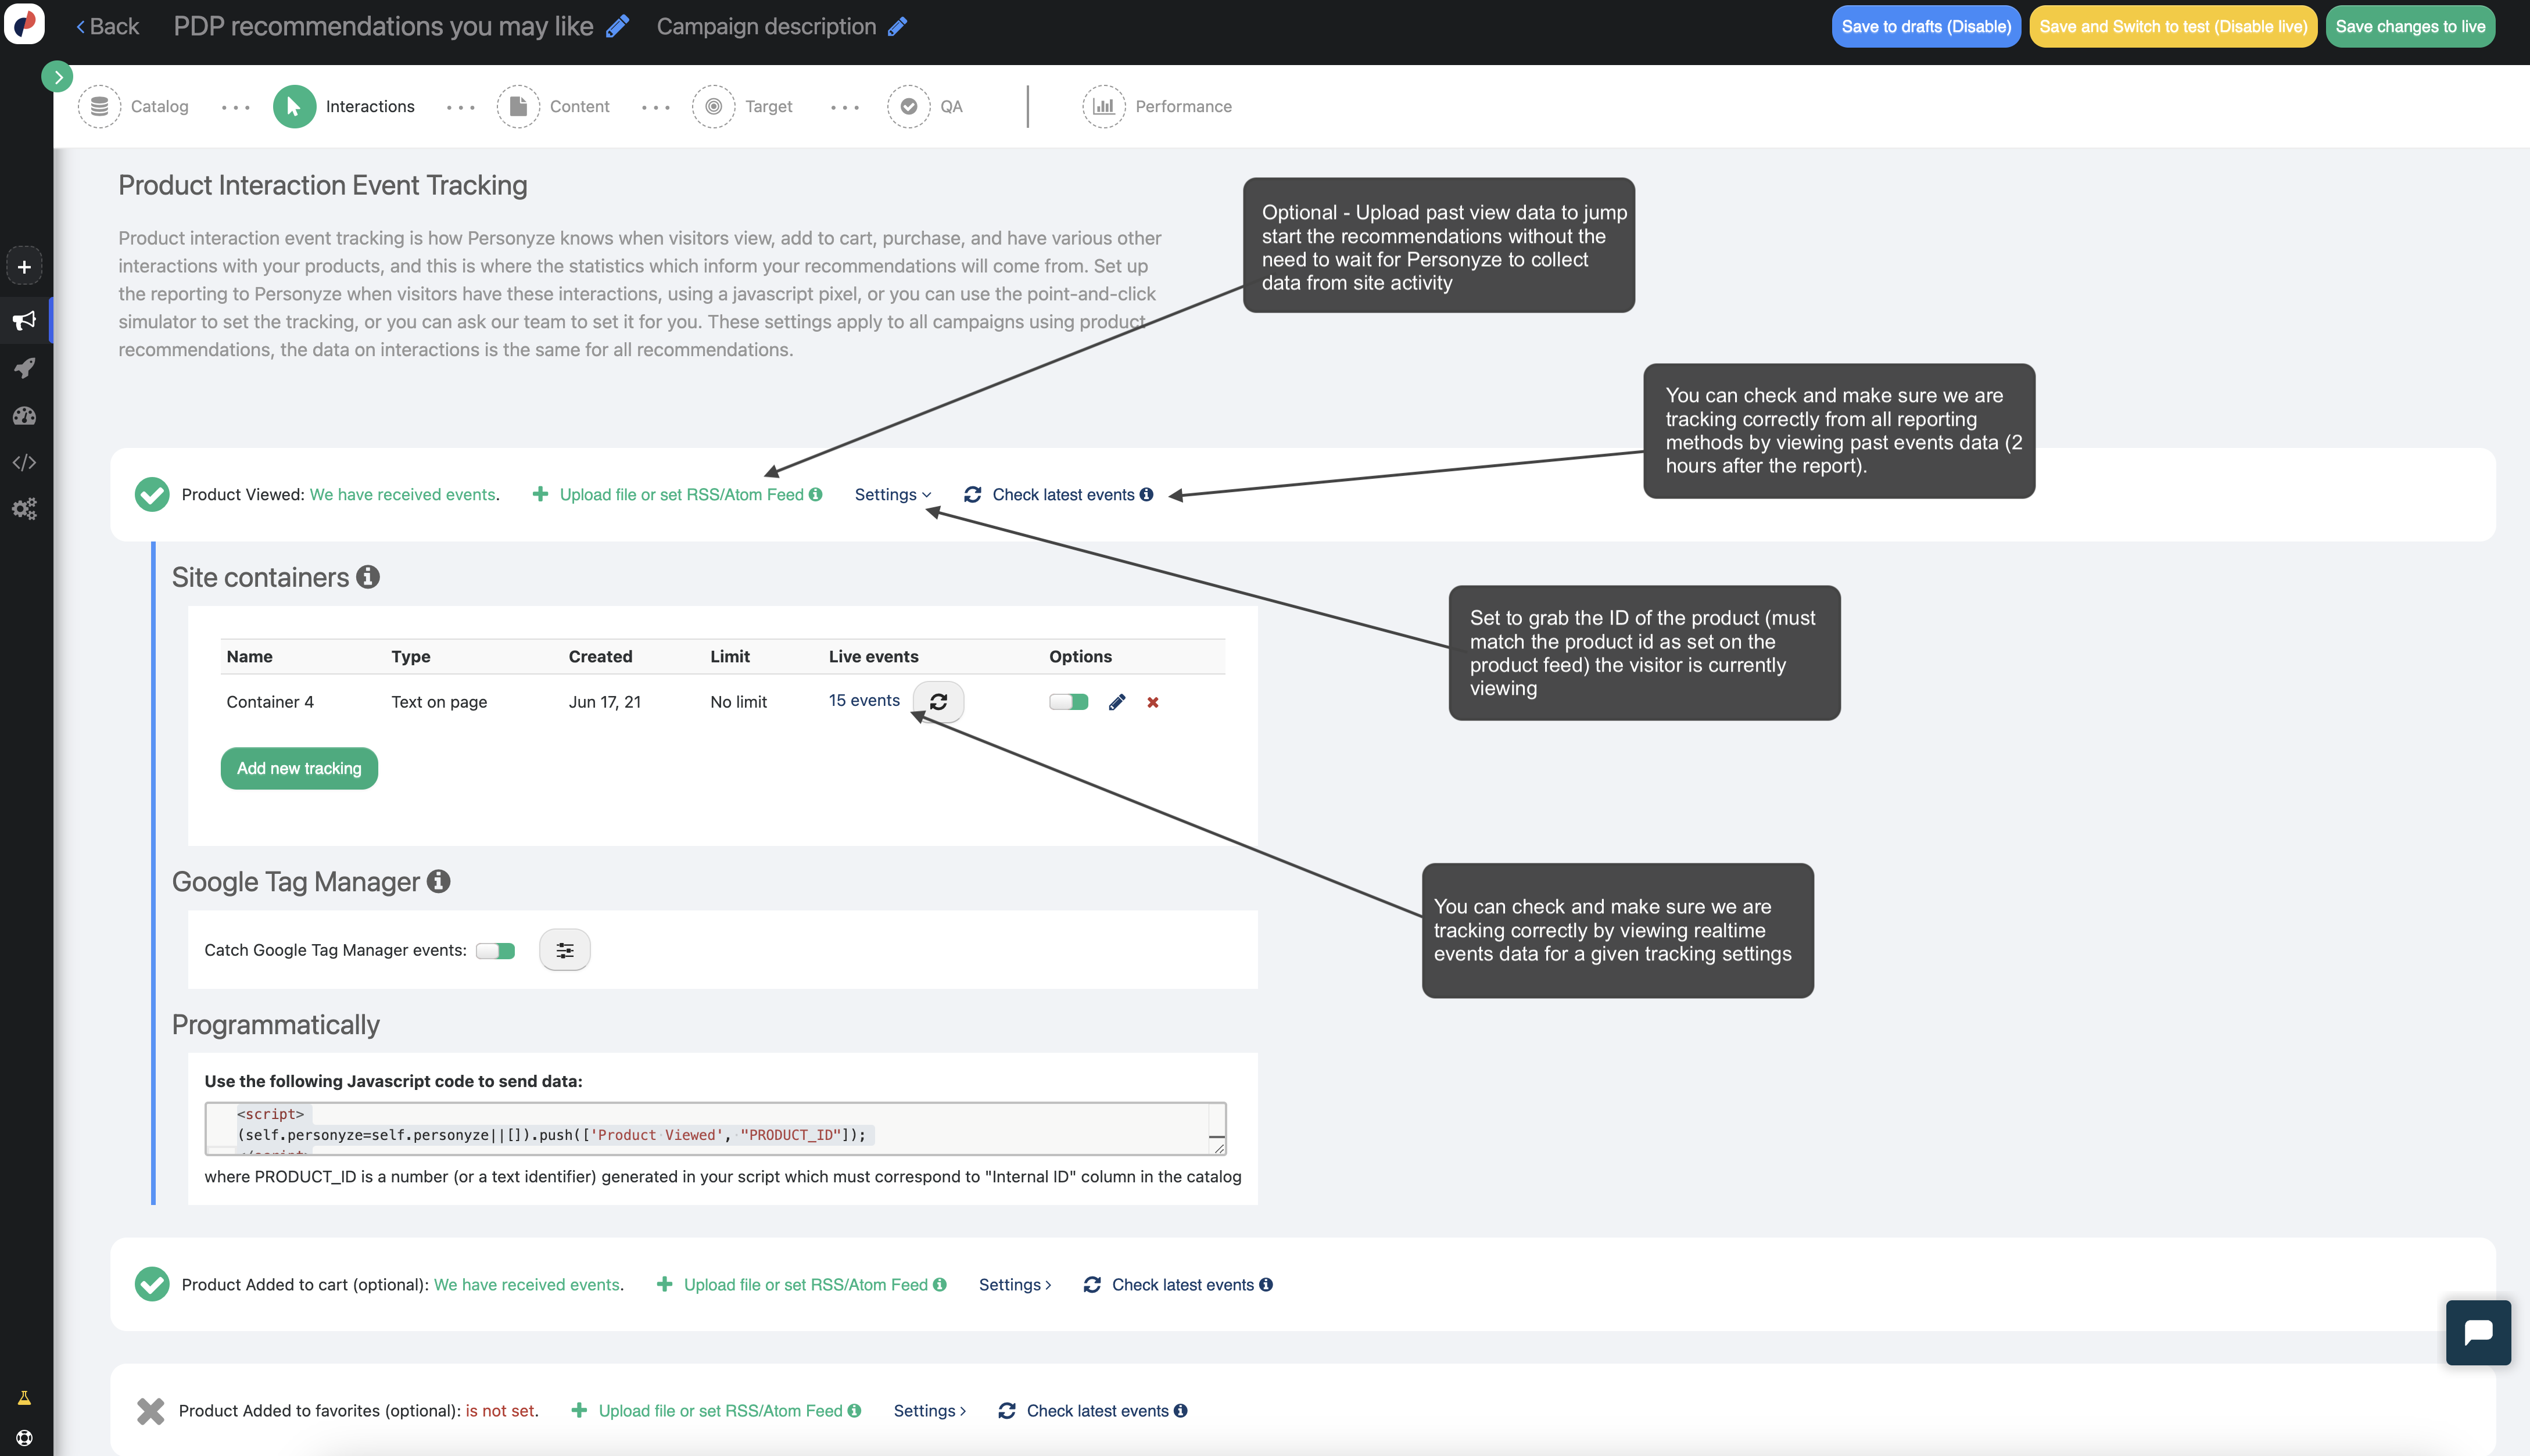
Product Interaction Event Tracking
To understand visitor interests, Personyze tracks product interaction events such as:
- Product Views
- Favorites/Saves
- Added to Cart
- Purchases
You’ll need to define how Personyze recognizes these events on your website. This configuration is only required once and applies globally across all product pages.
If you prefer, the Personyze team can set this up for you during onboarding. If you’re not in touch with a rep yet, just email support@personyze.com to request assistance.
Want to set it up yourself? Read our full guide here.
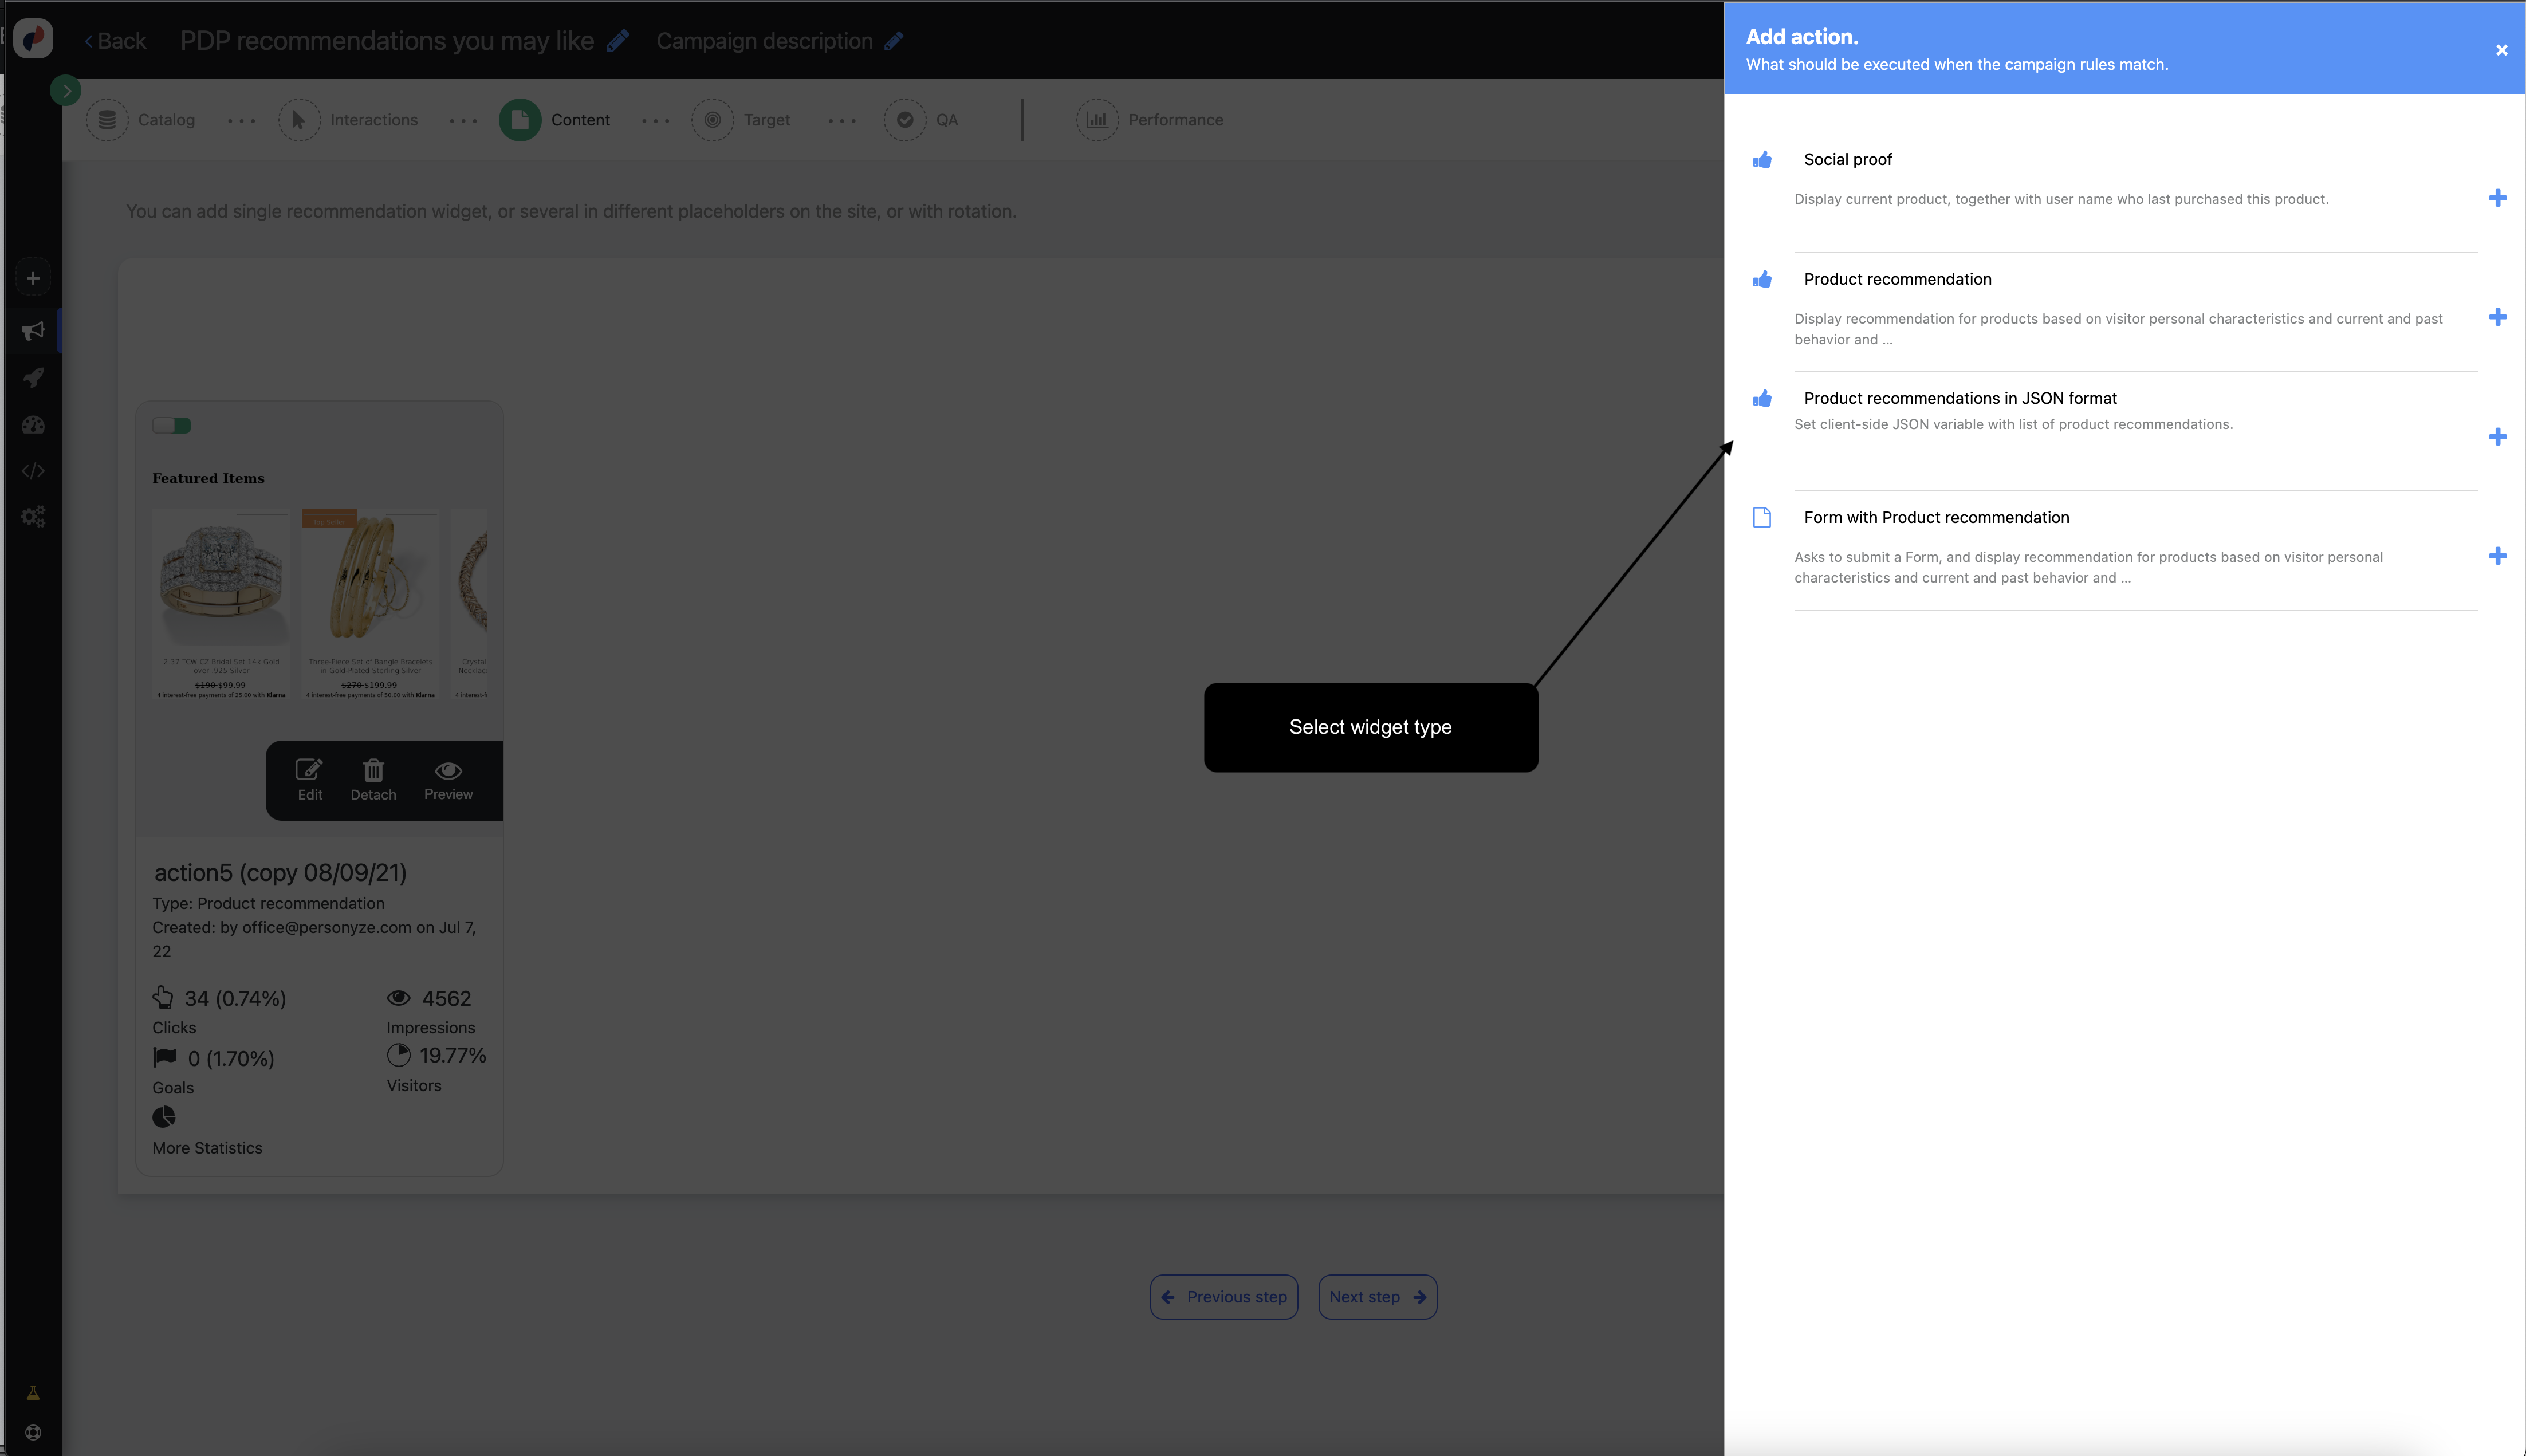
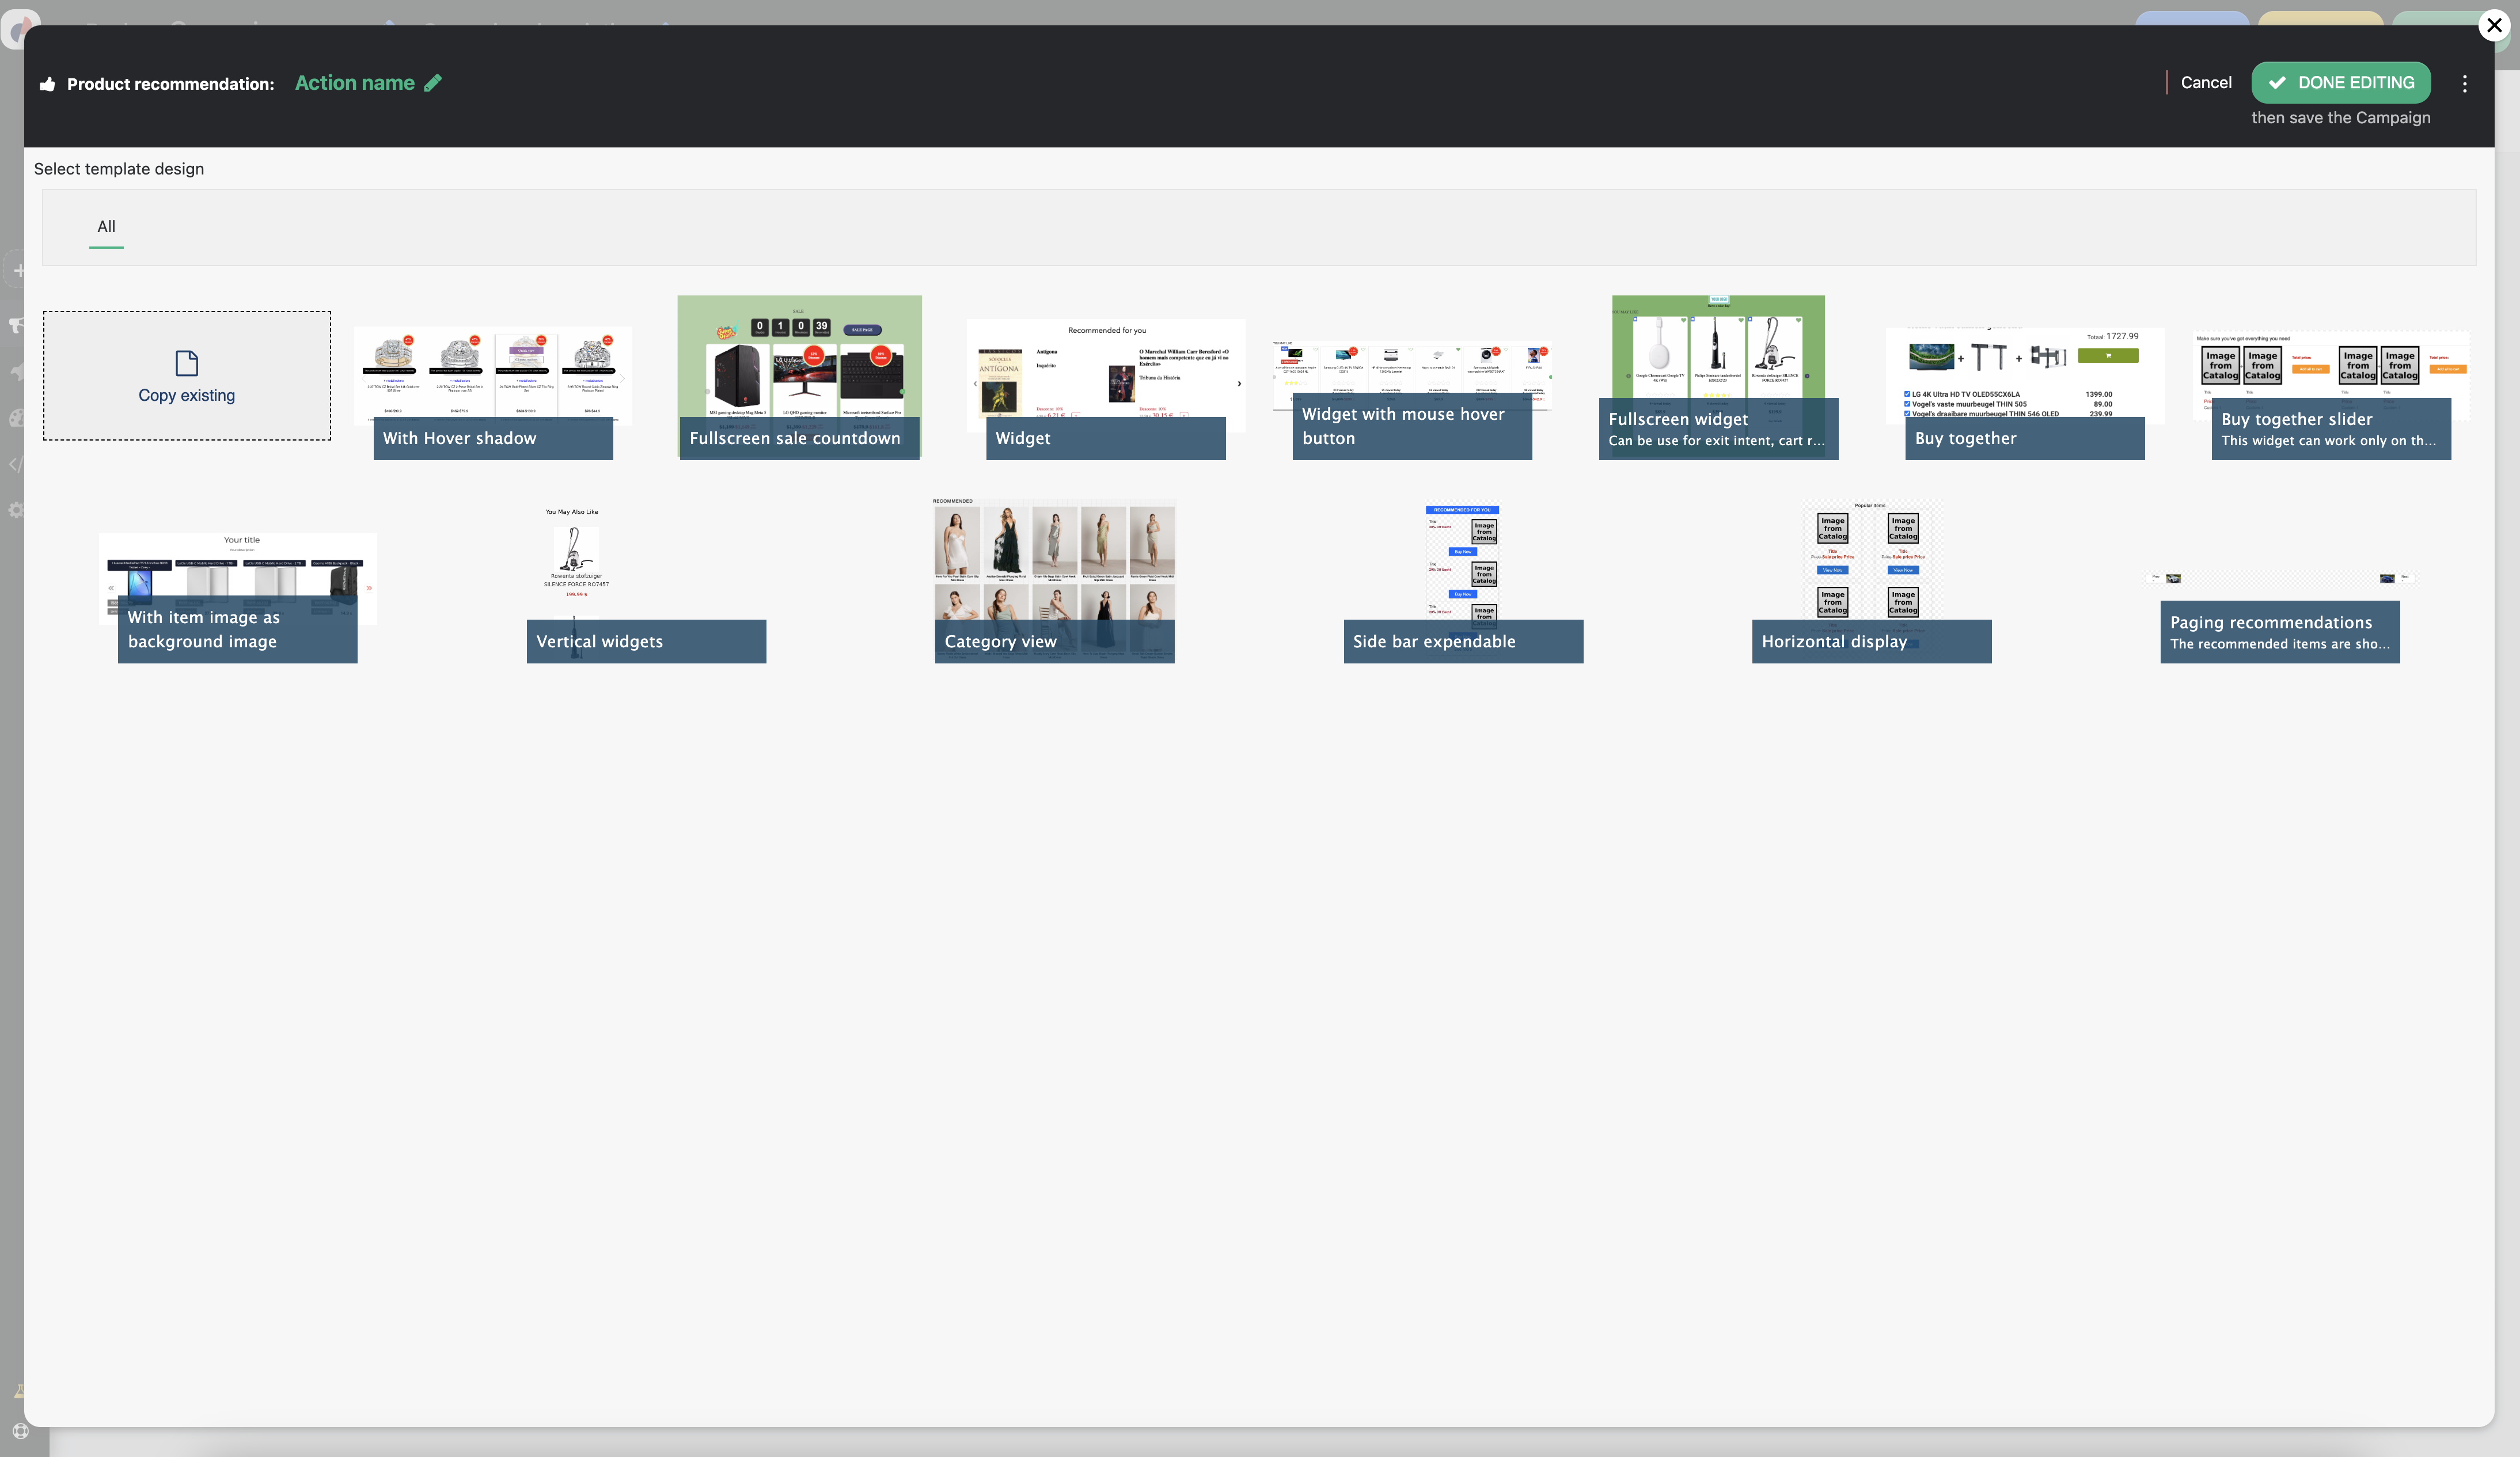
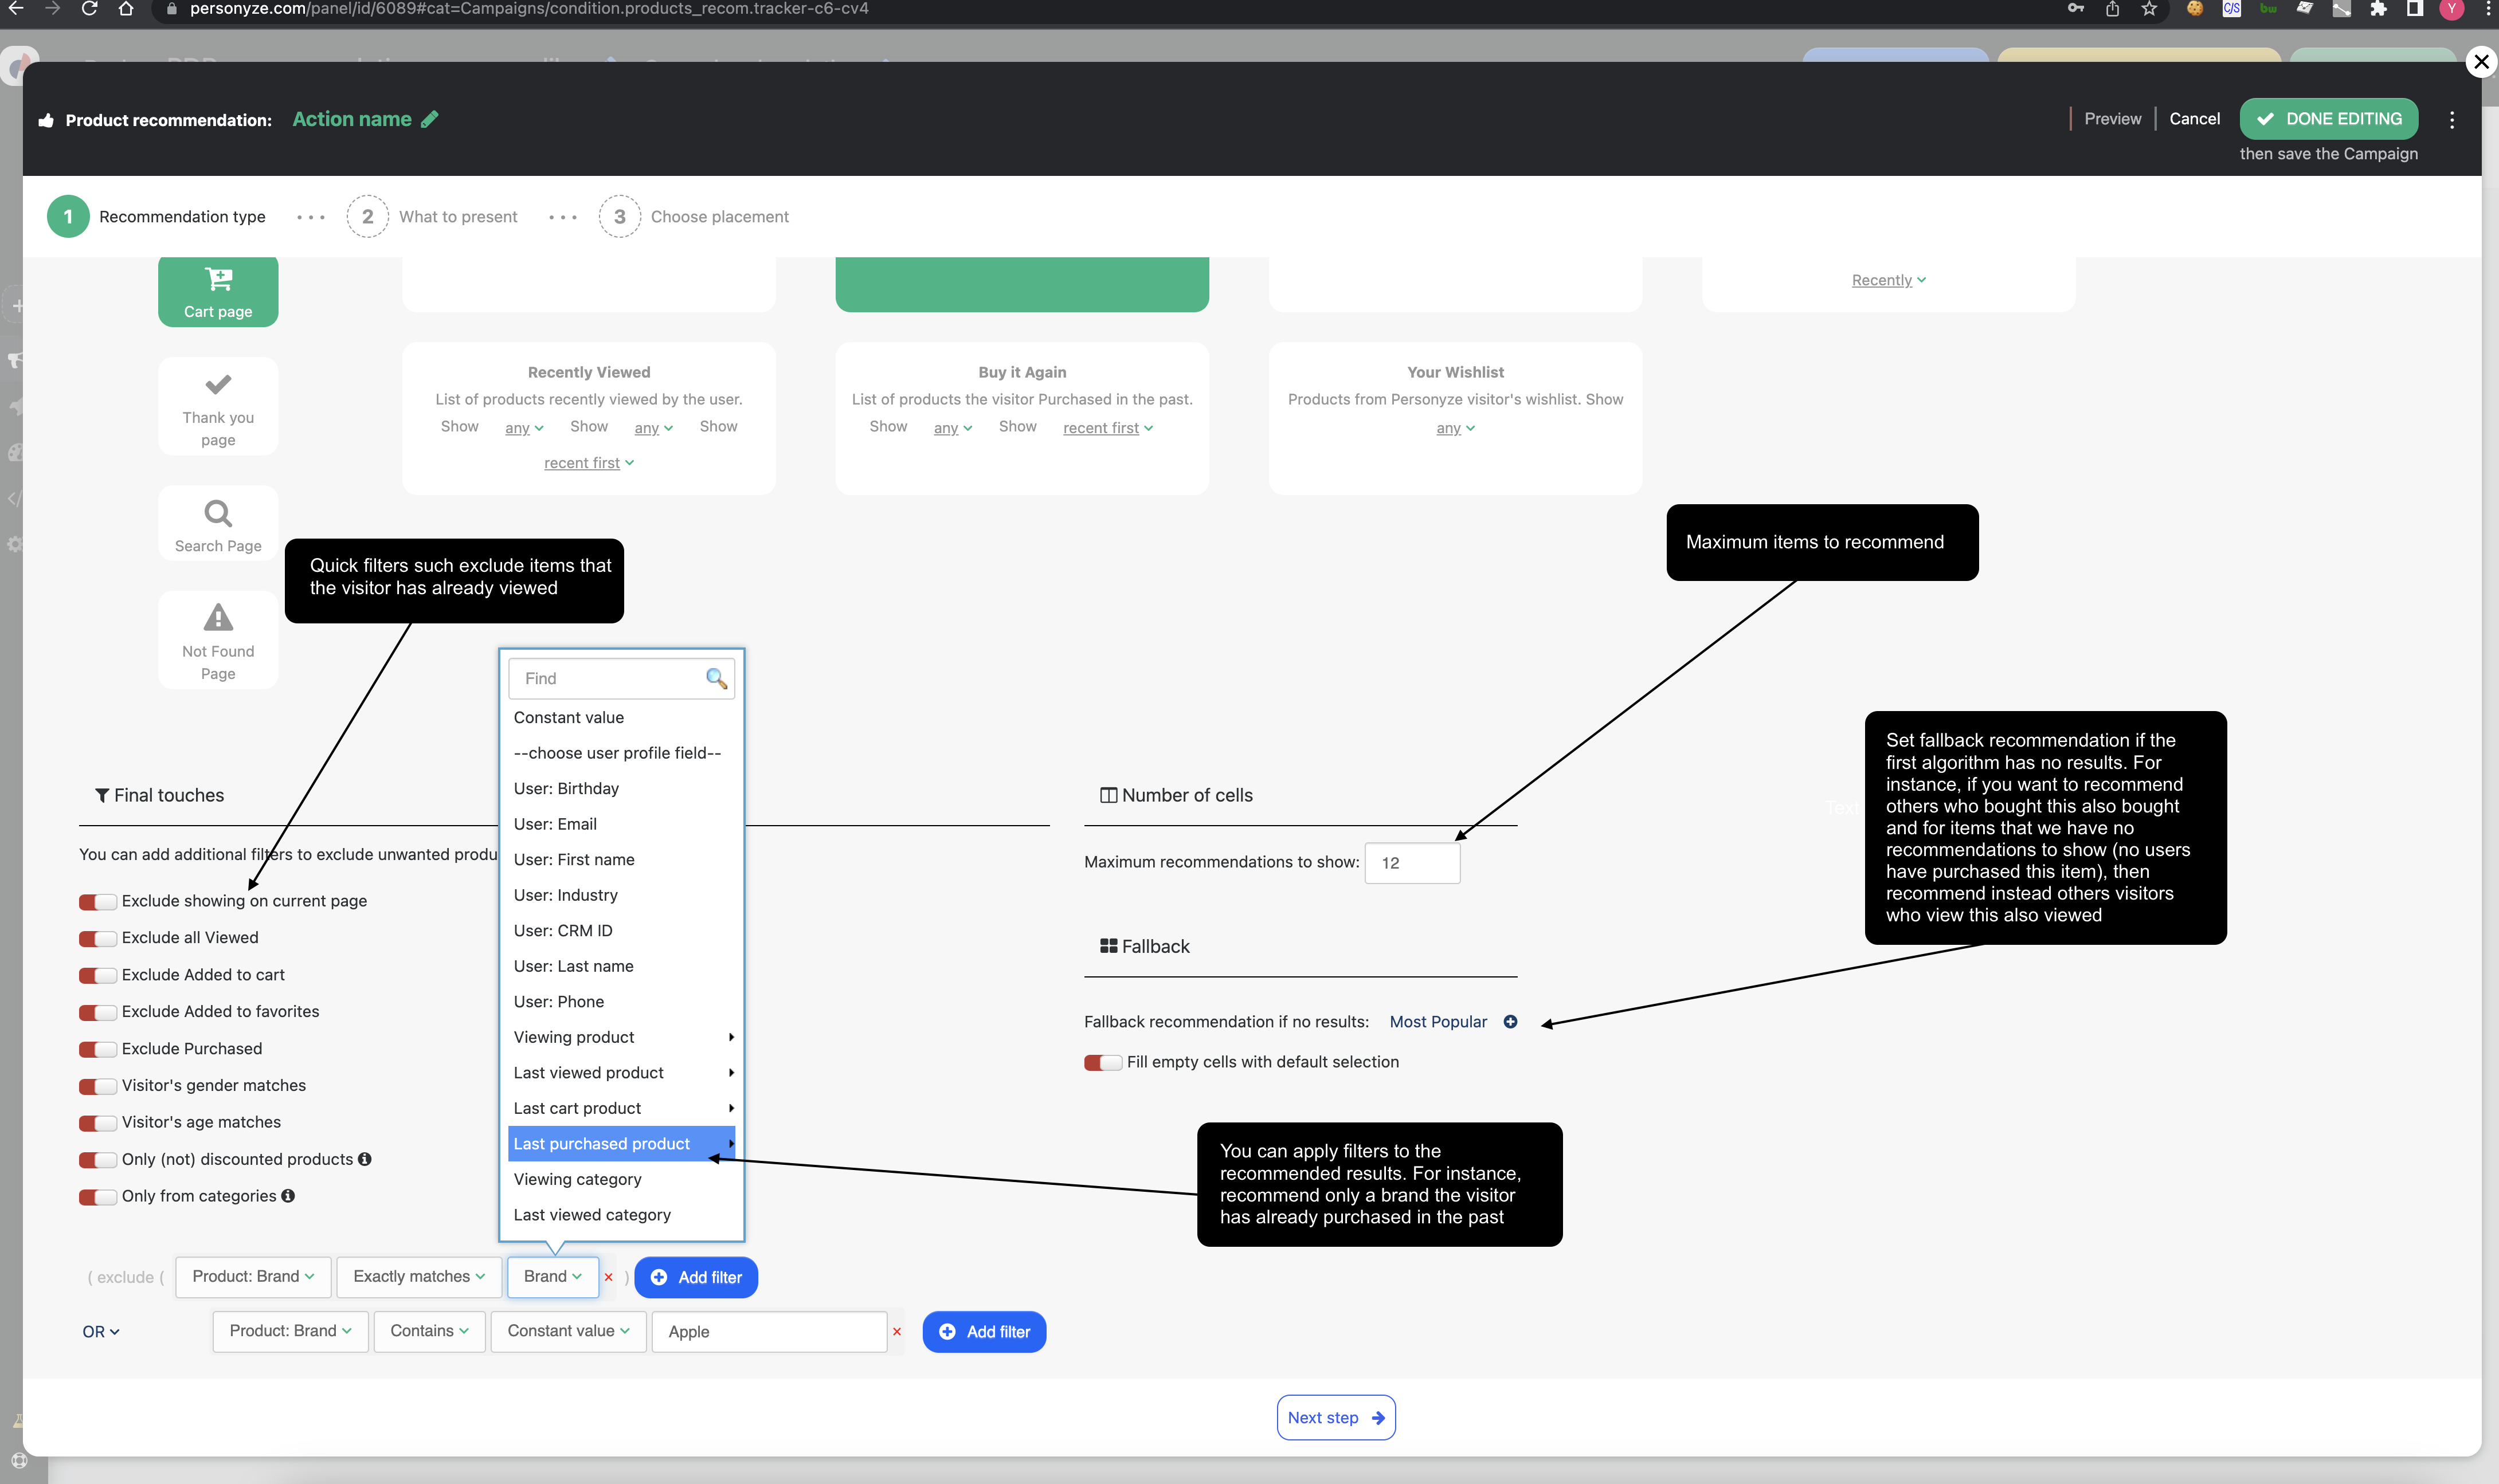
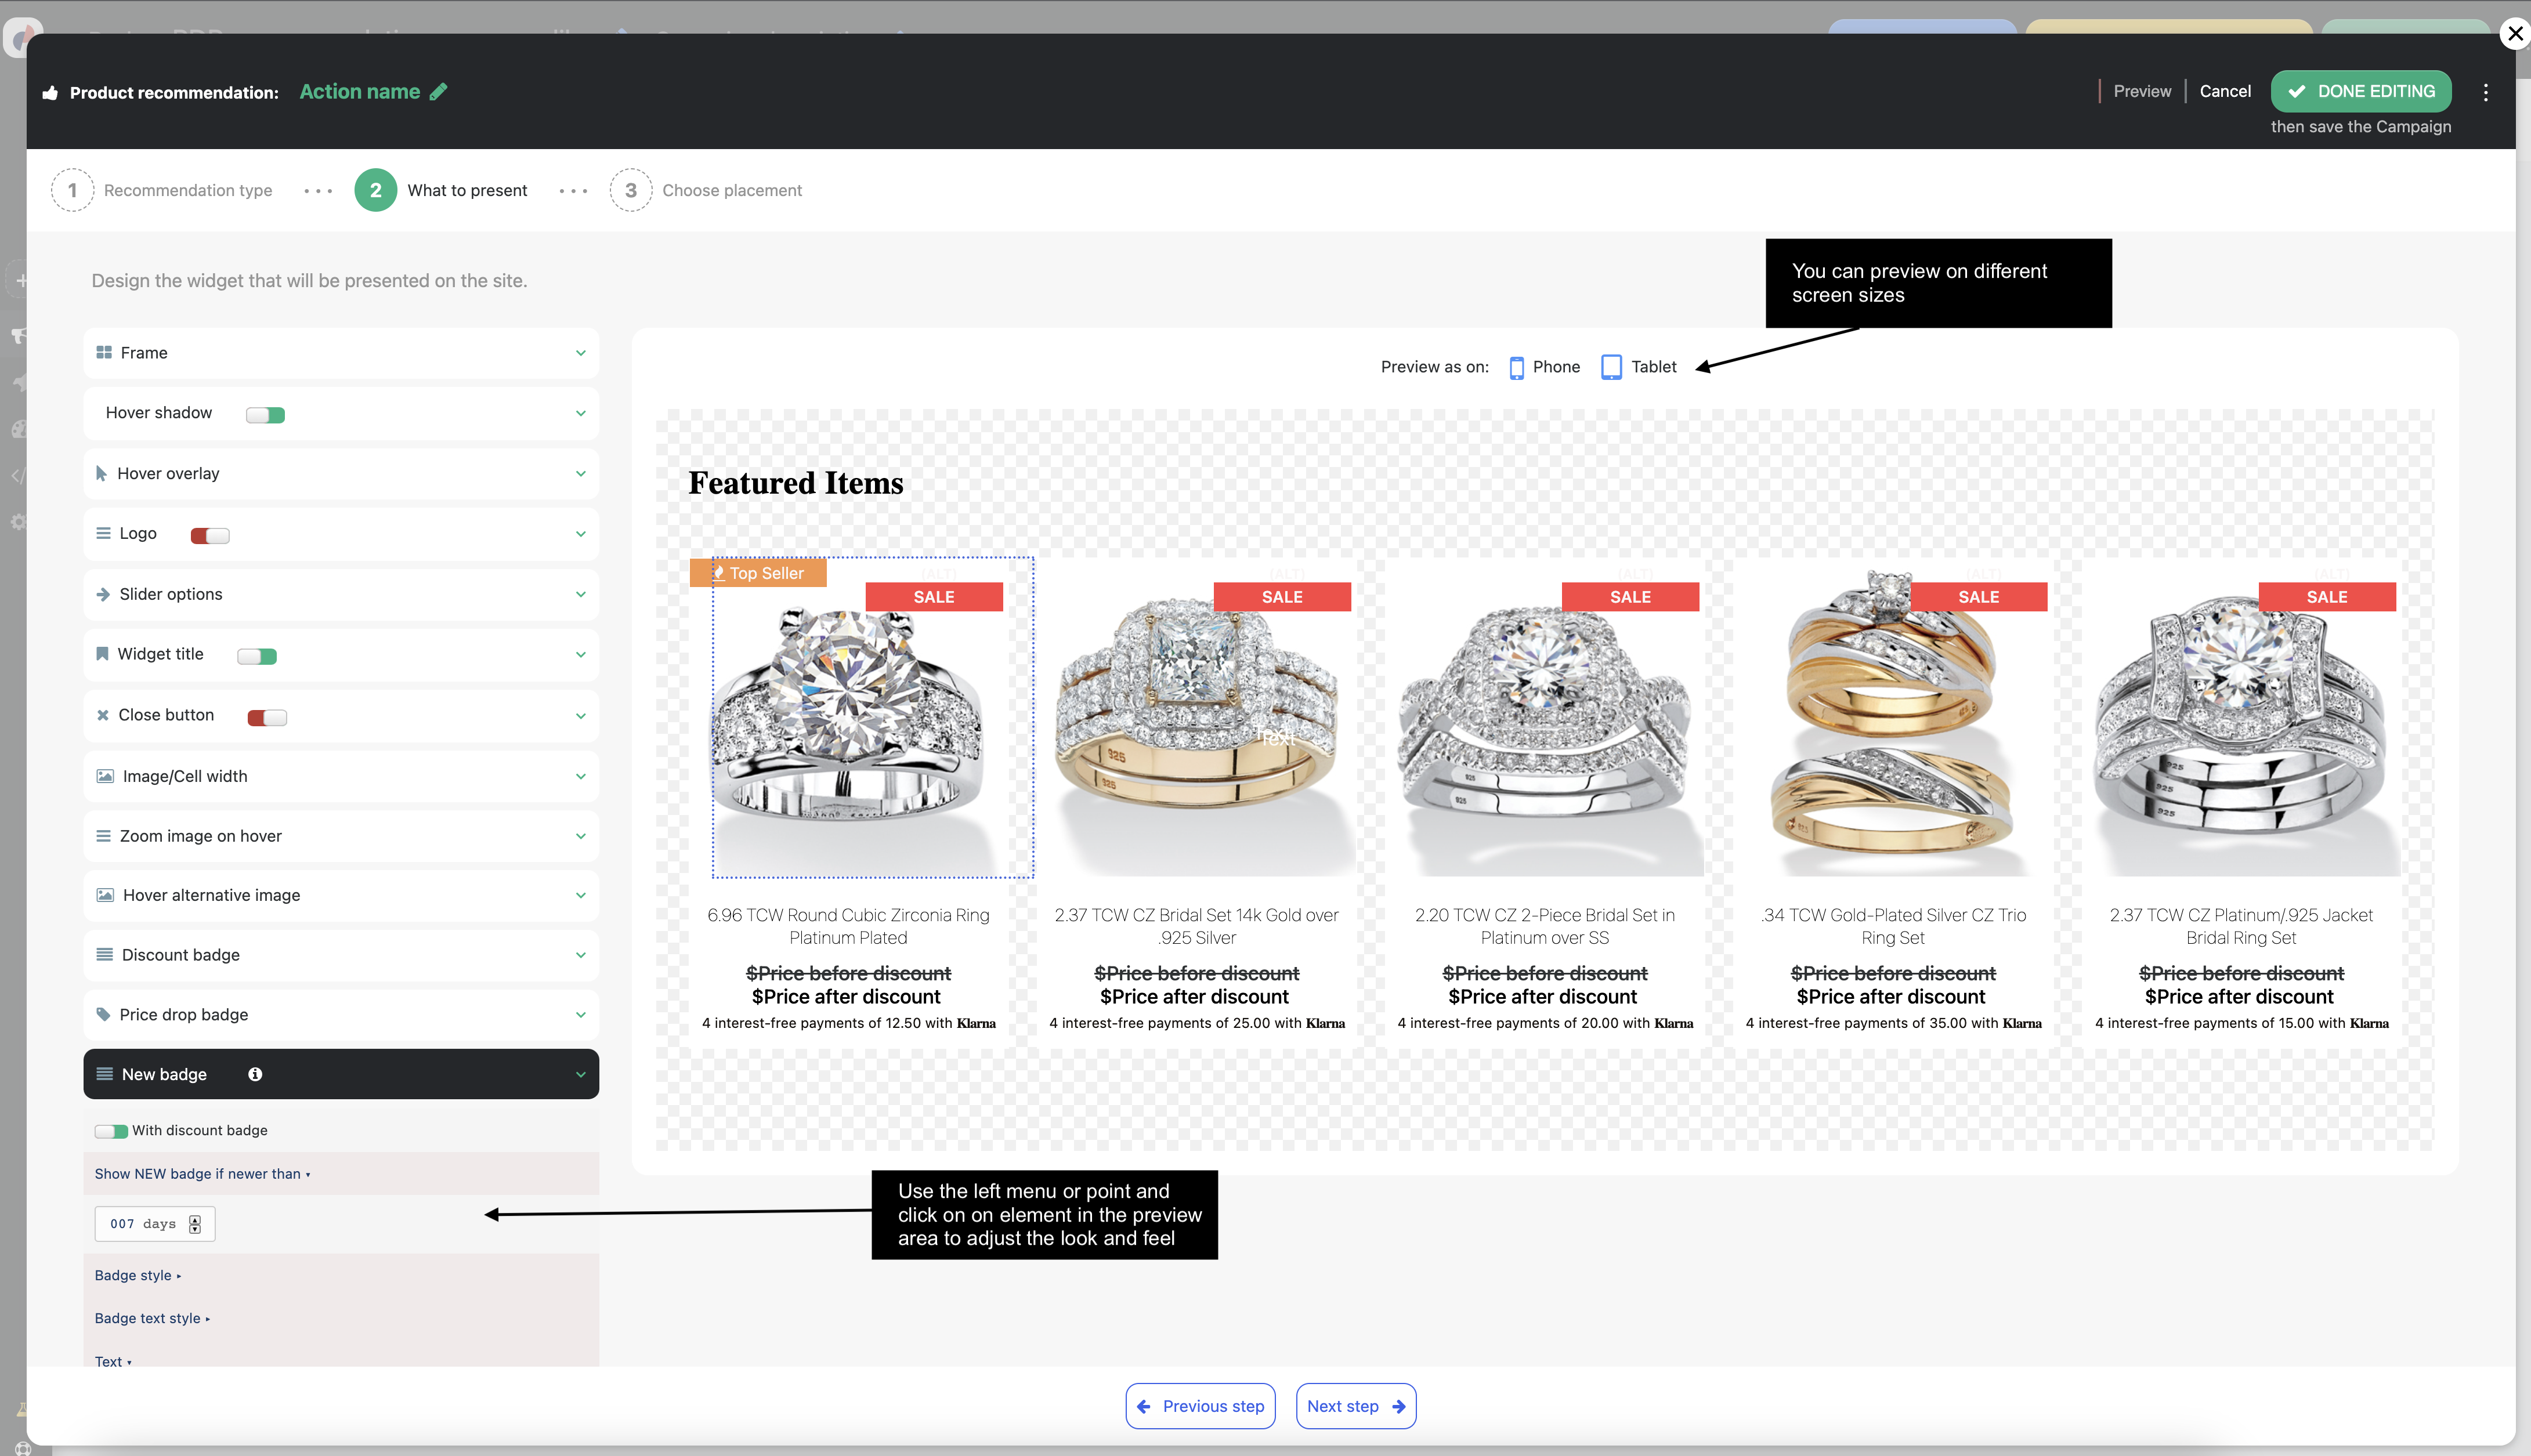
Recommendation widget
In this step, you design the recommendation widget that will appear on your site. You can choose from Personyze templates or implement your own HTML/CSS widget designs.
If you prefer a backend-only integration, you can use Personyze to generate recommendation data via JSON, and use your own CMS to display it.
When setting up your widget, you’ll be asked to choose a recommendation algorithm. Explore algorithm types.
The Personyze team can also assist with widget design—once created, your design can be reused across multiple pages and recommendation strategies.
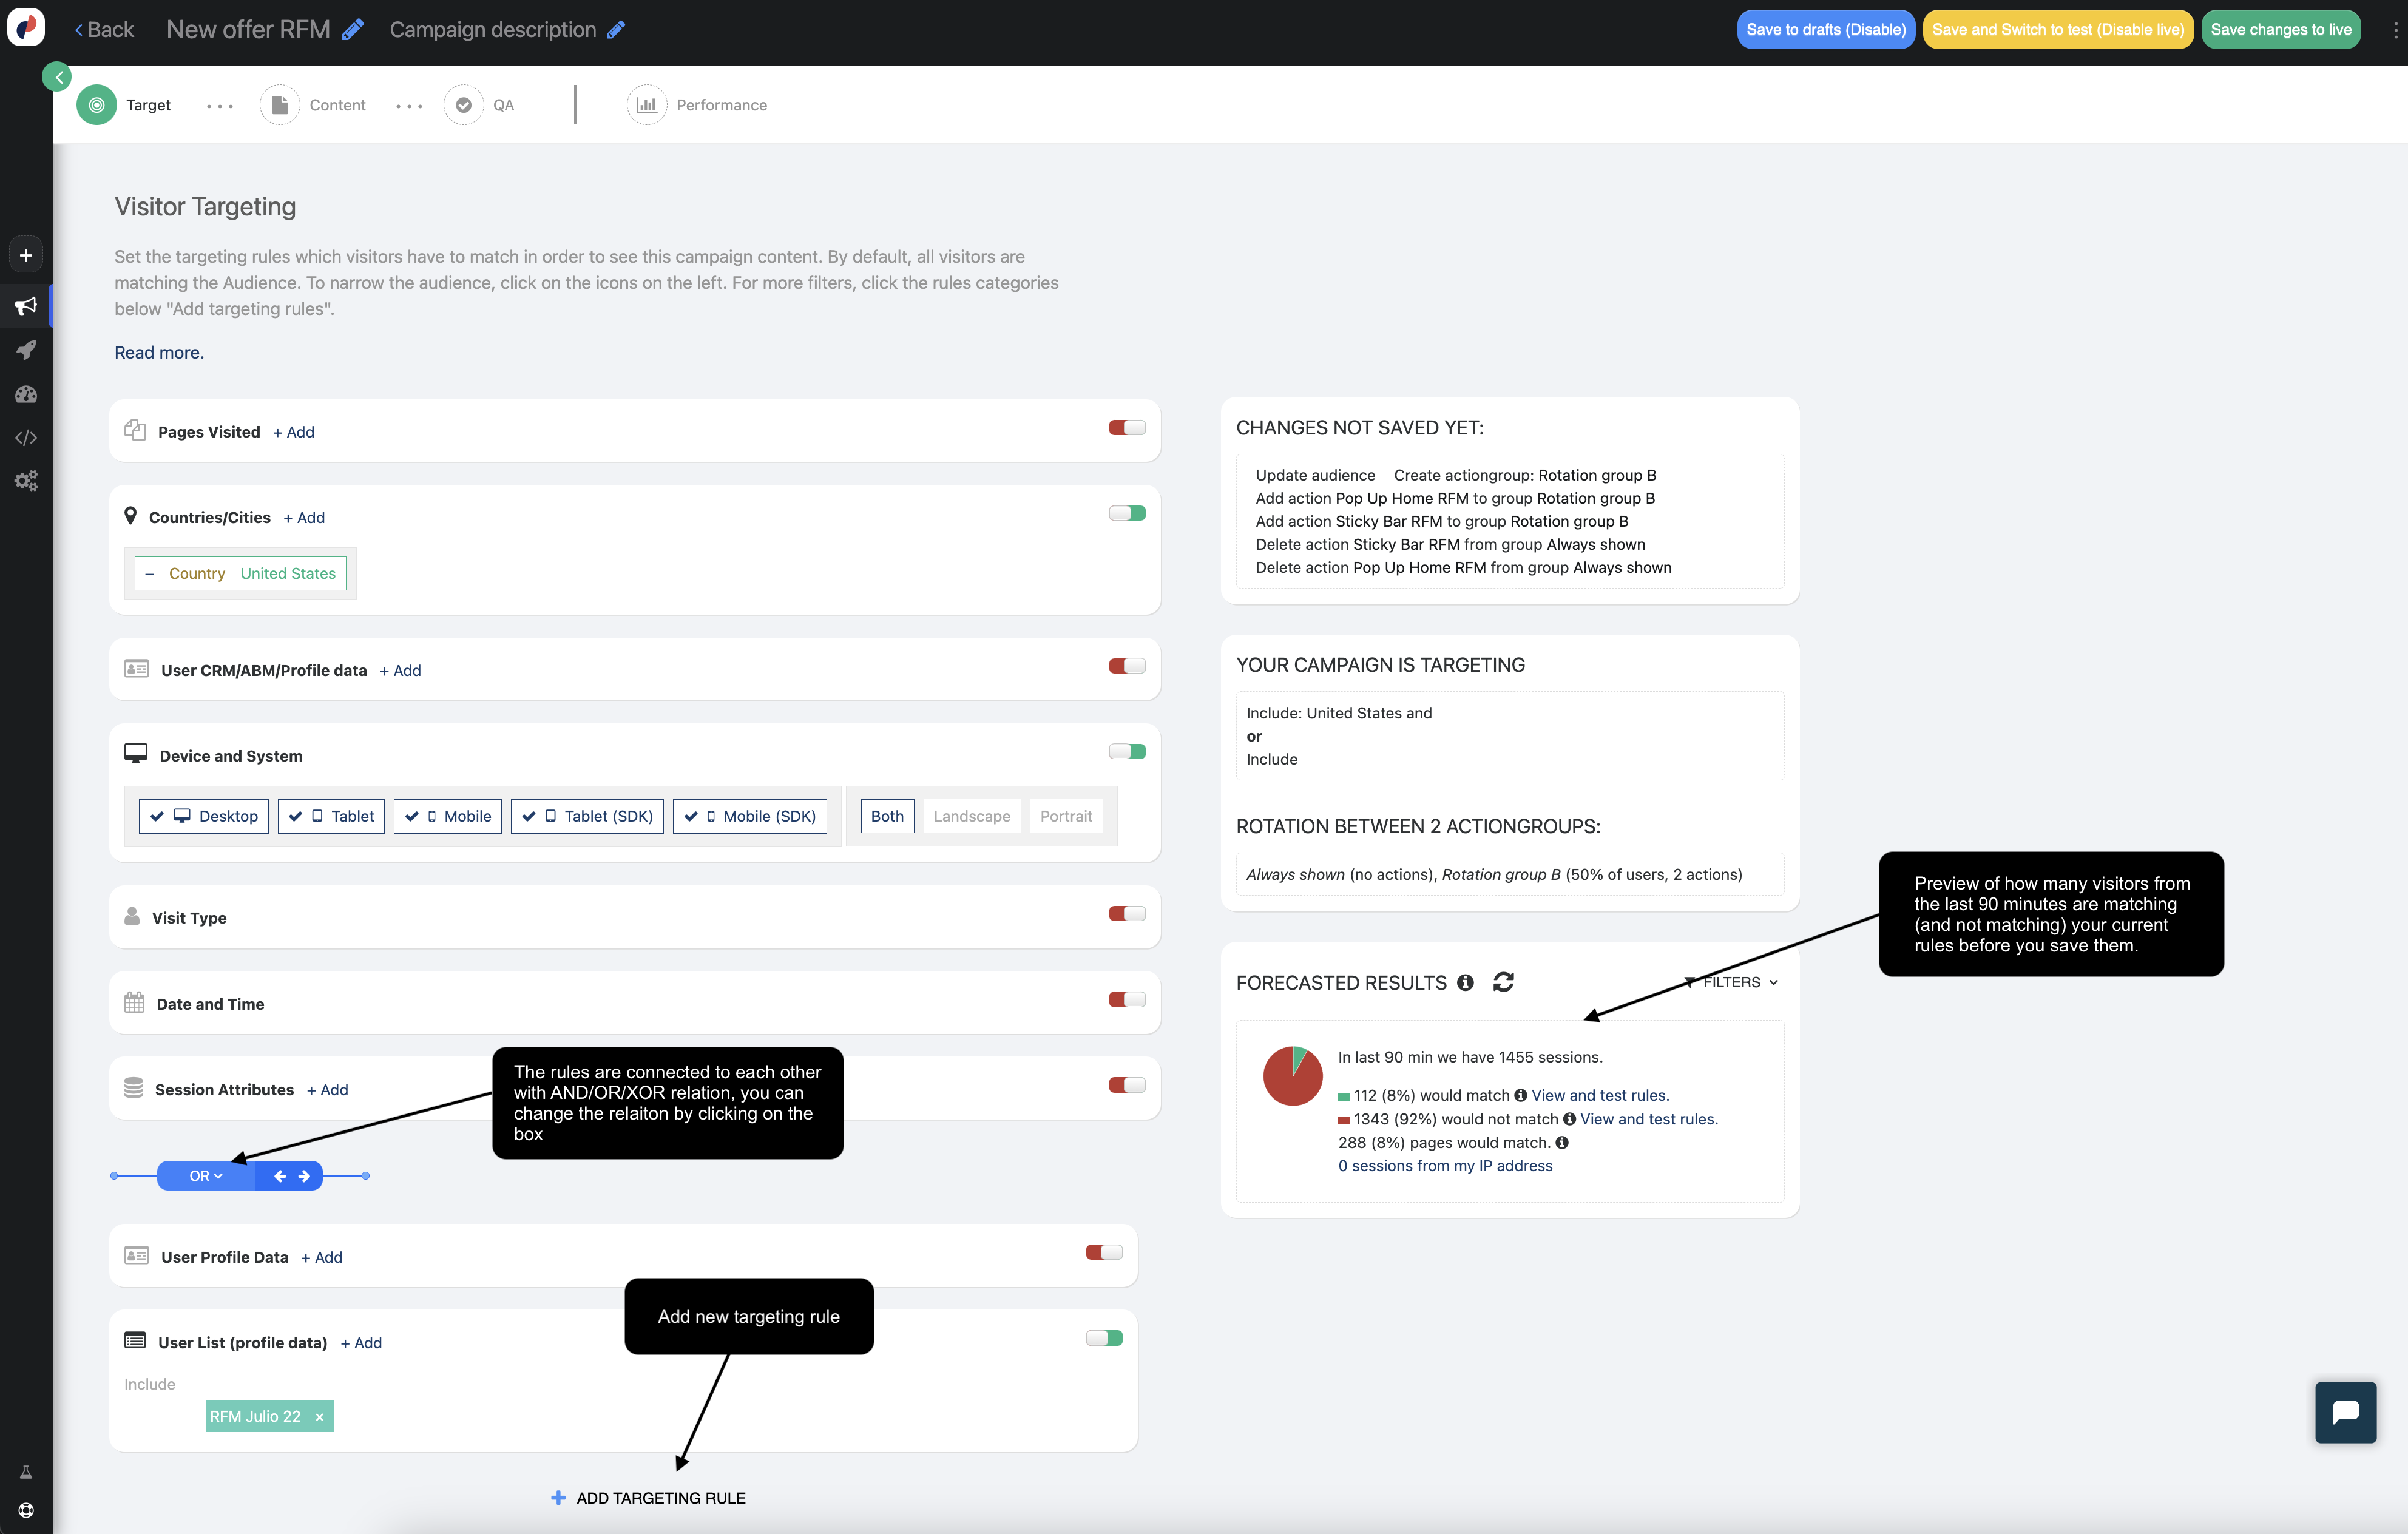
Target
Optionally, apply targeting rules so recommendations show only to specific visitors—for example, “Buy Again” suggestions for past buyers only.
This step is identical to the targeting system used in other campaign types and supports the full range of Personyze audience filters.
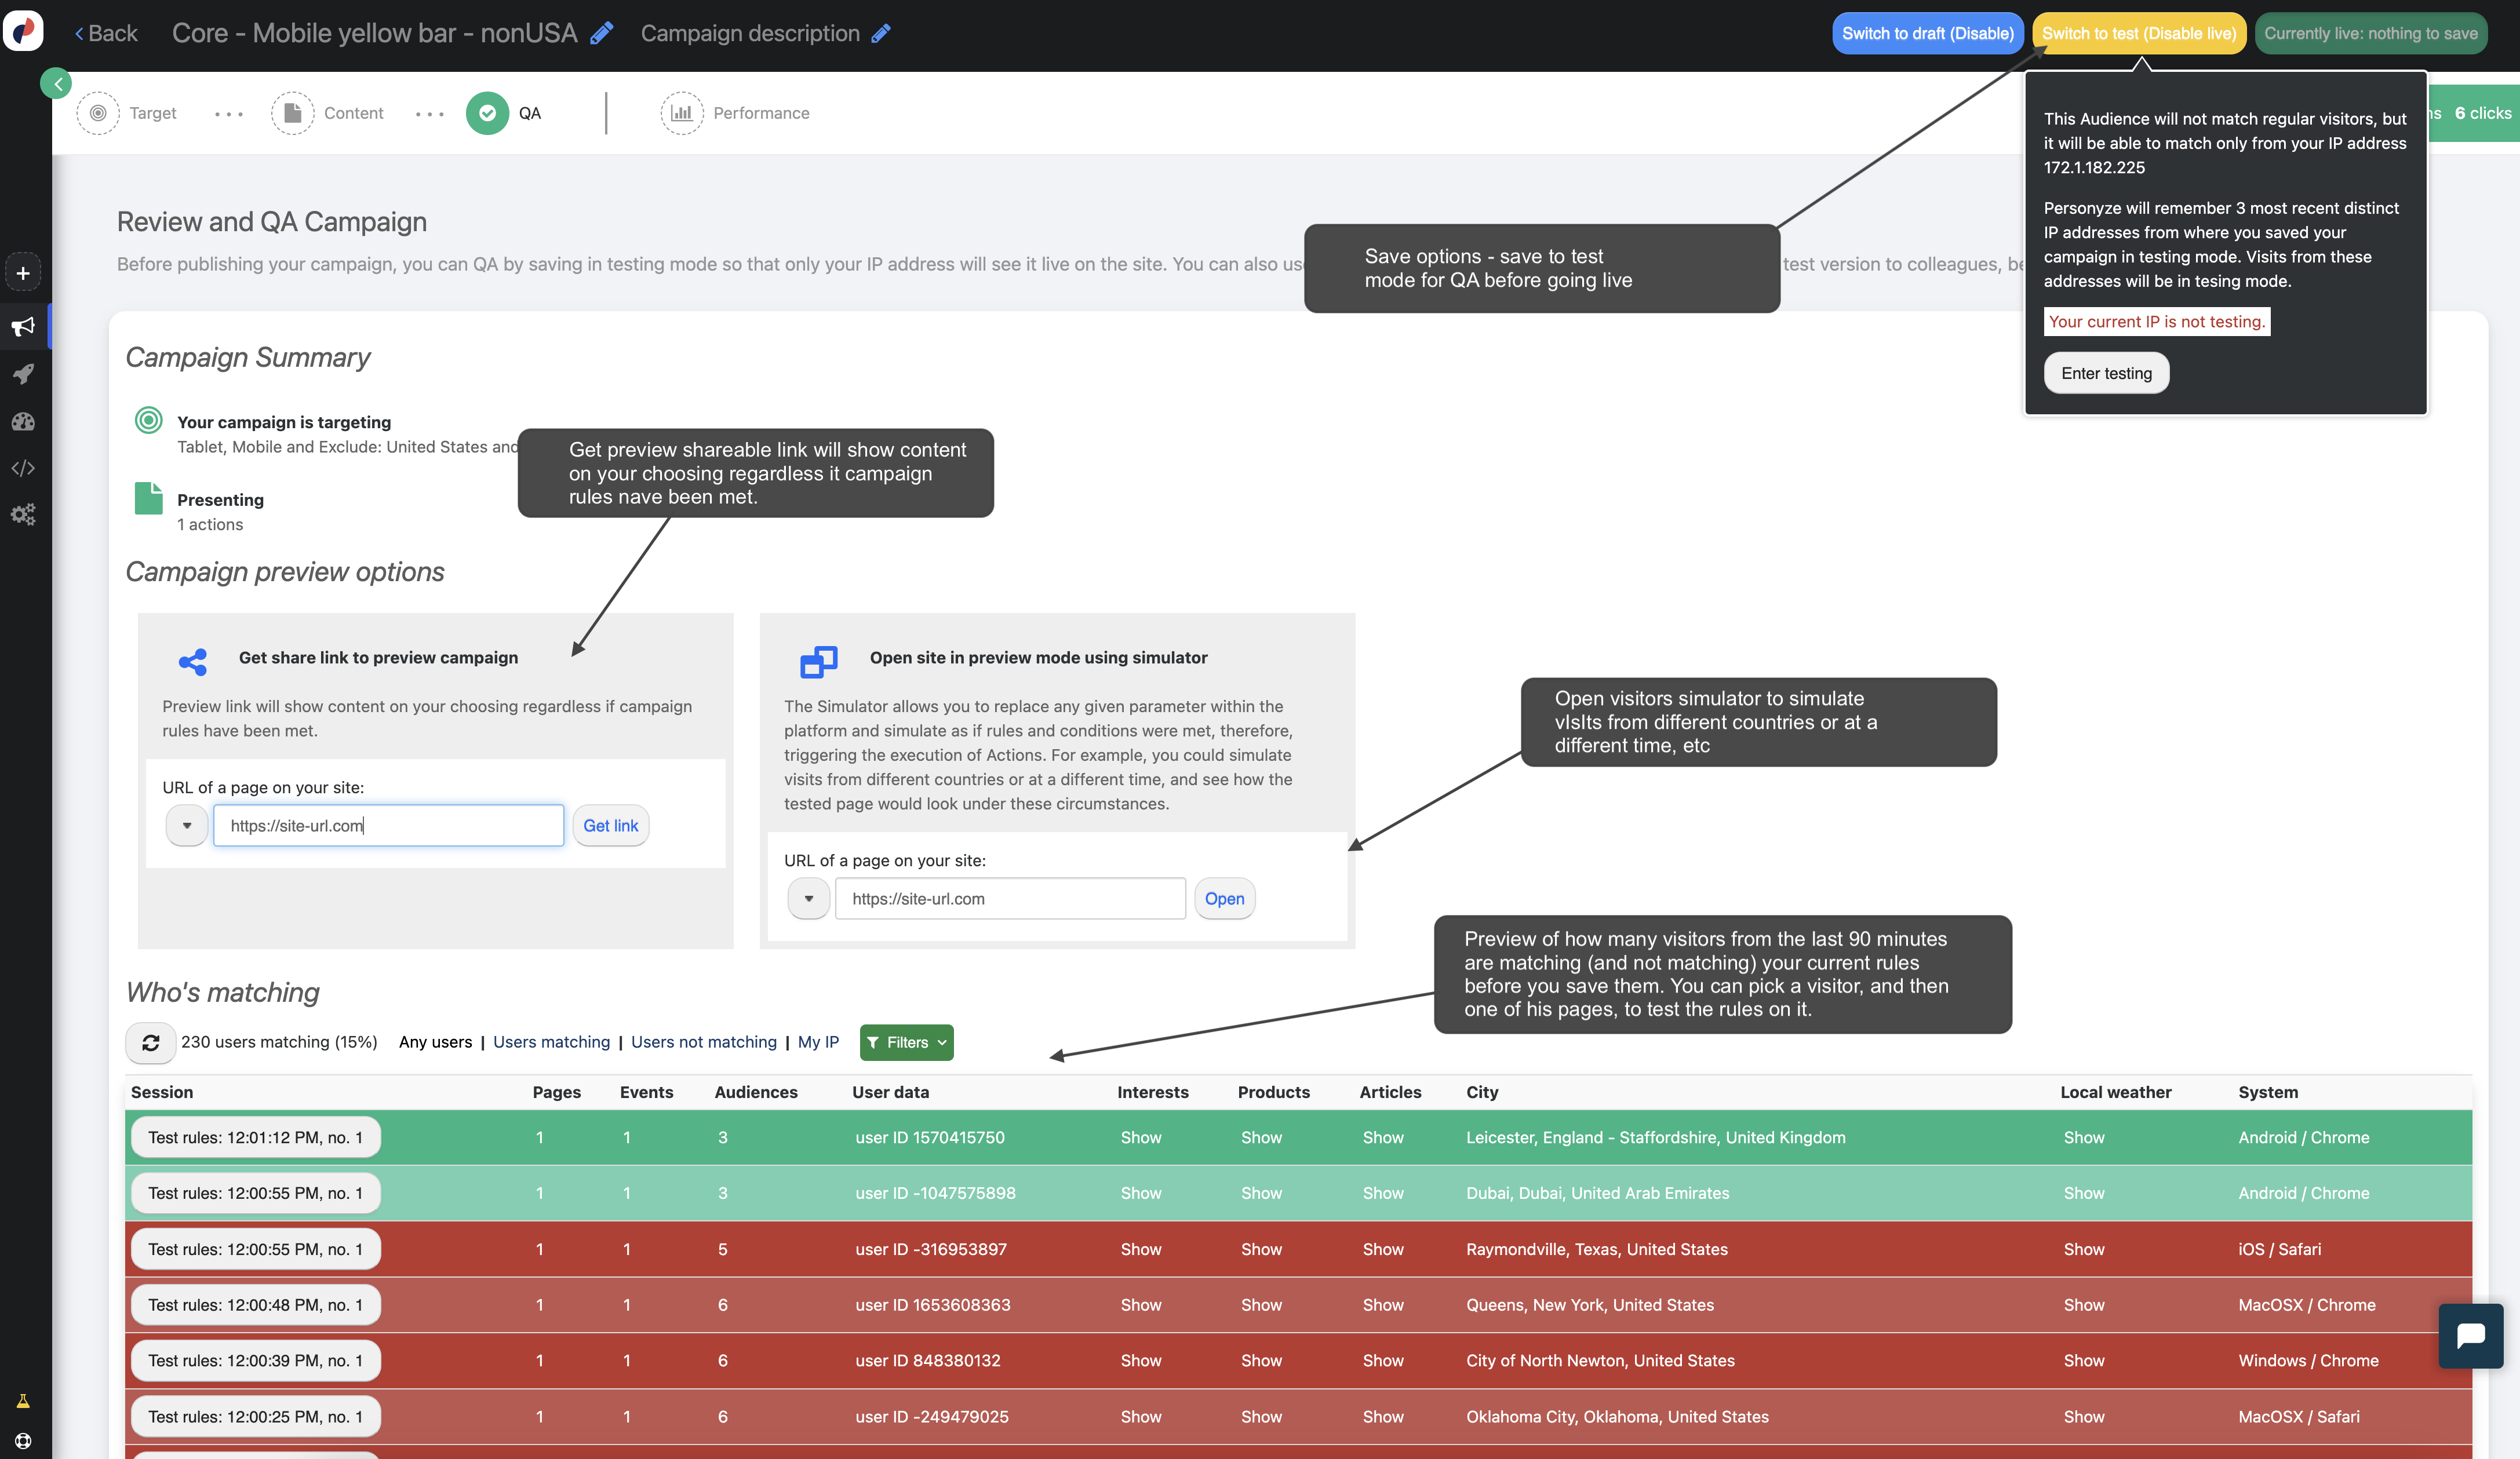
QA
Quality assurance for recommendation campaigns works the same as for any Personyze campaign. You can:
- Use the Simulator to preview campaigns
- Save the campaign in Testing Mode (visible only to your IP)
- Generate Test Links for internal reviews
Click here to learn more about QA options.
Campaign Performance Dashboard
After launch, track performance with detailed metrics like:
- Impressions & Clicks
- CTR & Conversions
- Revenue from recommendations
- Time to purchase after recommendation
- Performance by algorithm, product, audience, or device
These metrics are visible in your dashboard and can also be sent in real-time to Google Analytics.

