
Goals let you cumulatively measure the efficiency of your website; they are a fundamental component for the success of any organization. Personyze monitors three main types of goals and allows you to track up to 12 goals:
Conversion Goals
A Conversion Goal can be anything of worth for your business, such as downloading a map, printing a coupon, filling a form, solving a problem through the support pages; anything that creates profit, increases the likeliness of generating profit or increases engagement. Personyze allows you to measure the conversion rate for every action and segment, with regard to up to 12 different conversion goals.
Every time you define a new conversion goal, a column with a matching name is added to the Audience and Actions statistics charts, and all relevant data can be viewed in the Statistics Section.
There are three types of conversion goals:
-
JavaScript Goal:
_S_T.custom_event("ec6c", "1");
A JavaScript Goal provides you with a standard JavaScript conversion pixel. When executed, the JavaScript conversion pixel performs two functions:
-
- It notifies Personyze that a conversion took place, and registers an increase in that particular conversion rate for every Audience and Personalization Action that were matched or executed during that session.
- It keeps track of the Goal Value for every particular conversion and reports them for every Audience and Personalization Action that were matched or executed during that session. The overall Goal Value to the website for every particular goal, can be found in the “Metrics Over Time” chart in the Audience Analytics section.
To set up a new JavaScript Goal:
-
- Go to the “Goals” section, under the setting Menu.
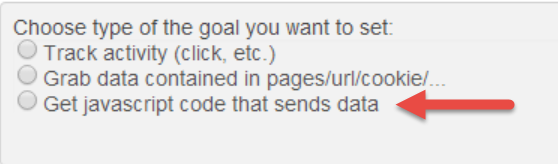
- Click on “New Goal Event” and select the “Get JavaScript…” option:
-
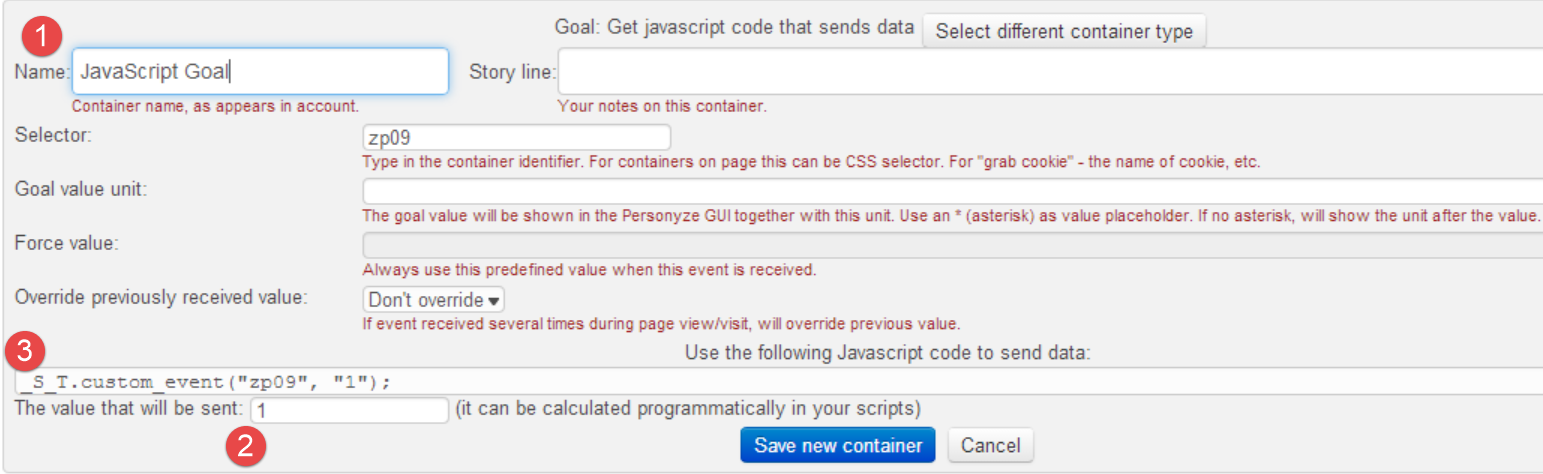
- Customize Your Goal:
-
-
- Name Your Goal.
- Specify the Static Goal Value to be assigned to the conversion, in the event the container is impty or doesn’t exist.
- Copy your JavaScript conversion pixel, embed it on a relevant page, or set it up to be as a JavaScript action to be executed in the event of a specified Audience/Segment being matched.
-
Note: There Are Three Ways to Execute a JavaScript Conversion Pixel:
- Embed it in a Page – same as Google Analytics conversion pixel, Personyze conversion pixel can be embedded in any webpage, and executed every time a visitor arrives to that webpage.
For example: a visitor arrives at the “Thank You” page at the end of the checkout process. - Attach it to an Audience – The real benefit of using Personyze’s JavaScript Conversion pixel, stems from Personyze segmentation engine’s ability to describe and identify just about any visitor behavior, activity, and data. If you are capable of verbally describing a “Converted” visitor( especially if your description is slighly more creative than “visitor got to the ‘thank you’ page”), you can use Personyze Segmentation Engine to identify visitors matching your “Conversion Audience” description, and execute a Conversion Pixel using a JavaScript Action.For Example: a visitor who completed the checkout process after adding more than 5 items, or 100$ worth of products to the shopping cart.
- Execute after an Action Event took place: Personyze ability to learn from, and respond to, the visitor’s interaction with it’s personalization actions, represents a unique personalization flexibility. When creating a Personalization Action, such as a popup, you can instruct Personyze to respond differently in the event of a visitor clicking on the popup than the events of him closes it, or ignoring it altogether. One of the available event-response options, is to execute any custom JavaScript code, such as the JavaScript Conversion Pixel.For Example: When trying to reduce your shopping cart abandonement ratio with an exit-intent discount popup, a visitor clicking on the popup, and continuing with the checkout process can execute a JavaScript conversion pixel, and count a separate Conversion Rate.
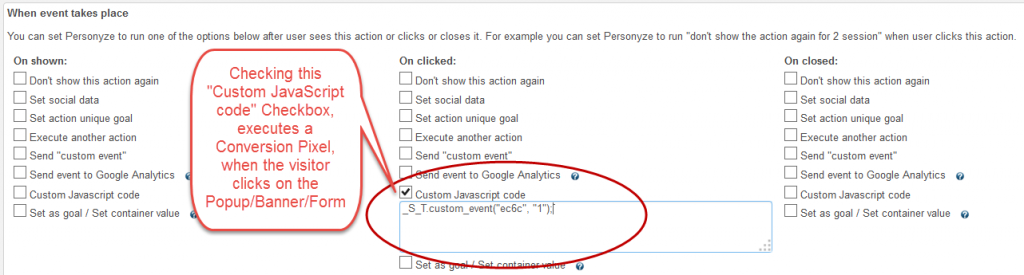
Executing a Personyze Conversion Pixel if a visitor responds to a popup by clikcing on it
-
Grab Data Goal:
A Grab Data Goal keeps track of data being extracted from a specified page container( such as a field on a page, an input box, a cookie, a meta tag, etc.) and registers a conversion when that container receives a desired value.
Grab Data Goal Examples:
- A visitor typing in his email address or contact in the opt-in form.
- Personyze detects a returning visitors by extracting his dynamic ID from a cookie.
- Detect a visitor arriving to the website as a result of a specific marketing campaign, by extracting the URL Parameter value.
To set up a new Grab Data Goal:
-
- Go to the “Goals” section, under the setting Menu.
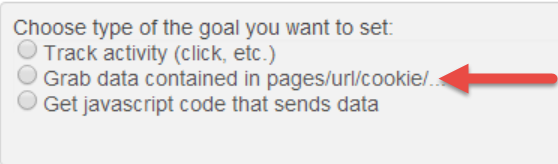
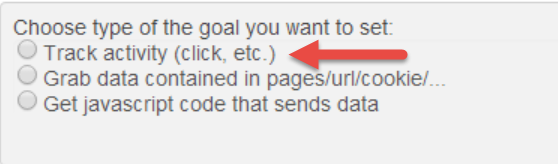
- Click on “New Goal Event” and select the “Grab Data…” option:
-
- Customize Your Goal:
-
-
- Name your Goal.
- Select the appropriate container type.
- Choose the timing for the data to be extracted.
- Provide the appropriate selector/container ID.
- Specify what values should pass through the container.
- (Optional) Set a static Goal Value to be reported
-

-
Track Activity Goal:
A Track Activity Goal keeps track of visitor behavior over a specified page element( such as a button or a banner) and registers a conversion when specified activity takes place. Once a track activity goal is matched, Personyze registers an increase in that particular conversion rate for every Audience and Personalization Action that were matched or executed during that session.
To set up a new Track Activity Goal:
-
- Go to the “Goals” section, under the setting Menu.
- Click on “New Goal Event” and select the “Track Activity…” option:
-
- Customize your goal:
-
-
- Name your goal.
- Specify the ID of the page element to be tracked.
- Select what activity you wish to be tracked and reported under the associated “Conversion Rate” metric.
-

Click Through Rate( CTR)-
For every personalized element( such as: banners, popups, Personalization Action, etc.), by default Personyze monitors the percentage of visitors that clicked on that element out of all the visitors exposed to the element, and reports the statistics under the “CTR” column in Personalization Actions Statistics.
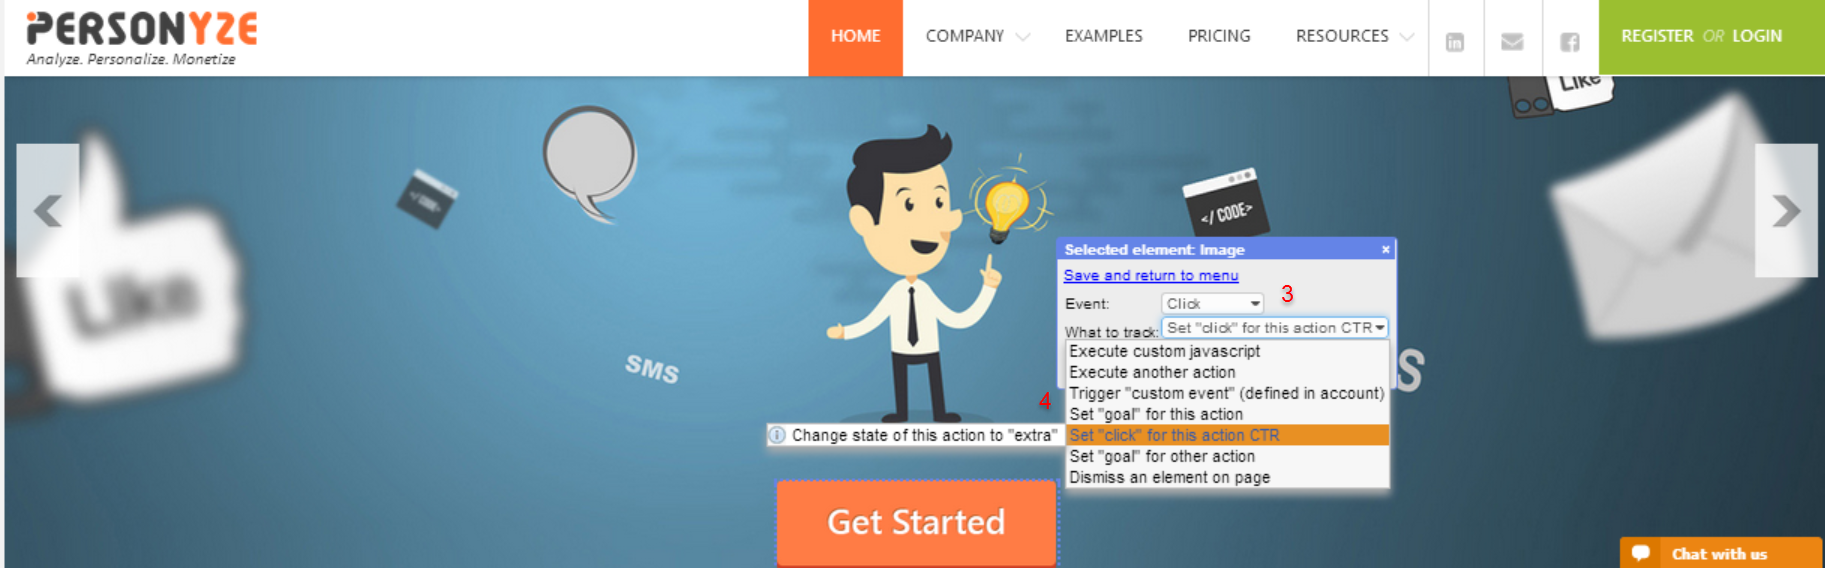
Note:When using the WYSIWYG Editor, the entire webpage is considered edited, therefore you must specify the monitored element on the page. To do so:
- Click on the appropriate element in the WYSIWYG Editor.
- Choose the “Trigger on Event” option from the menu.
- Choose “Click” as the type of event.
- Choose “Extra” from the “What To Track” menu.
Personalization Actions Unique Goal
In case there are multiple click behaviors we deem beneficial, we can use the WYSIWYG Editor to instruct Personyze track multiple click events on the same page and report them all as a single statistic.
When working on the copy of the webpage in the WYSIWYG Editor, clicking on different elements and choosing the “Create Click Goal” option from the menu. All clicks on monitored elements are reported under the “ Personalization Actions Unique Goal” column, in in the “ Personalization Actions Statistics” menu.
