Single Sign-On (SSO) lets your team access Personyze using your organization’s existing identity provider — Auth0, Okta, OneLogin, Microsoft Entra ID (Azure AD), Google Workspace, etc. Instead of managing a separate set of Personyze credentials, your IdP becomes the source of truth: when you disable a user there, their Personyze access is gone too.
When SSO makes sense
- Enterprise teams with central IT-managed user directories.
- Compliance-driven environments where access provisioning/deprovisioning must flow through a single identity system.
- Larger Personyze deployments with 5+ users where individual password management becomes overhead.
- Organizations using MFA universally — SSO inherits your IdP’s MFA enforcement, so Personyze automatically requires MFA without separate configuration.
How SSO works in Personyze
Personyze acts as a SAML 2.0 service provider. Your IdP issues SAML assertions when users authenticate, Personyze accepts them, and a Personyze user is provisioned (or matched, if pre-existing) based on the email in the assertion. After the initial setup:
- Users navigate to your Personyze login page and click Sign in with SSO.
- They’re redirected to your IdP for authentication.
- On success, the IdP returns a signed SAML assertion to Personyze.
- Personyze logs them in, creating the user account on first login if needed.
Managing SSO clients
SSO is configured per Personyze account in Admin Console → Settings → Integrations → Single Sign On. You can have multiple SSO clients configured if you support multiple IdPs (rare, but useful for parent/subsidiary organizations).
Provider-specific setup guides
Each major IdP has its own UI for creating a SAML application and exchanging metadata with Personyze. Step-by-step screenshots for the most common providers are below — pick yours and follow the matching section.
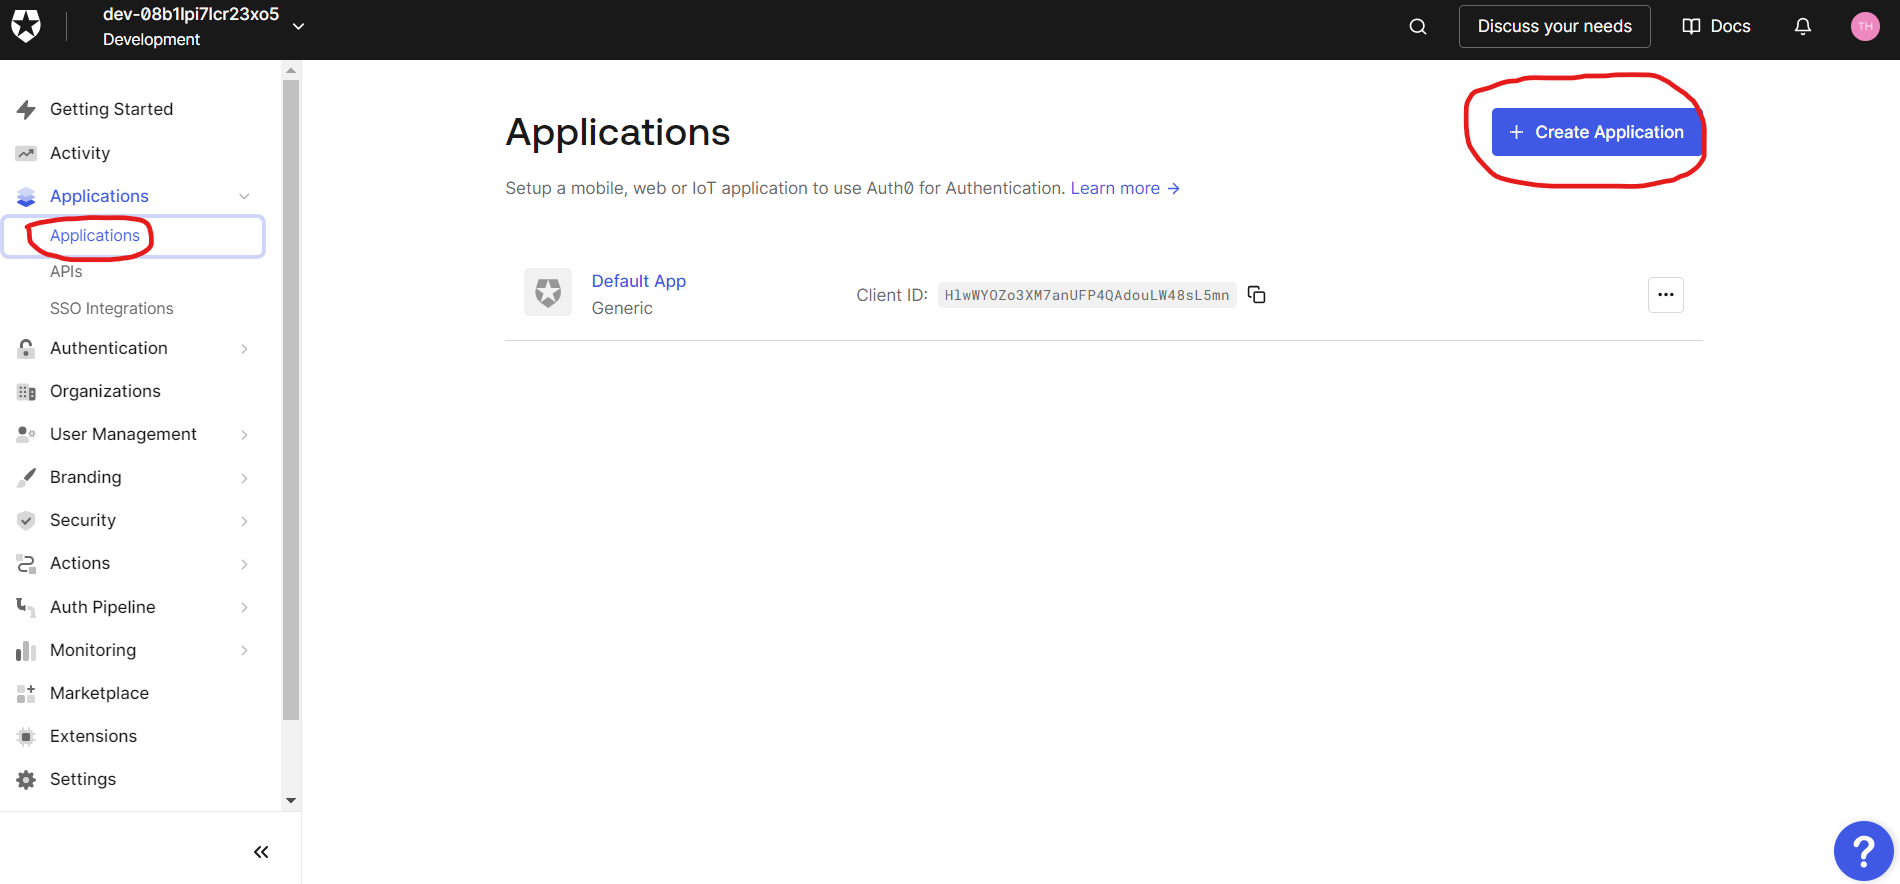
- Enabling SSO using Auth0
- Enabling SSO using Okta
- Enabling SSO using OneLogin
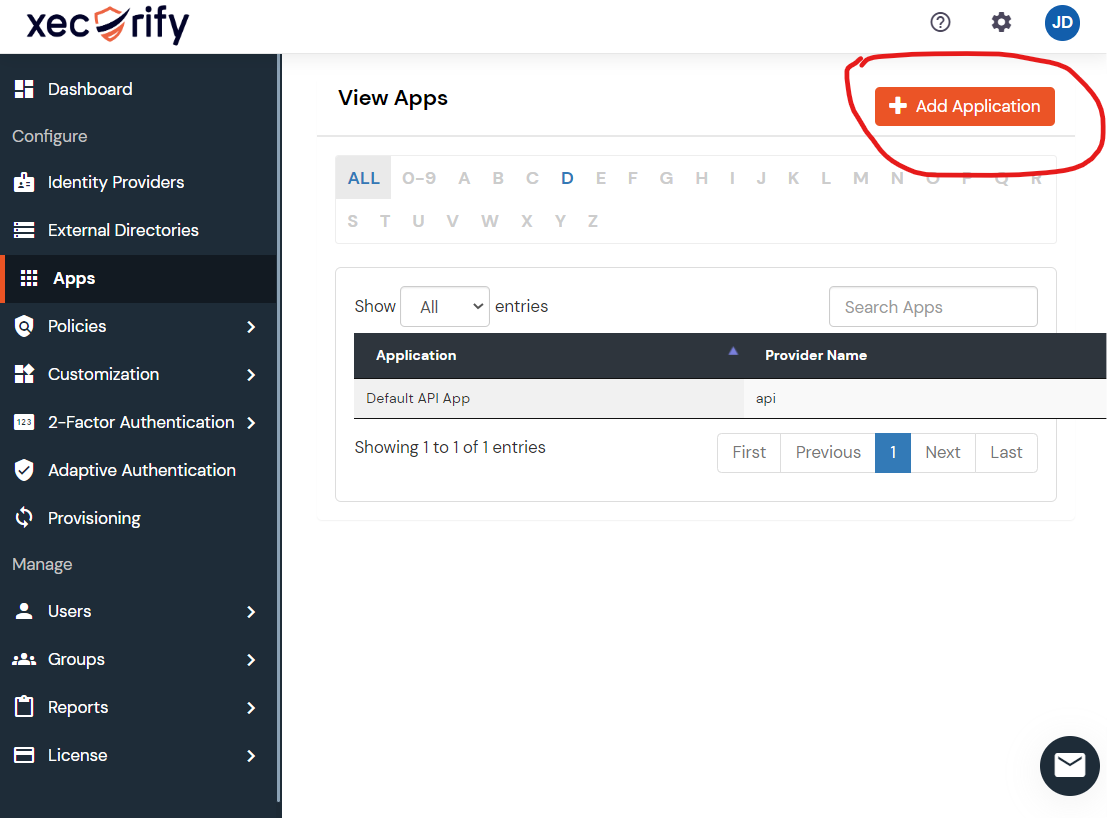
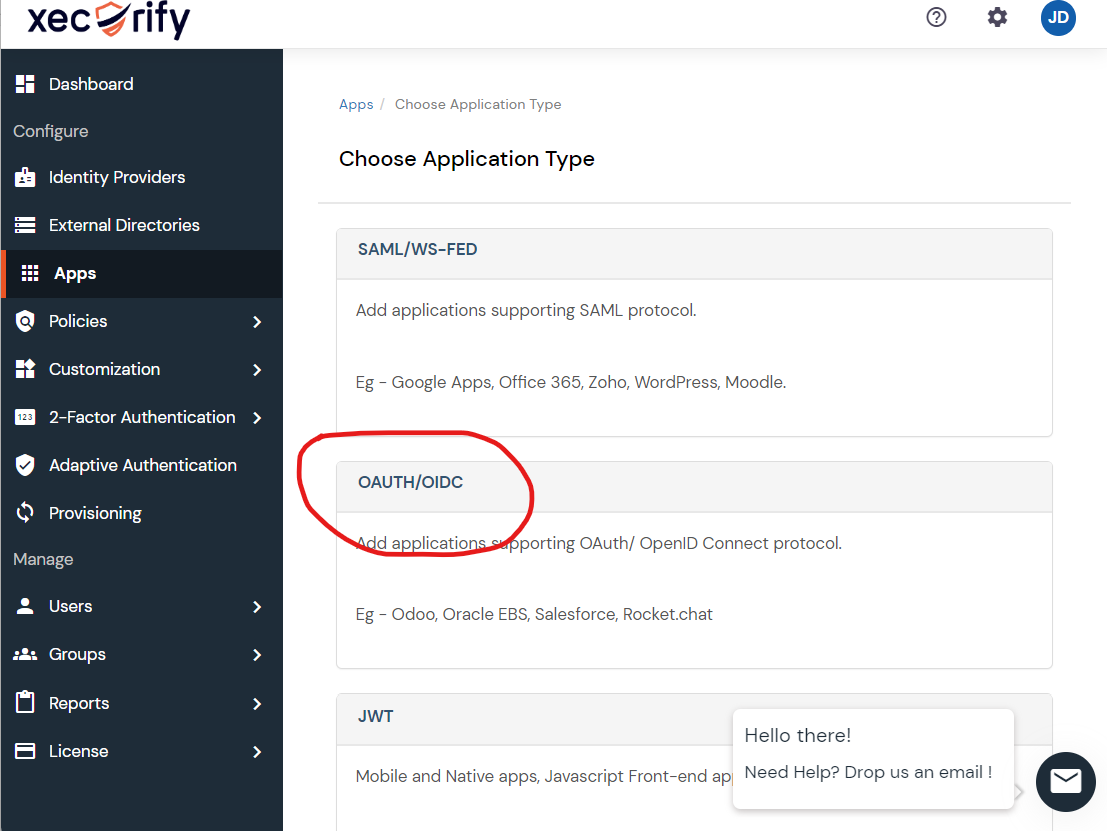
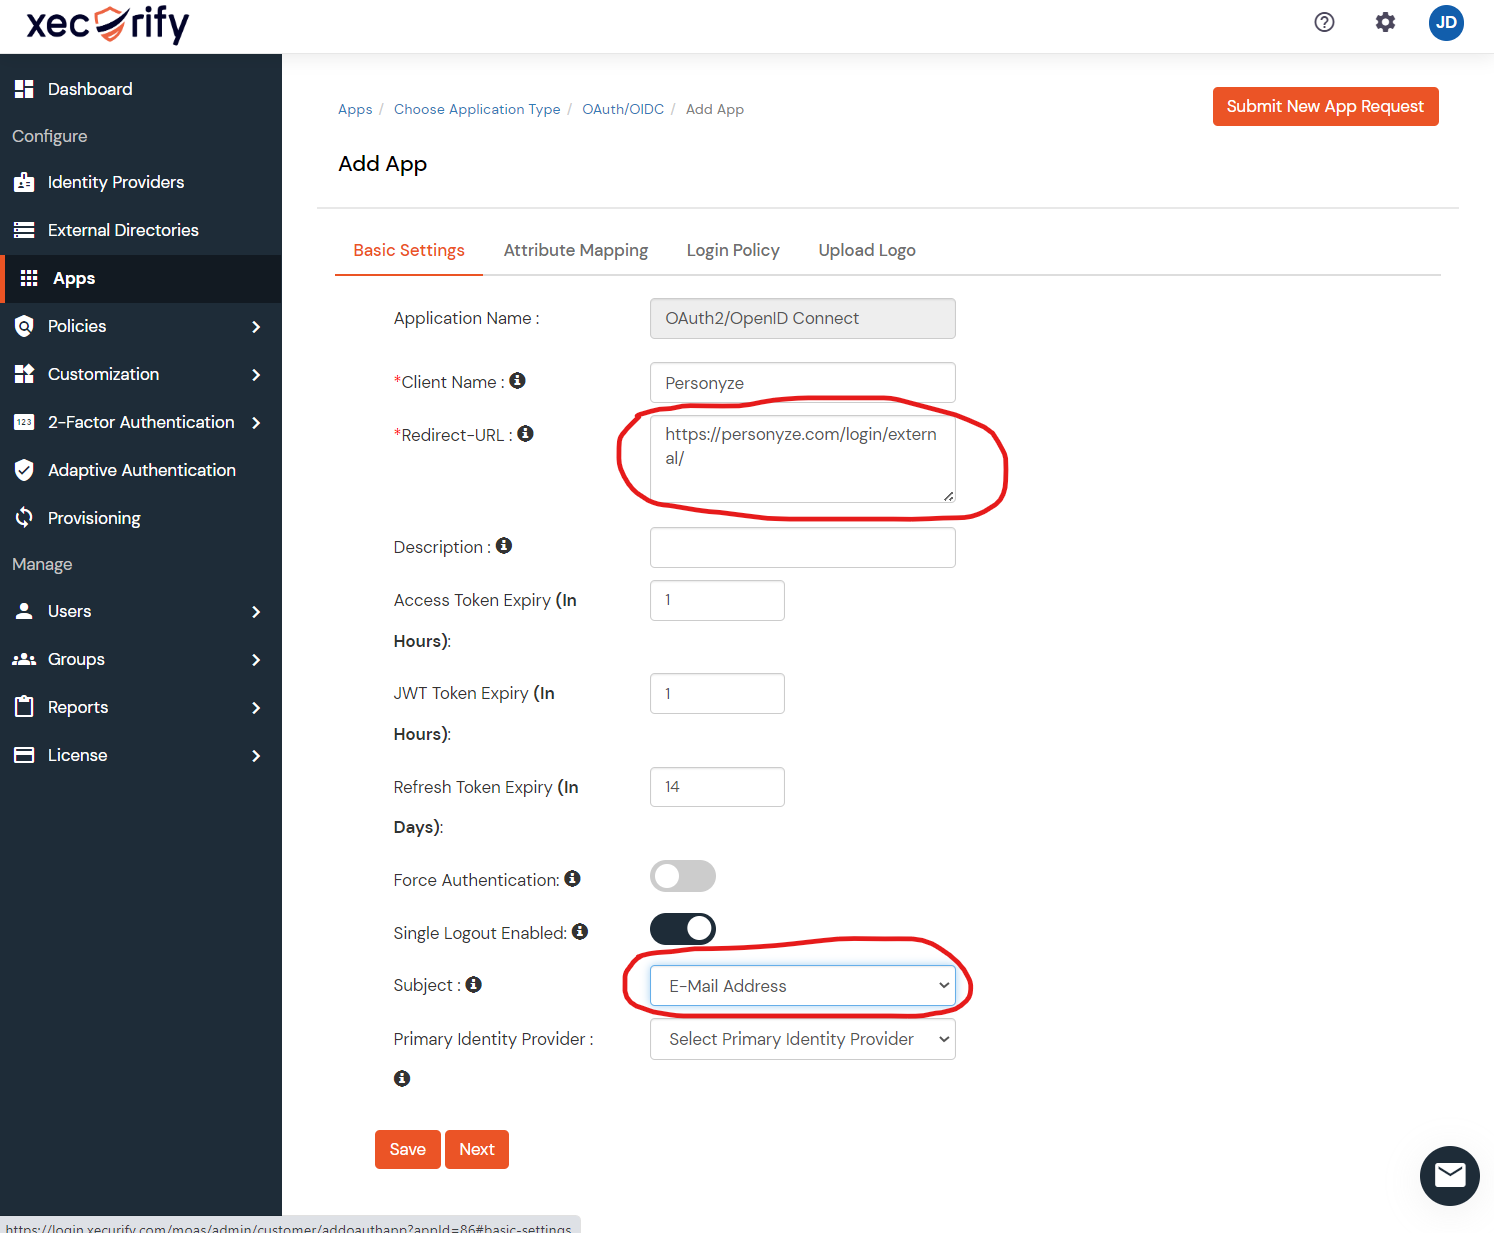
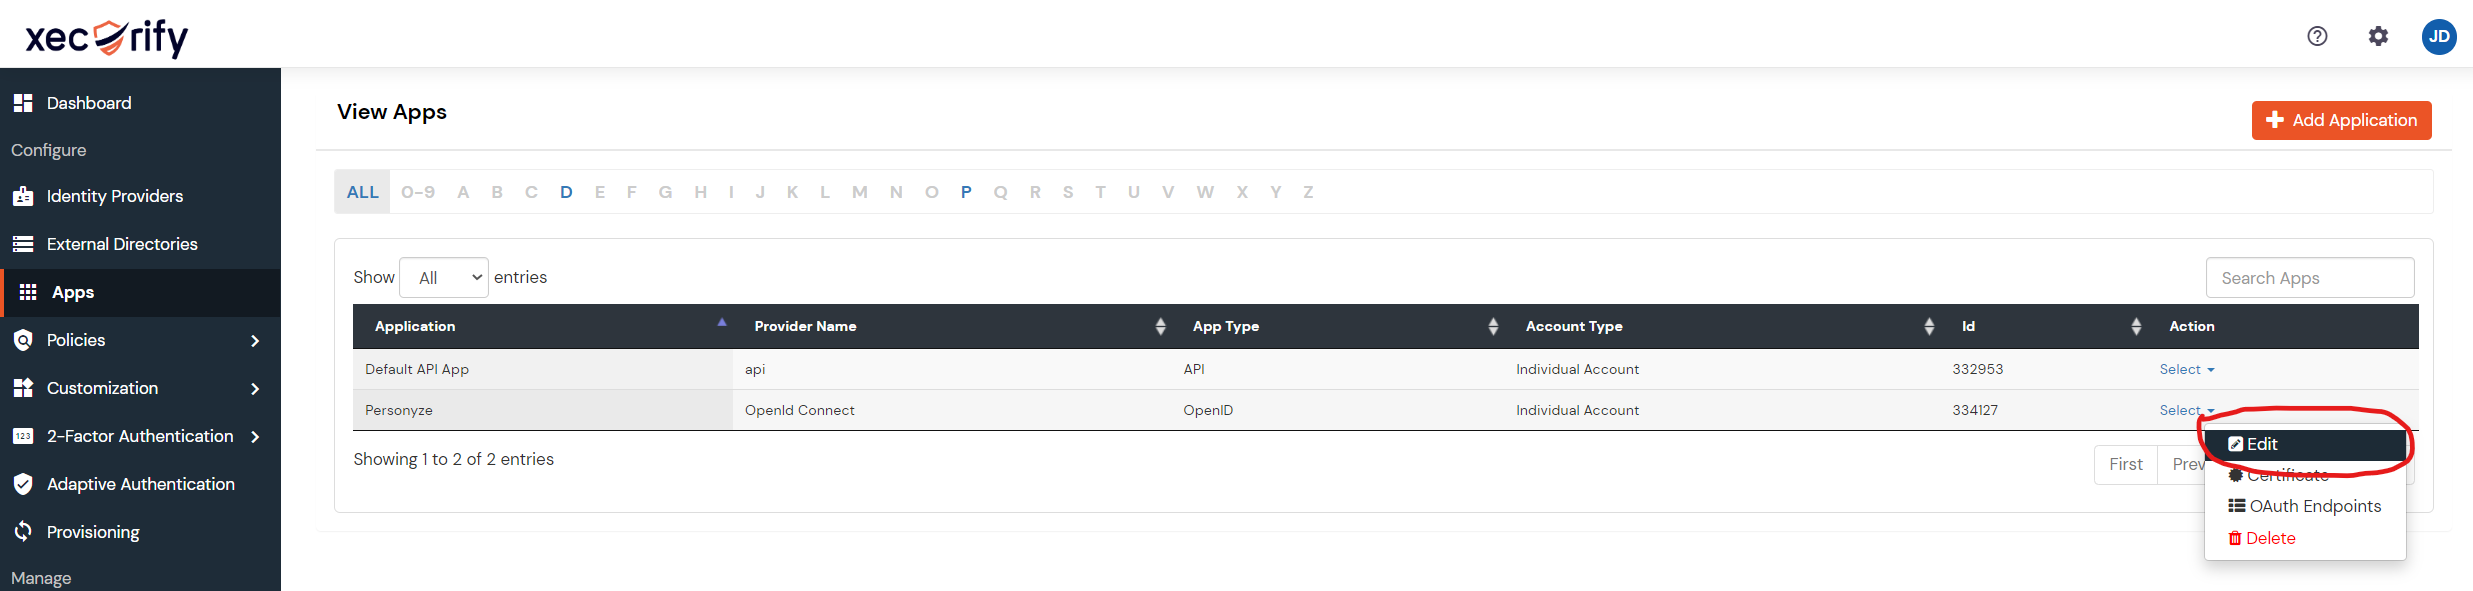
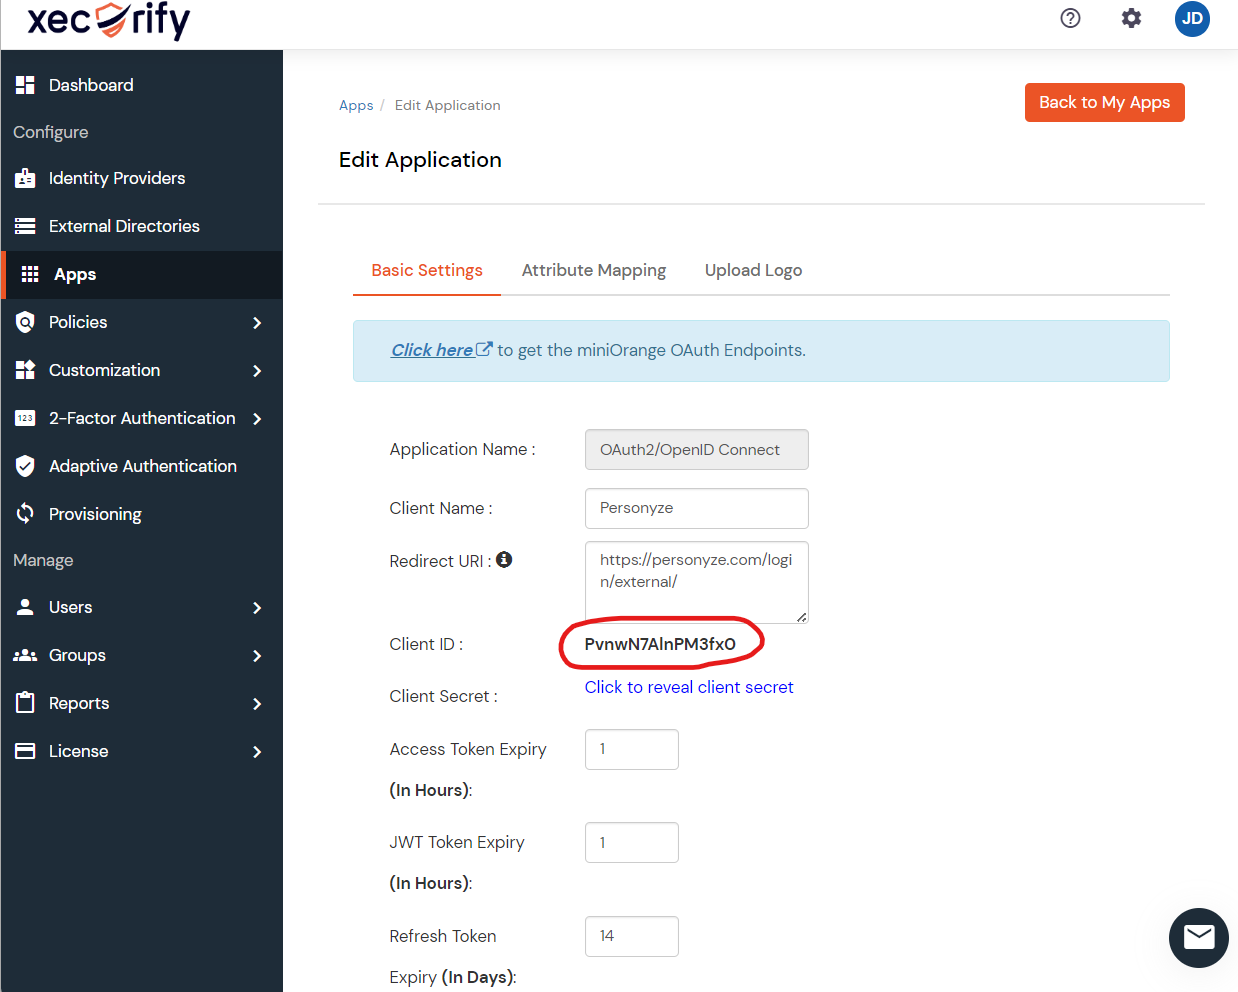
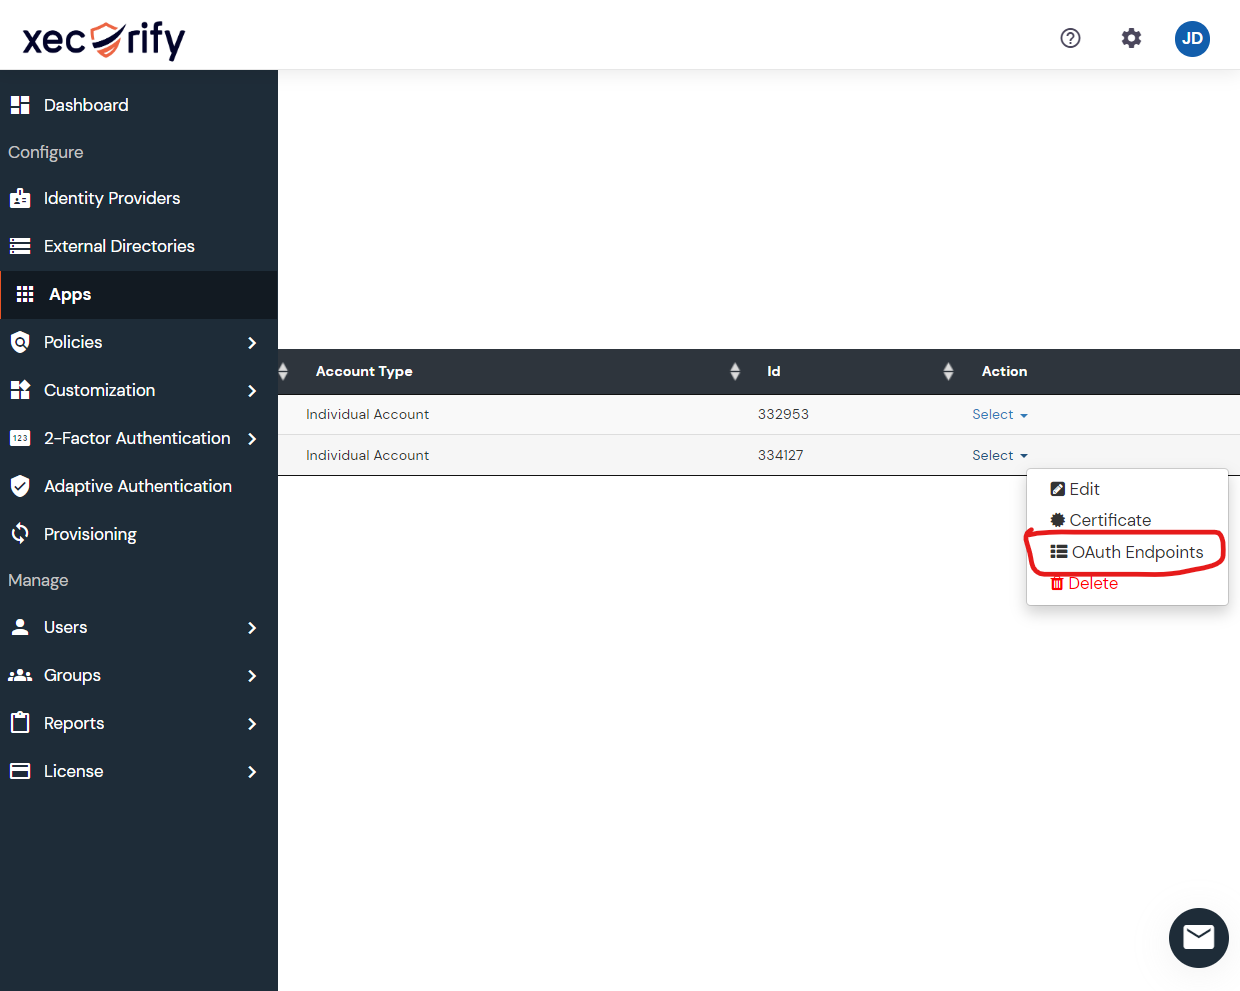
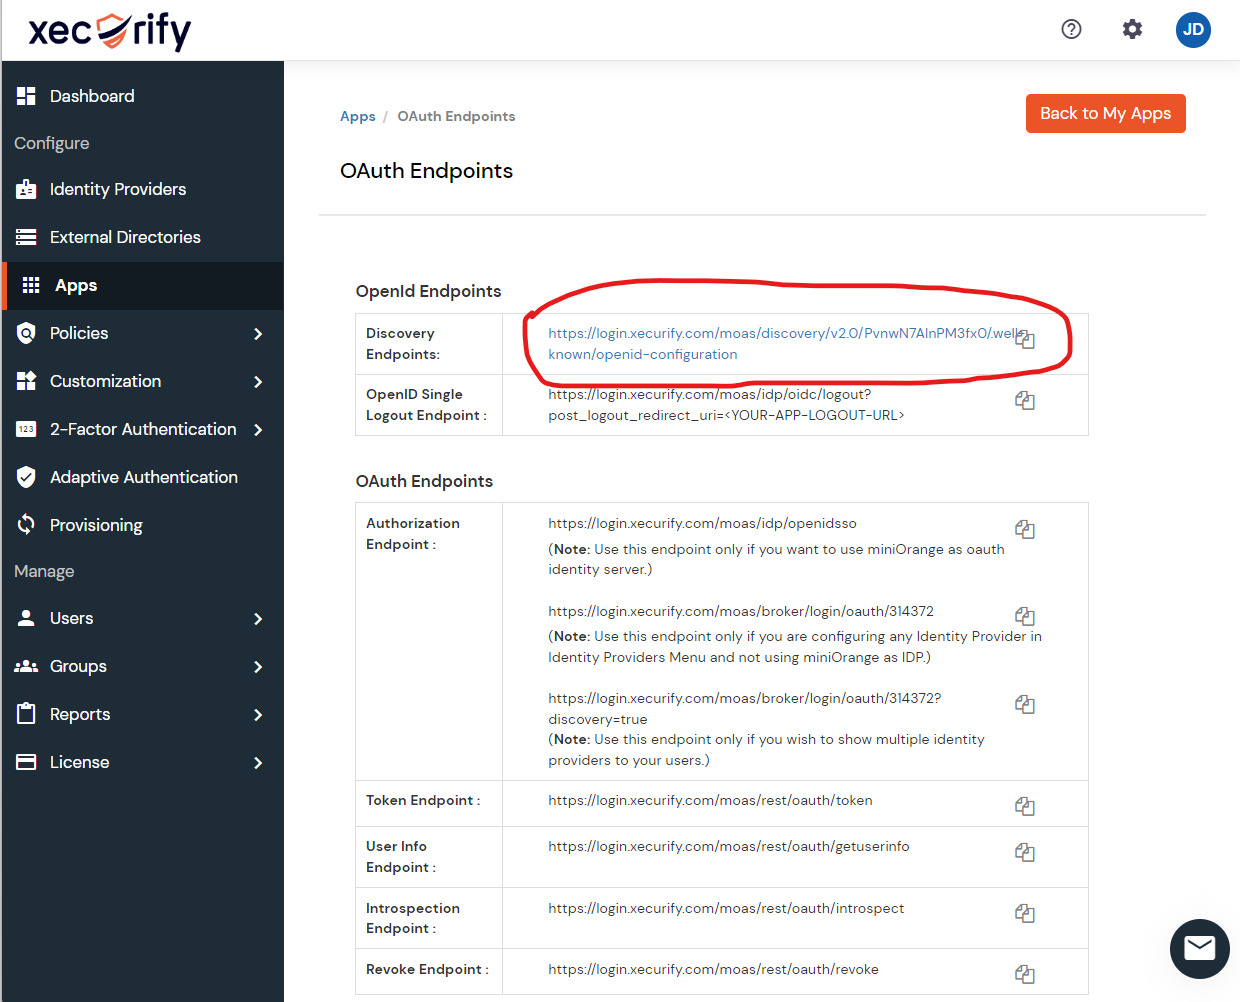
- Enabling SSO using Xecurify (any other SAML 2.0 provider — generic flow)
Common issues
- “Invalid SAML response.” Usually a clock skew between Personyze and your IdP — assertions have a tight validity window. Sync NTP on both sides.
- “User not provisioned.” The email in the SAML assertion doesn’t match an existing Personyze user, and auto-provisioning is disabled. Either pre-create the user in Personyze or enable just-in-time provisioning.
- Login loops back to IdP. The SAML response is reaching Personyze but failing signature validation. Verify the IdP’s signing certificate is correctly uploaded to Personyze’s SSO settings — re-export it from the IdP and re-paste if needed.
- SSO works in test, fails in production. Production typically uses a different ACS URL (Assertion Consumer Service) than test environments. Make sure the SAML application’s reply URL matches the production Personyze ACS.
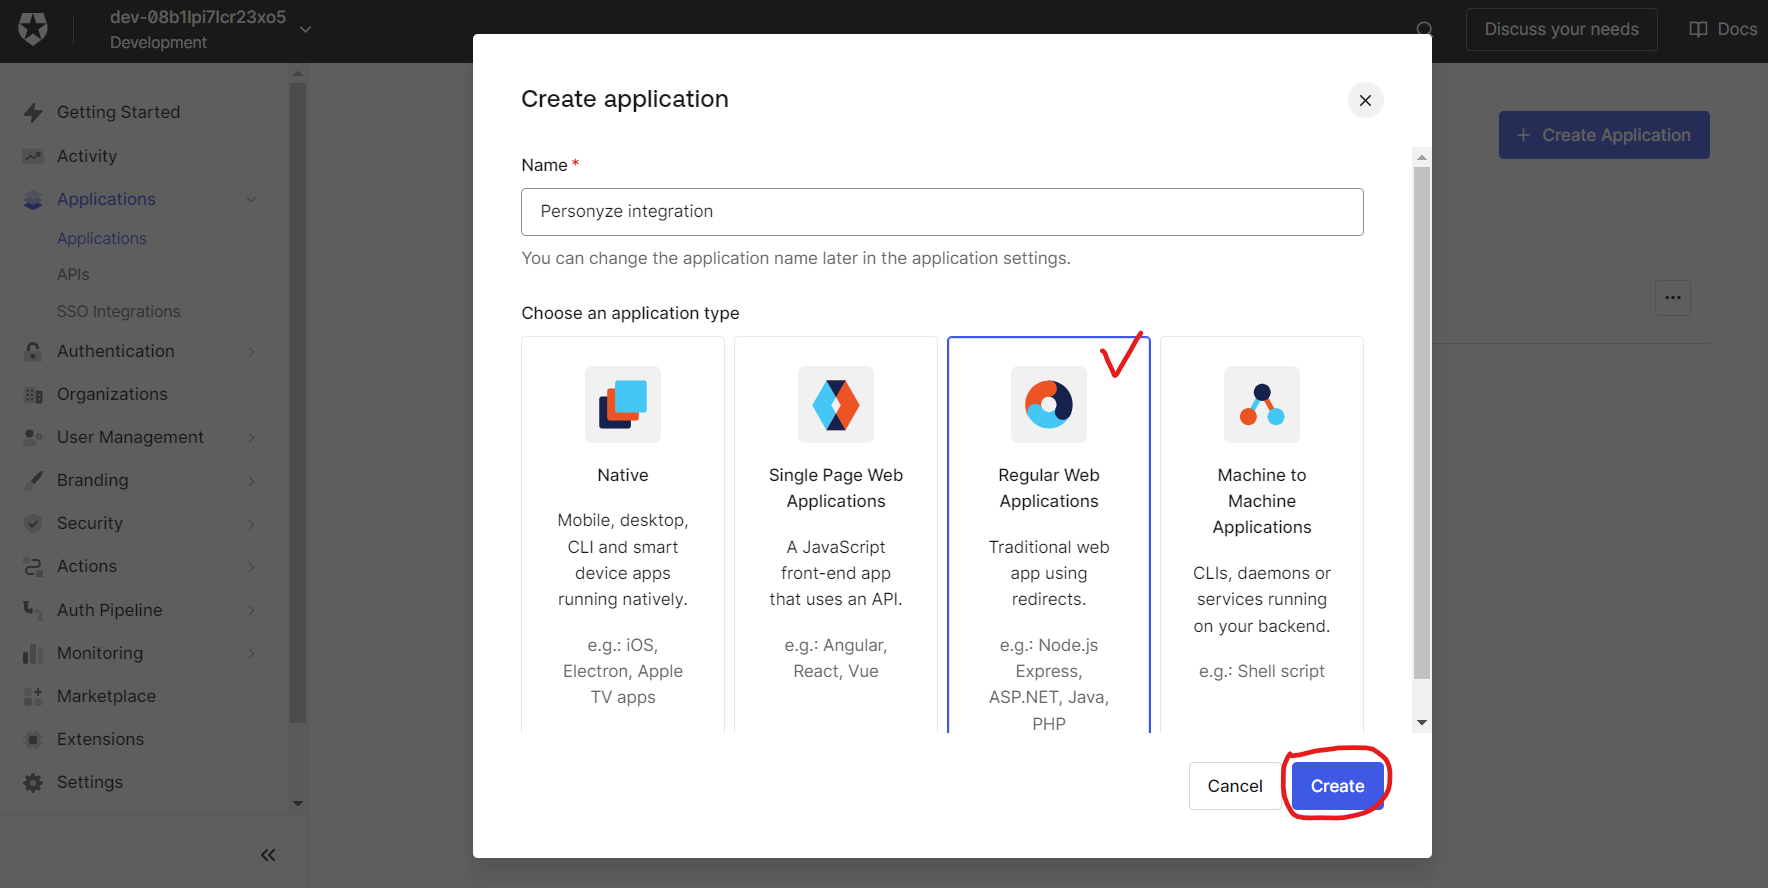
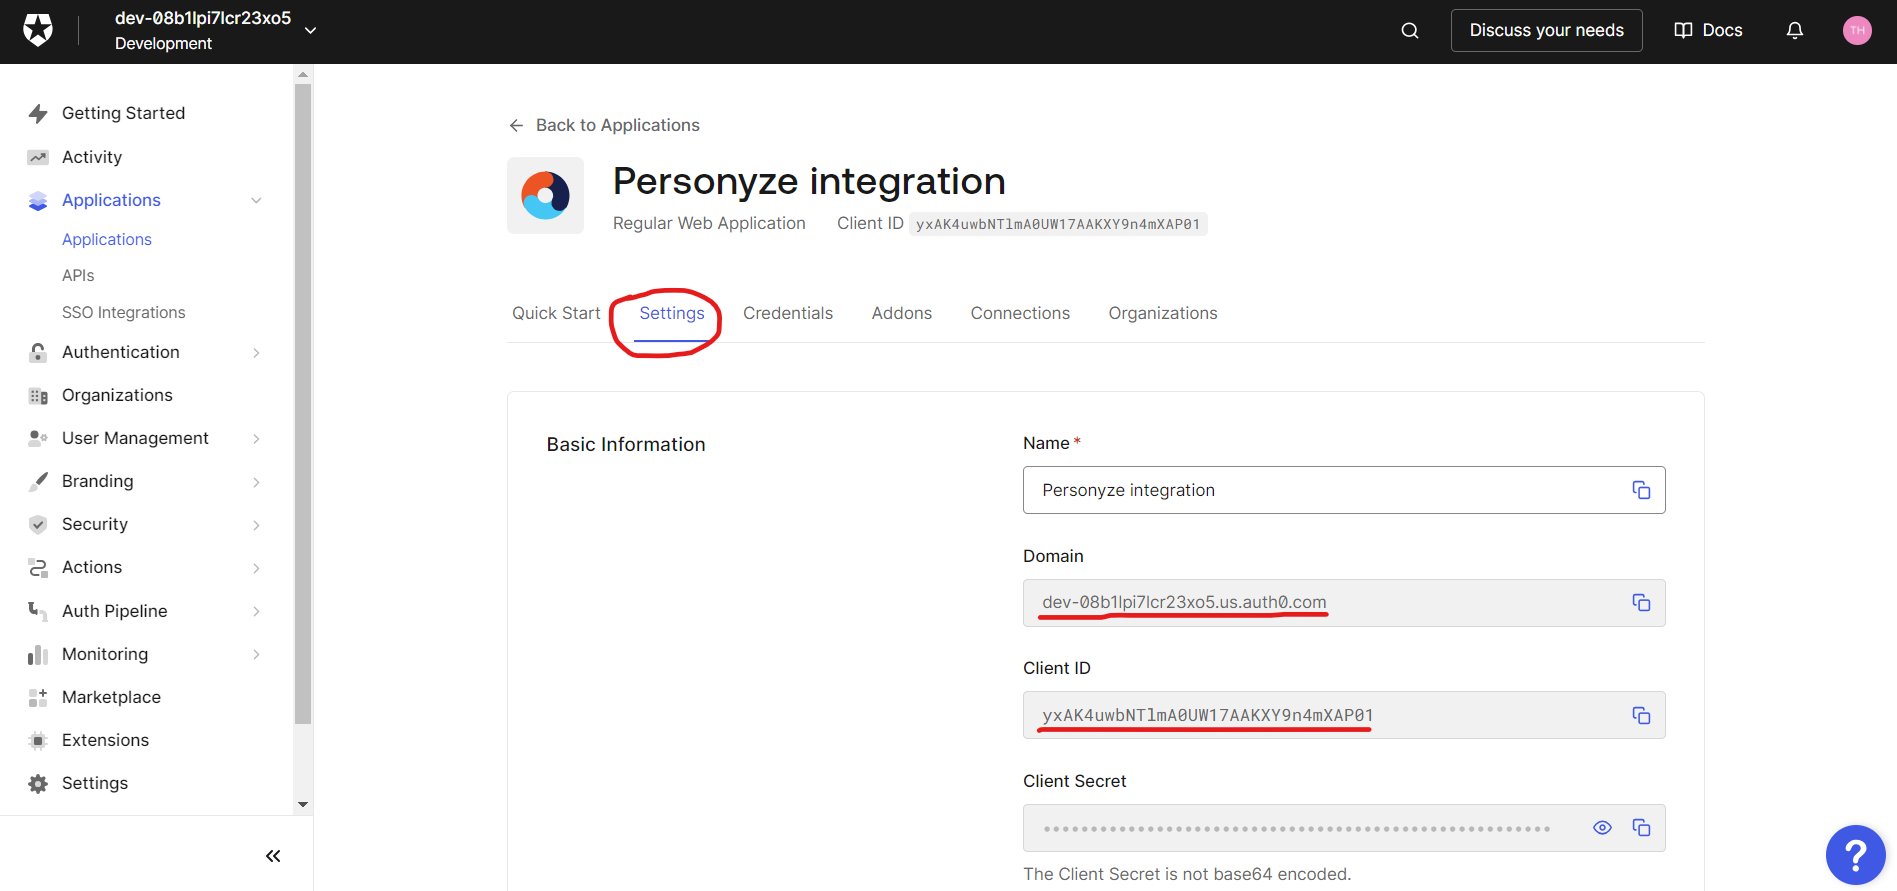
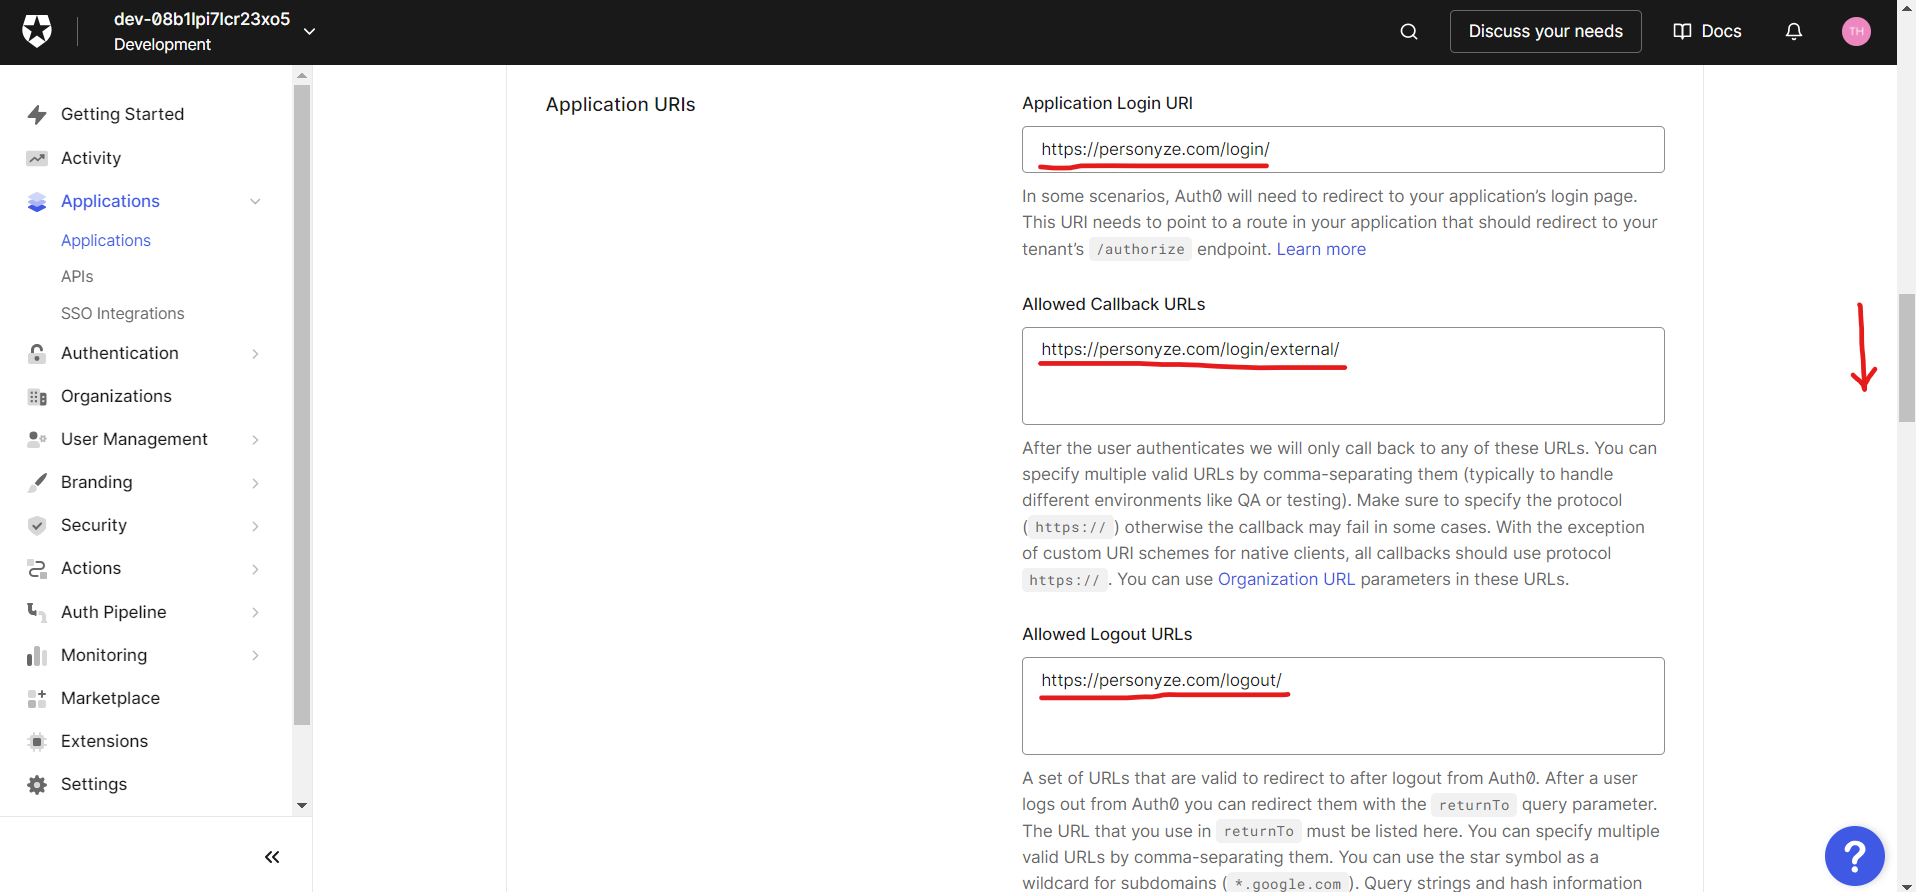
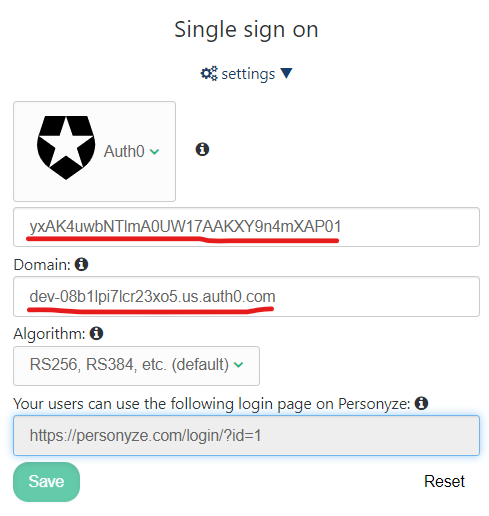
Enabling SSO using Auth0
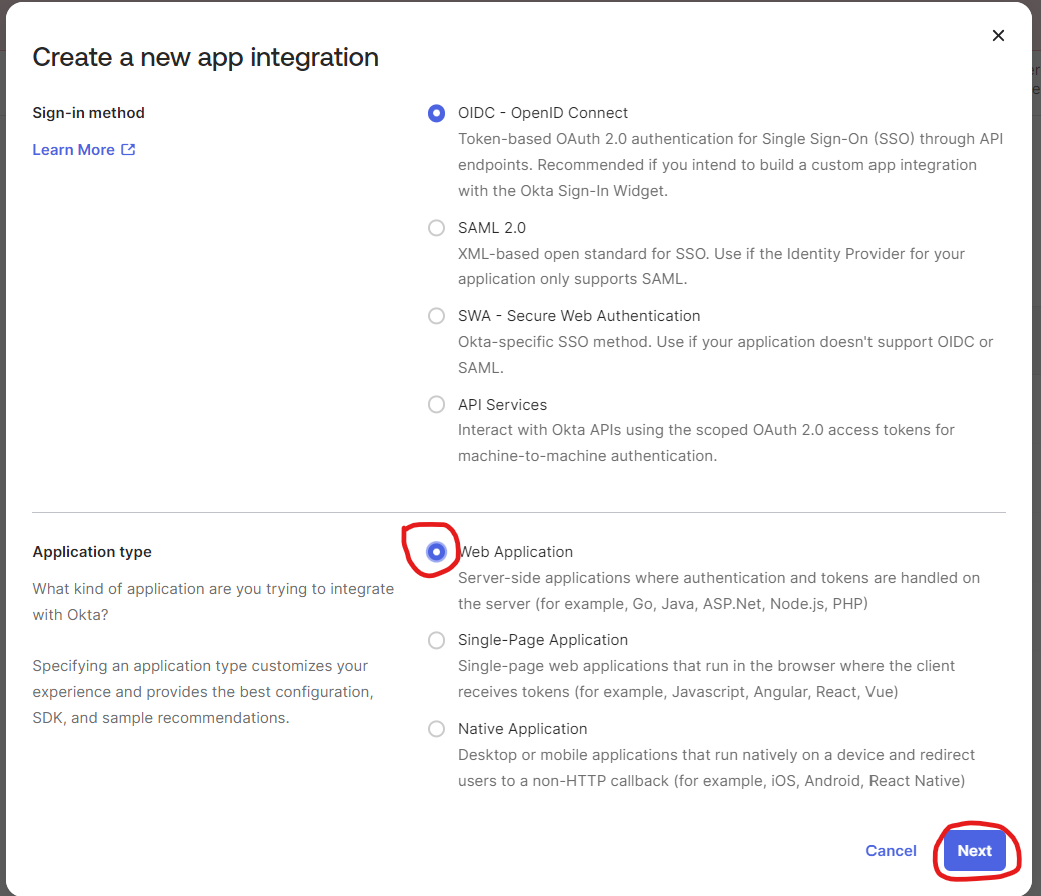
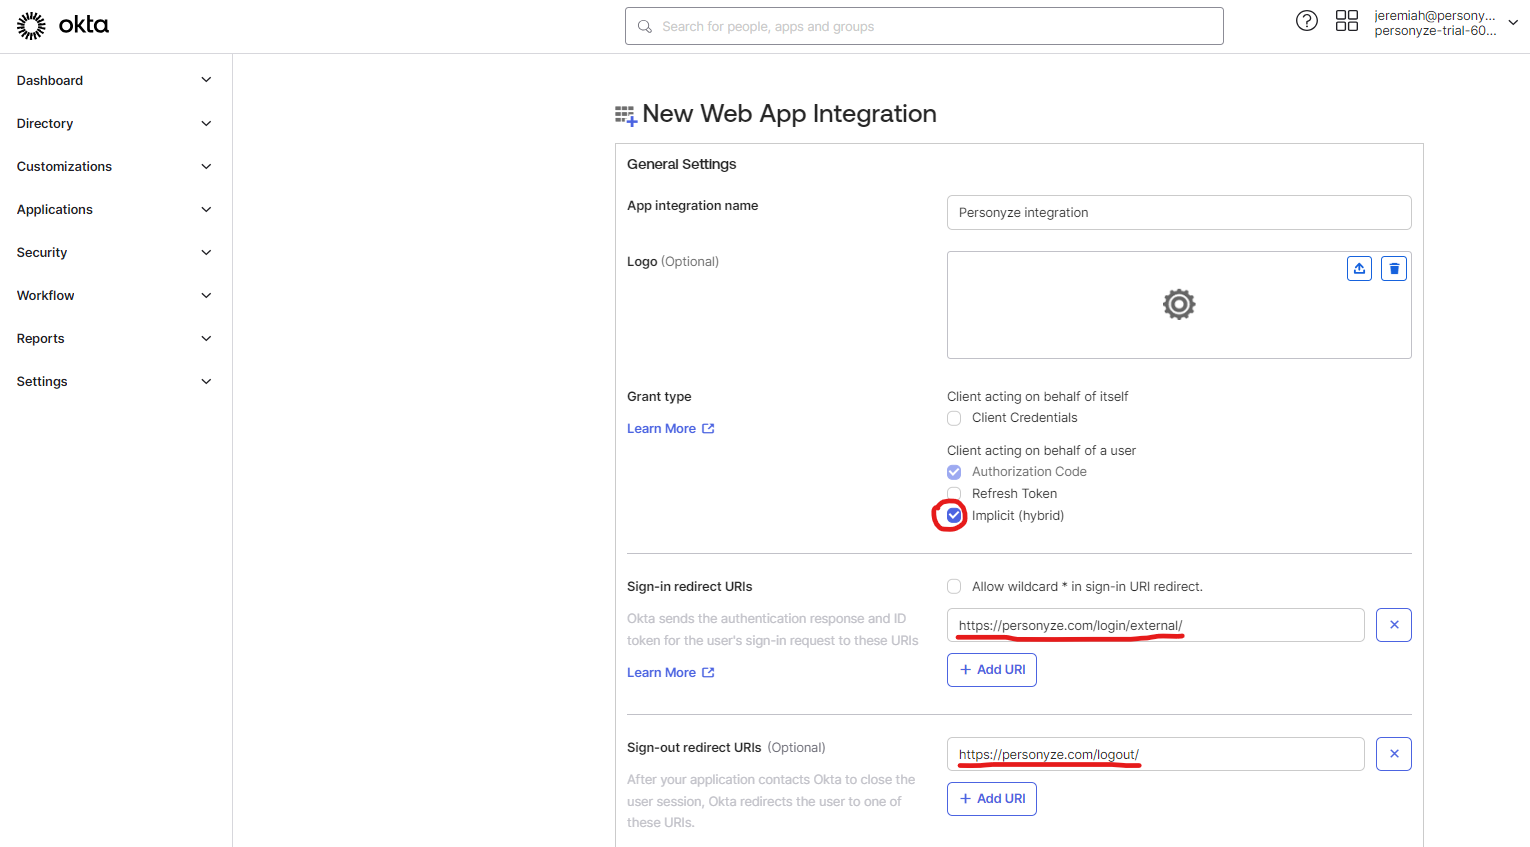
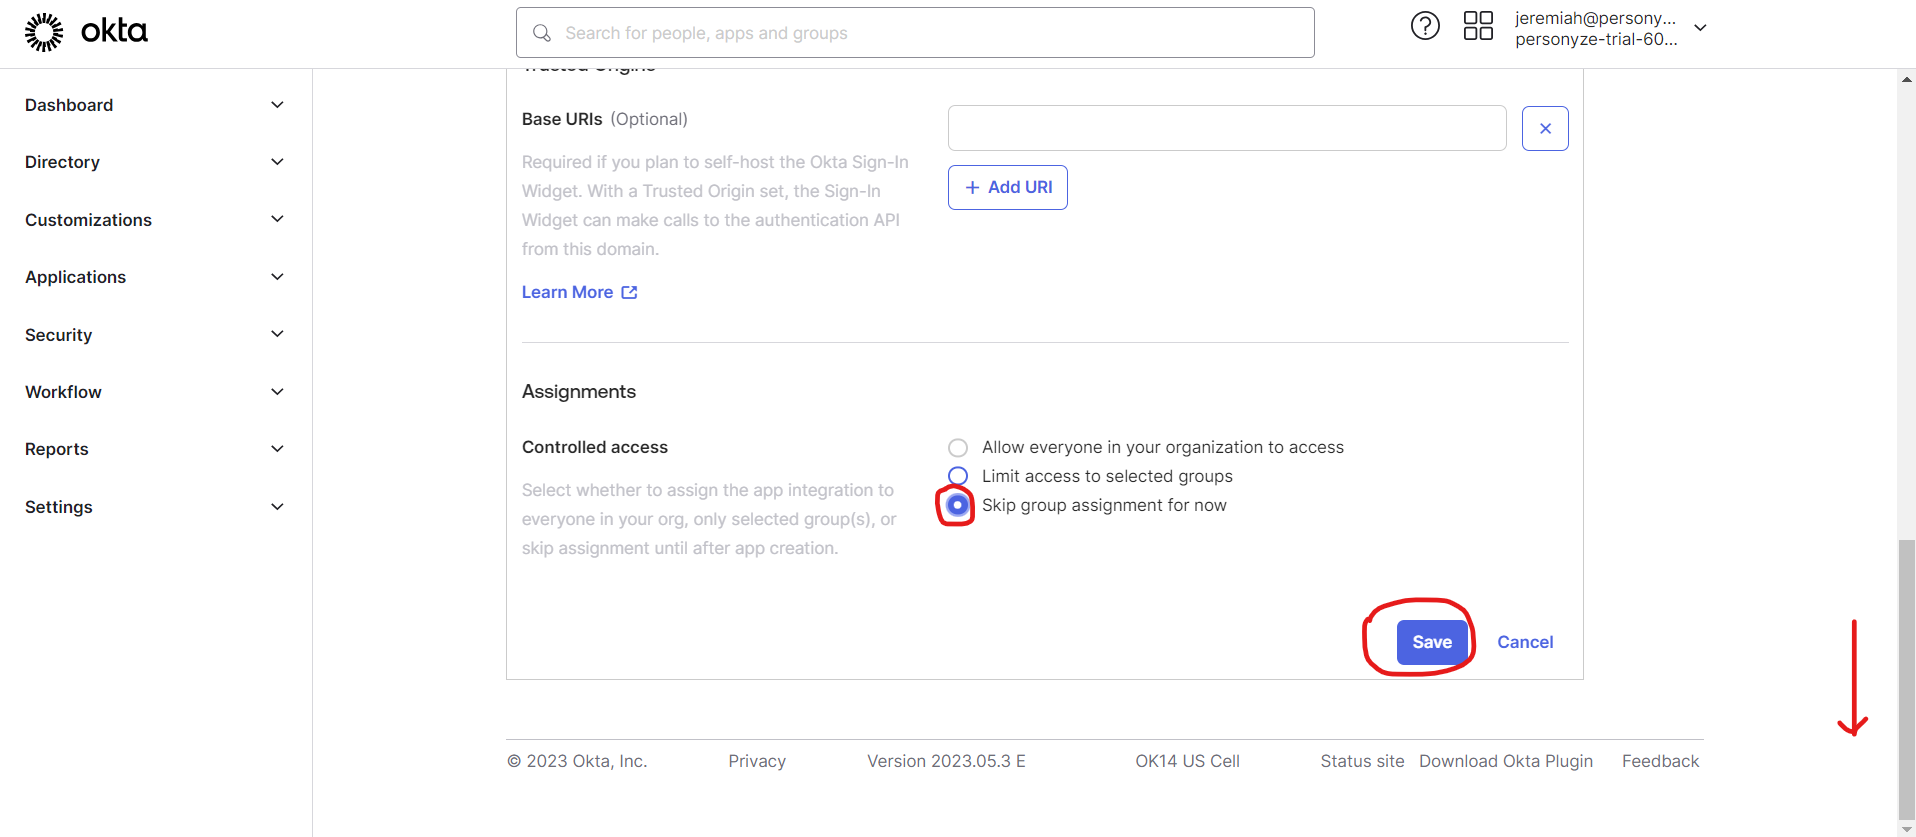
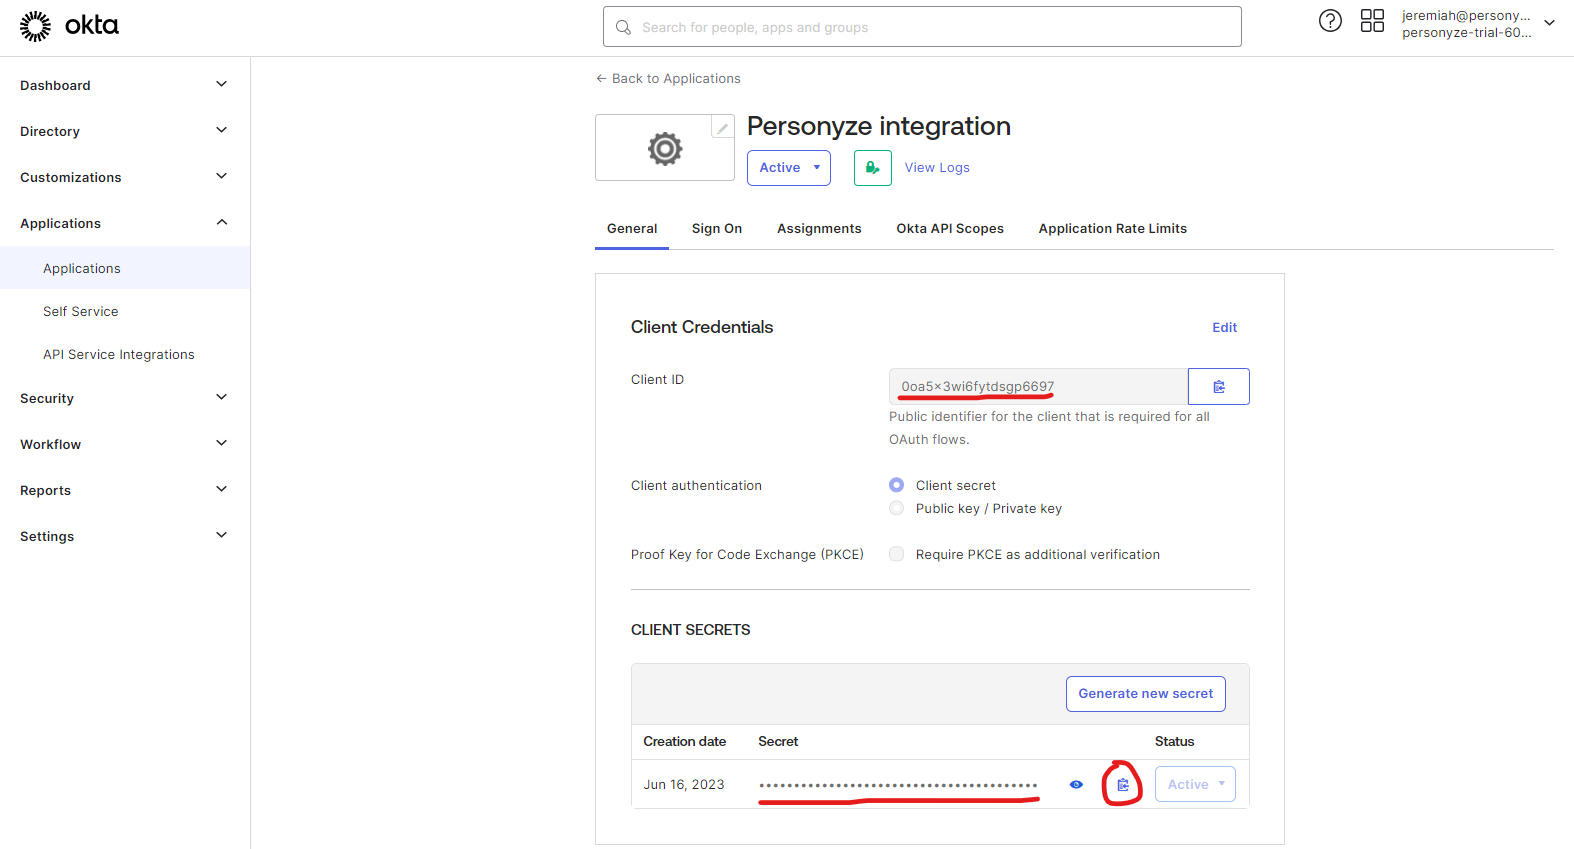
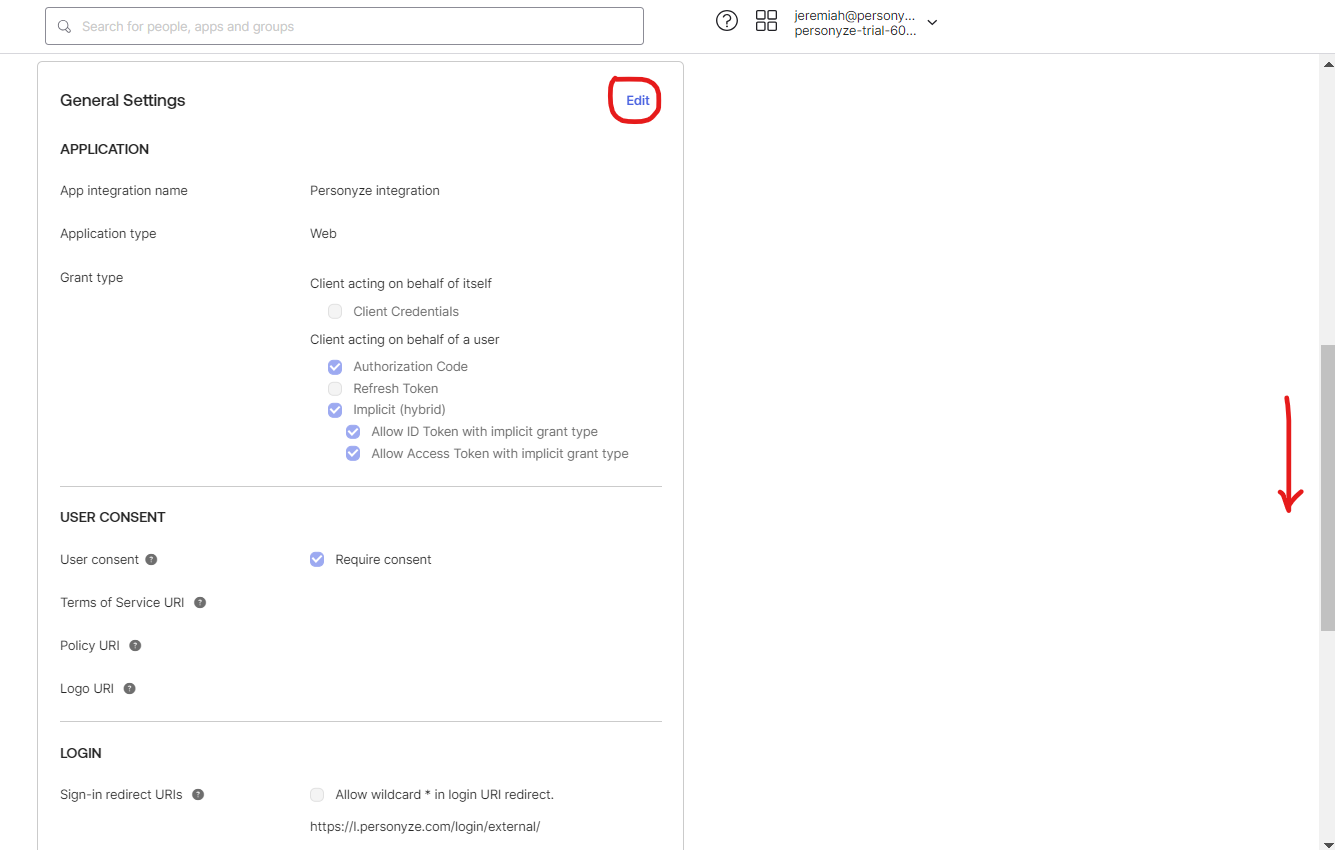
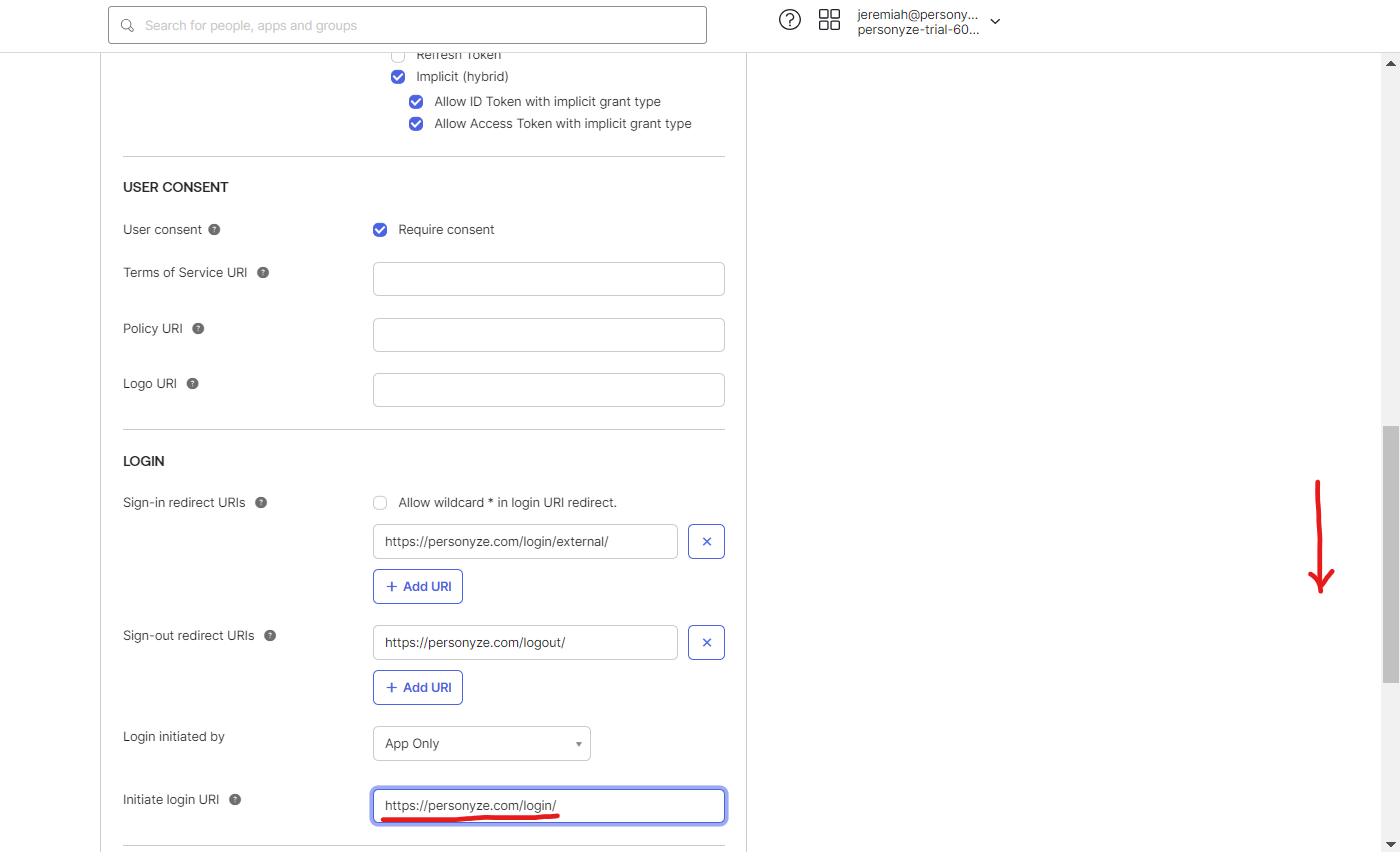
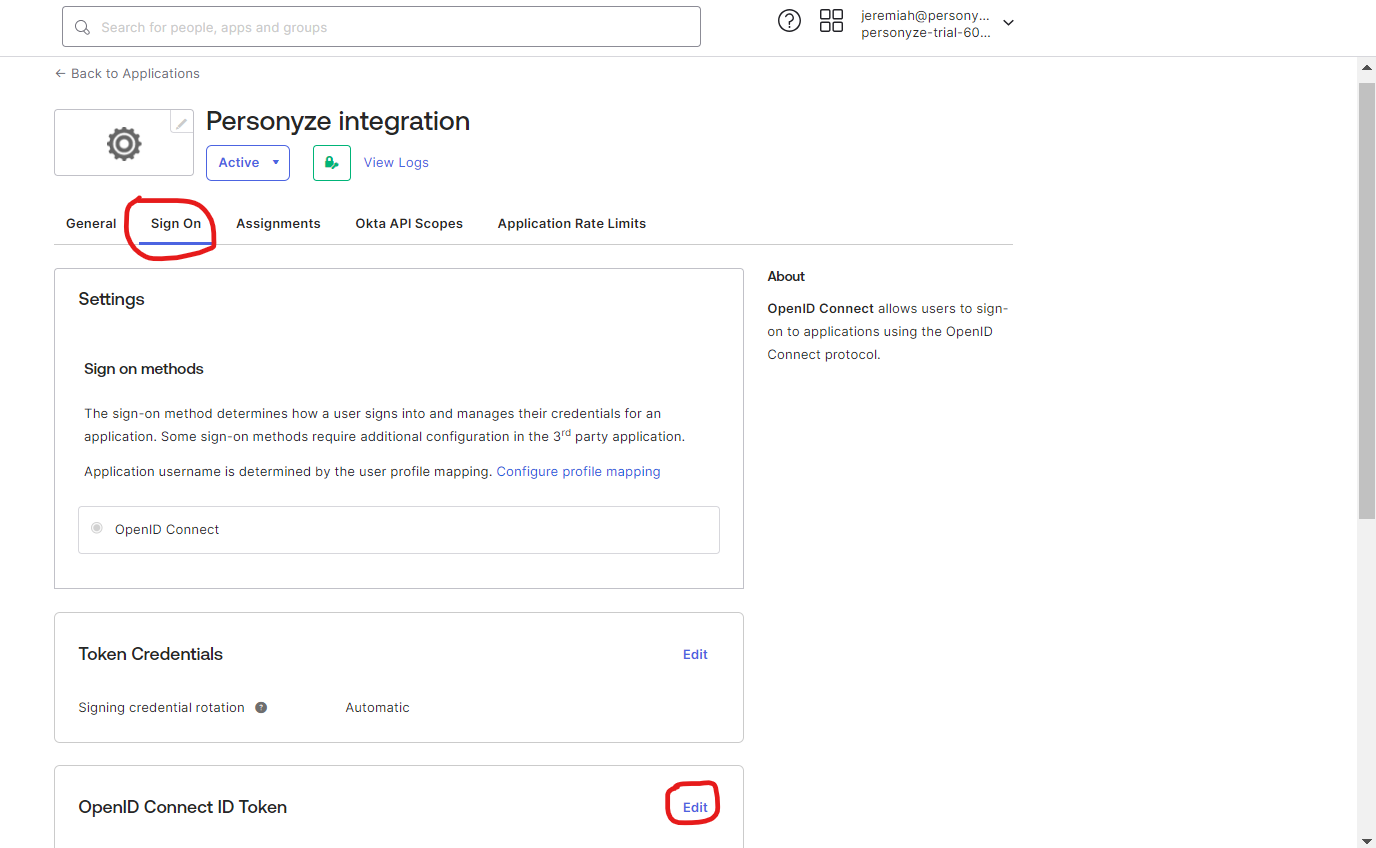
Enabling SSO using Okta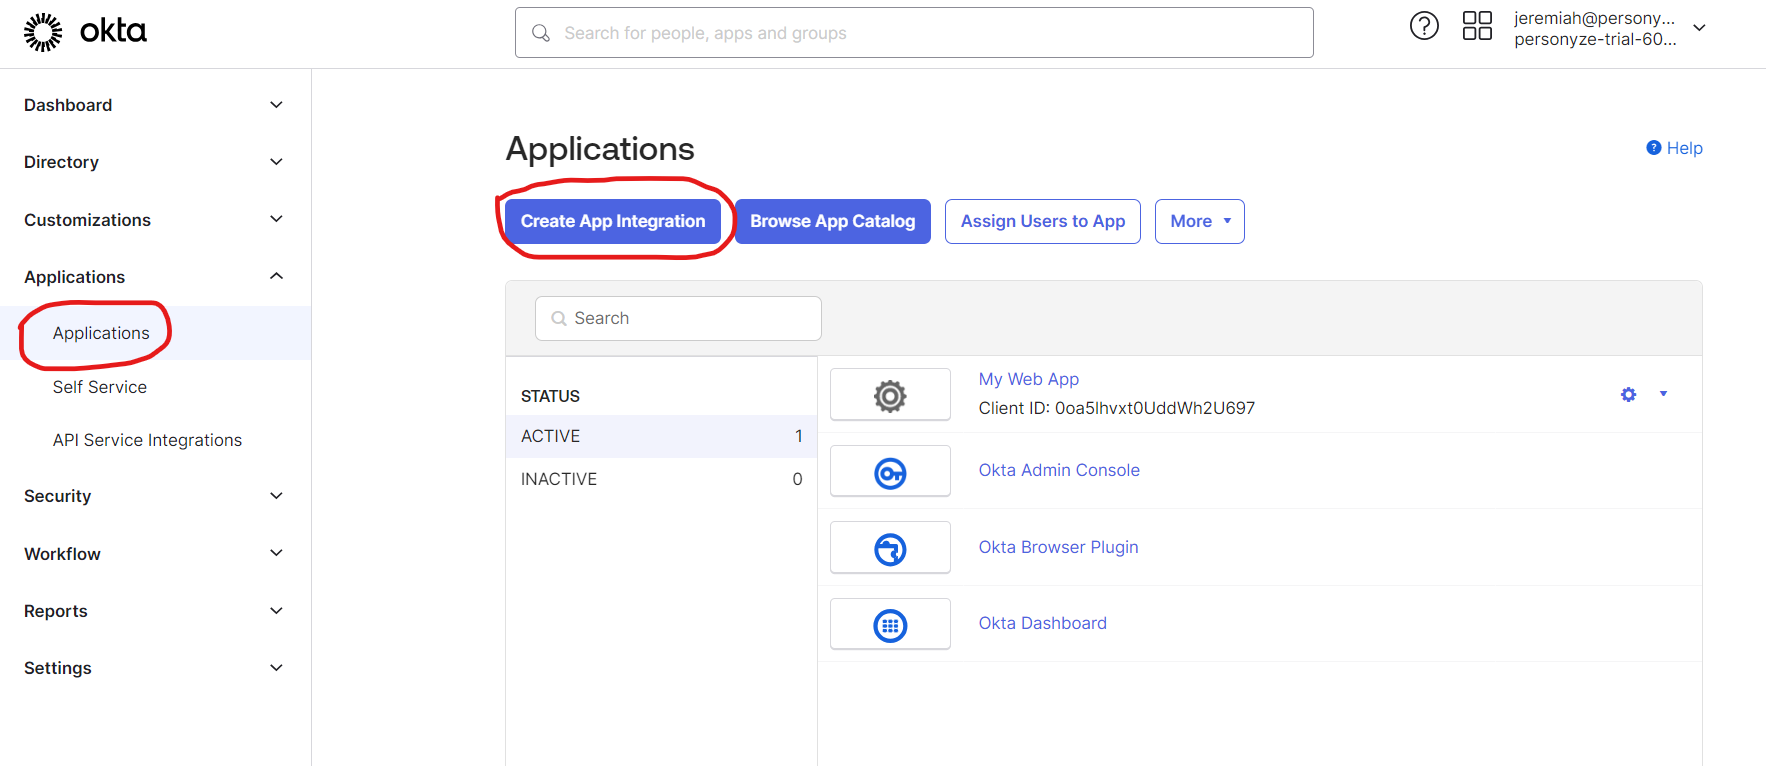

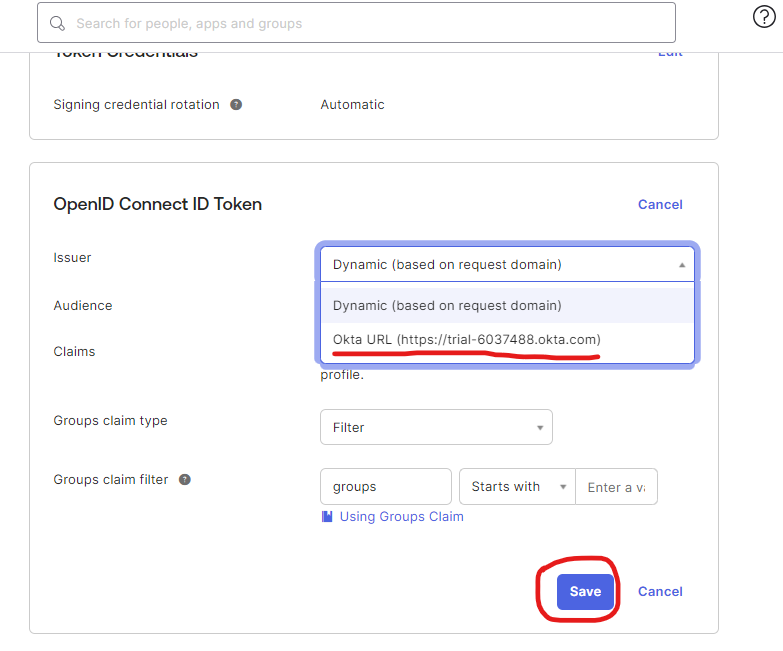

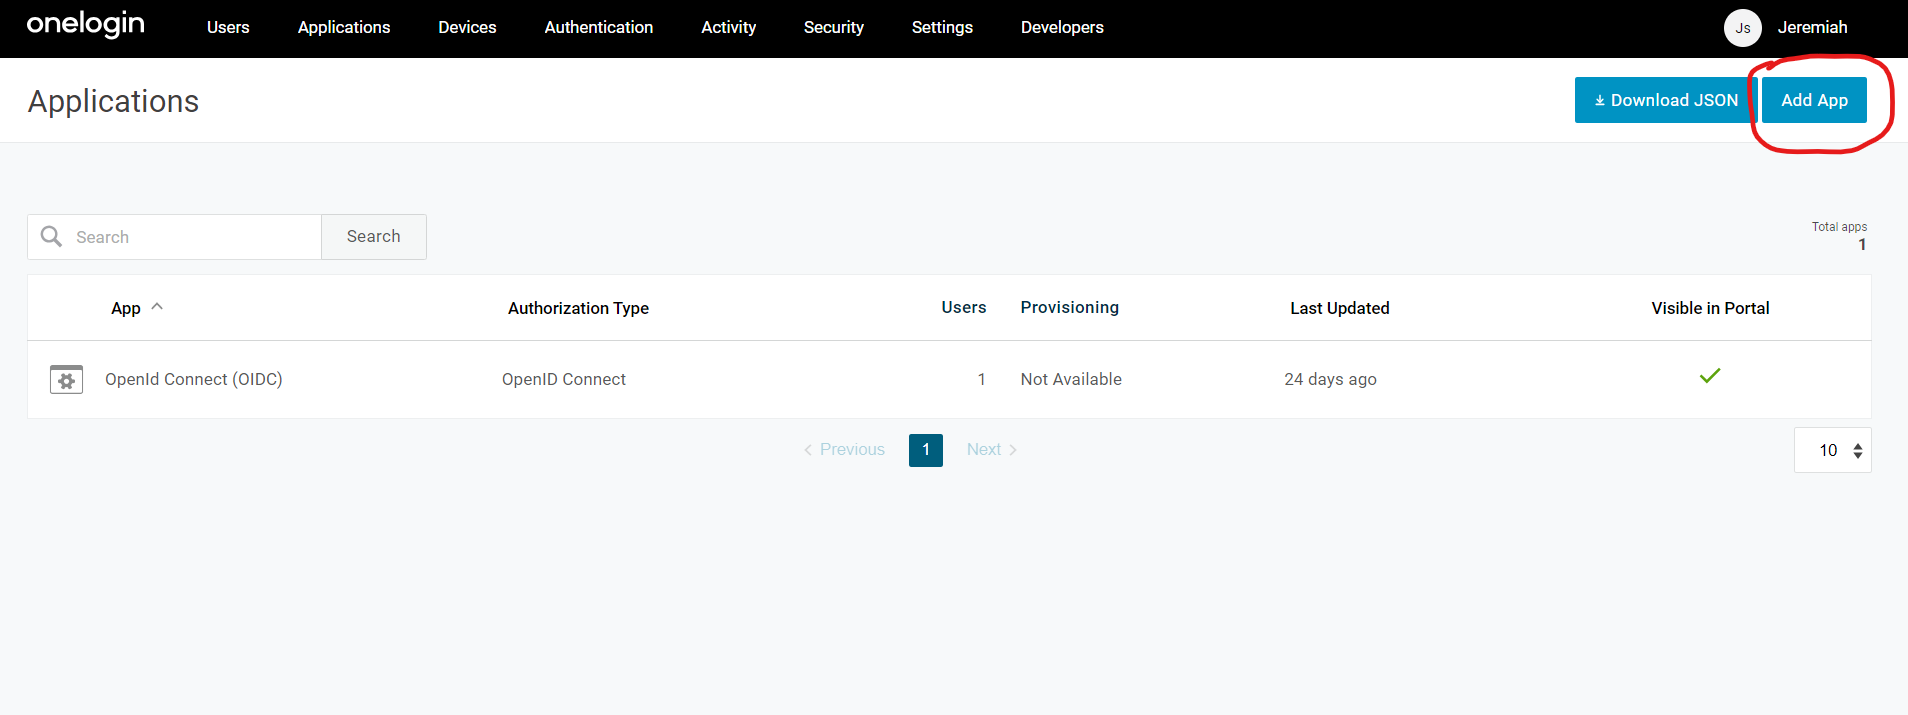
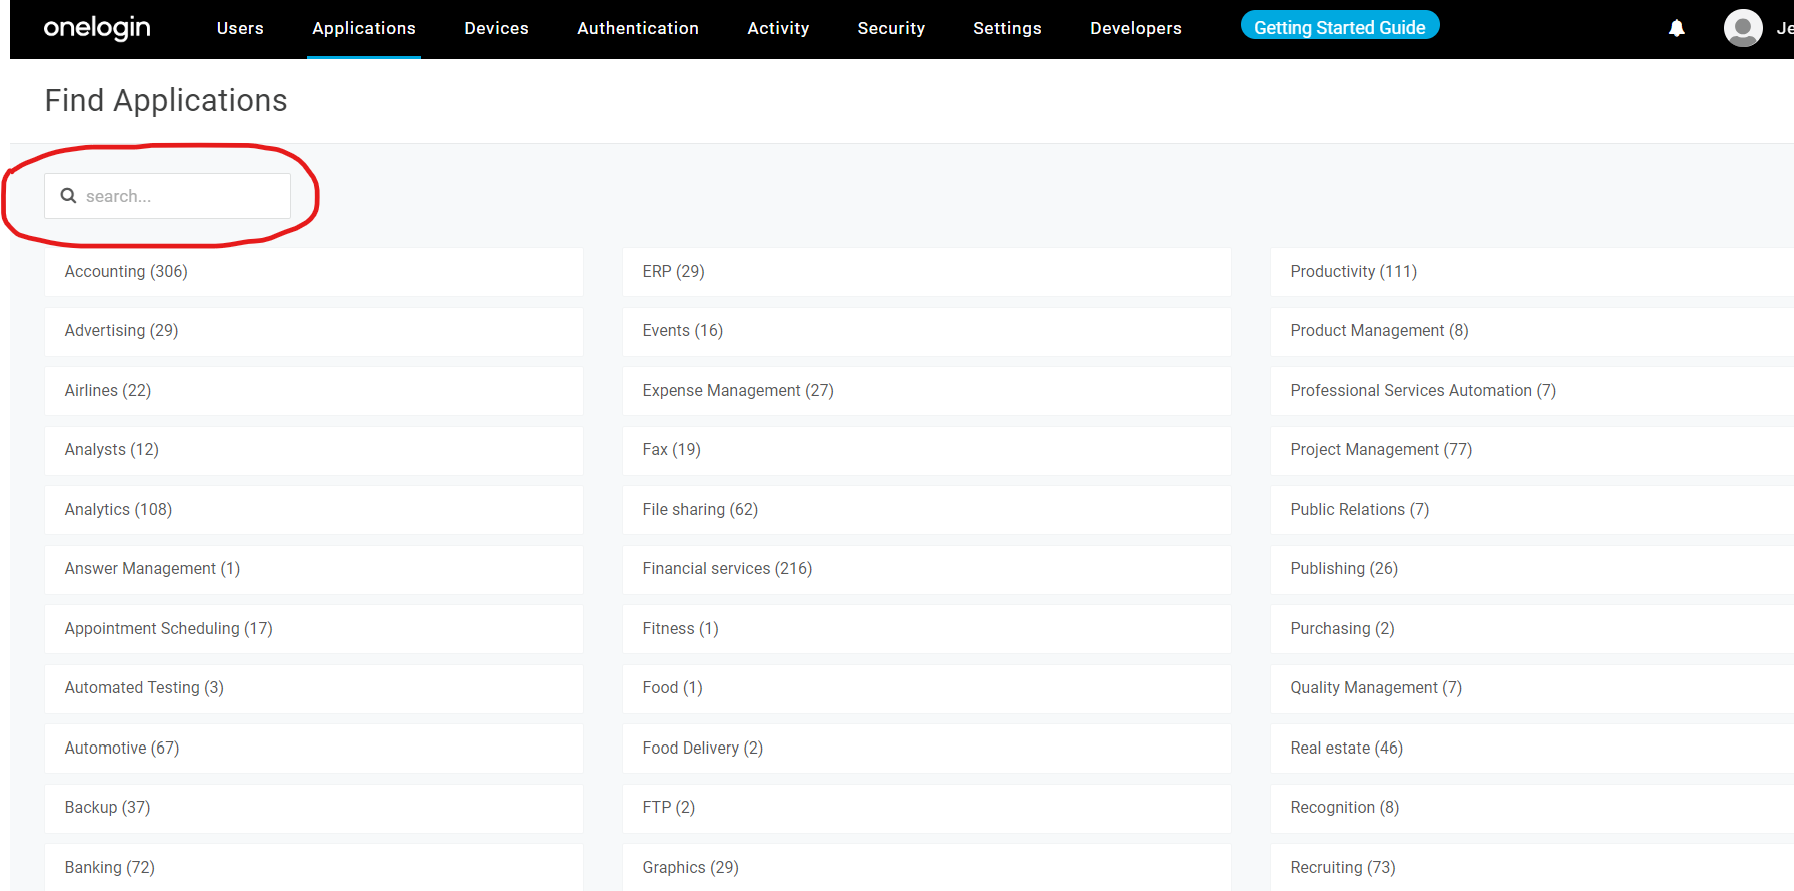
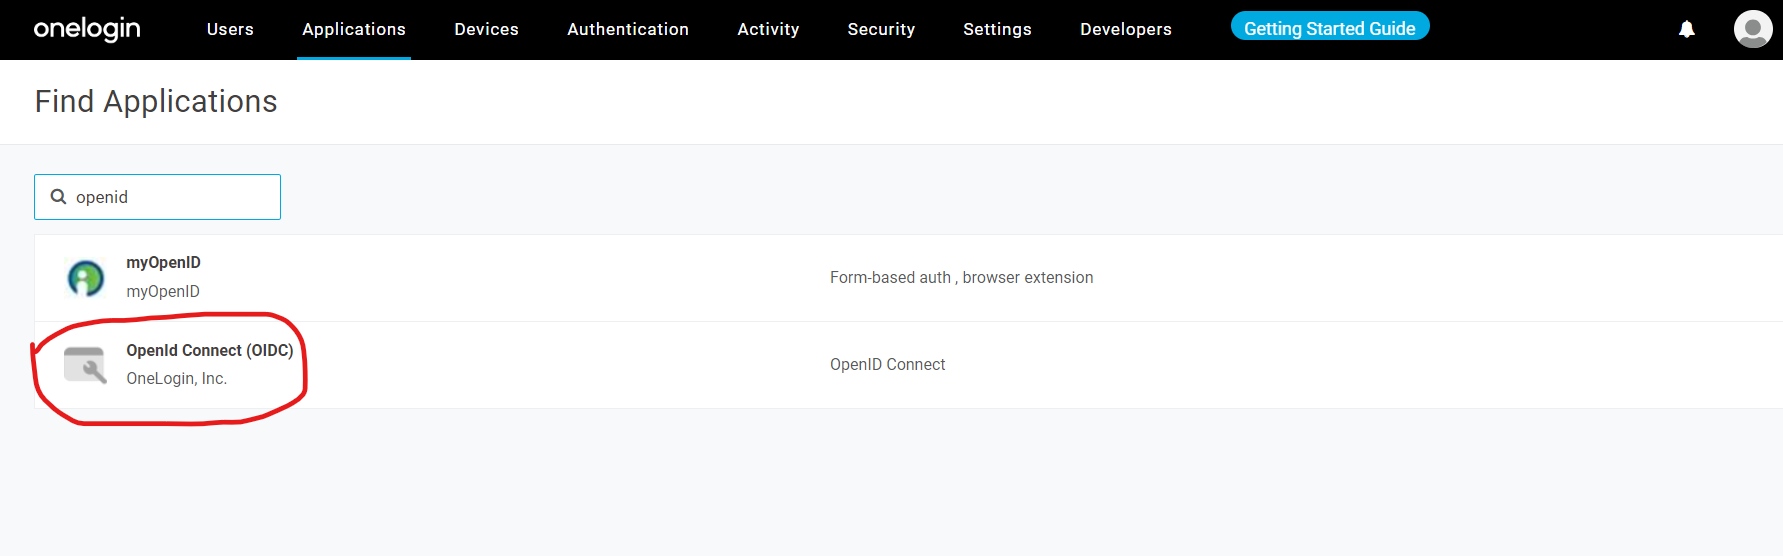
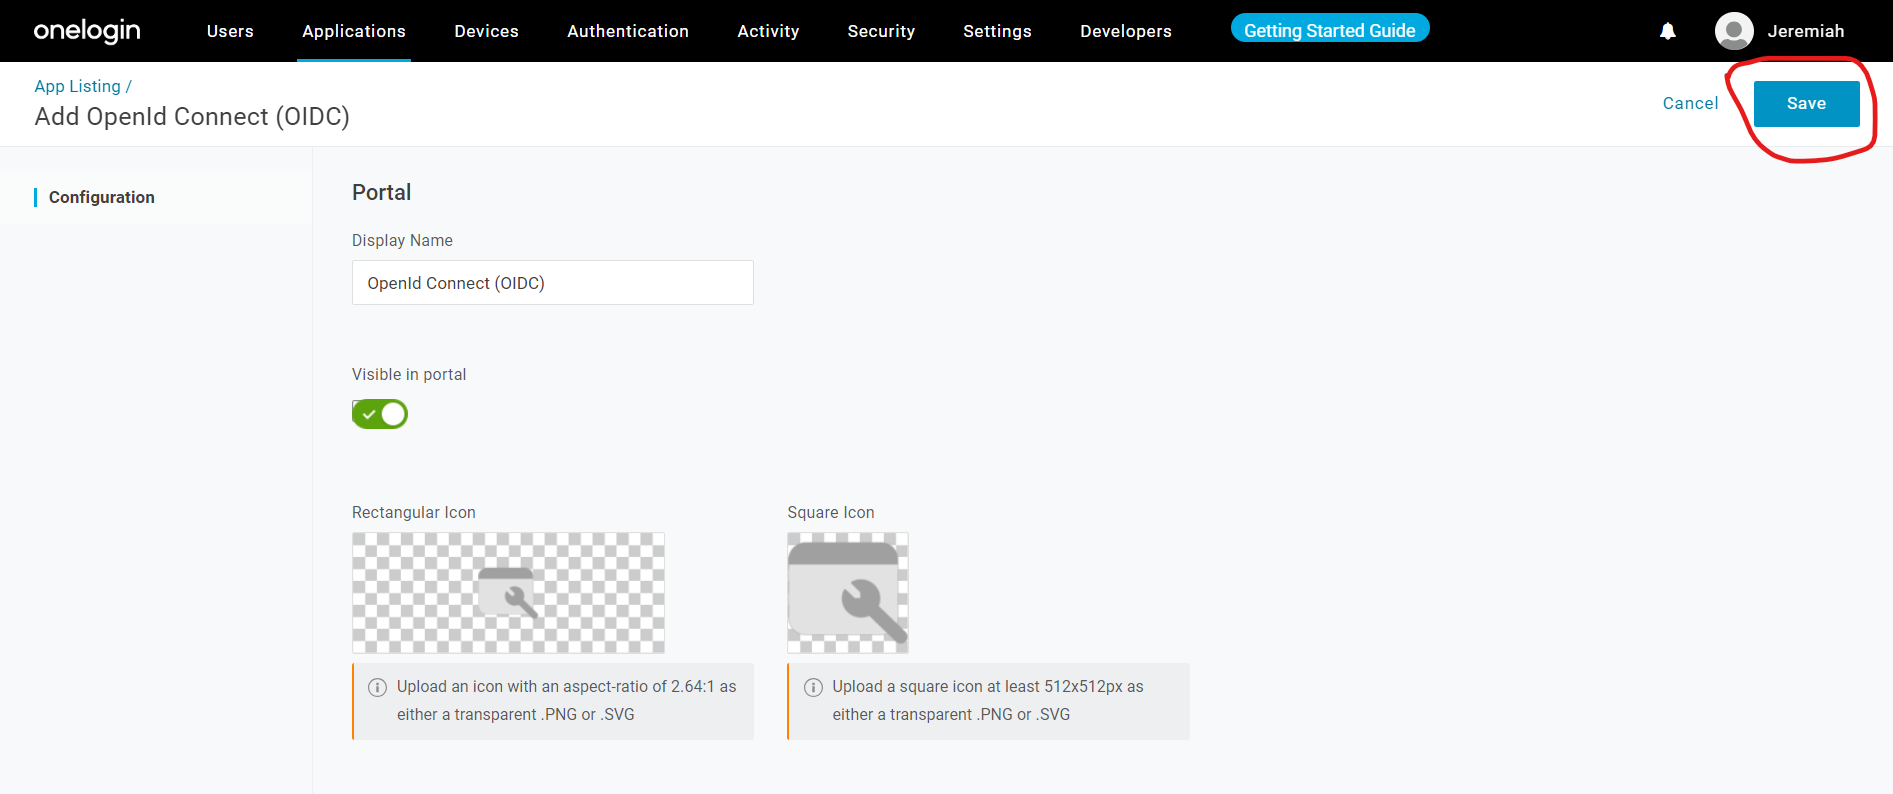
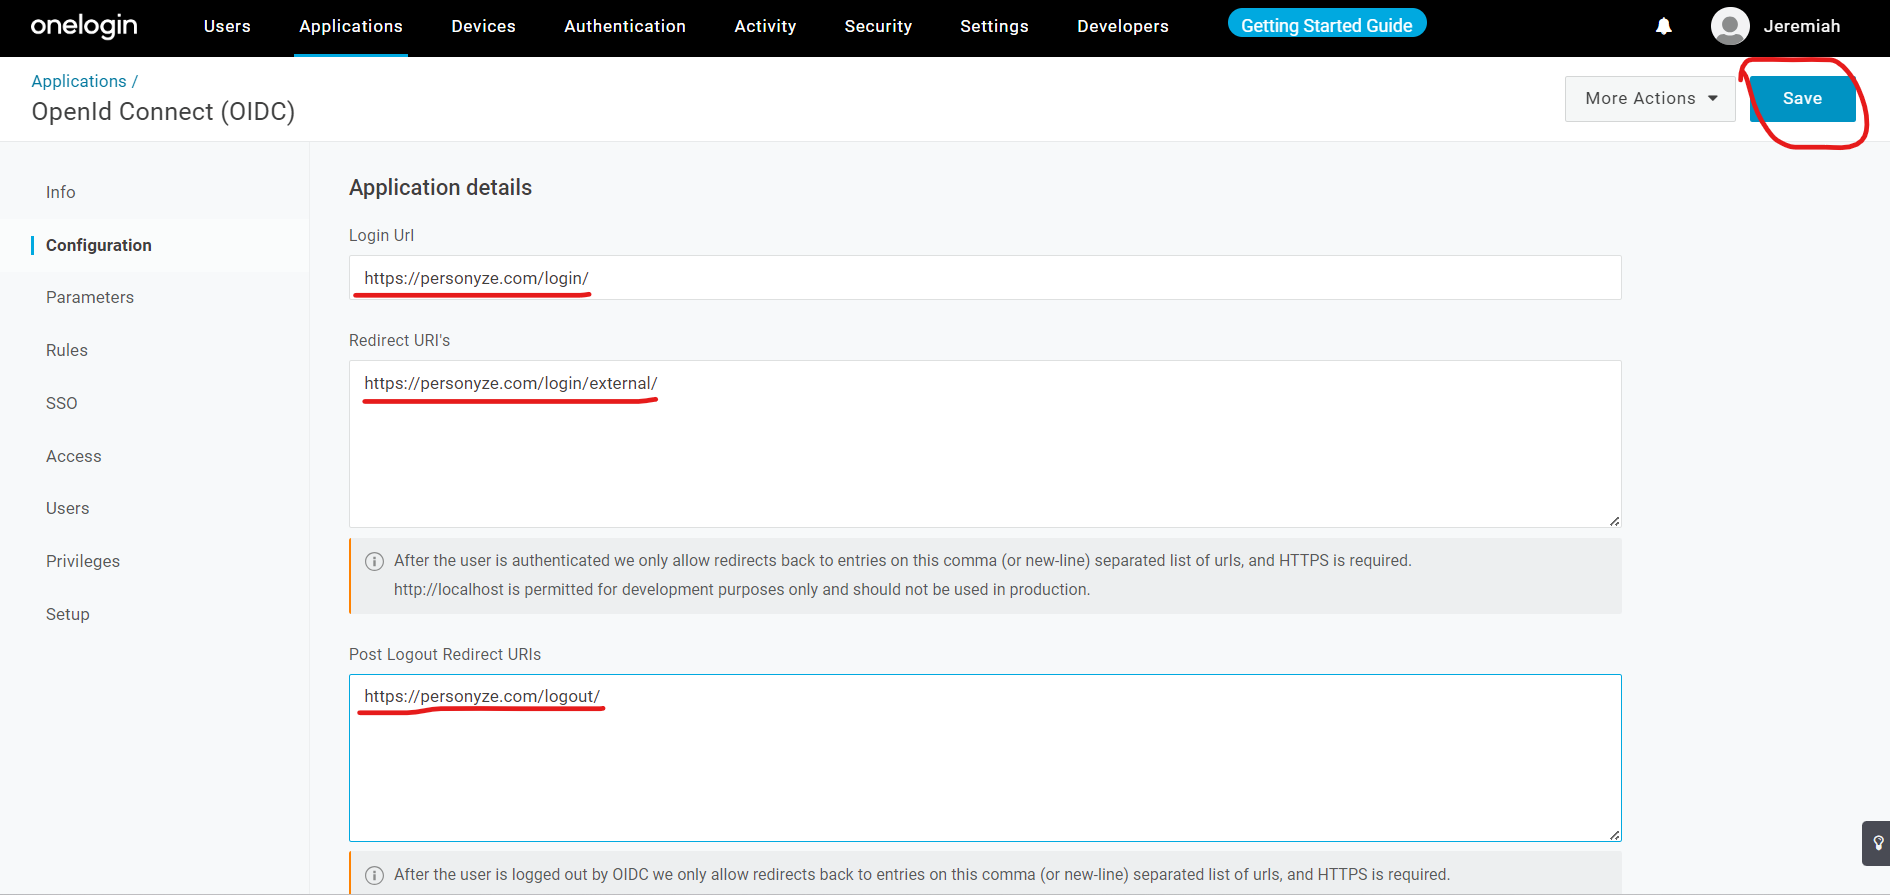
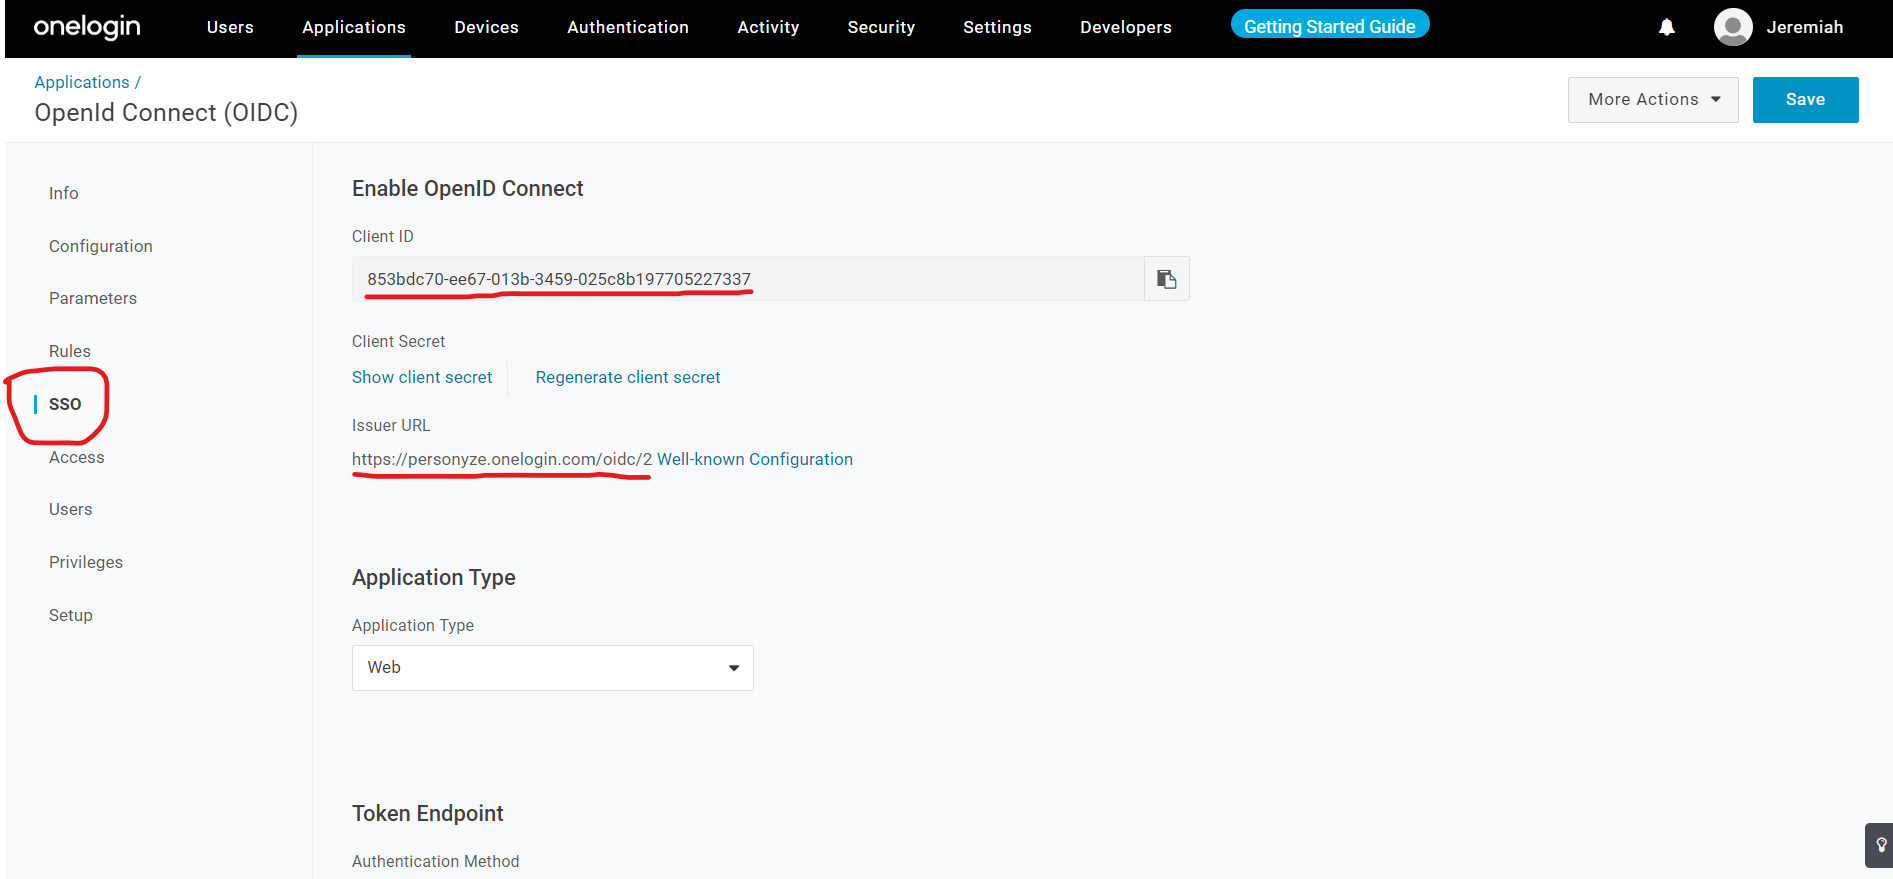
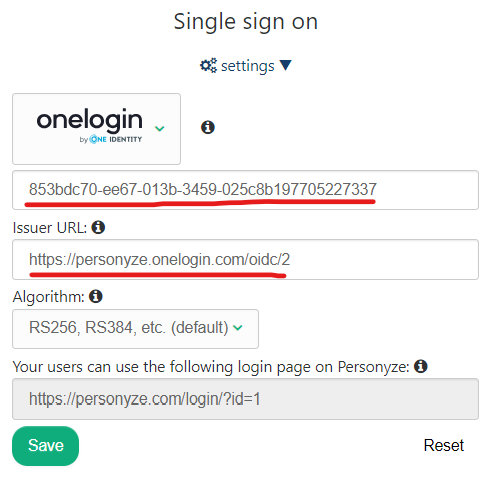
Enabling SSO using Onelogin

Enabling SSO using Xecurify