
CRM / User-List Targeting personalizes your site for people you already know — the contacts in your CRM, the accounts on your ABM list, or any user list you import. Personyze matches the visitor in front of you to their imported record, then lets you target on any field that record carries: account tier, industry, role, plan, renewal date, lifetime value — anything you can put in a spreadsheet column.
Watch the 2:27 walkthrough: the Your people step — the identifiers that recognise a visitor, the list that says who they are, and greeting them by name.
In the panel this campaign type lives under New campaign › CRM / User-List Targeting.
Before you start
The campaign needs two things: a list of your people, and a way to recognise one of them on your site — an email address or a CRM ID that your pages capture. Both are set up on the campaign’s first step.
On an account with no list yet, the campaign’s card in New campaign reads Needs a user list, and Connect a list beside it opens Settings › Imported user data. You can still build and save the campaign: it just won’t run until then.
The steps
The campaign has six steps: Your people, Target, Content, QA, Automation and Performance.
1. Your people
The first step answers one question from two ends: who you are bringing in, and how Personyze spots one of them on your site. Either half alone matches nobody — an identifier with no list, or a list with no identifier — which is why they are one step.
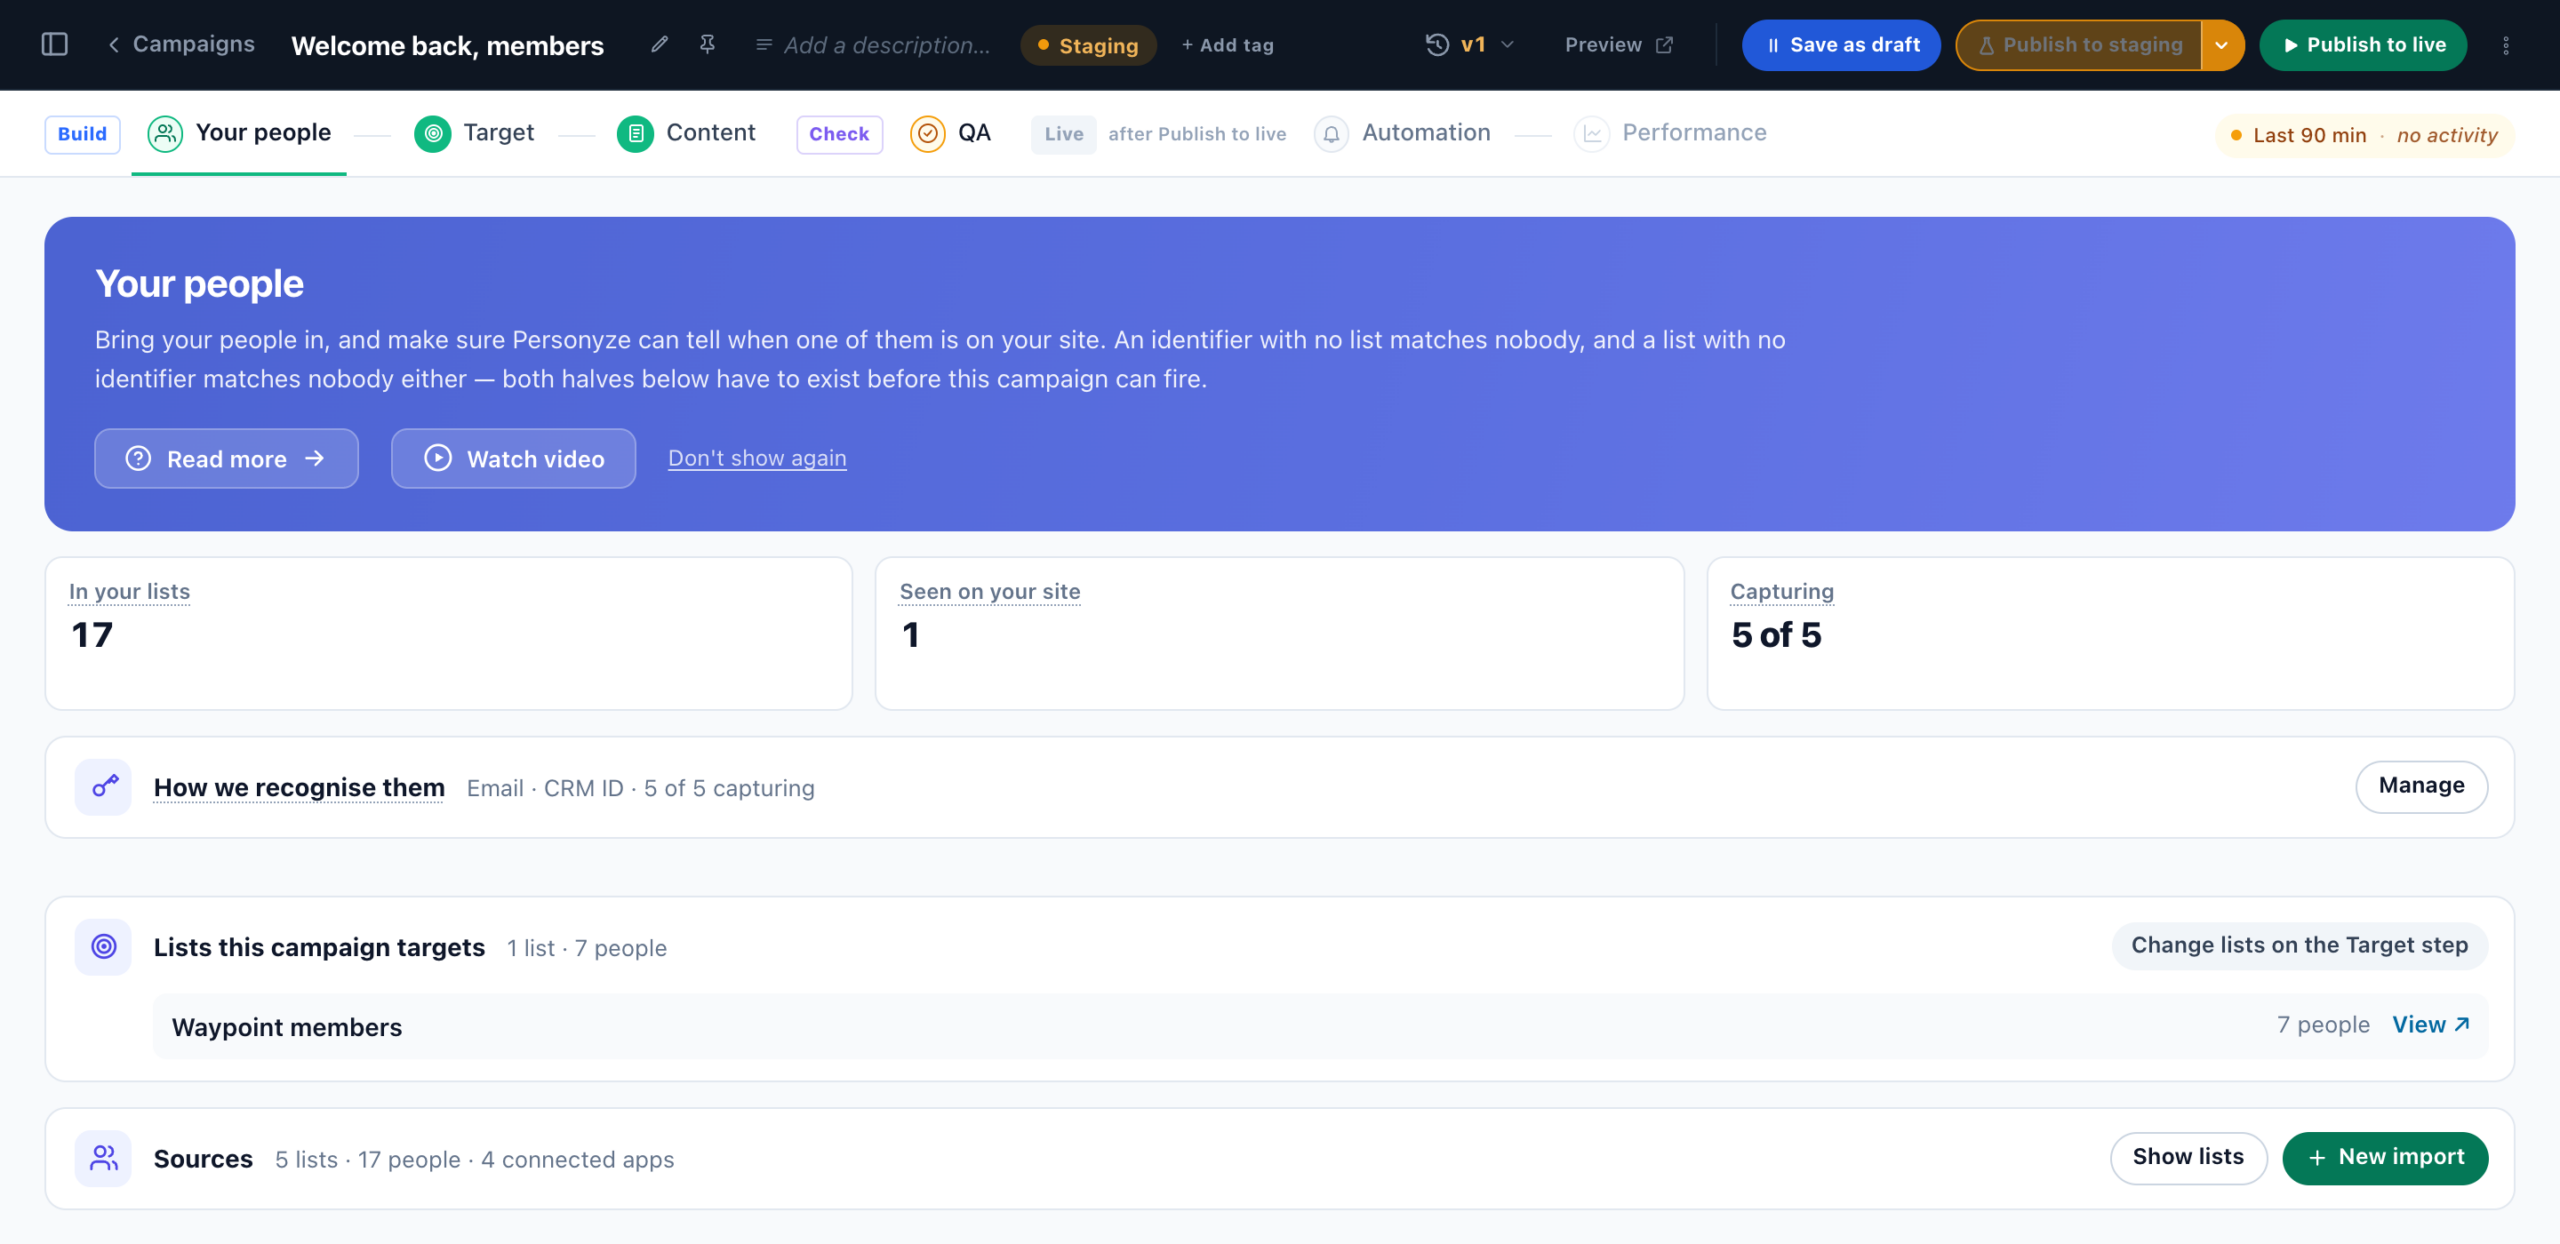
Under the blue box:
- This campaign will match nobody — a yellow note, only while a half is missing. It says which: nothing captures an email address or a CRM ID, no list with people in it is imported, or neither.
- Three tiles. In your lists: the people in your imported lists, each counted once however many lists they are in. Seen on your site: those of them who have visited your site — the ones this campaign can show to as soon as it is live. Capturing: how many of the places that read an email address or a CRM ID are switched on. One is enough.
- How we recognise them — one line: the identifiers something captures and how many places capture them, for example Email · CRM ID · 2 of 3 capturing. See below.
- Lists this campaign targets — the lists the campaign’s User lists rule picks, each with View ↗ to its own page in Imported user data, in a new tab. The lists are chosen on the Target step.
- Sources — your site, your connected apps and your imported lists. See Your lists.
How we recognise them
An identifier is what ties a visitor on your site to a person in your list. The identifier types are fixed: Email and CRM ID. What you set up is where on your pages each one is read from.
Manage at the end of the line opens them in a drawer: These identifiers belong to the whole site, not to this campaign. While nothing captures an identifier, the line is yellow and its button reads Set up.
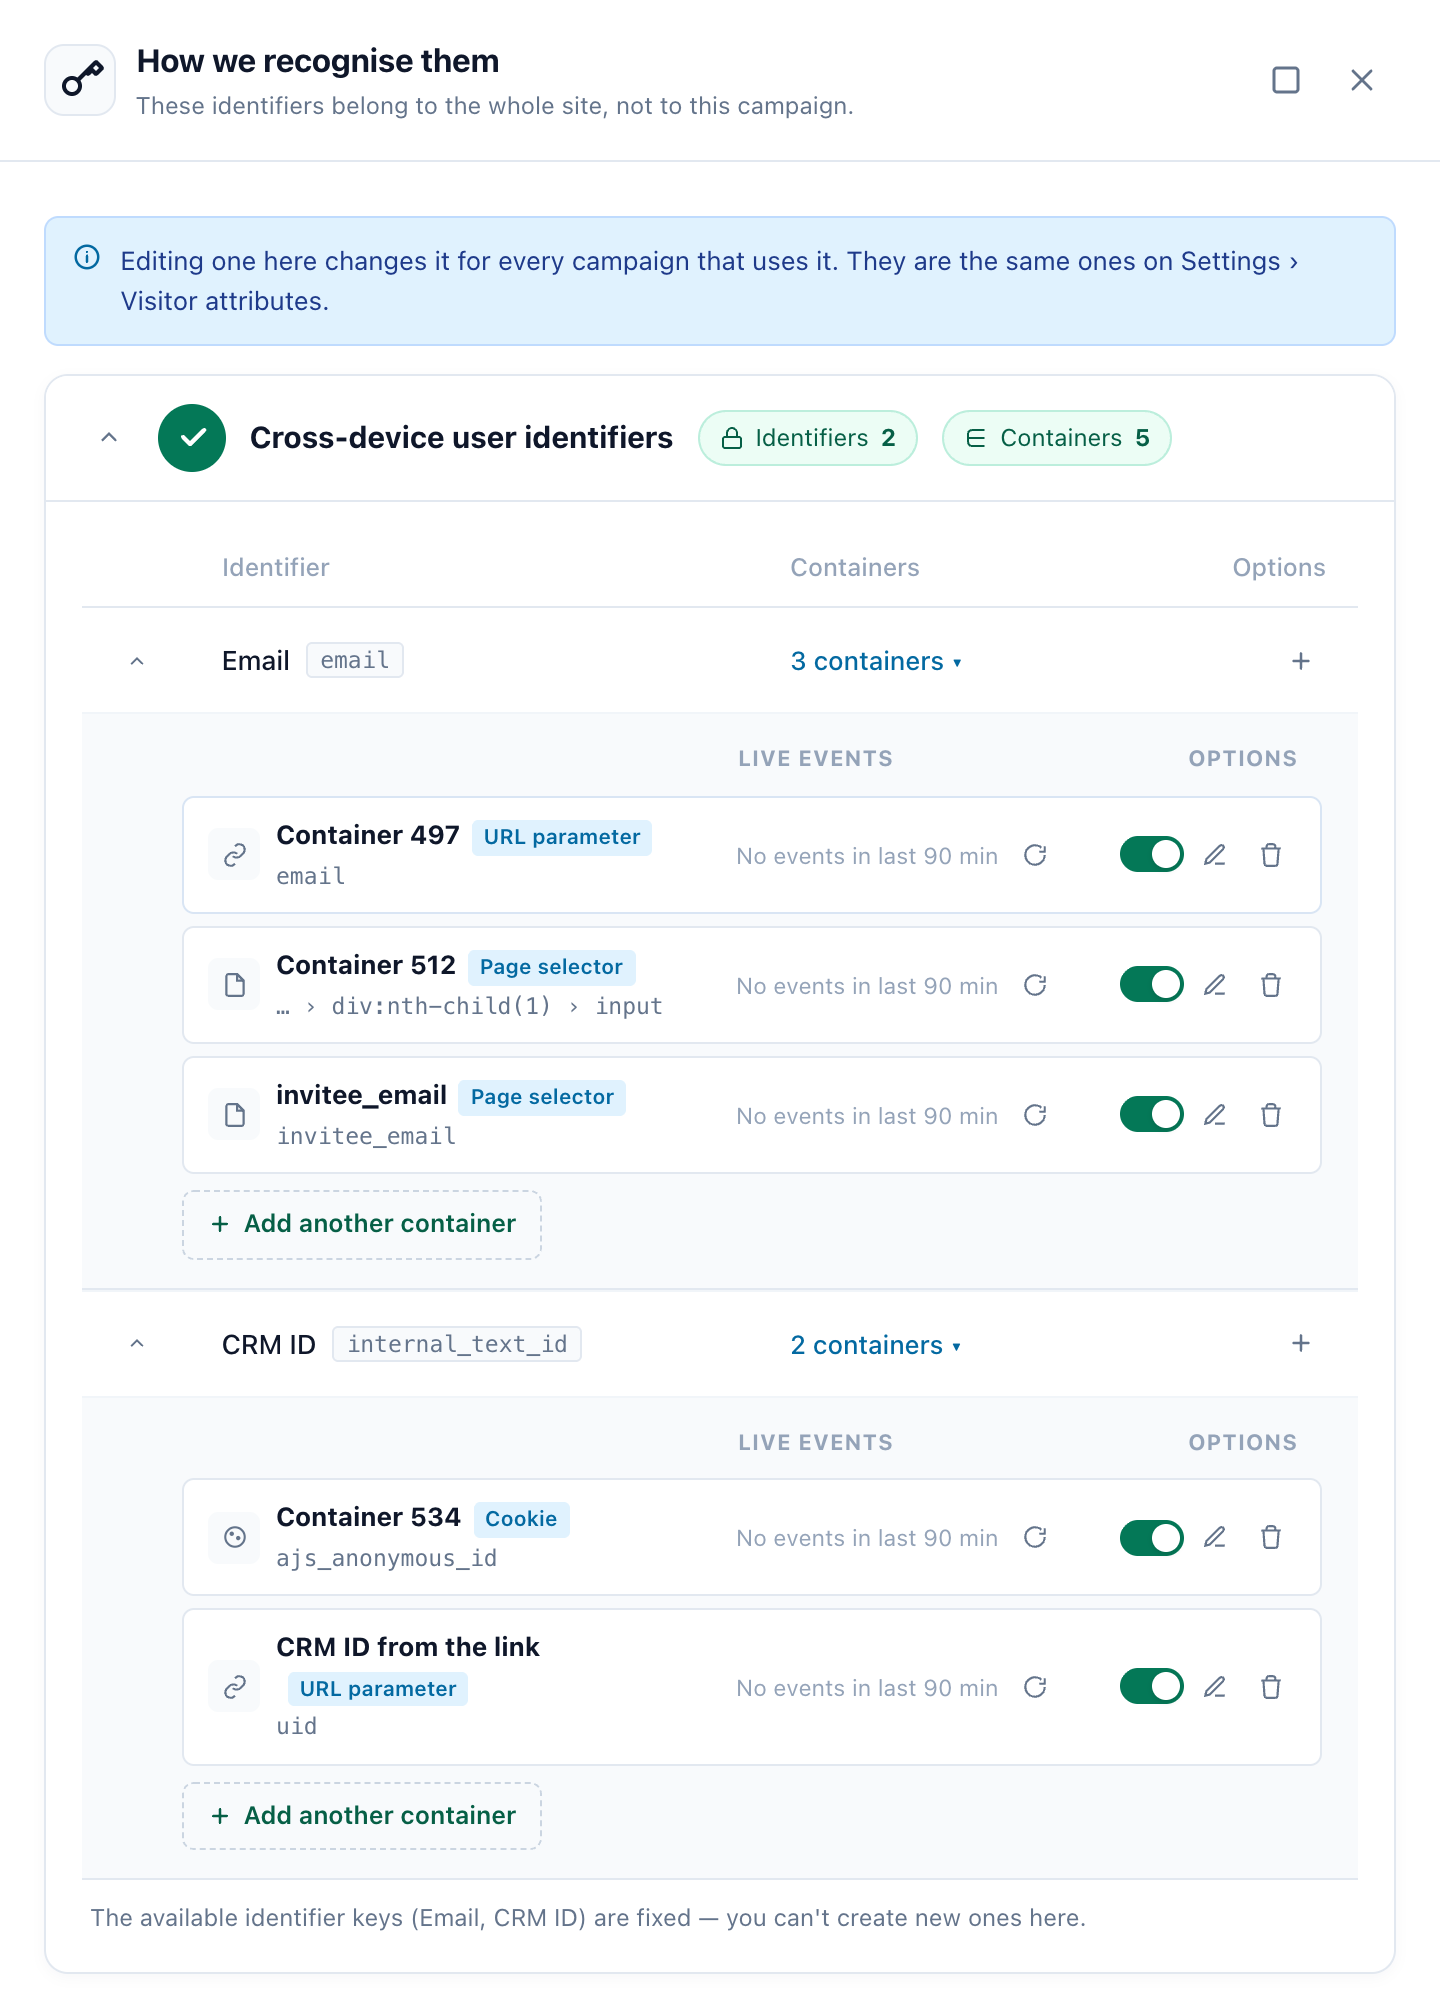
Each identifier reads its value from one or more containers. A container is one place on your pages:
- URL parameter — a path segment, a query parameter or the hash. For example, the email in the links you send from your email platform.
- Page / cookie — a CSS selector, a
window.*variable, a cookie, a meta tag, or local or session storage. For example, the login form’s email field, or the customer ID your application sets. - GA4 dimension — a Google Analytics dimension or user property.
- GTM datalayer — a key from the GTM
dataLayer.
Whichever container captured most recently holds the value. Each container shows its Live events — what it captured in the last 90 minutes, the fastest check that a selector still matches your page — and a switch: a container that is off collects nothing. Add another container adds a place.
The moment Personyze reads a value in one of these places, it matches the visitor to their record and applies your targeting on the spot. Because identifiers are identity, they also drive cross-device recognition: a person identified by the same email on their laptop and their phone is one profile, not two.
Your lists
Once the account has lists, the sources fold to one line: Sources, with how many lists, the people in them and the connected apps — for example 5 lists · 1,200 people · 2 connected apps — then Show lists and New import. Show lists opens the table in its place, and the chevron at the end of its title row folds it back. With no lists yet, the table is open.
The table is the one on an email campaign’s User Base step: your site first, then each connected app, then your imported lists. Its columns, its tabs and + Connect an app are described in The User Base step. On a list’s row, the gear edits the list and More options holds View users in this list, Export CSV, Upload a file into this list, Re-import now (feeds) and Delete list.
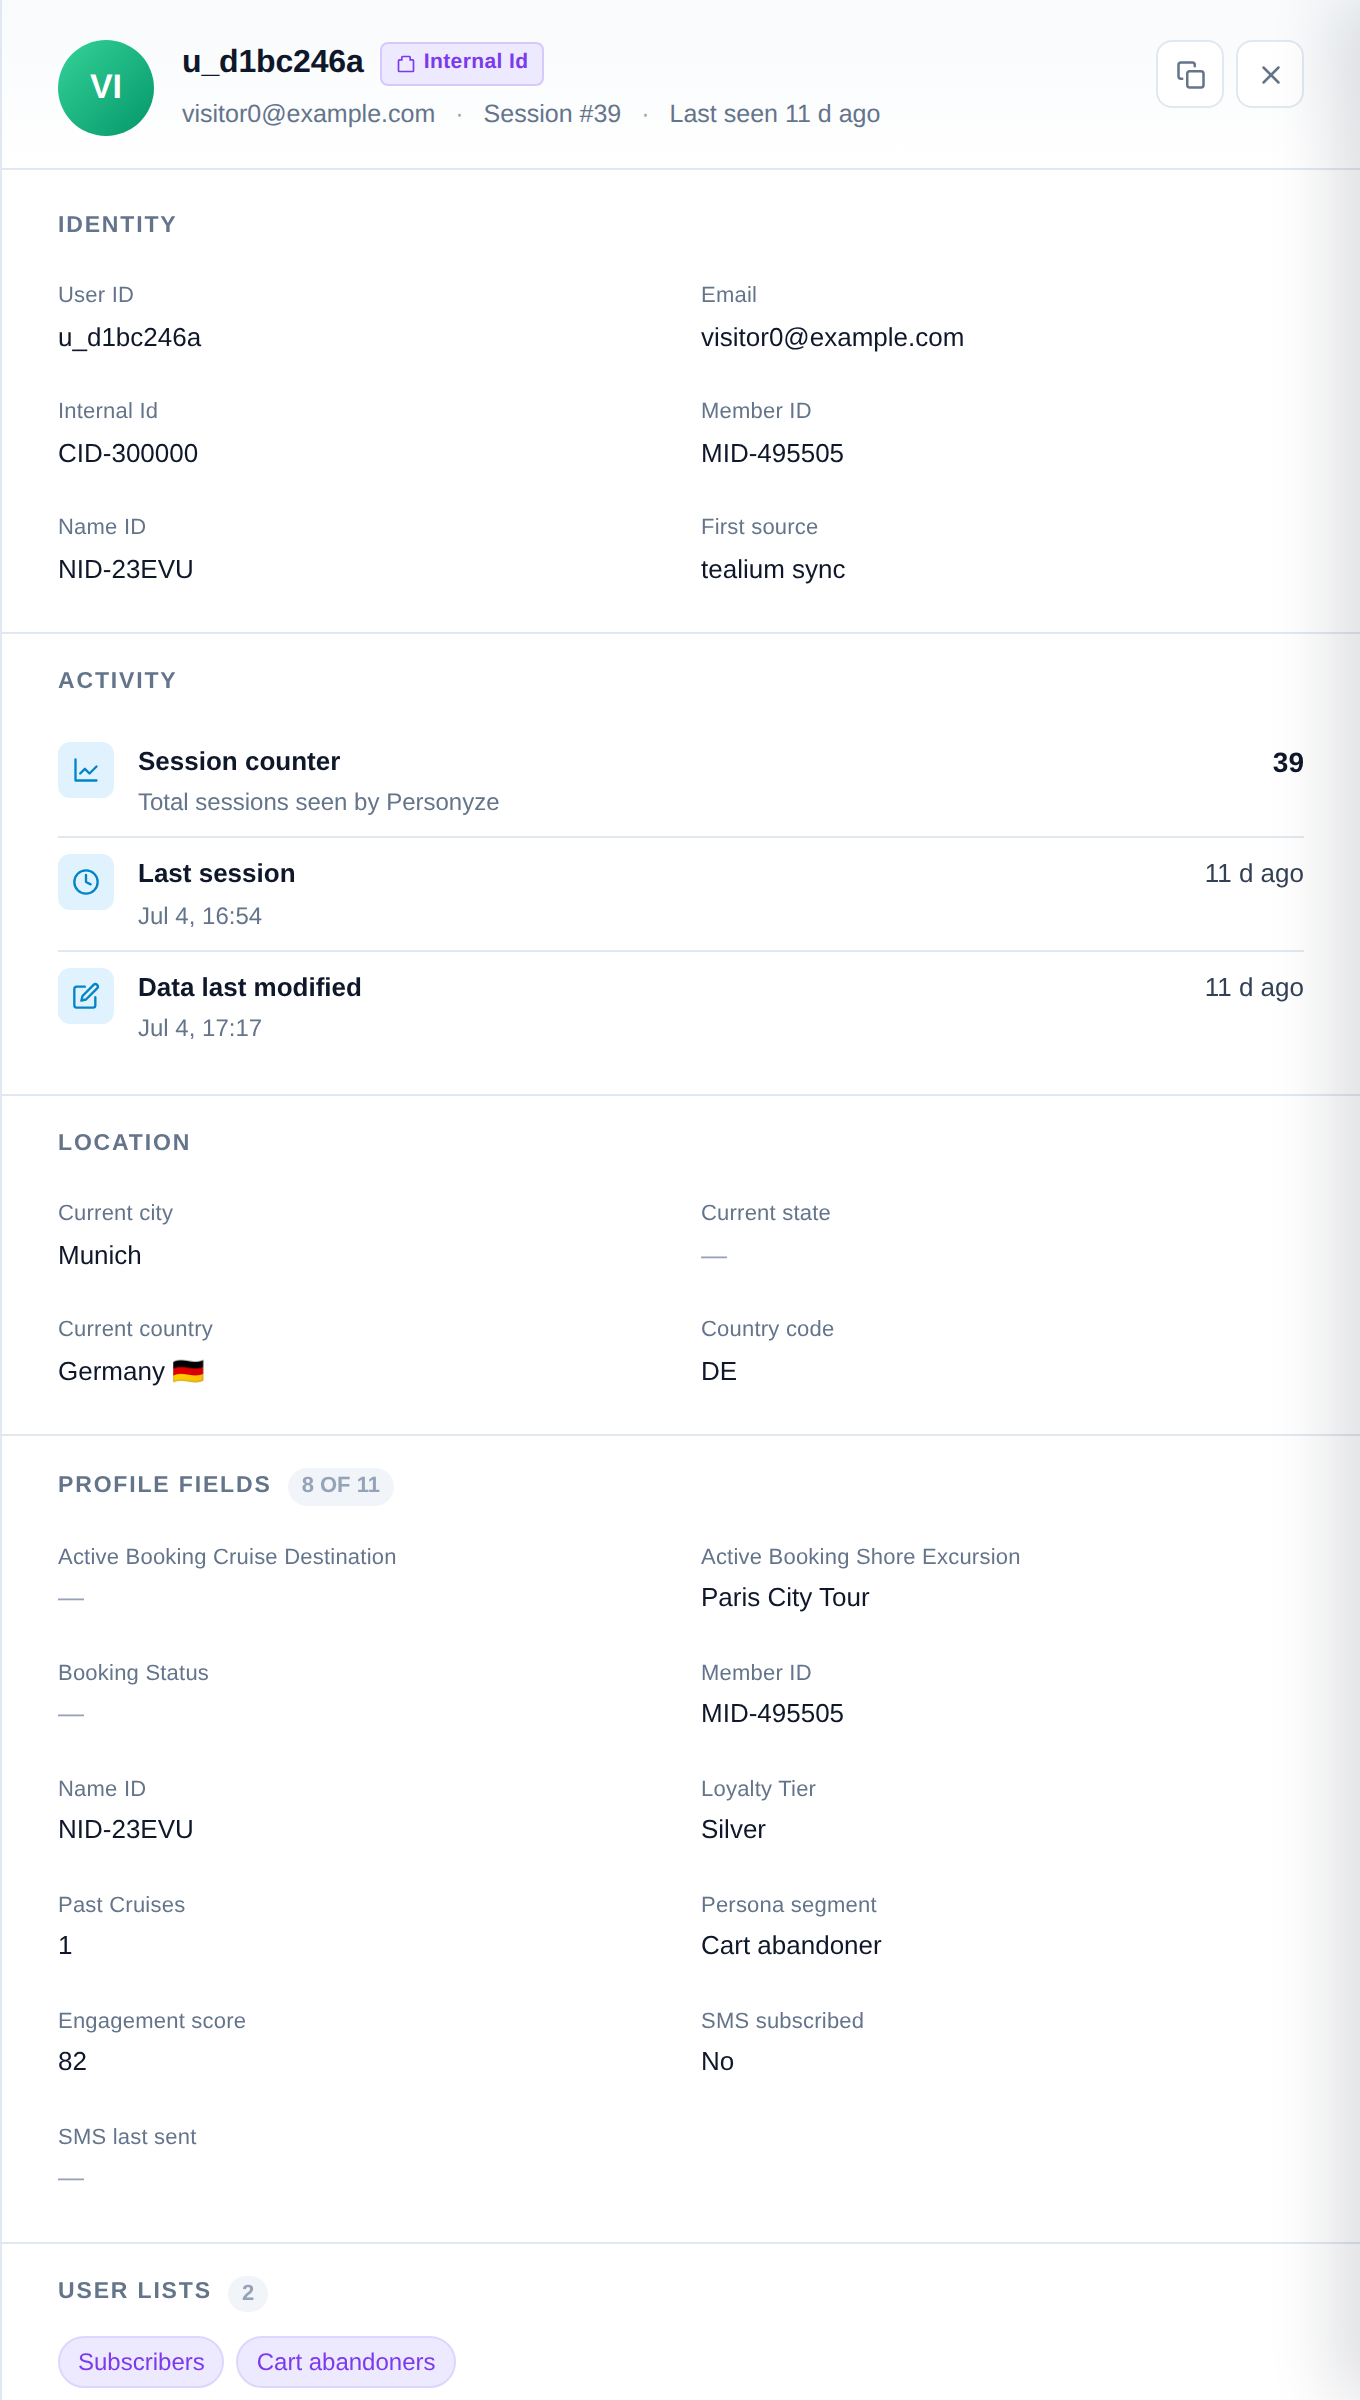
To see who is on a list, take someone off it, export it or look one person up, open the list in Imported user data.
Adding a list: New import
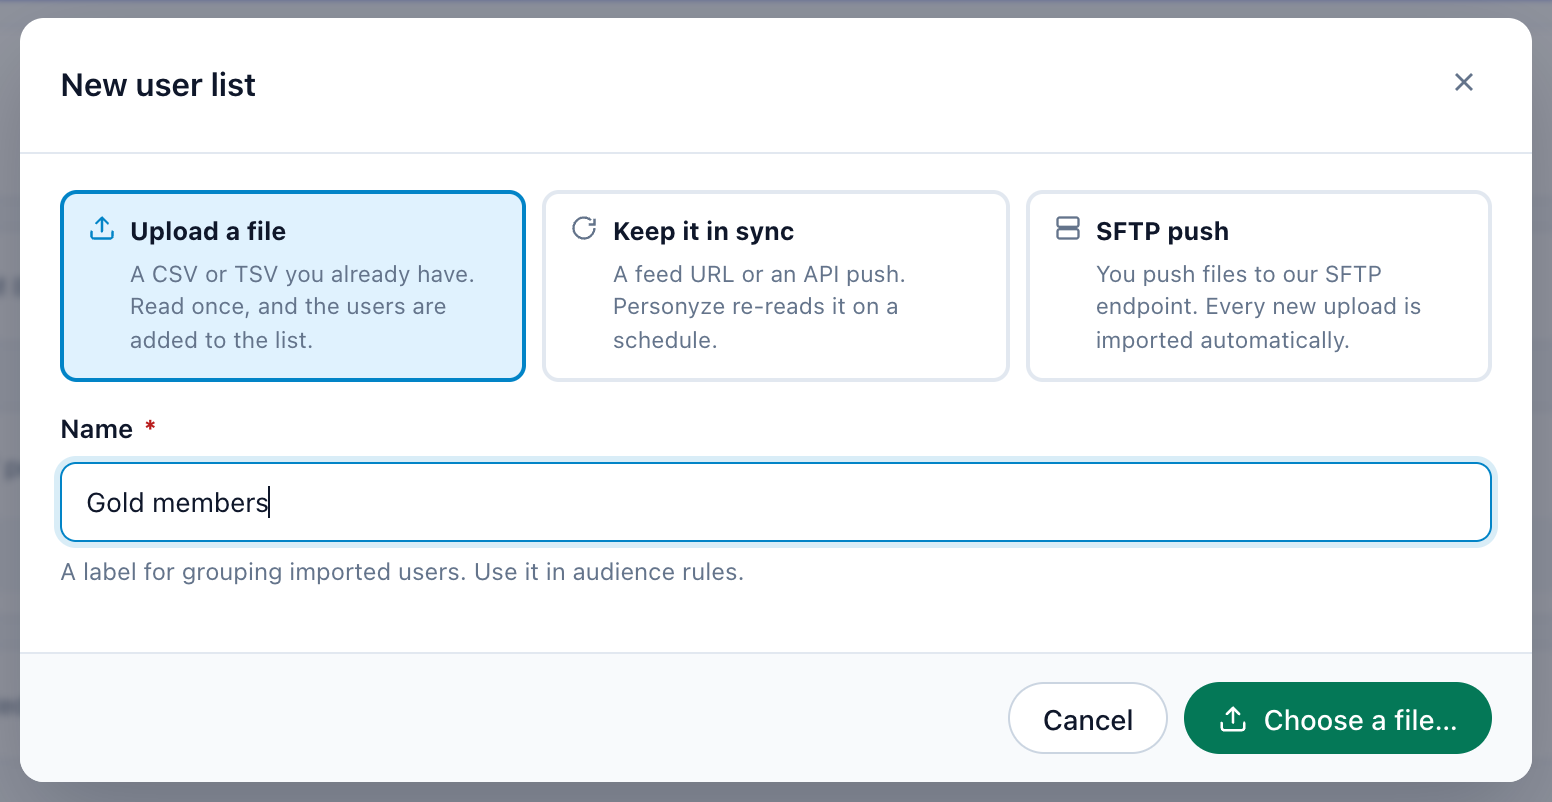
New import opens New user list. Pick where the people come from, and give the list a Name:
| Source | What it is |
|---|---|
| Upload a file | A CSV or TSV you already have, read once. Choose a file… goes on to the upload. Use it for a list that does not change often. |
| Keep it in sync | A feed URL or an API push, re-read on a schedule. Give the Import URL — CSV, JSON or an RSS / Atom feed, or an sftp:// path — or leave it blank for a list your systems fill through the REST API. Use it for data that moves: plan changes, renewal dates, account tiers. |
| SFTP push | You push files to your own SFTP upload account. Name the file users.csv and put it in the /upload folder: every new upload is imported automatically. |
Mapping the columns. An uploaded file goes through 1. Choose the file and 2. Map the columns; a feed has a Mapping tab beside Settings, filled by reading the feed; an SFTP list takes a Column → profile-field map. Each column of the file gets a Profile field, shown beside a few of its sample values. A column with no field yet can get one with Create a field for this column; a column left on — Ignore — is not imported.
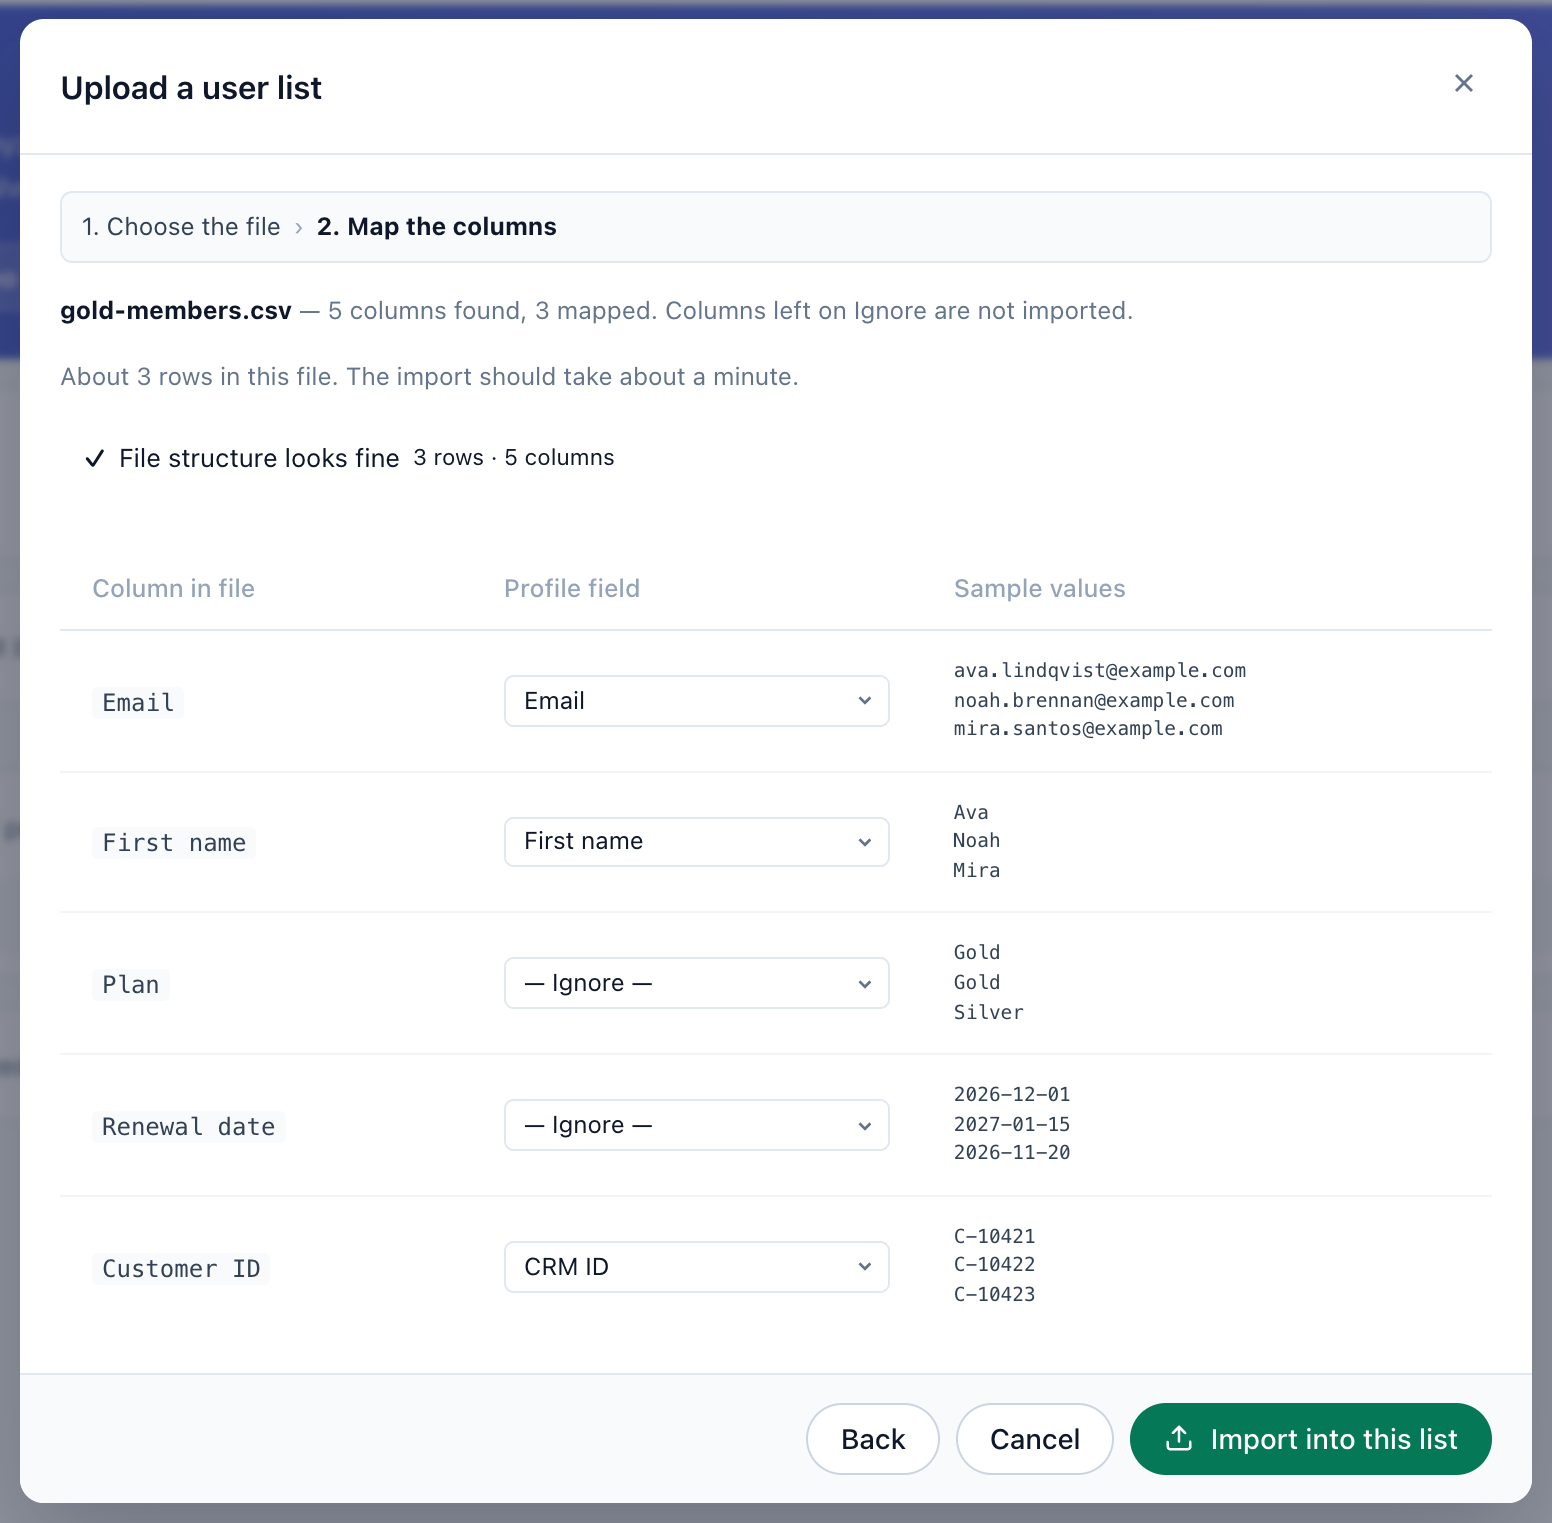
Map at least one column to the email address or the CRM ID — the id your own systems use. The import needs one column that identifies a person: without one it writes nothing. The columns you map become fields you can target on the Target step and print in the content.
A feed is checked every 10 minutes and re-imported when it has changed. Remove people who are no longer in the feed makes the feed the whole list: after each sync, anyone it did not carry is taken off the list. Feeds and SFTP drops are covered in full in Uploading feeds and data files.
2. Target
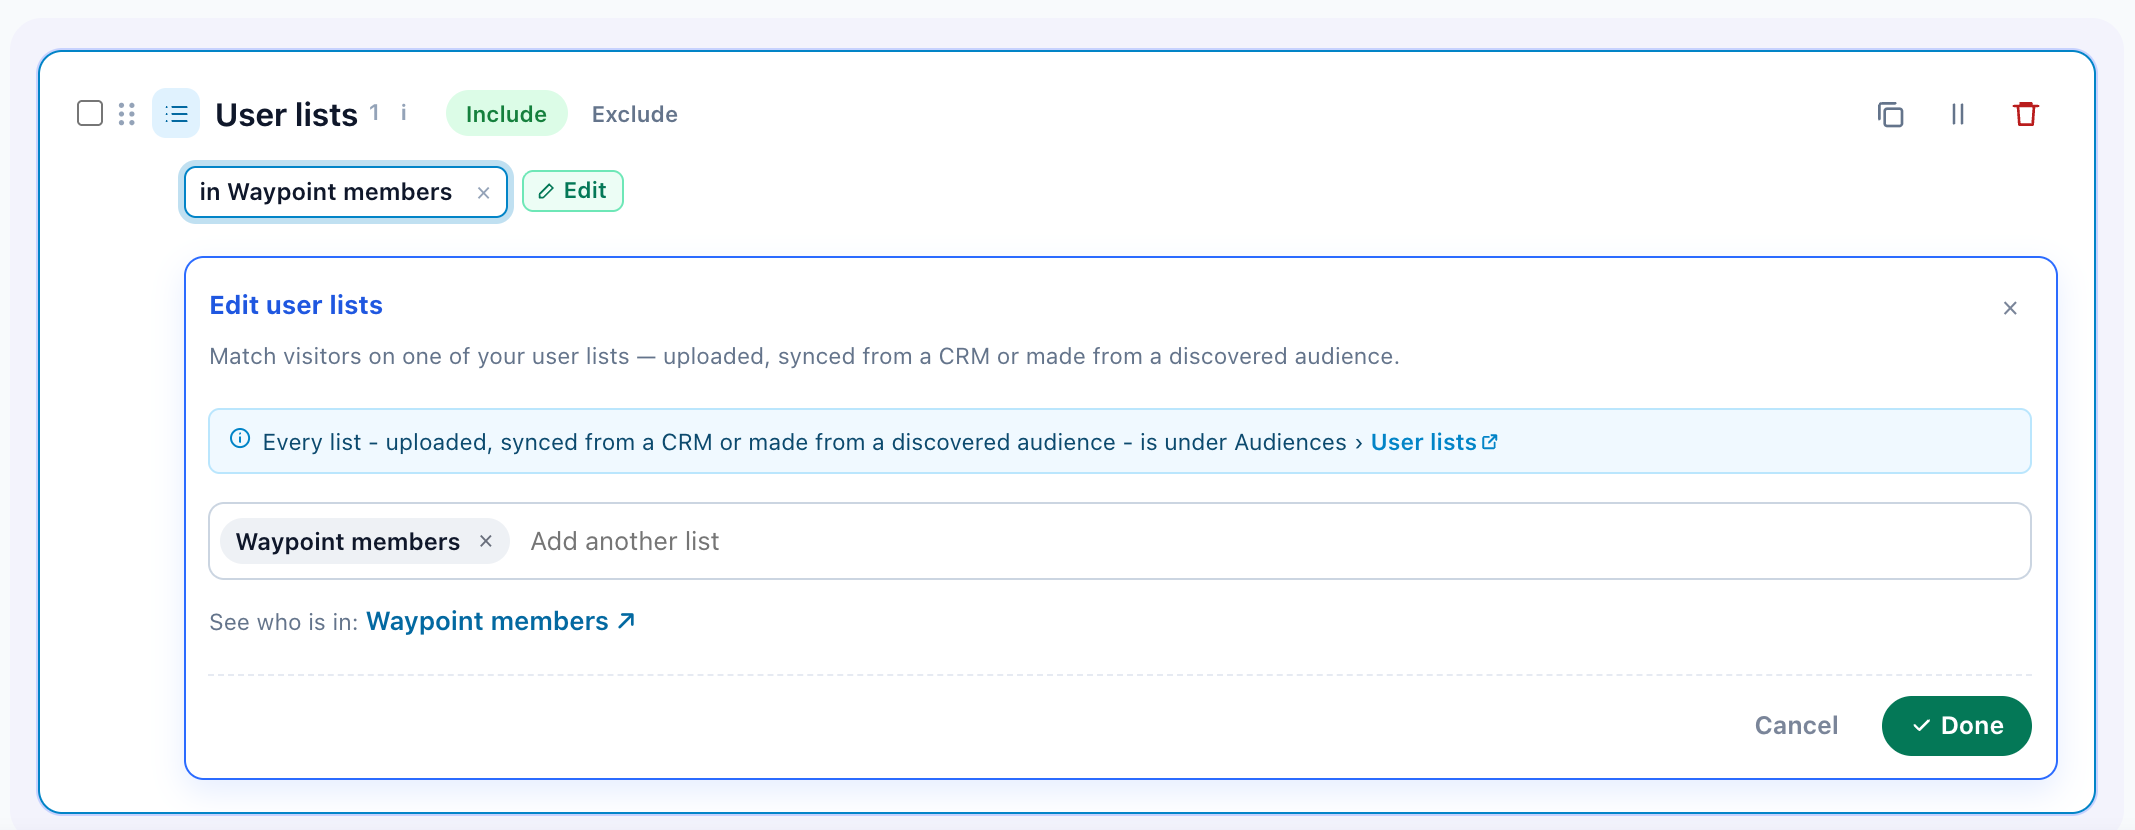
A new CRM campaign opens its Target step with the User lists rule already in place, waiting for a list. Pick one or more of your lists in it — Search your user lists — and the campaign is for the people on them. Set the card to Exclude to leave a list’s people out instead.
Under a User lists rule, See who is in: links each chosen list to its page in Imported user data, in a new tab — its people, Remove from this list, Export CSV.
To target by what the record says rather than by the list, press Add audience rule and pick User CRM/ABM/Profile, under Visitor context. Choose one of your profile fields — plan, account tier, renewal date — and a condition. A negative condition, such as doesn’t equal or is not one of, only matches people who have a value for the field: use is empty for those without one.
Both combine freely with Personyze’s behavioural and contextual rules — so “enterprise accounts” can become “enterprise accounts, on the pricing page, second visit this week”. See Targeting rules.
3. Content
Choose what to show the audience you just defined. Any Personyze content type works here: recommendation widgets, banners, popups, in-place edits with the Live Editor, or custom JavaScript.
Imported fields are also available inside the content, not just in the targeting — so a banner can greet someone by first name, name their account manager, or count the days to their renewal. See Inserting CRM variables.
4. QA
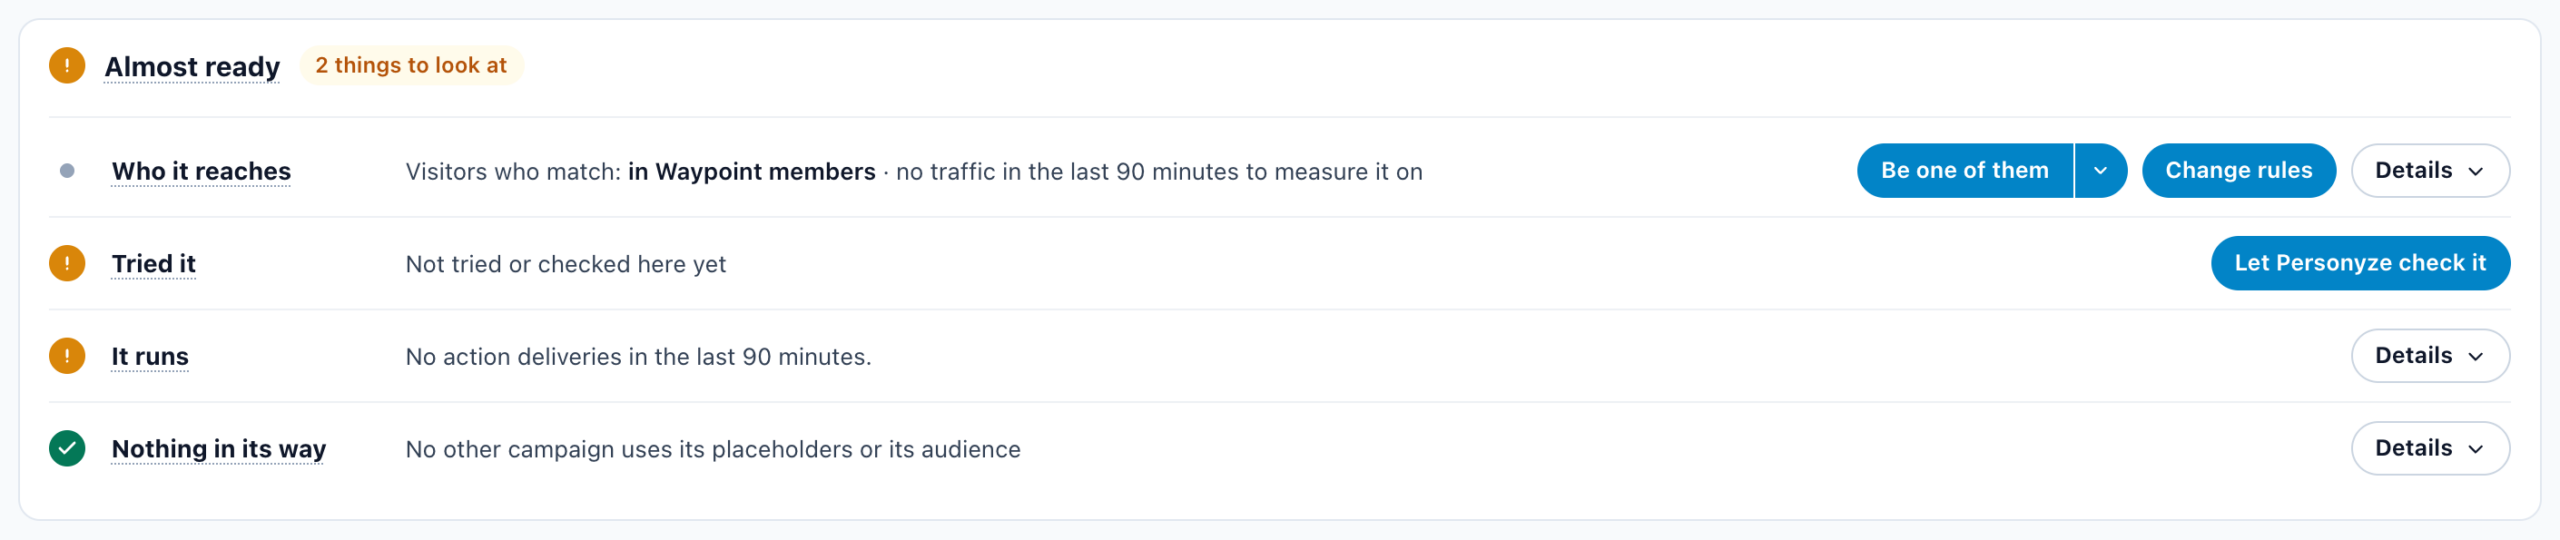
QA works the same as for any campaign. The QA step’s card answers four questions: who the campaign reaches, whether you tried it, whether it ran in the last 90 minutes, and whether another campaign is in its way. Who it reaches writes your rules out and counts who would match. On a campaign with audience rules, Be one of them opens the QA Simulator already set up as a visitor these rules match; a rule on a profile field, such as an email address, waits for you to press Apply. See Testing & QA.
5. Automation
Rules that tell you, or have Personyze act, when this campaign’s numbers cross a line — see Automation.
6. Performance
After the campaign is running, the Performance step shows its live results: how often it was shown, how the audience engaged, and what it contributed.
Reading the numbers: One campaign’s Performance step on the Performance Metrics page explains every figure on this screen and how to read it.
If nobody matches
Almost every “my CRM campaign is not showing” case comes down to identity, not targeting. Work through it in this order:
- Read the Your people step. While a half is missing, This campaign will match nobody says which. Seen on your site at 0 means nobody from your lists has been recognised on your site yet.
- Is the identifier being read? Sign in on your own site, then open How we recognise them › Manage and check each container’s Live events. A container with no events is not finding the value where it was told to look; one that is switched off captures nothing.
- Did the import land? In Settings › Imported user data, check the list’s Users and Last refresh; a failed import shows its error in red under the list’s name. Find a person answers whether one person is on it. Lists also get smaller by themselves: see Why a list gets smaller.
- Is the field mapped? A column left on — Ignore — was never imported, so a rule on it matches nobody. For a feed or an SFTP drop, the list’s page shows what each column fills under Columns, with Use it for one that fills nothing.
- Only then, check the rules. Who it reaches and Be one of them on the QA step show whether they match.
Related
- Imported user data — your lists and the people in them: remove, add, export, Find a person.
- The User Base step — the same sources, and the lists a campaign targets.
- Uploading feeds and data files — feeds, SFTP drops and their column mapping.
- Cross-Device Tracking — how identifiers unify a person across devices.
- Adding Custom User Profile Data Fields — creating fields to import into.
- User Profile Data Setup and Synchronizing — keeping imported data fresh.
- Inserting CRM Variables — imported fields in your content.
- REST API: users object — pushing profiles programmatically instead of importing files.