
What User Profile Data Is For
UI path: Settings → Customer and session data management.
If you’re using Personyze for ABM, CRM targeting, or any personalization that depends on who someone is rather than what they’re doing right now, you need profile fields: permanent attributes stored against a user and still there on their next visit, from any device.
There are two ways the data gets in, and they differ in one important respect:
- Captured from your own site — scraped from the page, a cookie, or a URL. Personyze already knows which visitor it’s looking at, because it assigned them its own cookie ID on arrival, so the value is stored straight onto that profile. No key needed.
- Imported in bulk — from a file, feed, SFTP, or API. These records come from outside and have no idea which browser belongs to whom, so they need a key — an email or CRM ID — to match them to a visitor.
Your Profile Fields
Expand User cross-session attributes to see every field on your user profile and how healthy it is.
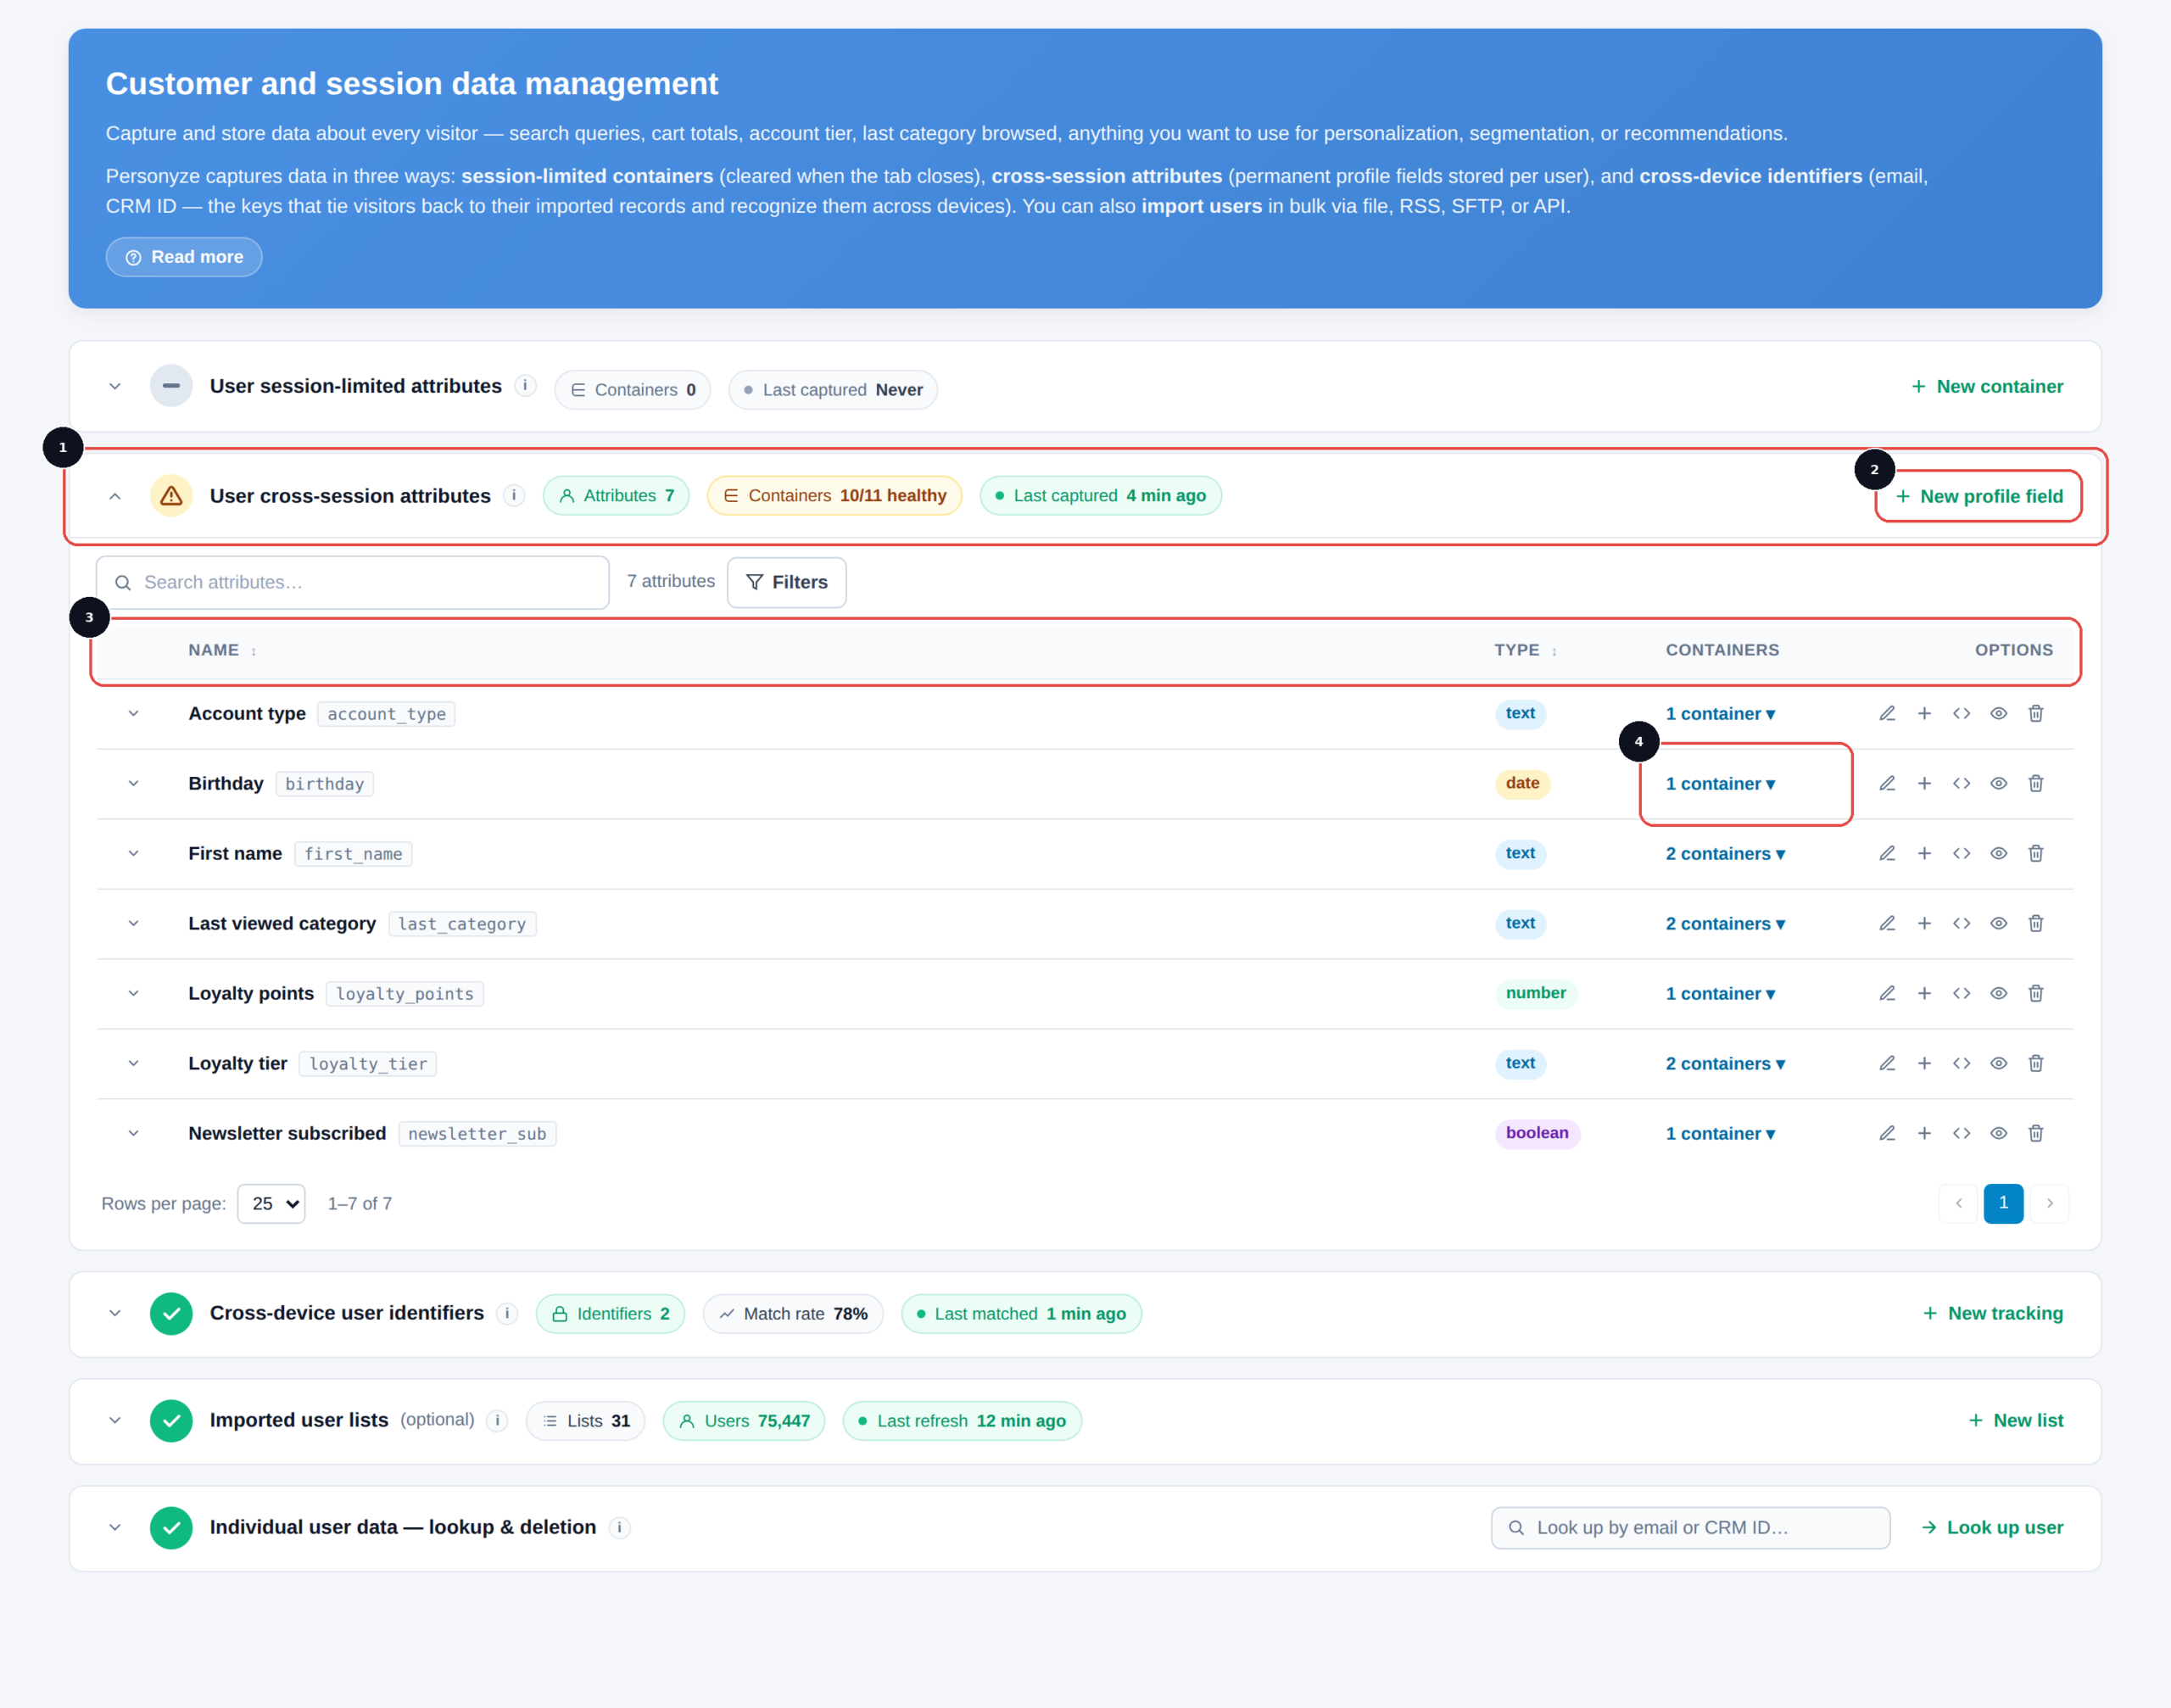
2 New profile field — creates a new attribute.
3 The fields table — each field’s display name and internal key (
account_type), its type (text, number, date, boolean), and the containers feeding it.4 Containers — how many grabs populate this field. Expand it to see which. A field with 0 containers exists but nothing fills it.
Two columns here do most of the diagnostic work. Containers tells you whether anything actually populates a field — a field with none will always be empty, and that’s the usual reason a targeting rule never matches. The healthy count in the header tells you whether those grabs are still returning data; if it drops (10/11), one of them broke, most likely because the page it scraped changed.
Adding a Field
Click New profile field, give it a descriptive name (Industry, Account Type, Signup Date), and pick its data type — text, number, date, boolean. Choose the type deliberately: number is what lets you target “loyalty points greater than 500”, and date is what lets you target “signed up in the last 30 days”. Store either as text and those comparisons won’t work.
Once saved, the field is available for targeting, dynamic content, and statistics filters.
You can then tell Personyze how to populate it: capture it from the page, a cookie, or a URL, or fill it from an import. Capturing from your own site is covered in Grab Data from Your Site — the same picker, masks, and settings apply.
Importing Users in Bulk
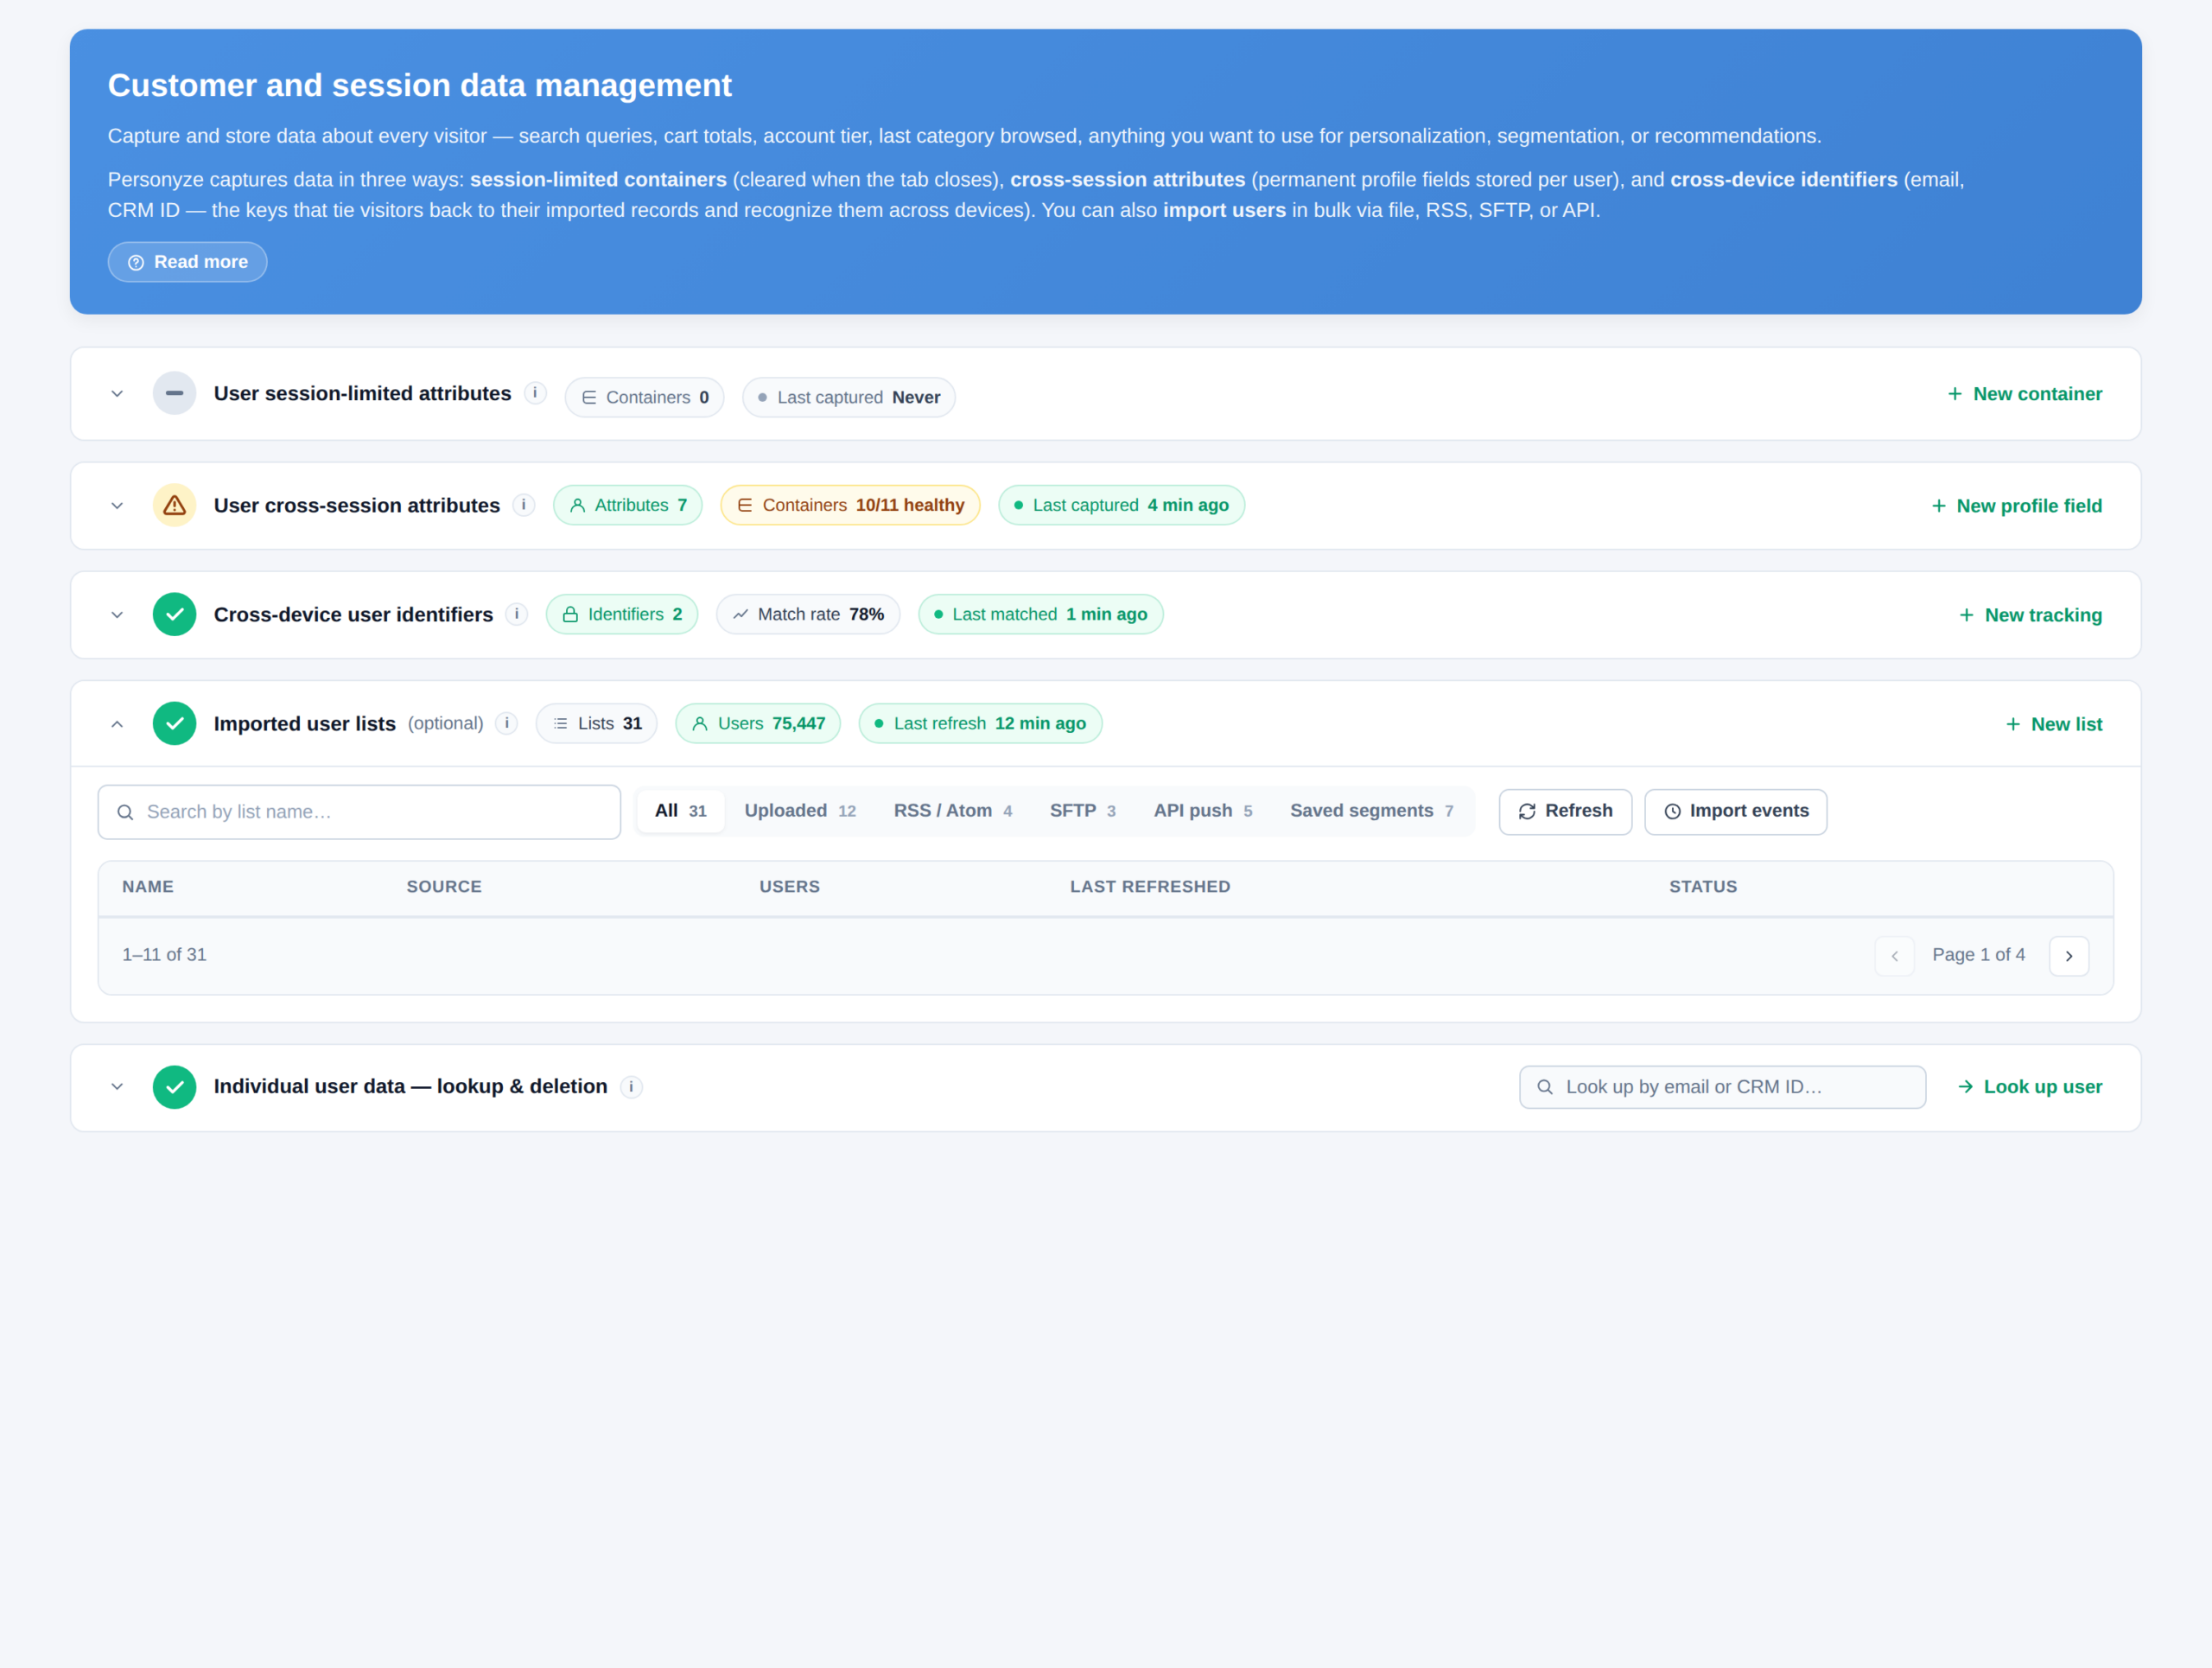
Imported user lists is where user data arrives from outside your site. Each list shows its source, how many users it holds, when it was last refreshed, and its status — and you can filter by source type: uploaded files, RSS / Atom, SFTP, API push, or saved segments.
That Last refreshed column is the first thing to check when imported data doesn’t behave as expected.
The Import Wizard
Click New list to open Import Data from a File or Feed, a four-step wizard.
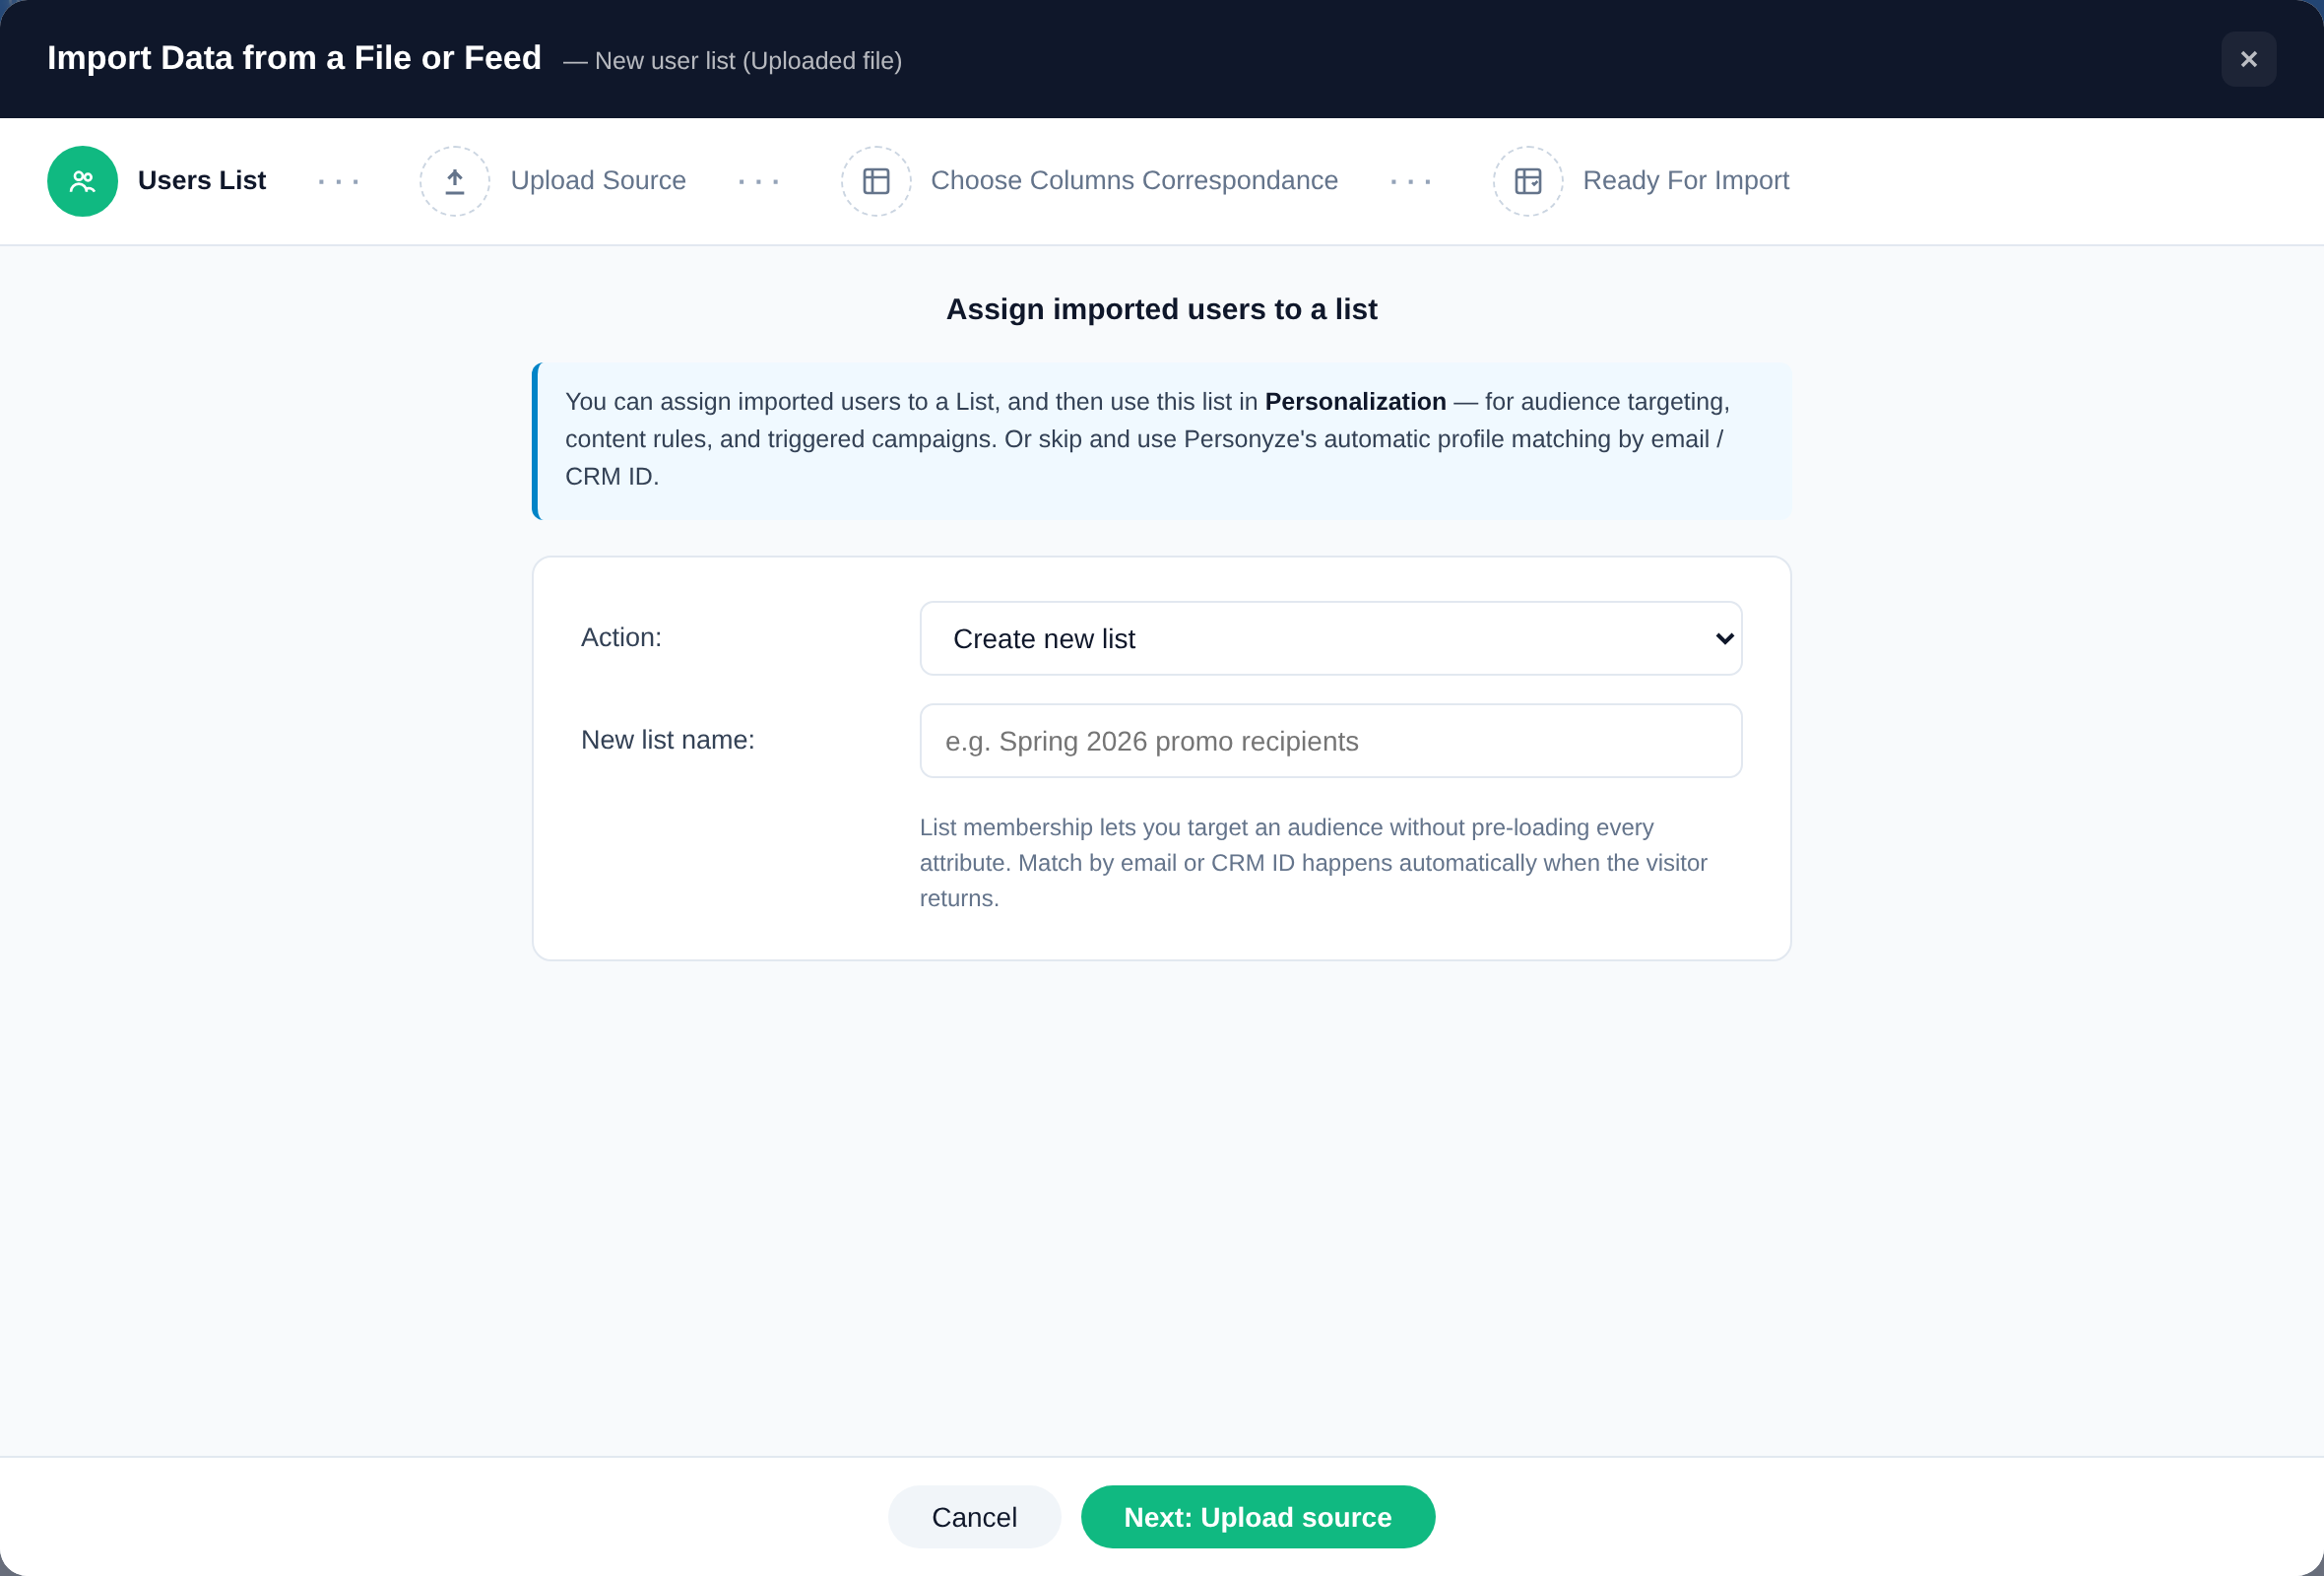
1. Users List
First, decide whether the imported users should be assigned to a list. A list is targetable in its own right — you can build an audience of “anyone in this list” without pre-loading every attribute about them. Choose Don’t assign, an existing list, create a new list, or create from a saved segment.
If you skip it, Personyze still matches users automatically by email or CRM ID when they return — you just don’t get list membership as a targeting handle.
2. Upload Source
Point Personyze at the data. A one-off file upload, or a live source that keeps syncing: an RSS / Atom feed, a live spreadsheet URL, SFTP, or API push.
For live feeds, Personyze checks the source for updates roughly every 10 minutes and integrates changes automatically. SFTP is self-service: set your own upload account up under Settings → Site profile → SFTP file drop — see SFTP file drop.
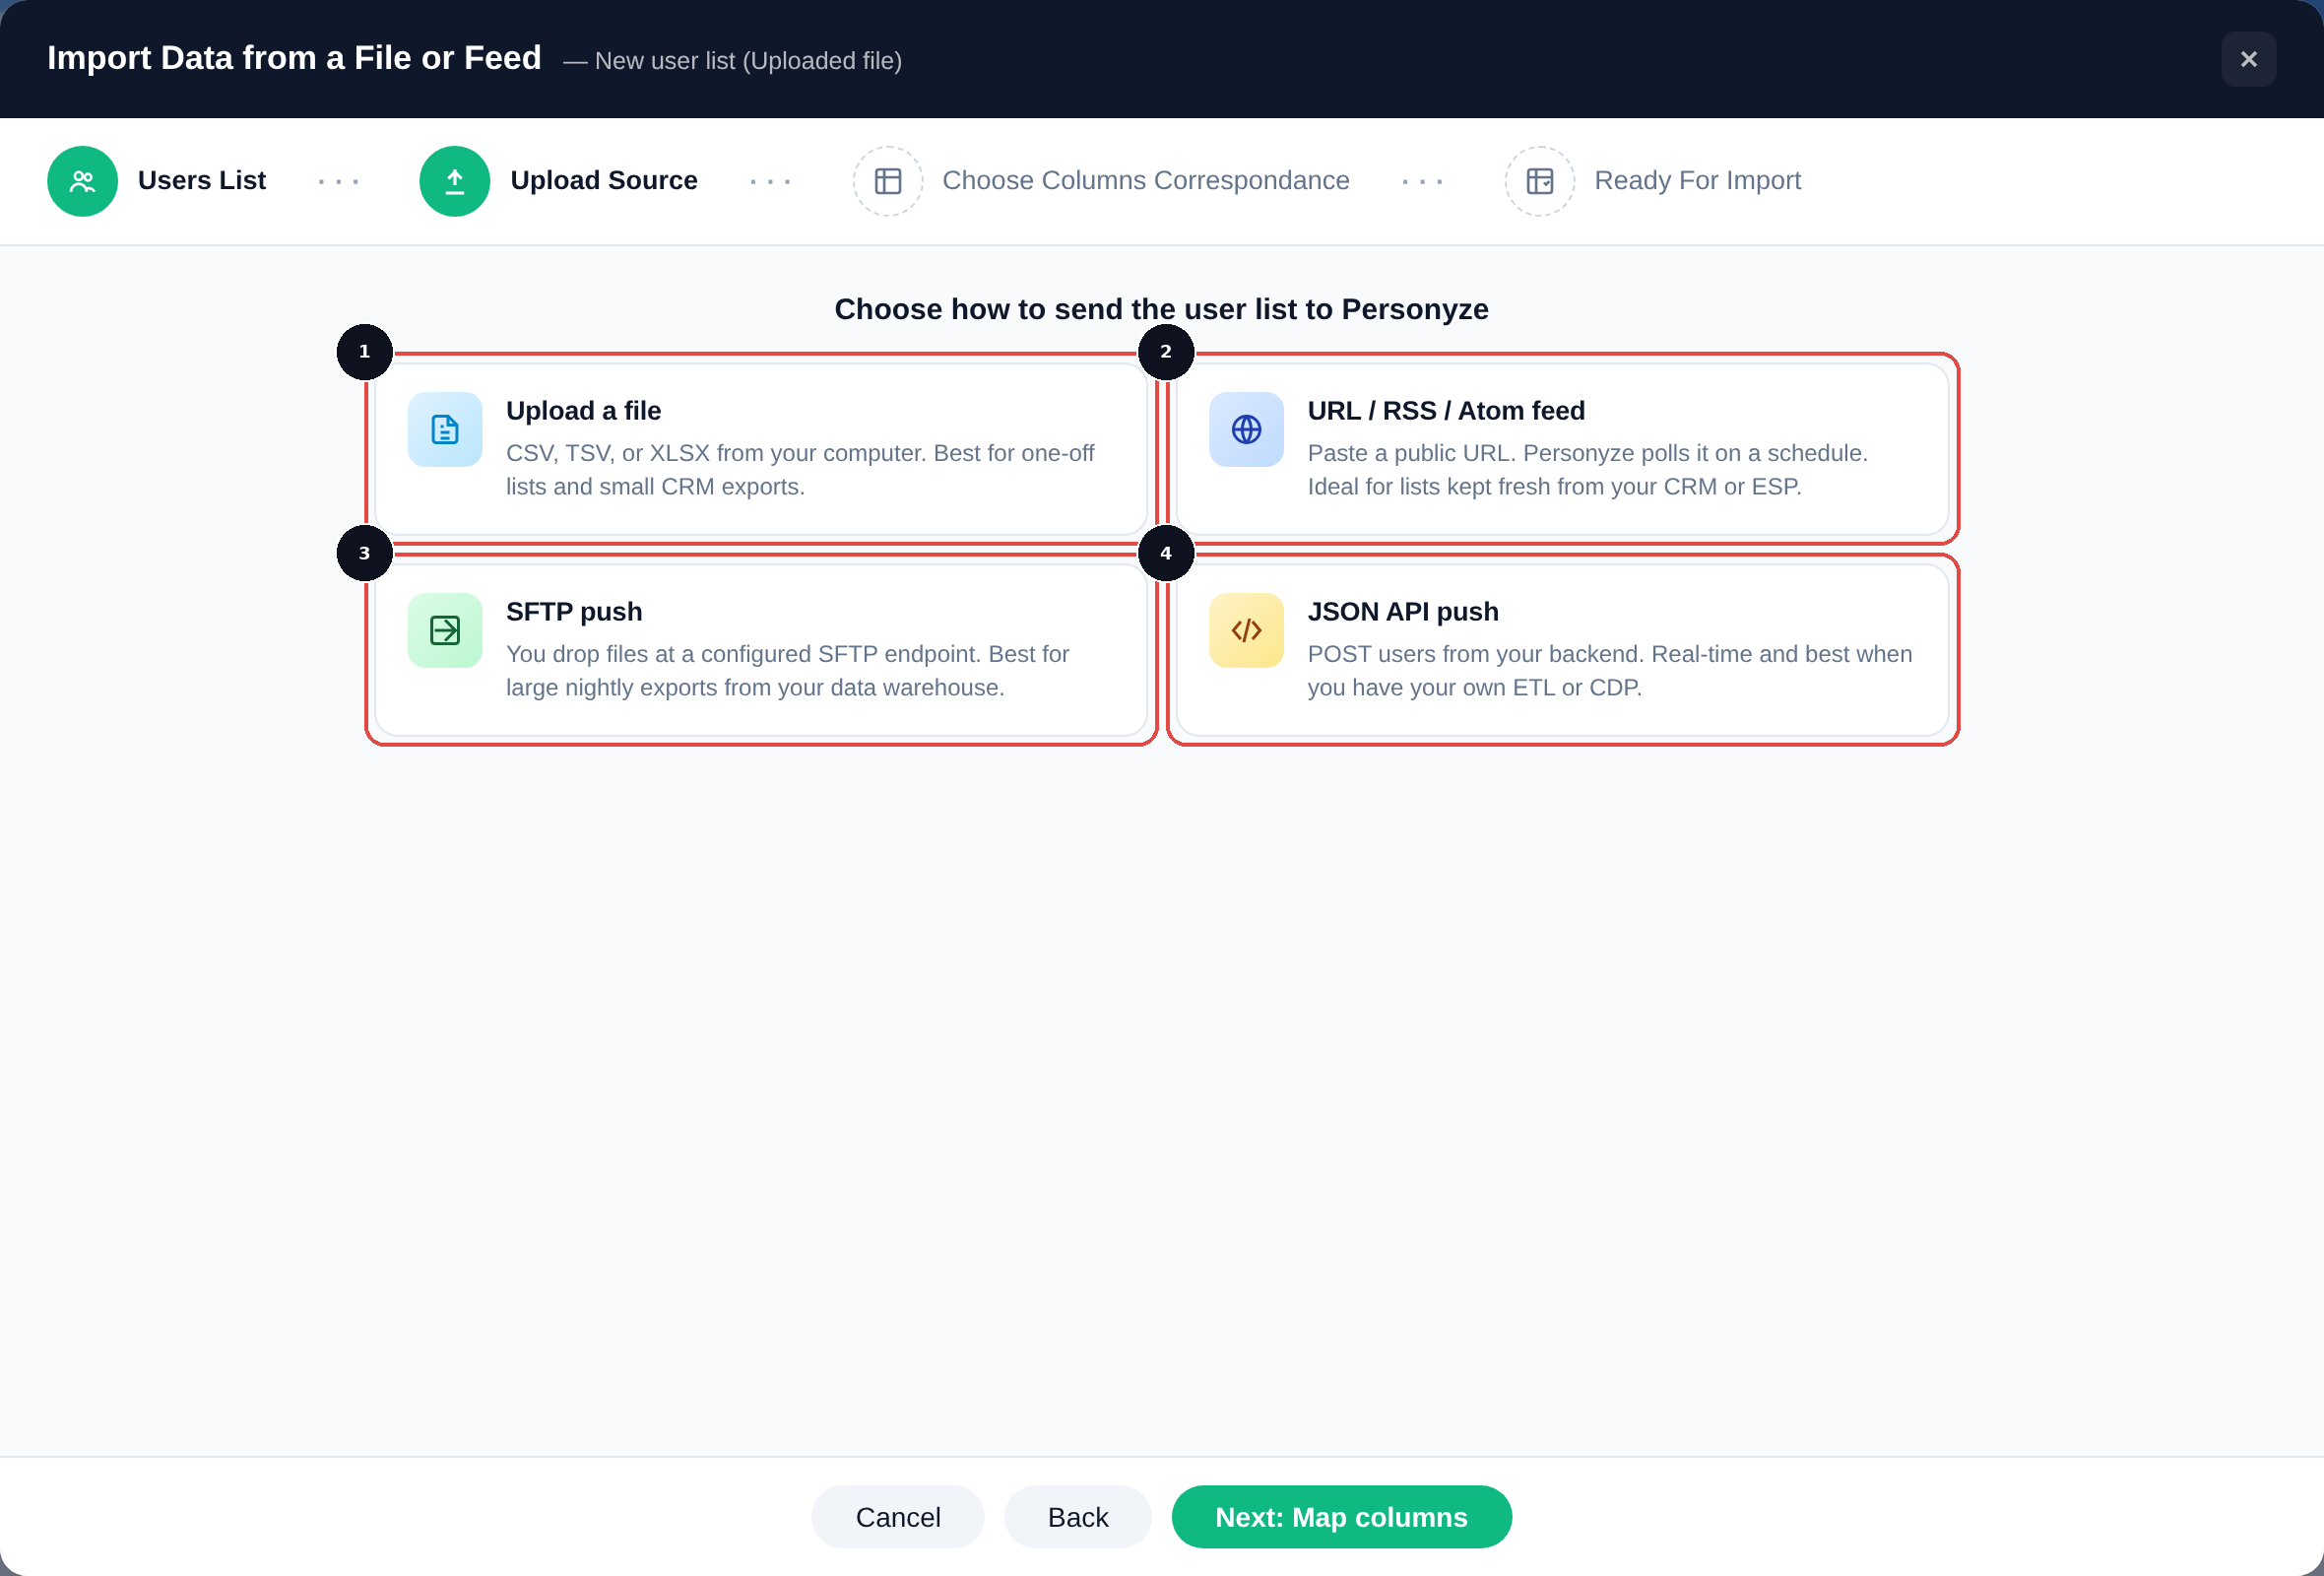
2 URL / RSS / Atom feed — paste a public URL and Personyze polls it on a schedule. Ideal for lists kept fresh from your CRM or ESP.
3 SFTP push — you drop files at a configured endpoint. Best for large nightly exports from a data warehouse.
4 JSON API push — POST users from your own systems in real time.
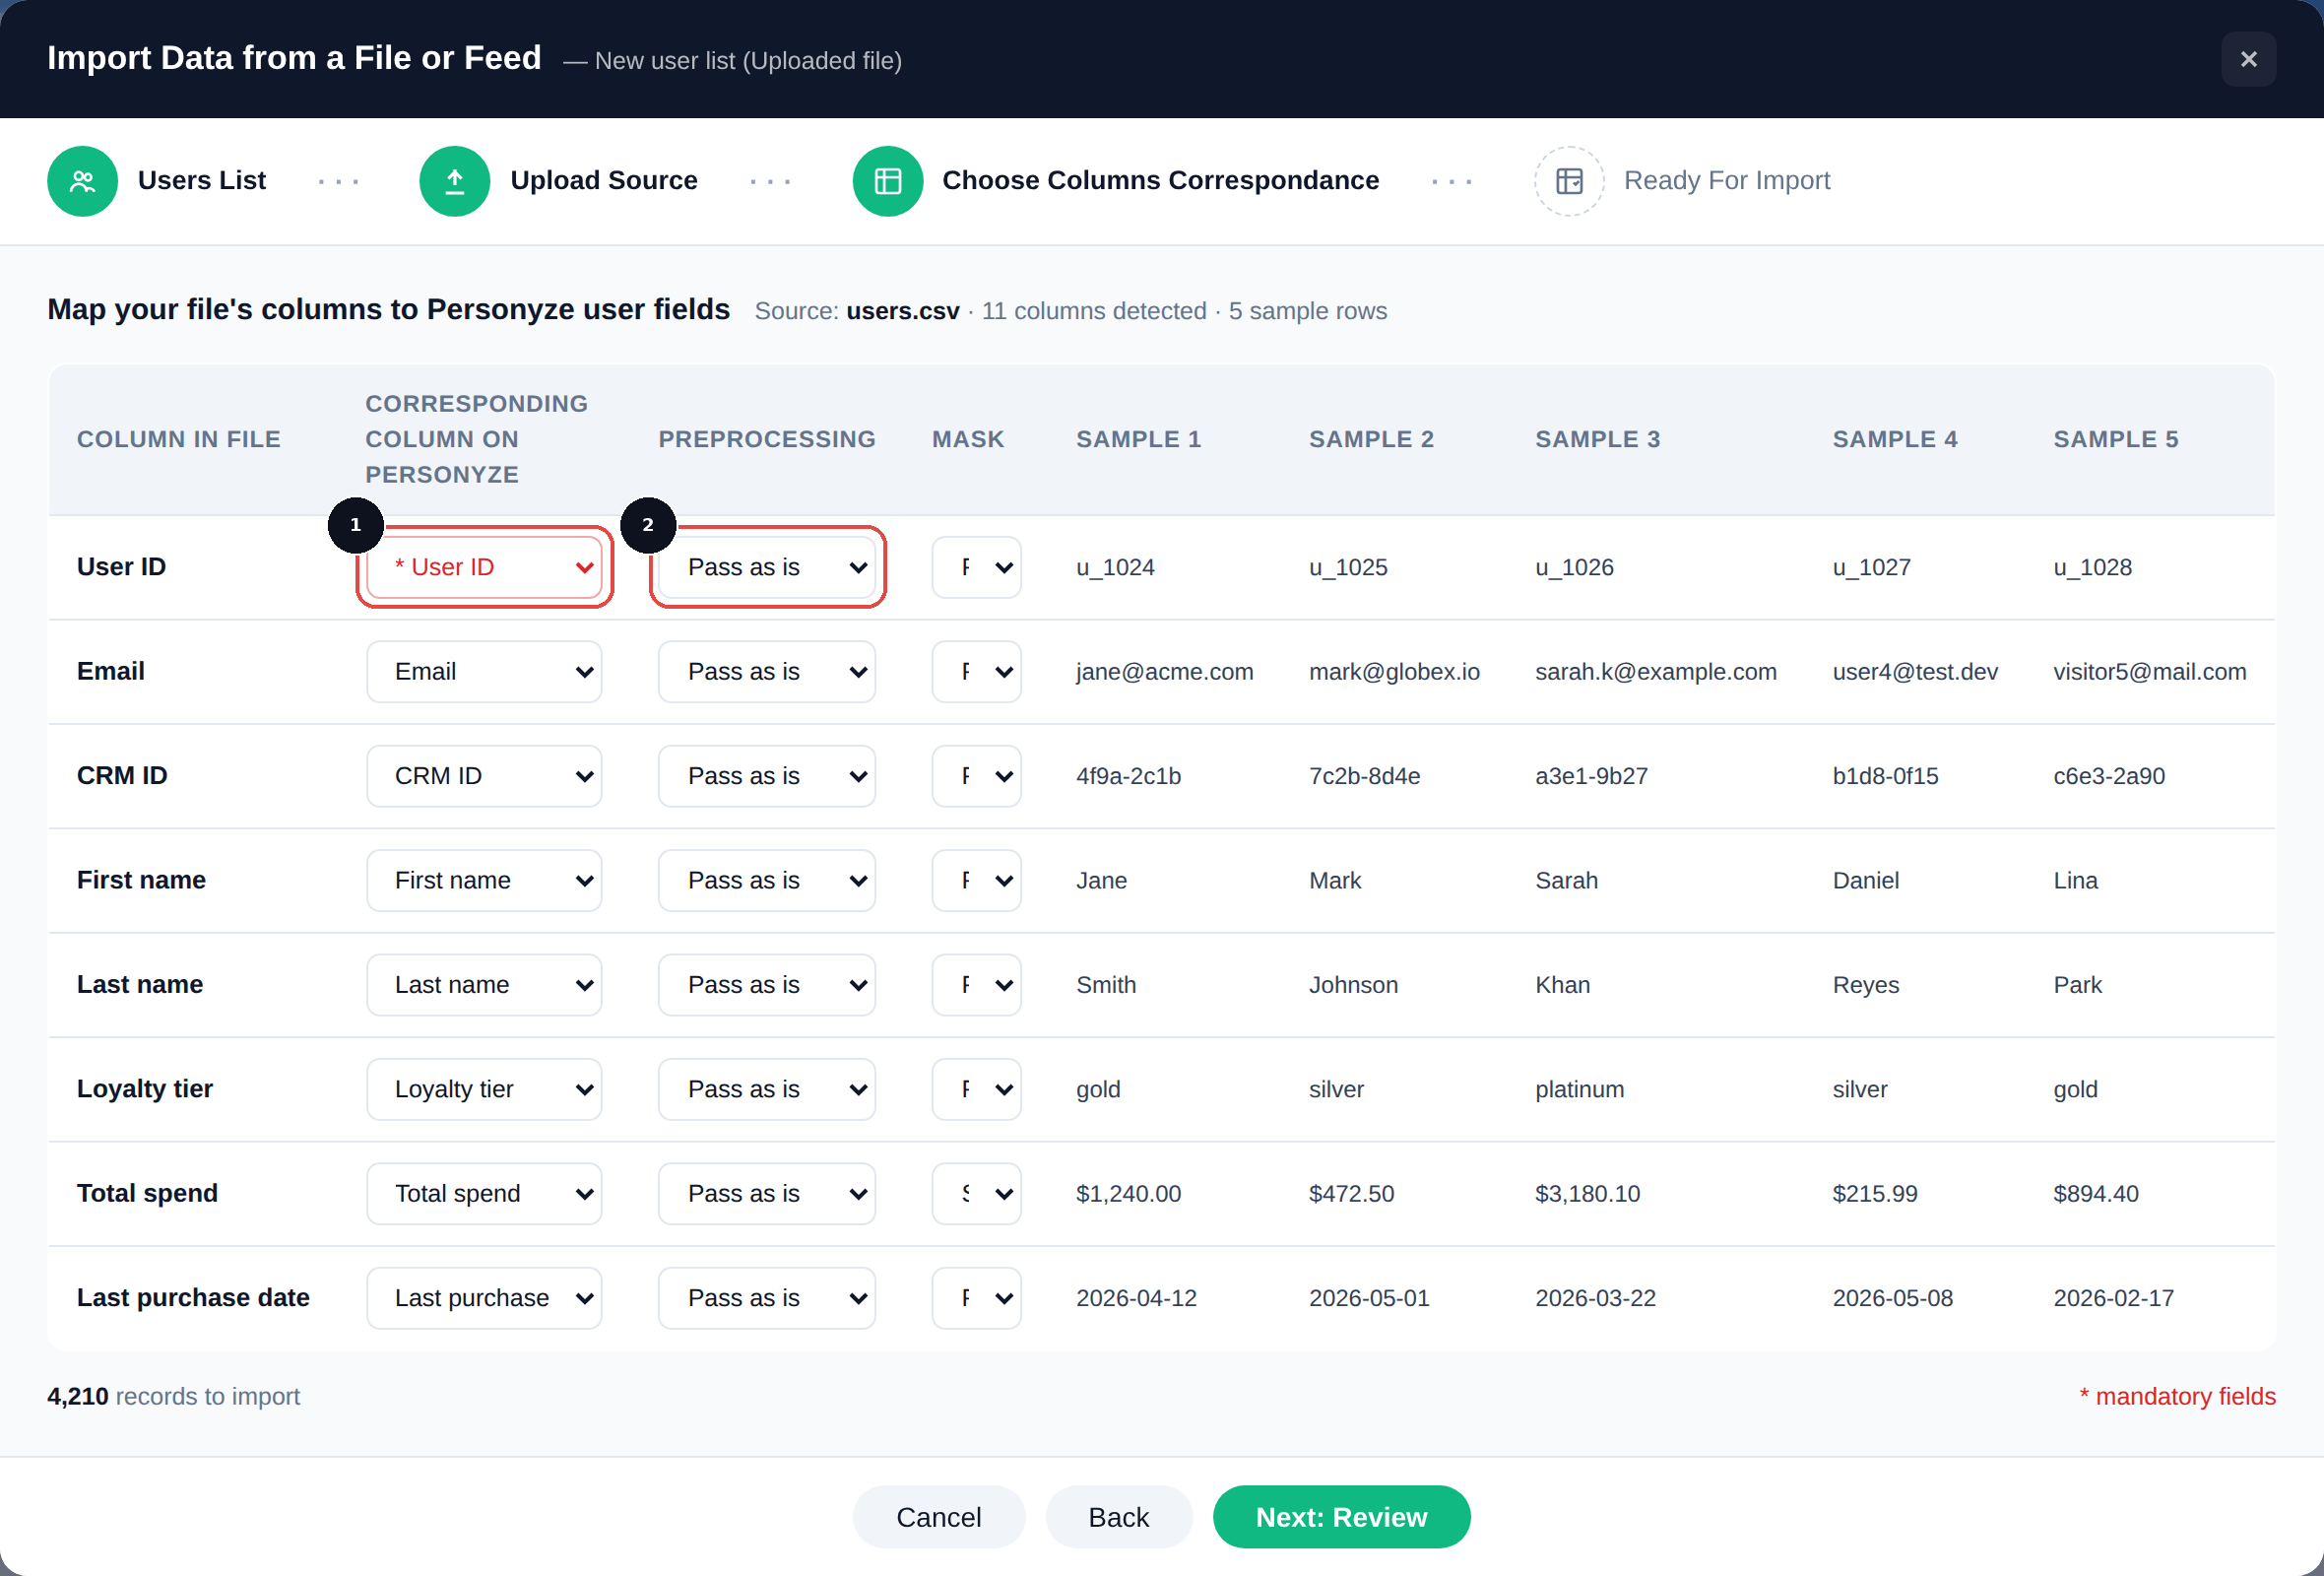
3. Choose Columns Correspondence
Tell Personyze what each column in your data actually is — which one is the email, which is the CRM ID, which maps to Industry or Account Type. This is where your profile fields get connected to the incoming data.
At least one column has to be a key — the email or CRM ID Personyze will match against real visitors. Without it, the rows import but never attach to anyone.
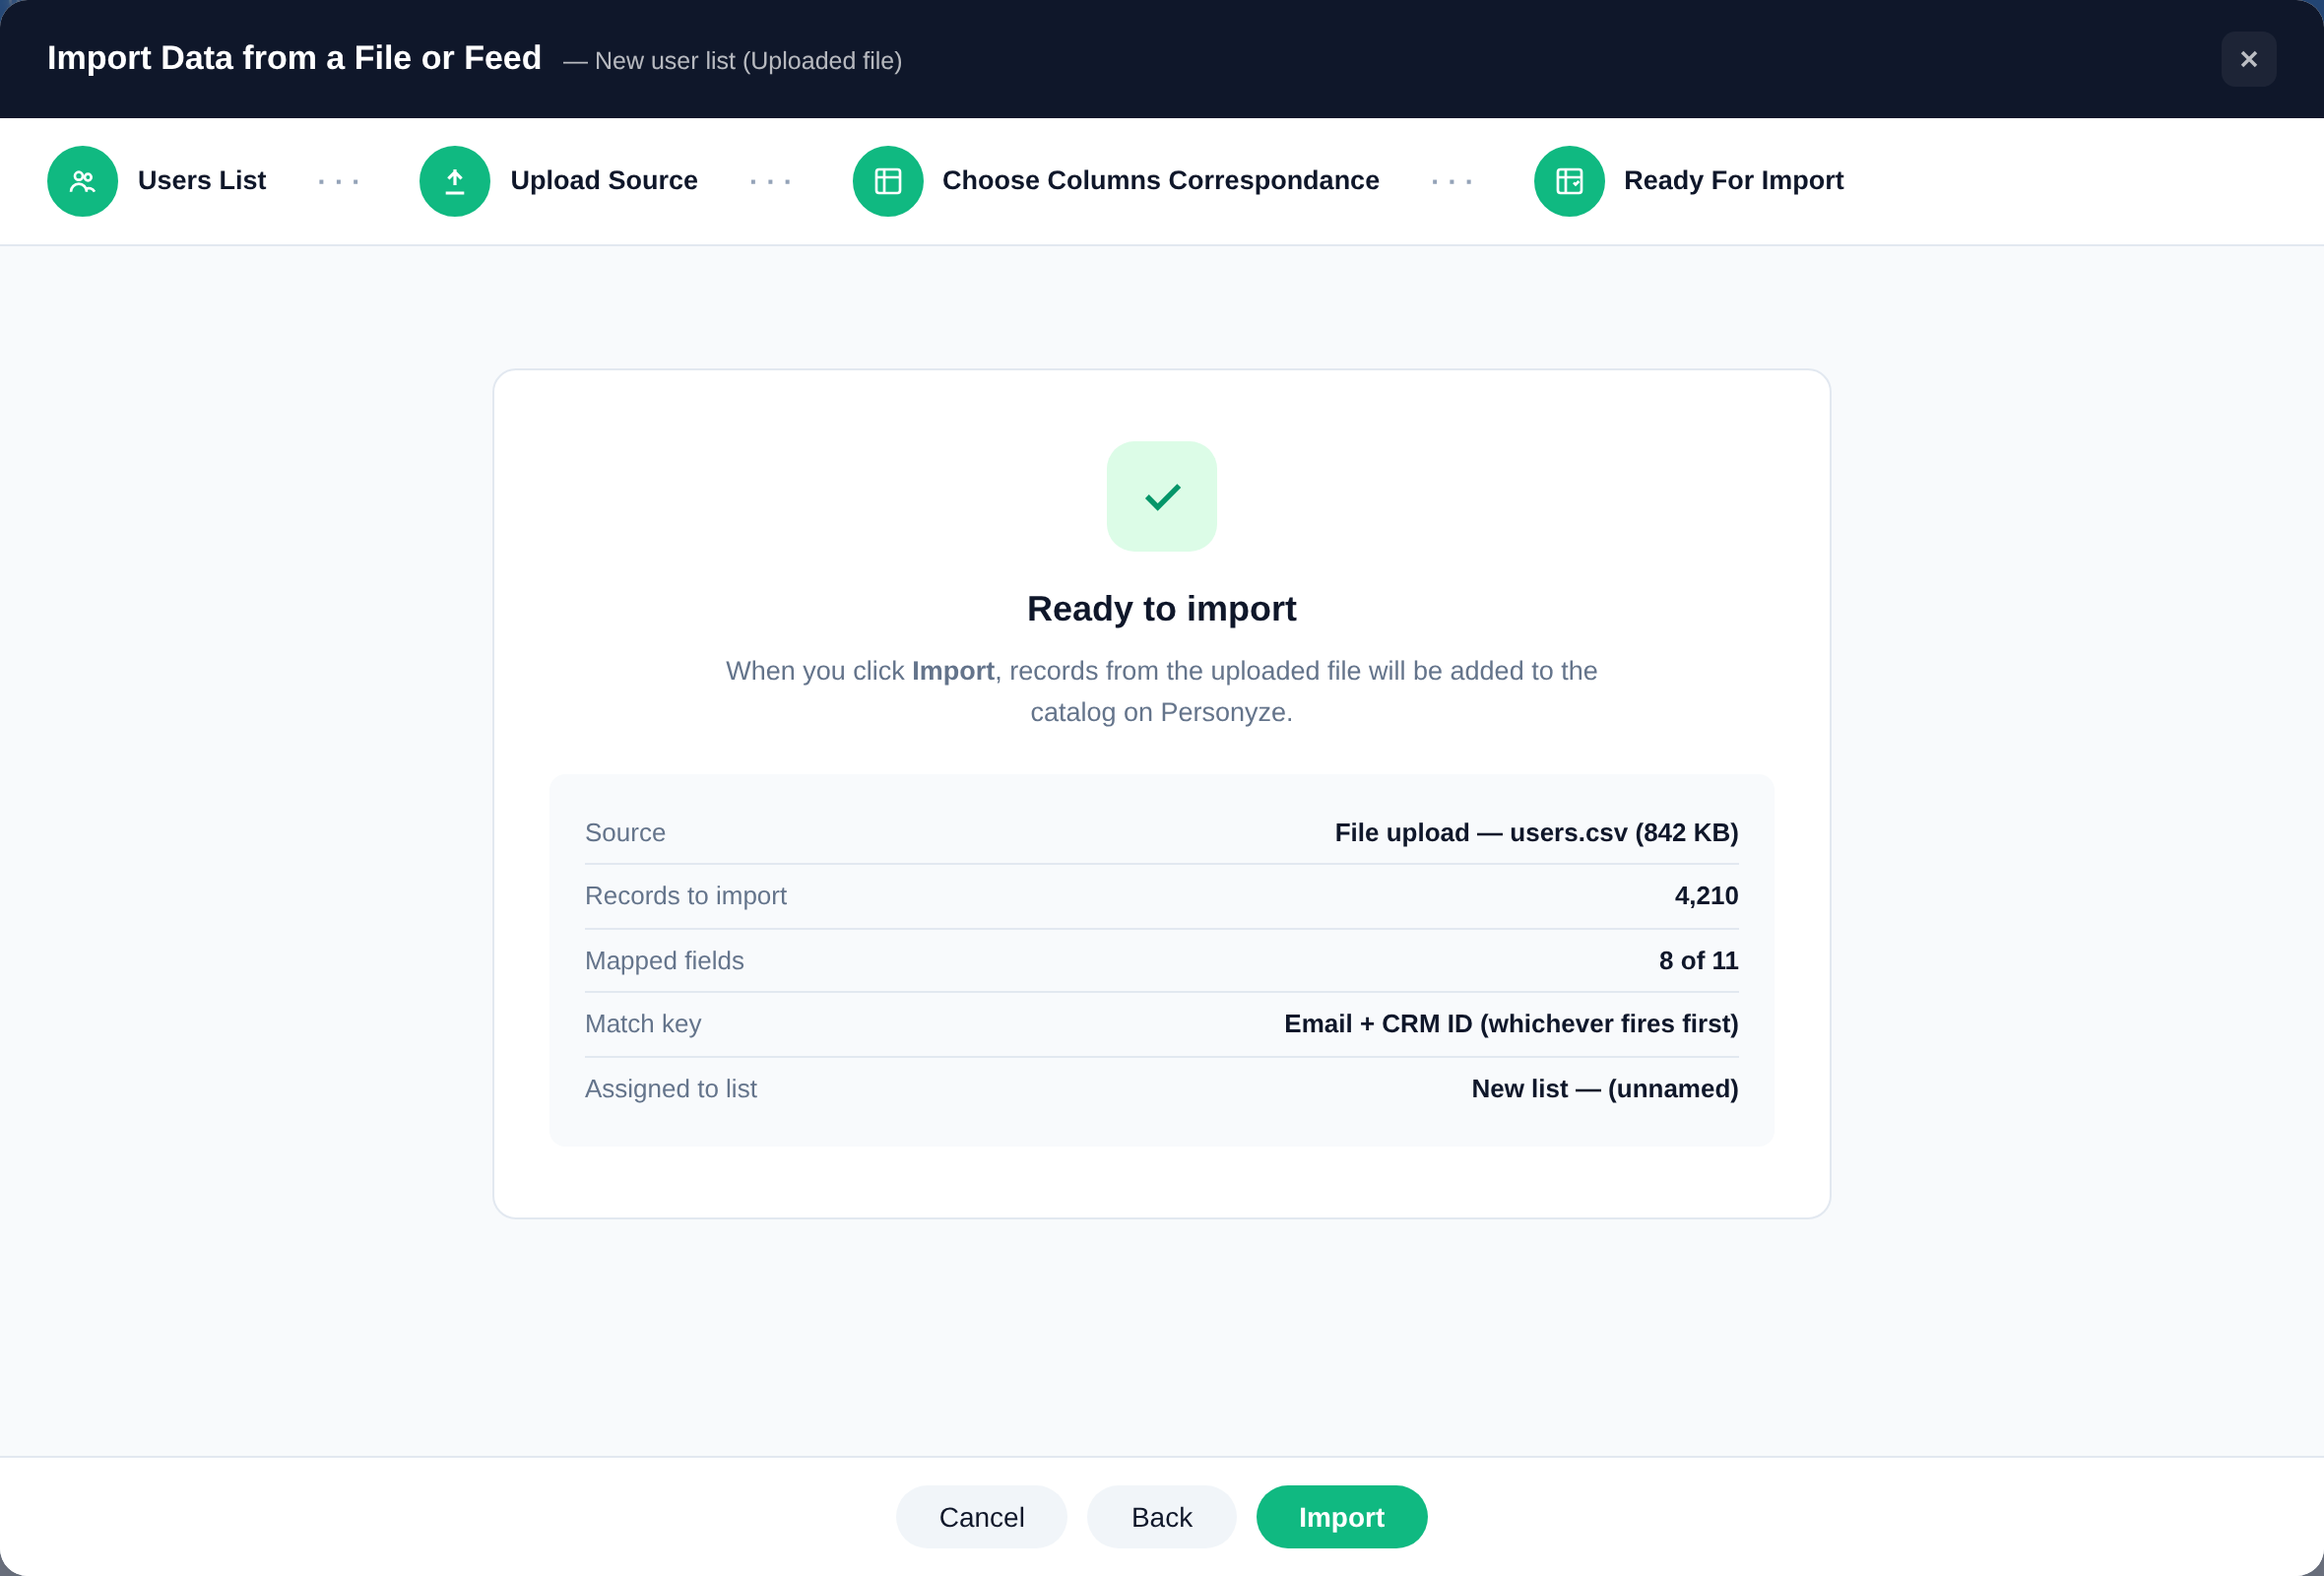
4. Ready for Import
Review the mapping and start the import. From then on, live sources keep themselves up to date.
When You Need a Key — and When You Don’t
A common misconception is that you must set up an identifier before any of this works. You don’t.
For data grabbed on your own site, no key is required. Personyze assigns every visitor its own cookie ID the moment they arrive, so it already knows whose profile to write to. Grab an account tier off the page and it lands on that visitor’s profile immediately, anonymous or not — and it’s there for targeting on their next visit from the same browser.
Keys earn their keep in two specific situations:
- Matching imported records. A CRM export has no idea which browser belongs to whom. A key — an email, CRM ID, or member ID that Personyze can read on the page, in a cookie, as a URL parameter, or from a login field — is what connects that row to the visitor in front of you. Import the world’s best CRM data and it does nothing until a key ties it to a browser.
- Recognizing someone across devices. The cookie ID is per-browser: the same person on their laptop and their phone is two profiles. An identifier is what merges them into one.
Keys are configured under Cross-device user identifiers.
Checking a User’s Data
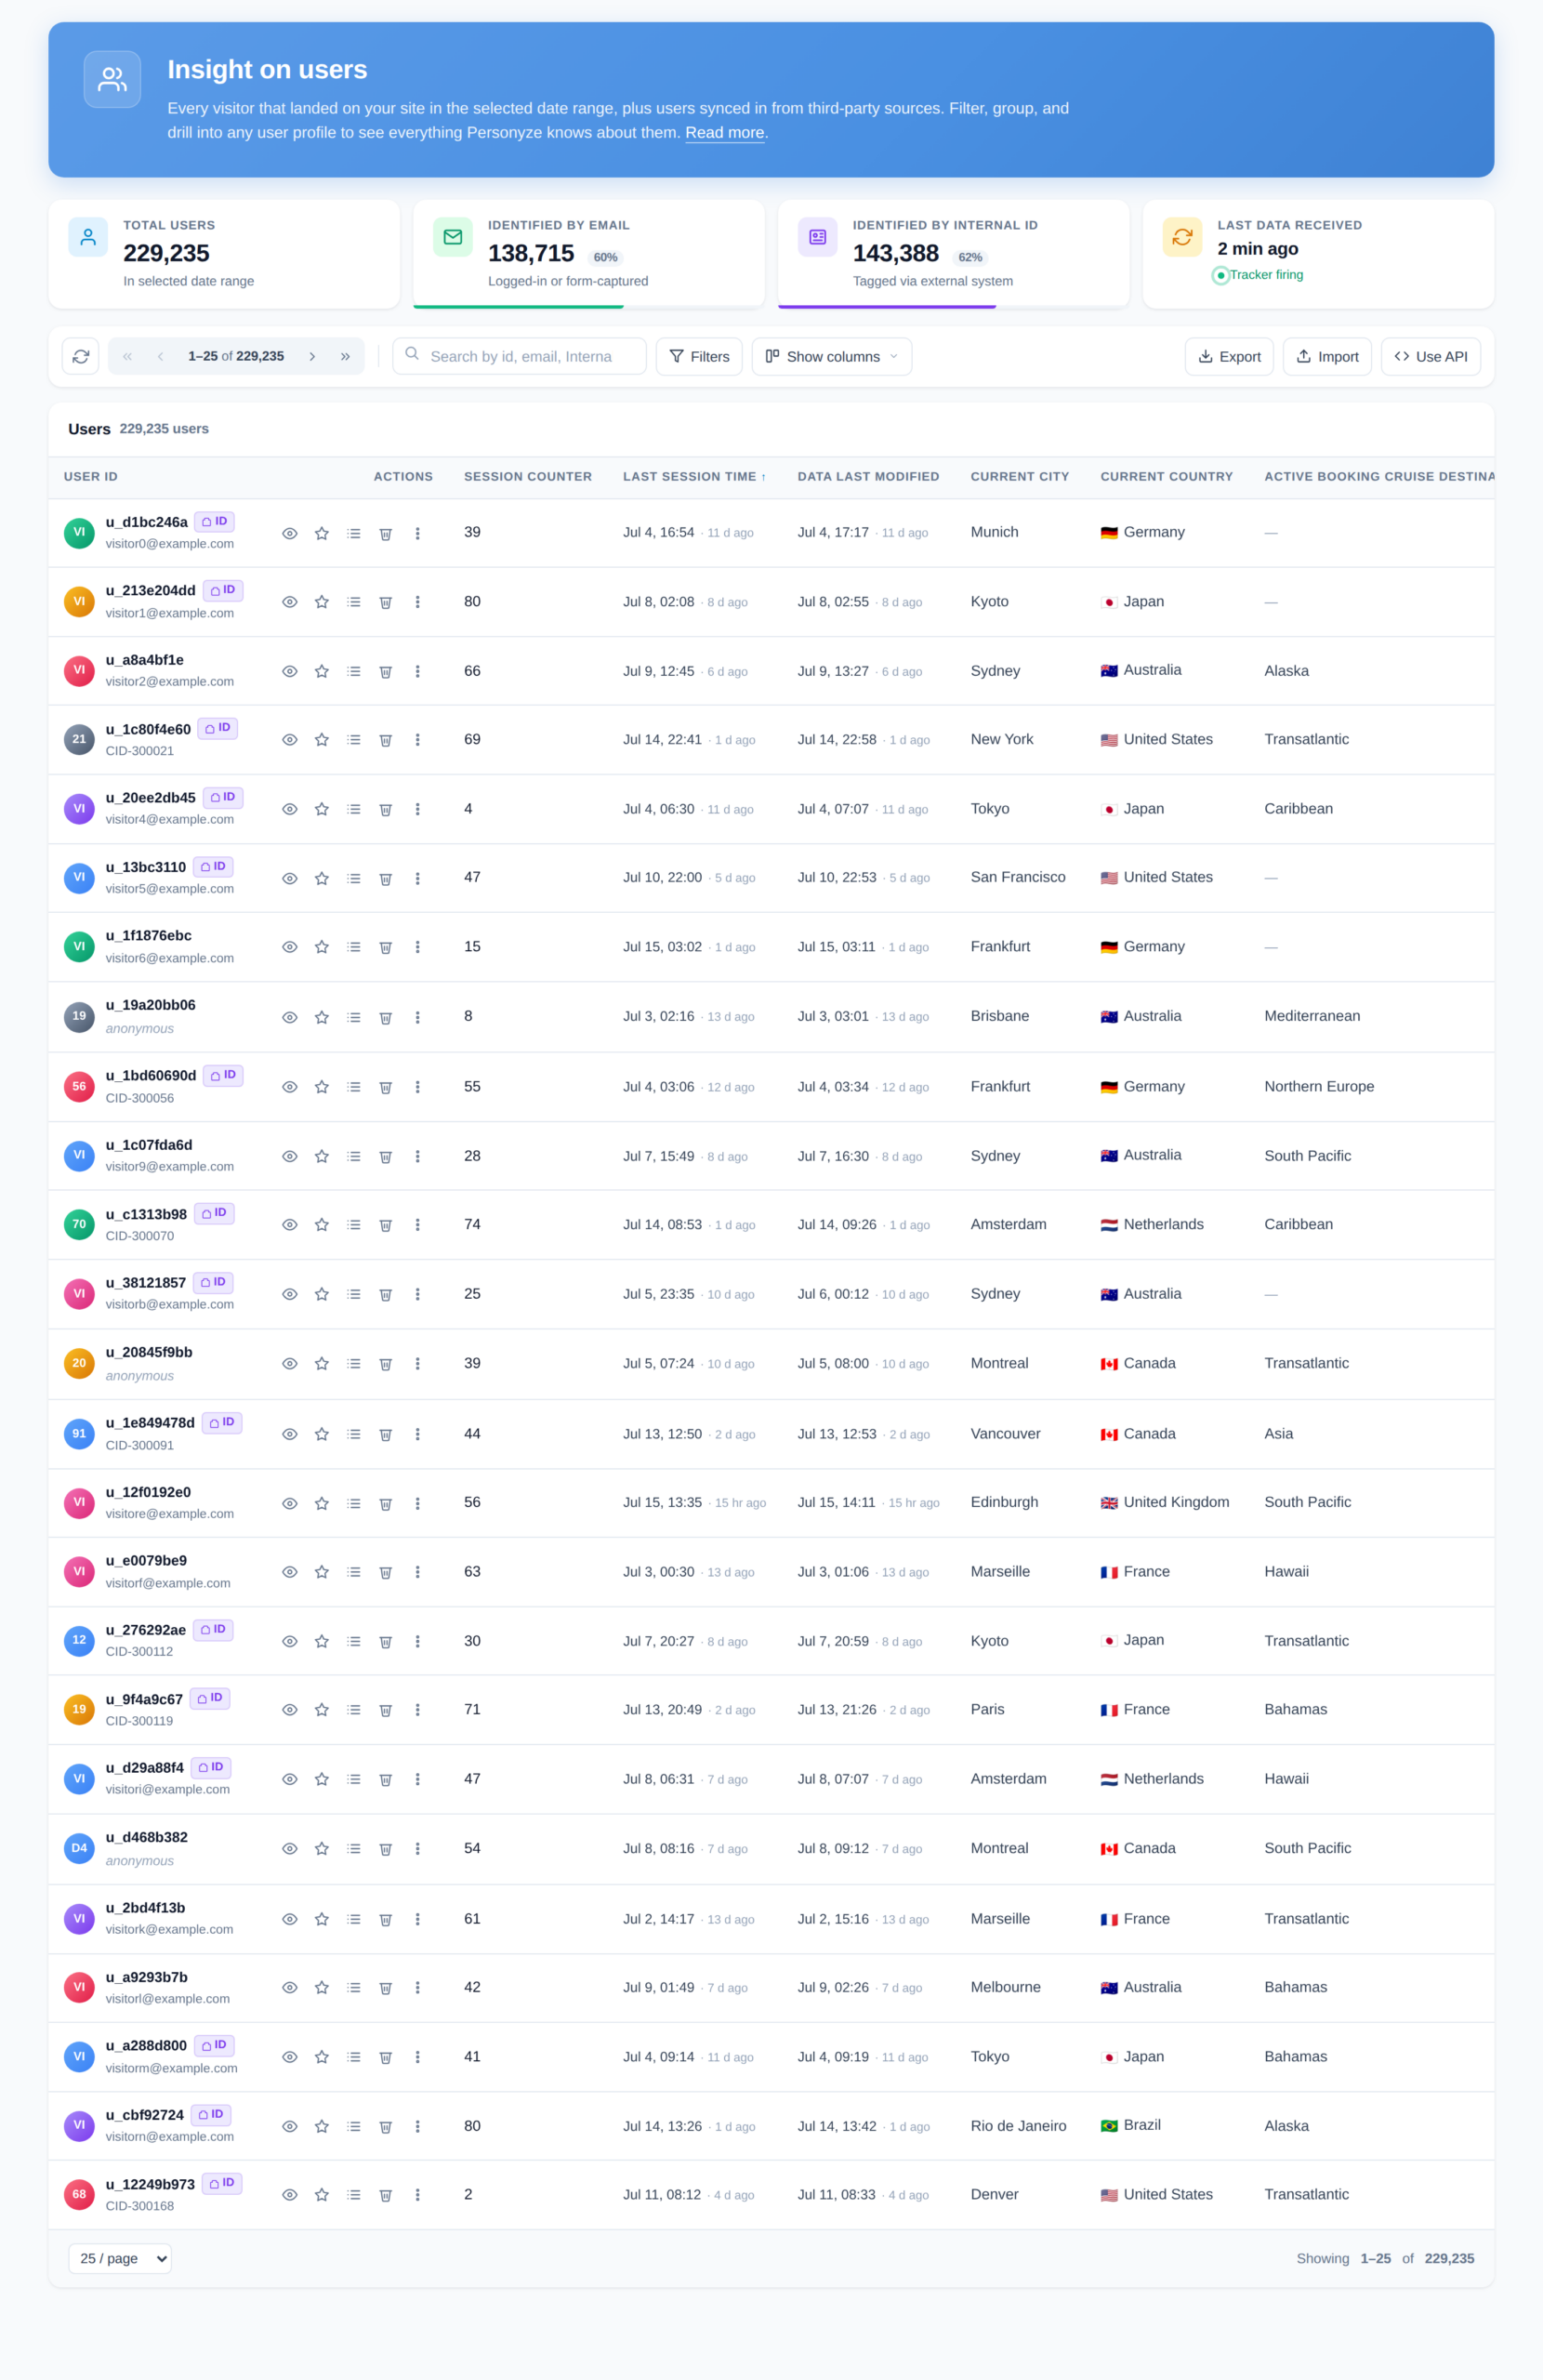
Insight on users lists every visitor in the selected range plus anyone synced in from third-party sources, with their profile fields as columns. Filter, group, and search it to confirm the data landed the way you expected.
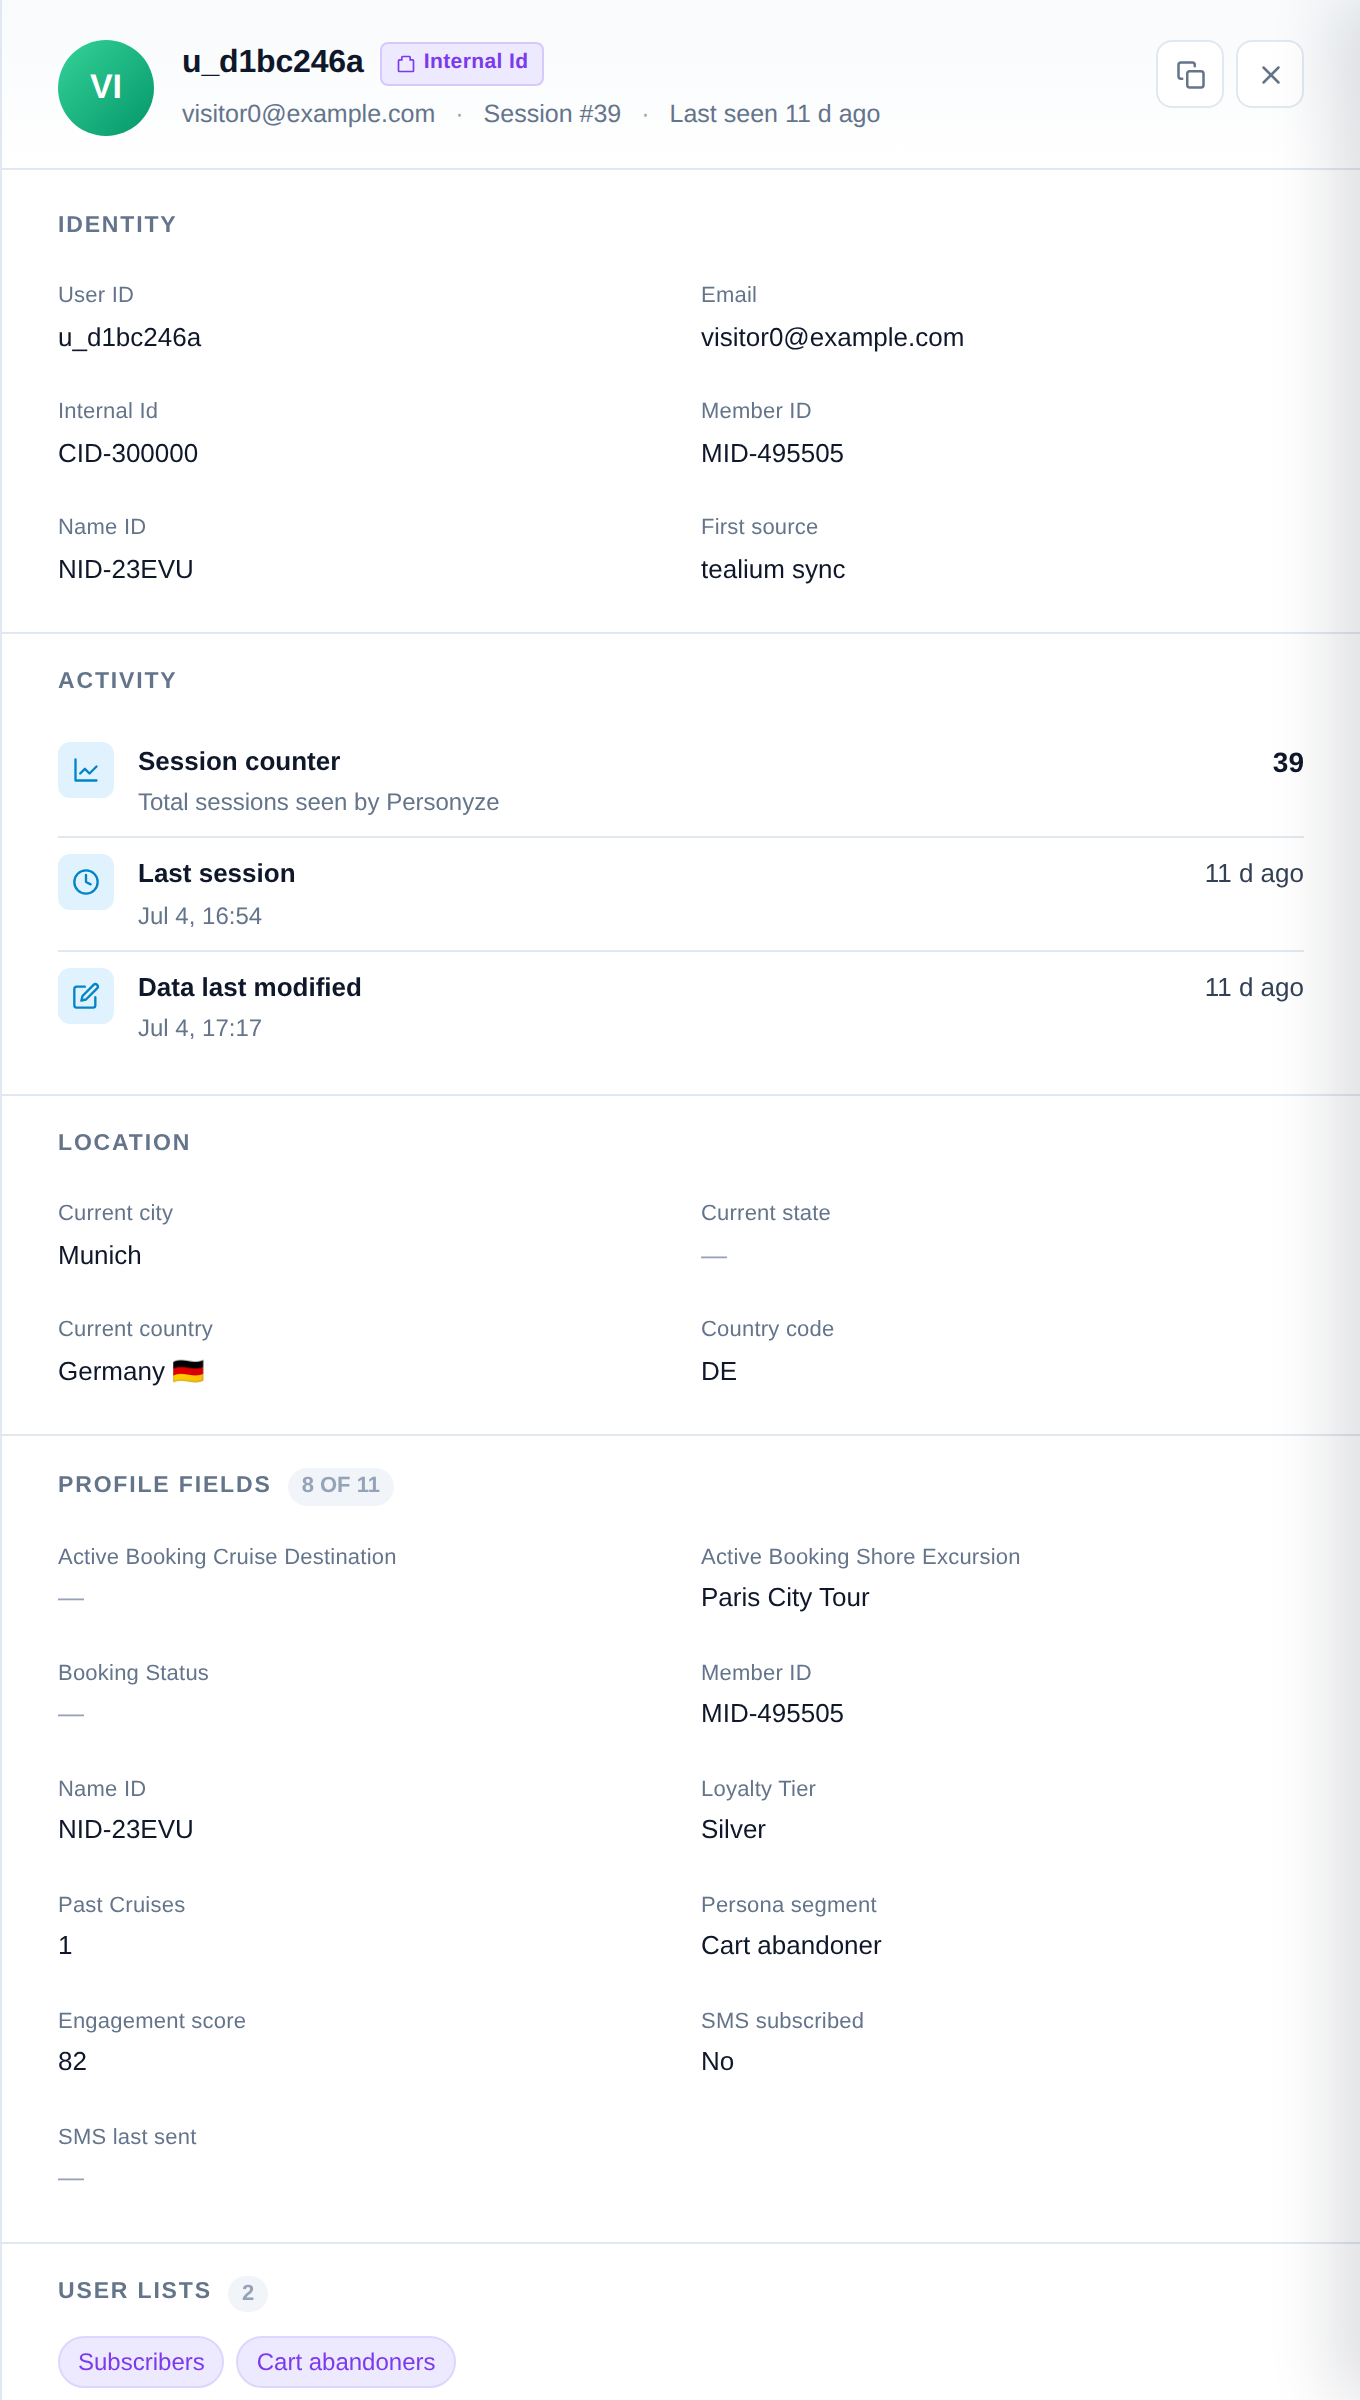
Open any row for the full profile: the identity keys that tie them together (user ID, email, CRM ID, member ID, and which source they first came from), their activity, and every stored profile field.
The first source line is useful when debugging — it tells you whether a value arrived from a feed, an integration, or was scraped off your own site.
Using Profile Fields in Targeting
Once a field exists and is populated, it becomes a targeting rule. In the audience builder, add a rule and choose User / CRM / ABM data — profile fields from your CRM.
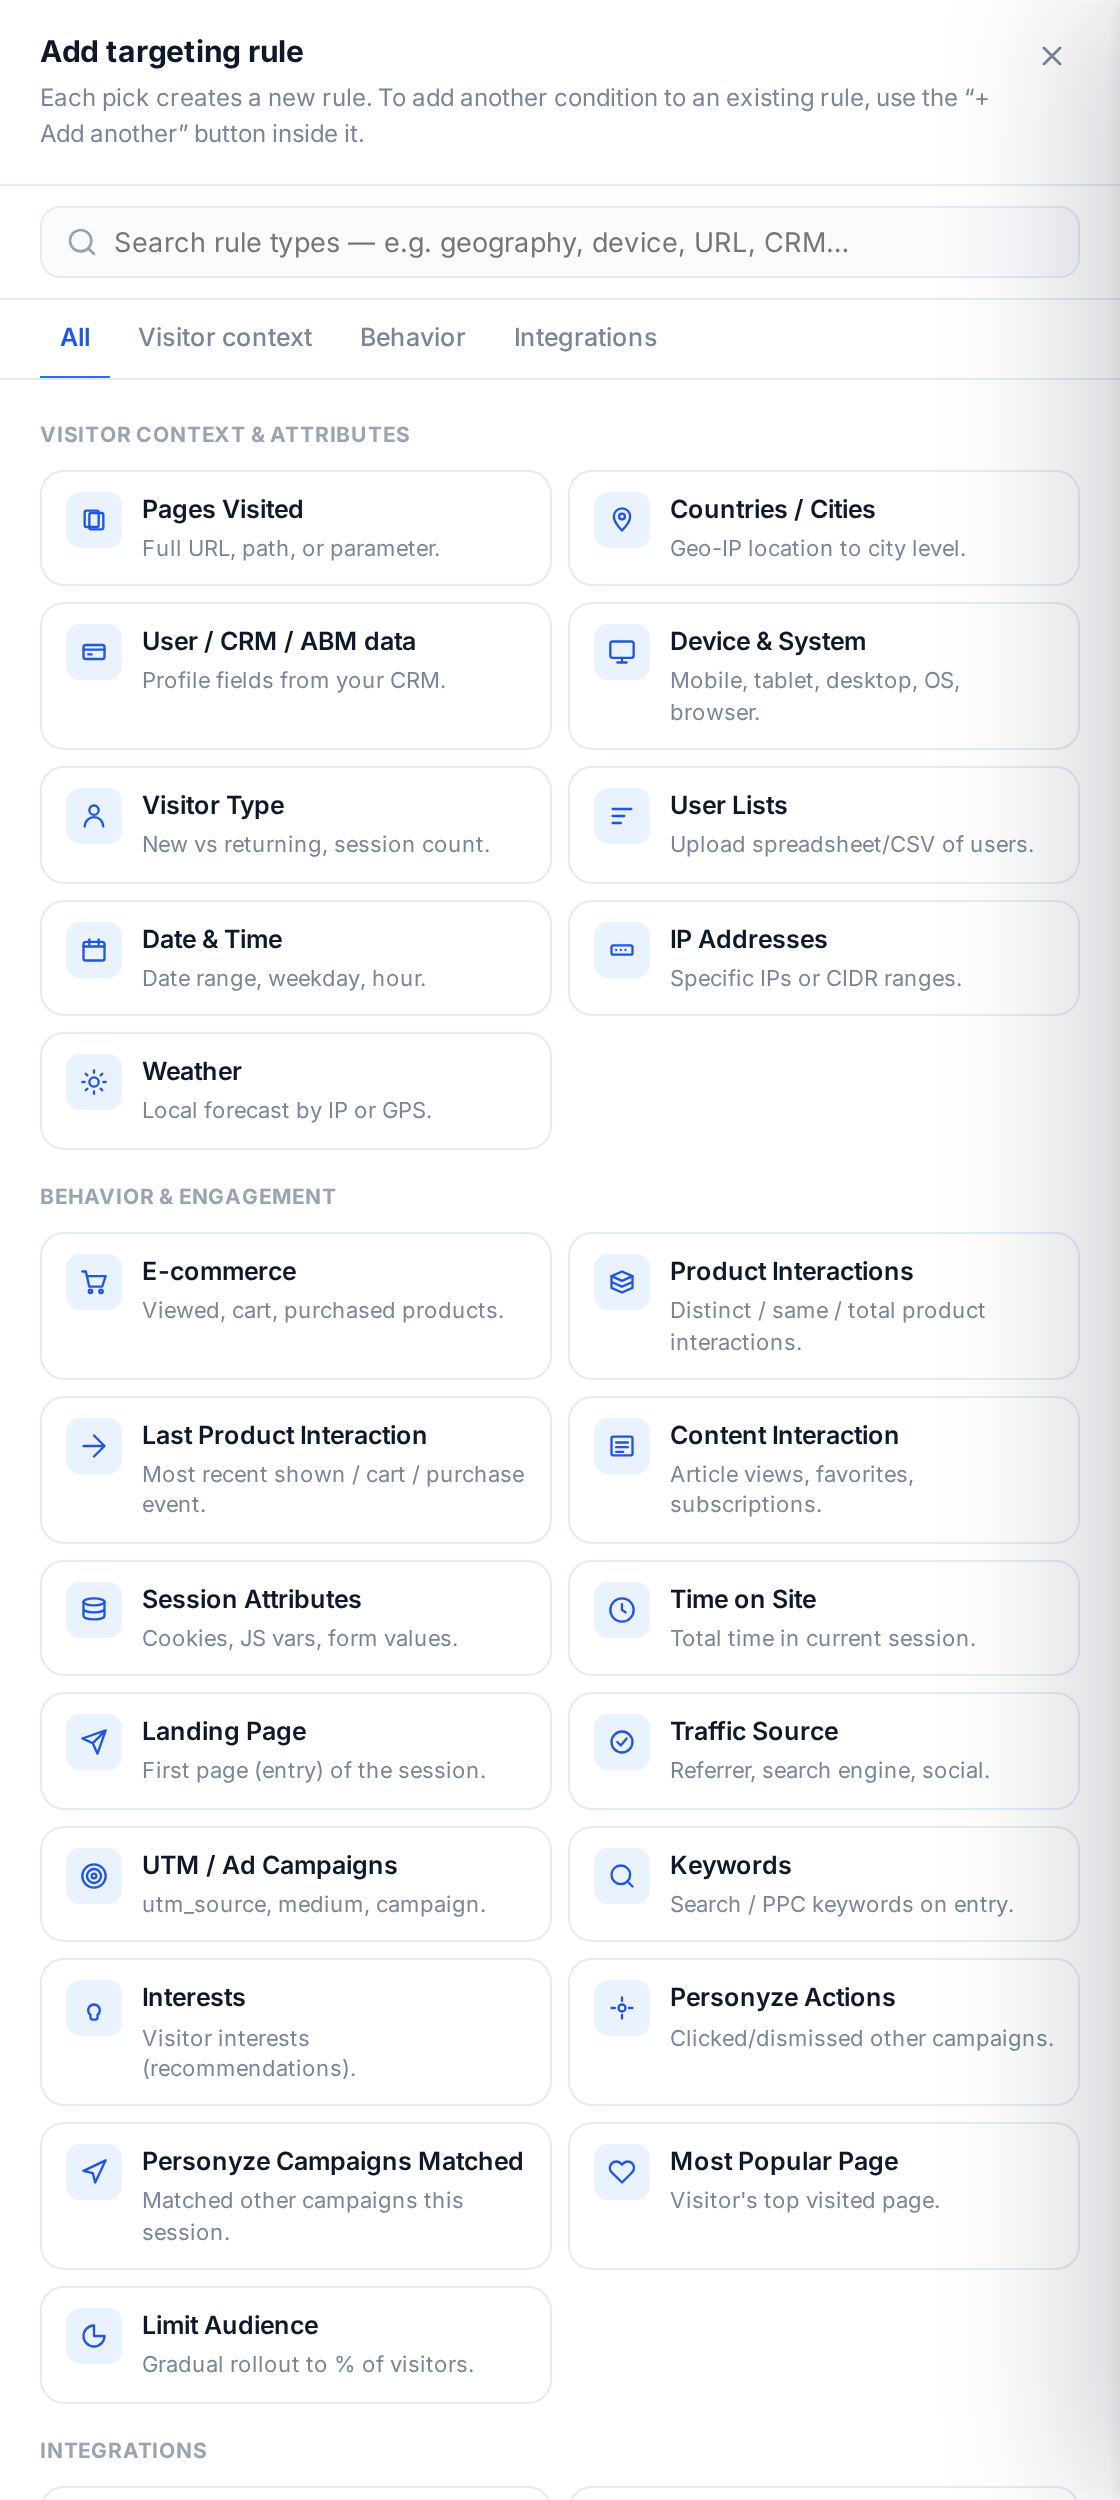
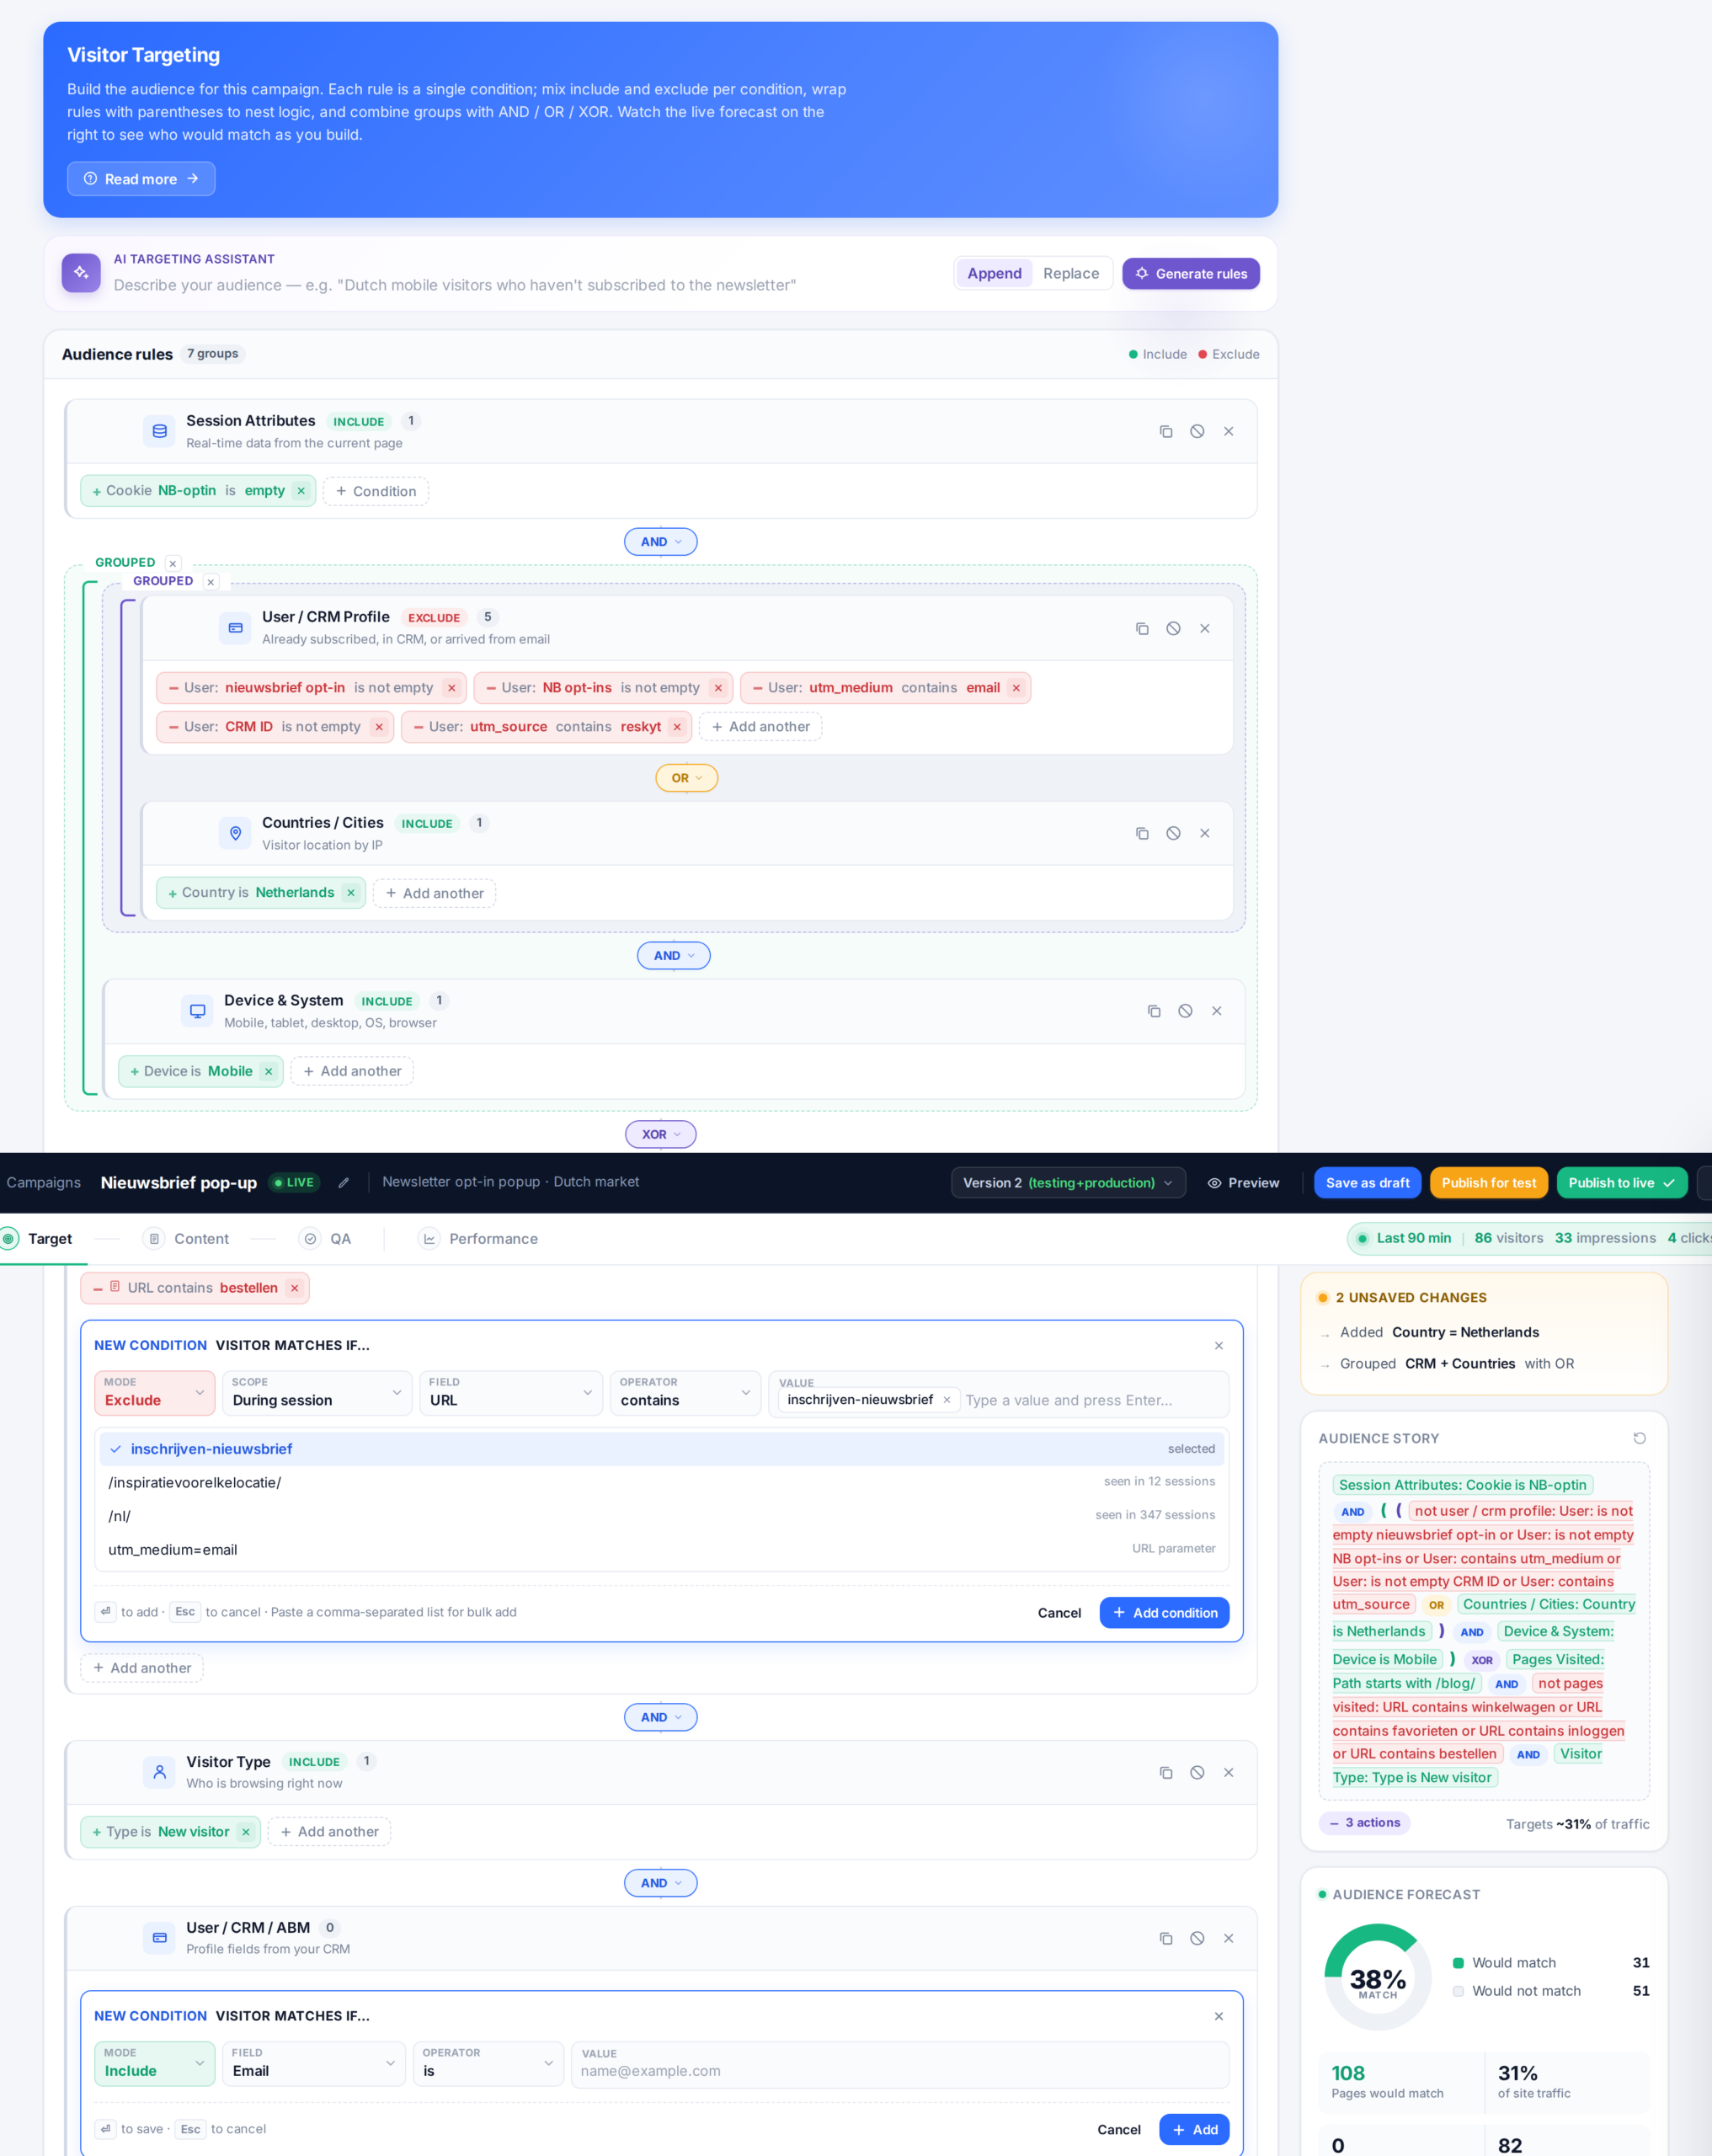
Because rules combine, a profile field is rarely used alone — the useful audiences are things like “Account Type is Enterprise AND has visited Pricing in this session”, mixing what you know about them with what they’re doing now.
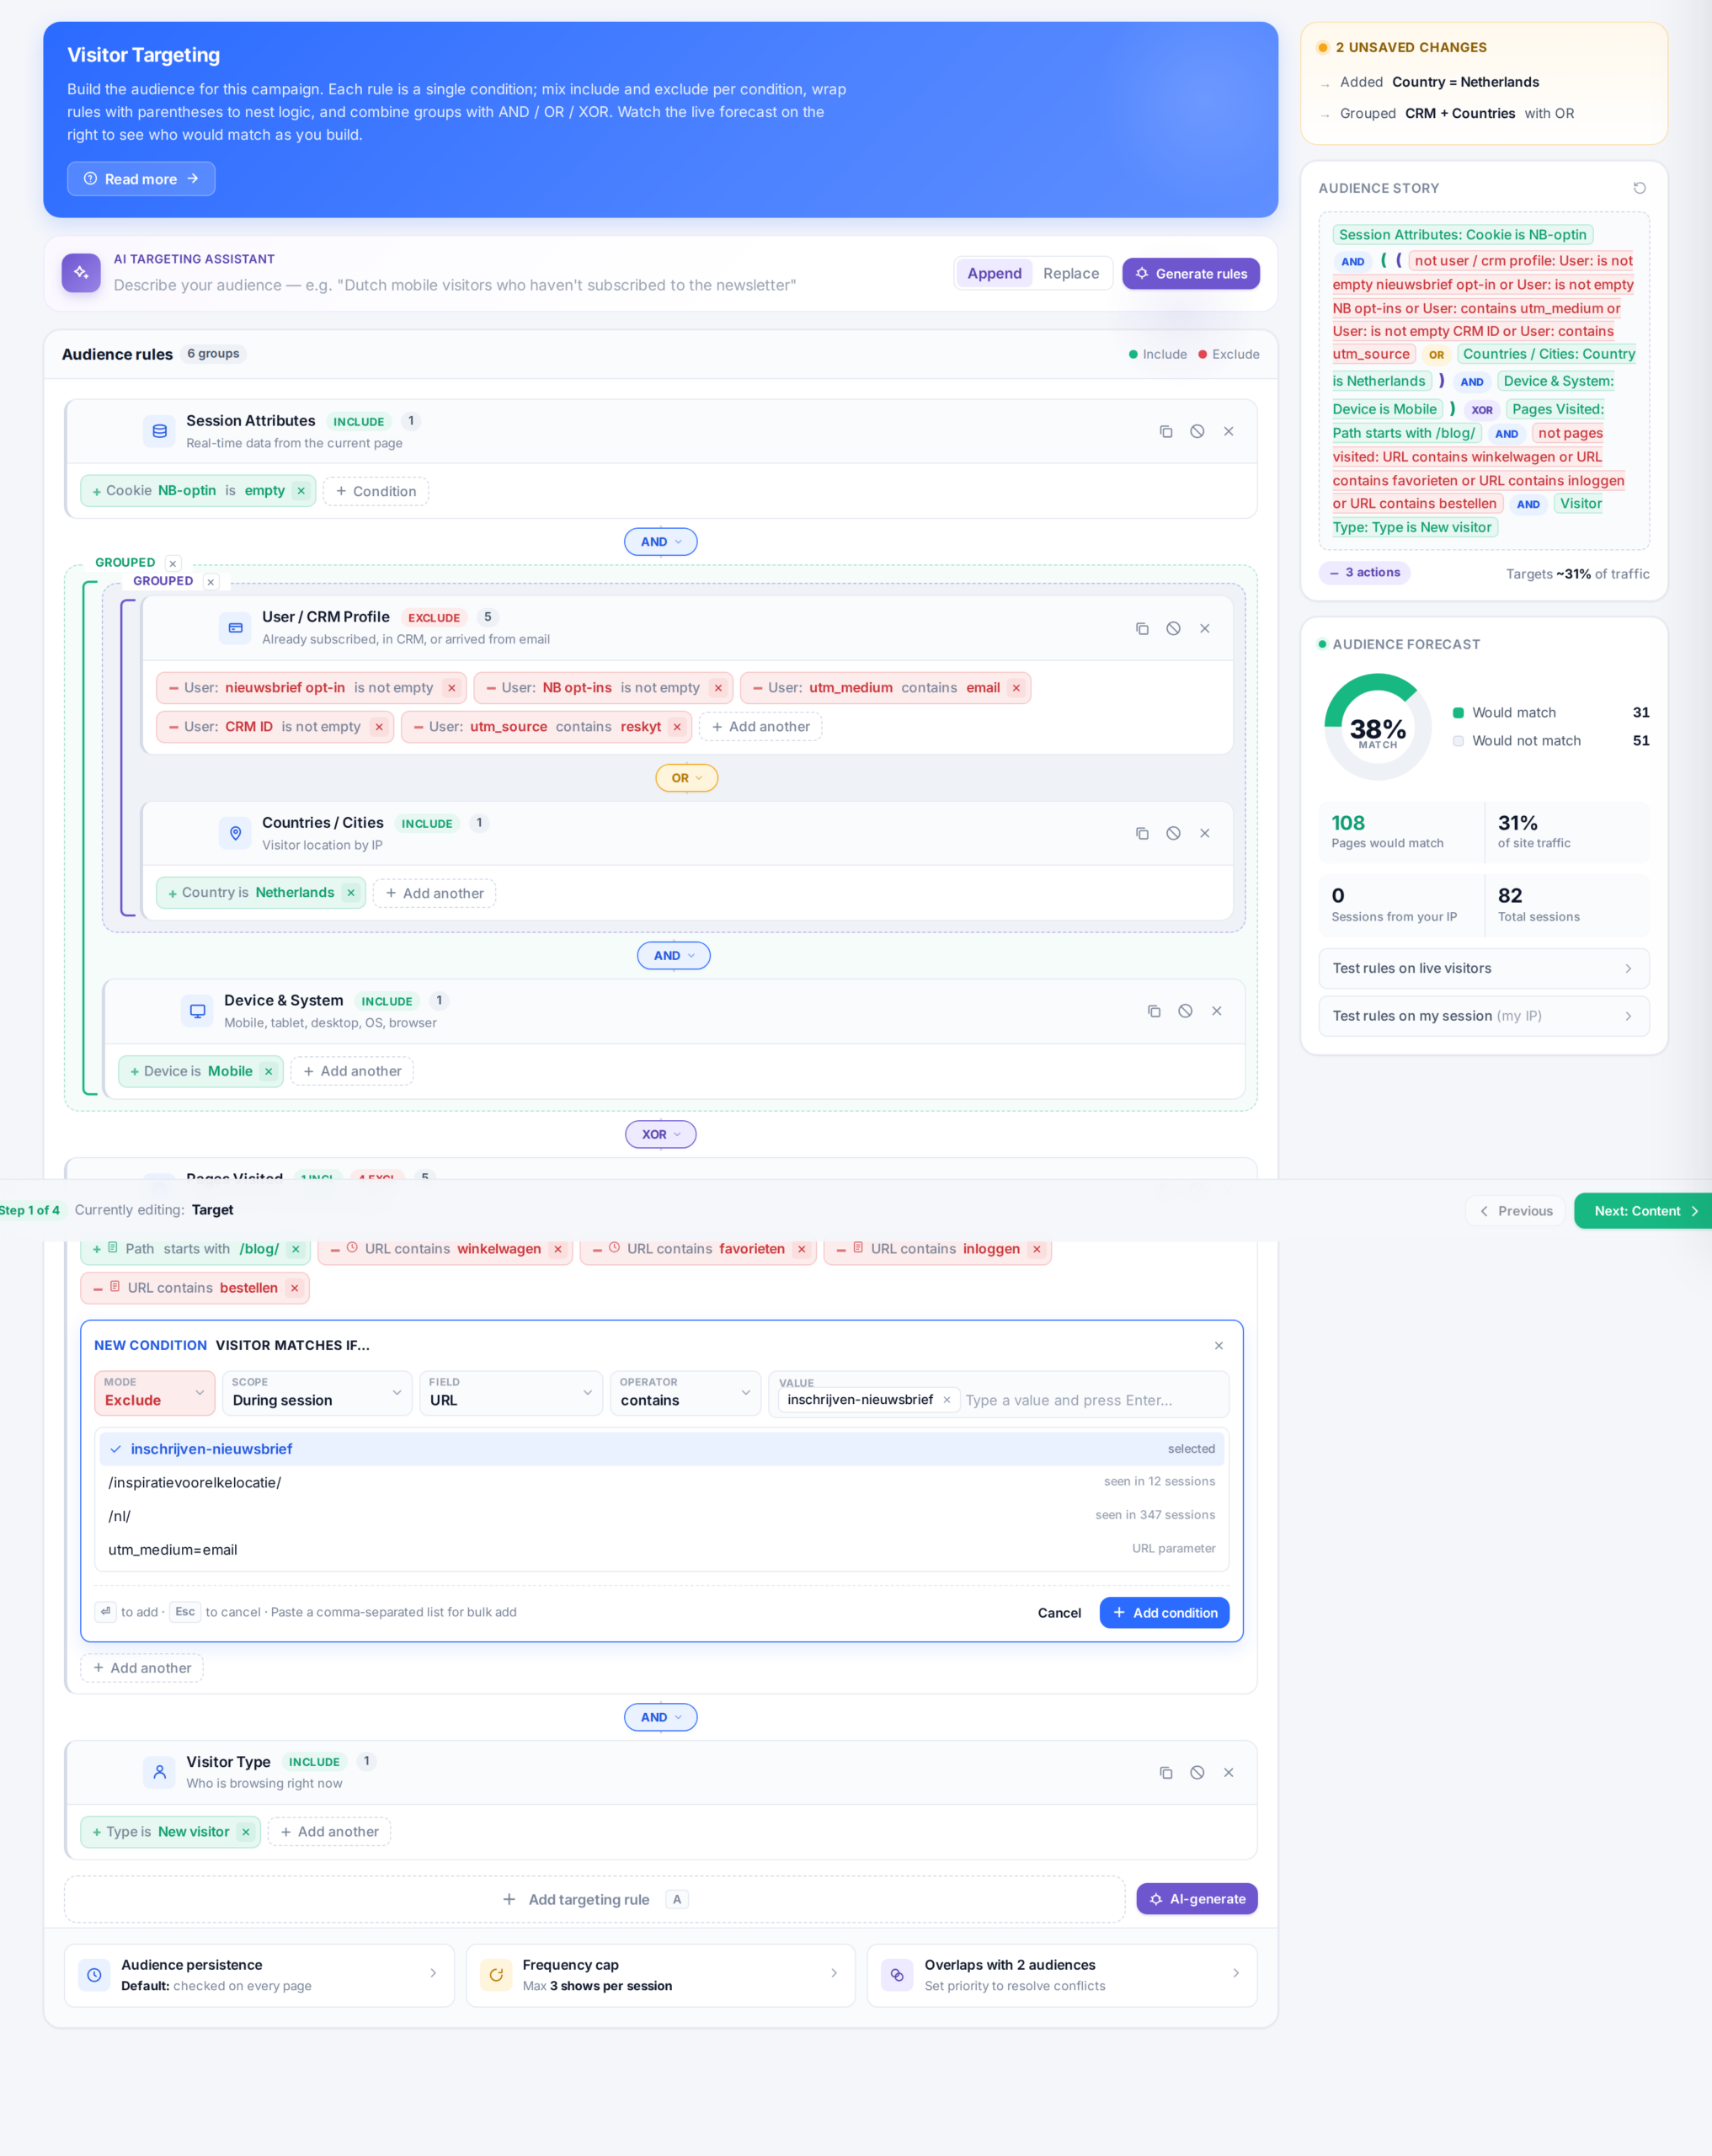
Profile fields also work as dynamic variables in content — drop a first name or account tier straight into a banner via the HTML editor — and they appear as filters in your statistics, so you can break any report down by an imported attribute.
When Data Appears
- Imported/synced data is available from the user’s next session. If someone is on the site when the data arrives, they won’t see it applied until they return — so when testing a feed against yourself, log out, clear cookies, and log back in.
- Data captured on-site — scraped from the page, a cookie, or a URL parameter — is available immediately.
- If you need profiles to update during an active session, Personyze support can enable that on request.
- Live feeds are checked for updates about every 10 minutes.
Related
- Grab Data from Your Site — capturing profile values from your own pages.
- Adding Custom User Profile Data Fields for ABM & CRM Targeting
- Getting started with CRM and user list targeting