
Zapier connects Personyze to thousands of apps with no code — and it now works in both directions. Personyze can finish a Zap, creating or updating visitor profiles from any app in your stack, and it can now start one: a change on a visitor profile can trigger a Zap, with searches and audience steps to use in between.
Zapier authenticates with the username api and a password you generate in Personyze. That password is an API key — keys generated for Zapier and keys generated for the Full-featured API are the same set, so either one works here.
What you can build
| Step | Kind | What it does |
|---|---|---|
| Visitor Created or Updated | Trigger | Starts a Zap when a visitor profile is created, or any field on it changes |
| Create or Update User | Action | Creates a visitor, or merges into the existing one |
| Update Visitor | Action | Updates an existing visitor. Never creates one |
| Delete Visitor | Action | Permanently deletes a person’s data in Personyze, matched by email or visitor ID: their profile and everything recorded about them, as Data & privacy → Visitor requests deletes it. The address goes on your suppression list, and the request is logged. A deletion that runs out of time fails the step; run it again to delete the rest. |
| Add Visitor to Audience | Action | Adds a visitor to an audience, chosen by name |
| API Request (Advanced) | Action | Any authorized call to the REST API |
| Find Visitor | Search | By email or visitor ID |
| Find Events | Search | Tracked events, optionally by visitor, container or date |
| Find or Create Audience | Search + create | Looks up an audience by name, and creates it when there is no match |
| Create Audience | Action | Creates an audience outright |
| Record Product or Article Interaction | Action | Records that a visitor viewed, liked, carted or purchased something |
| Create or Update Product | Action | Adds a product to the catalog, or updates the one with that ID |
The walkthrough and numbered steps below cover connecting your account and pushing data in. The sections after them cover triggering a Zap from Personyze, and the behaviour worth knowing before you build.
Prefer to click through it? Use the interactive walkthrough below, then scroll down for the detailed steps.
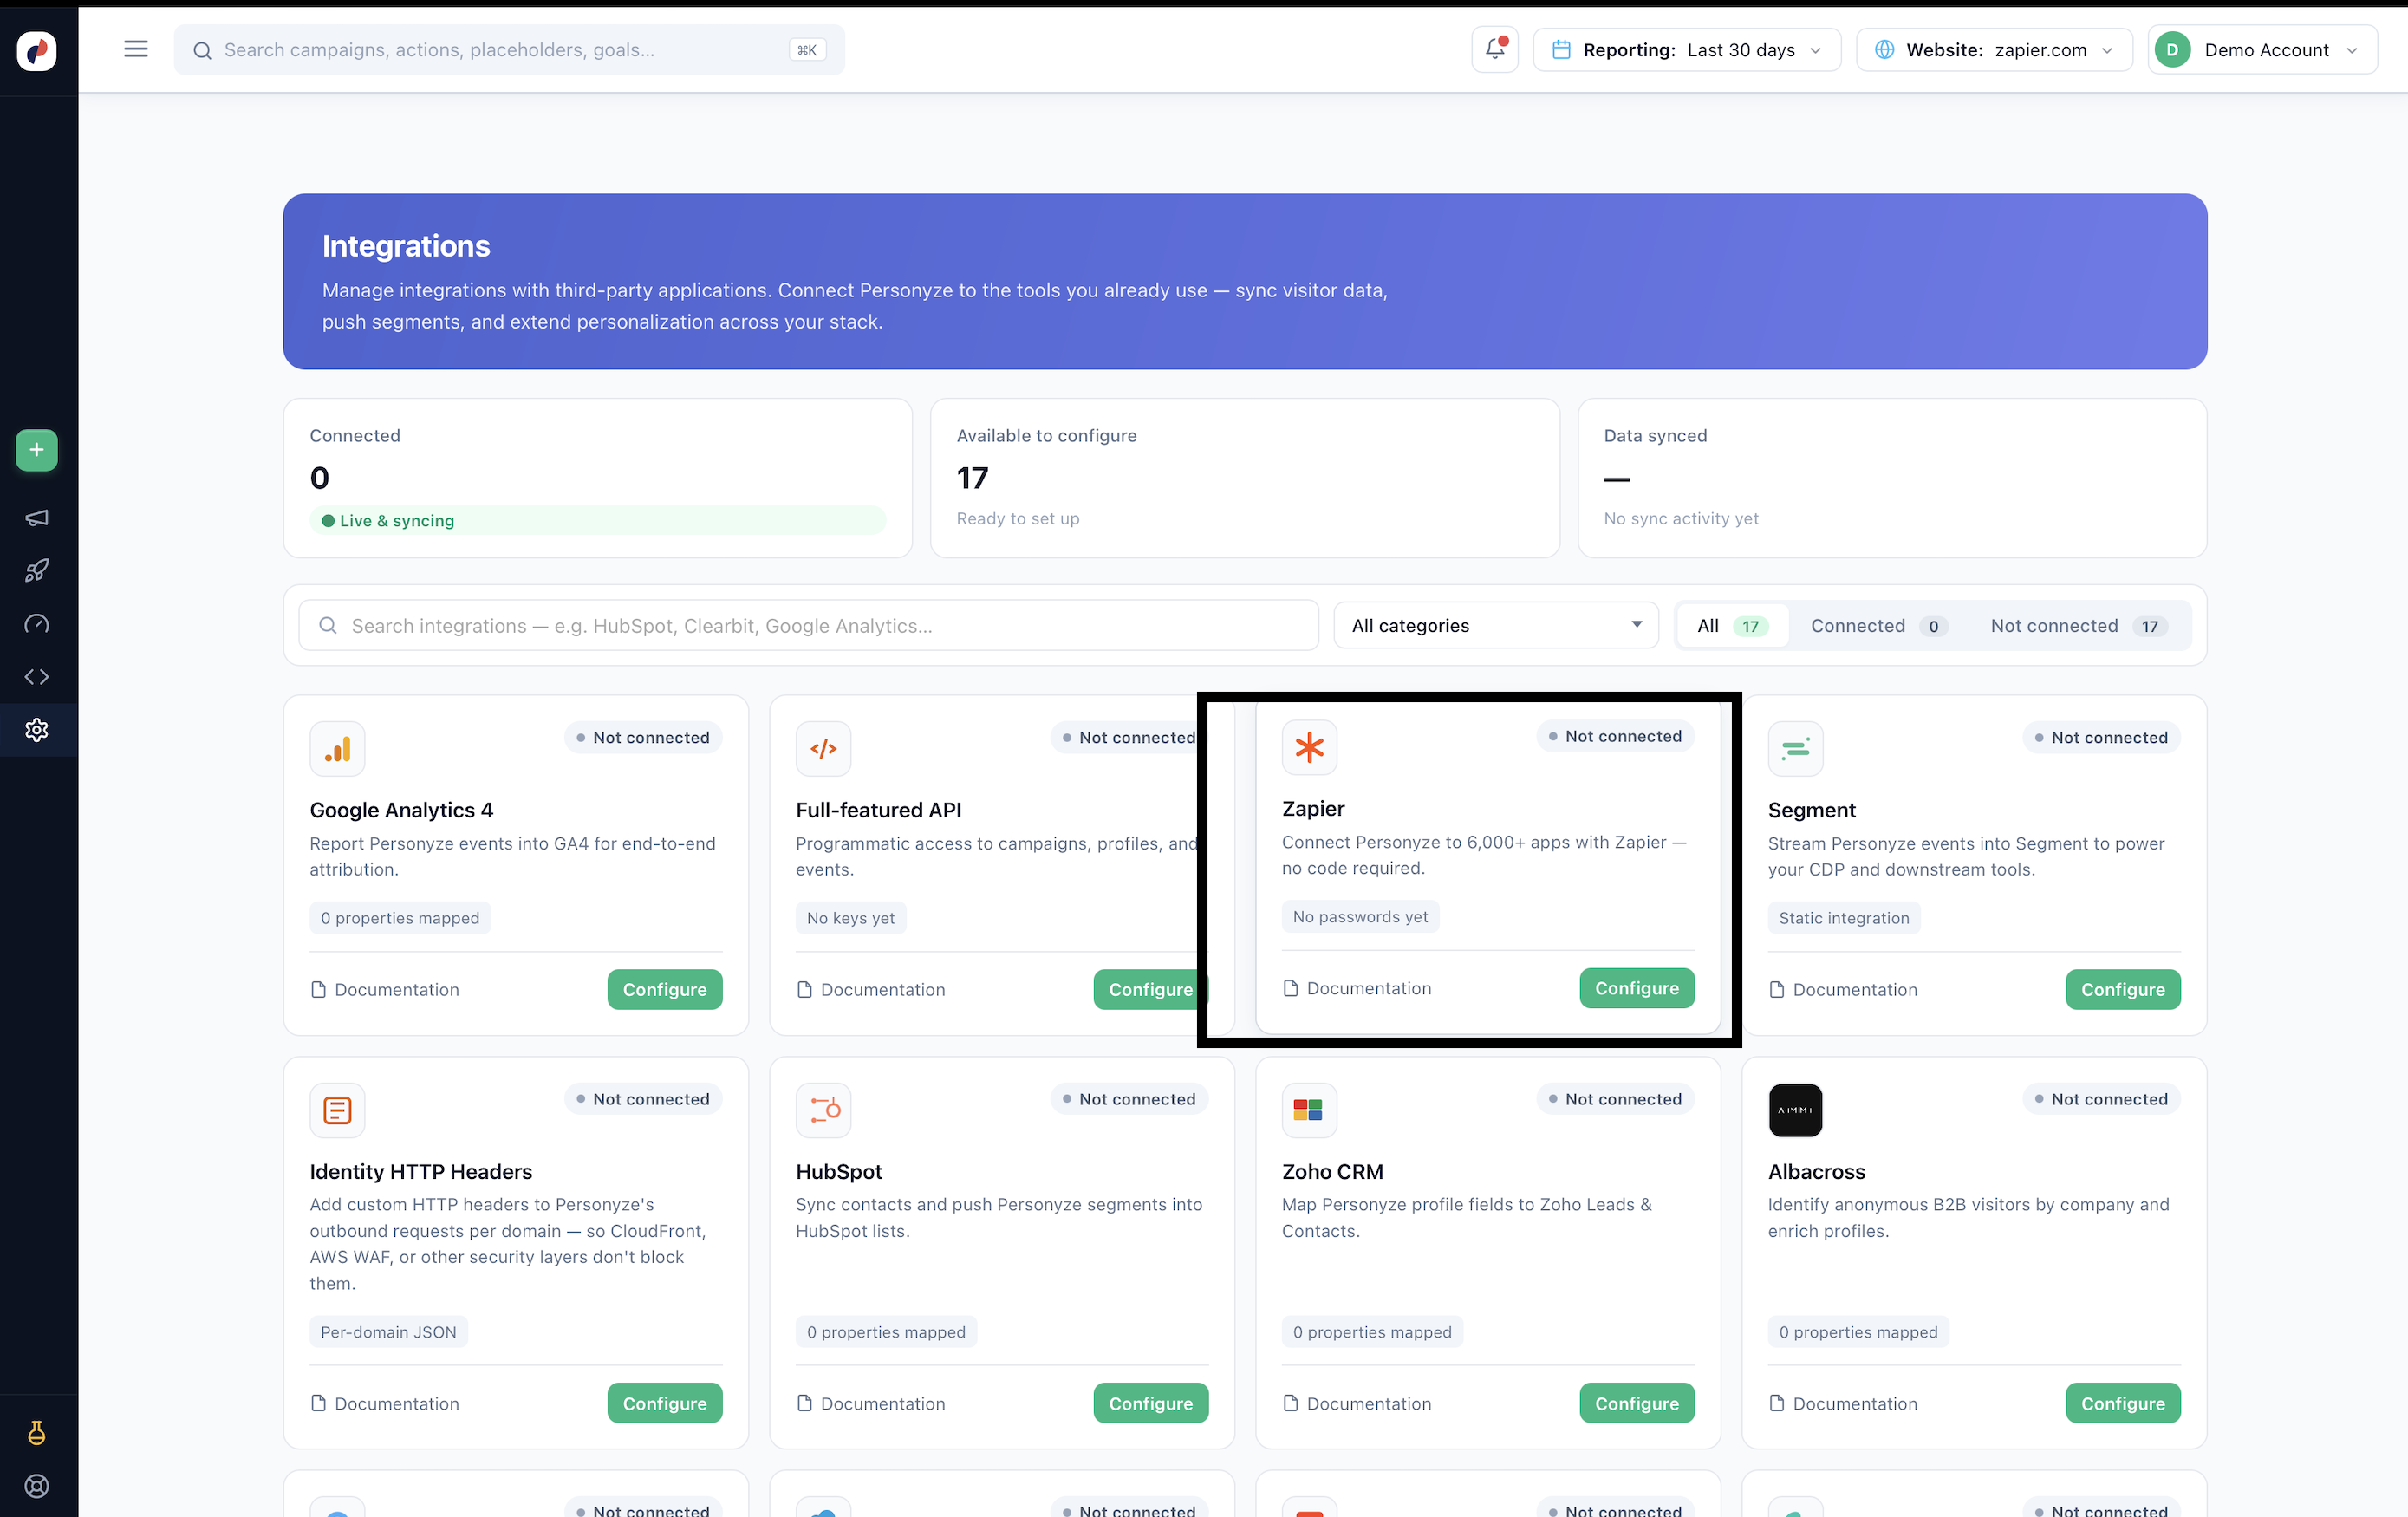
Activate the integration
In Personyze, go to Settings → Integrations, find the Zapier card, and click Configure.
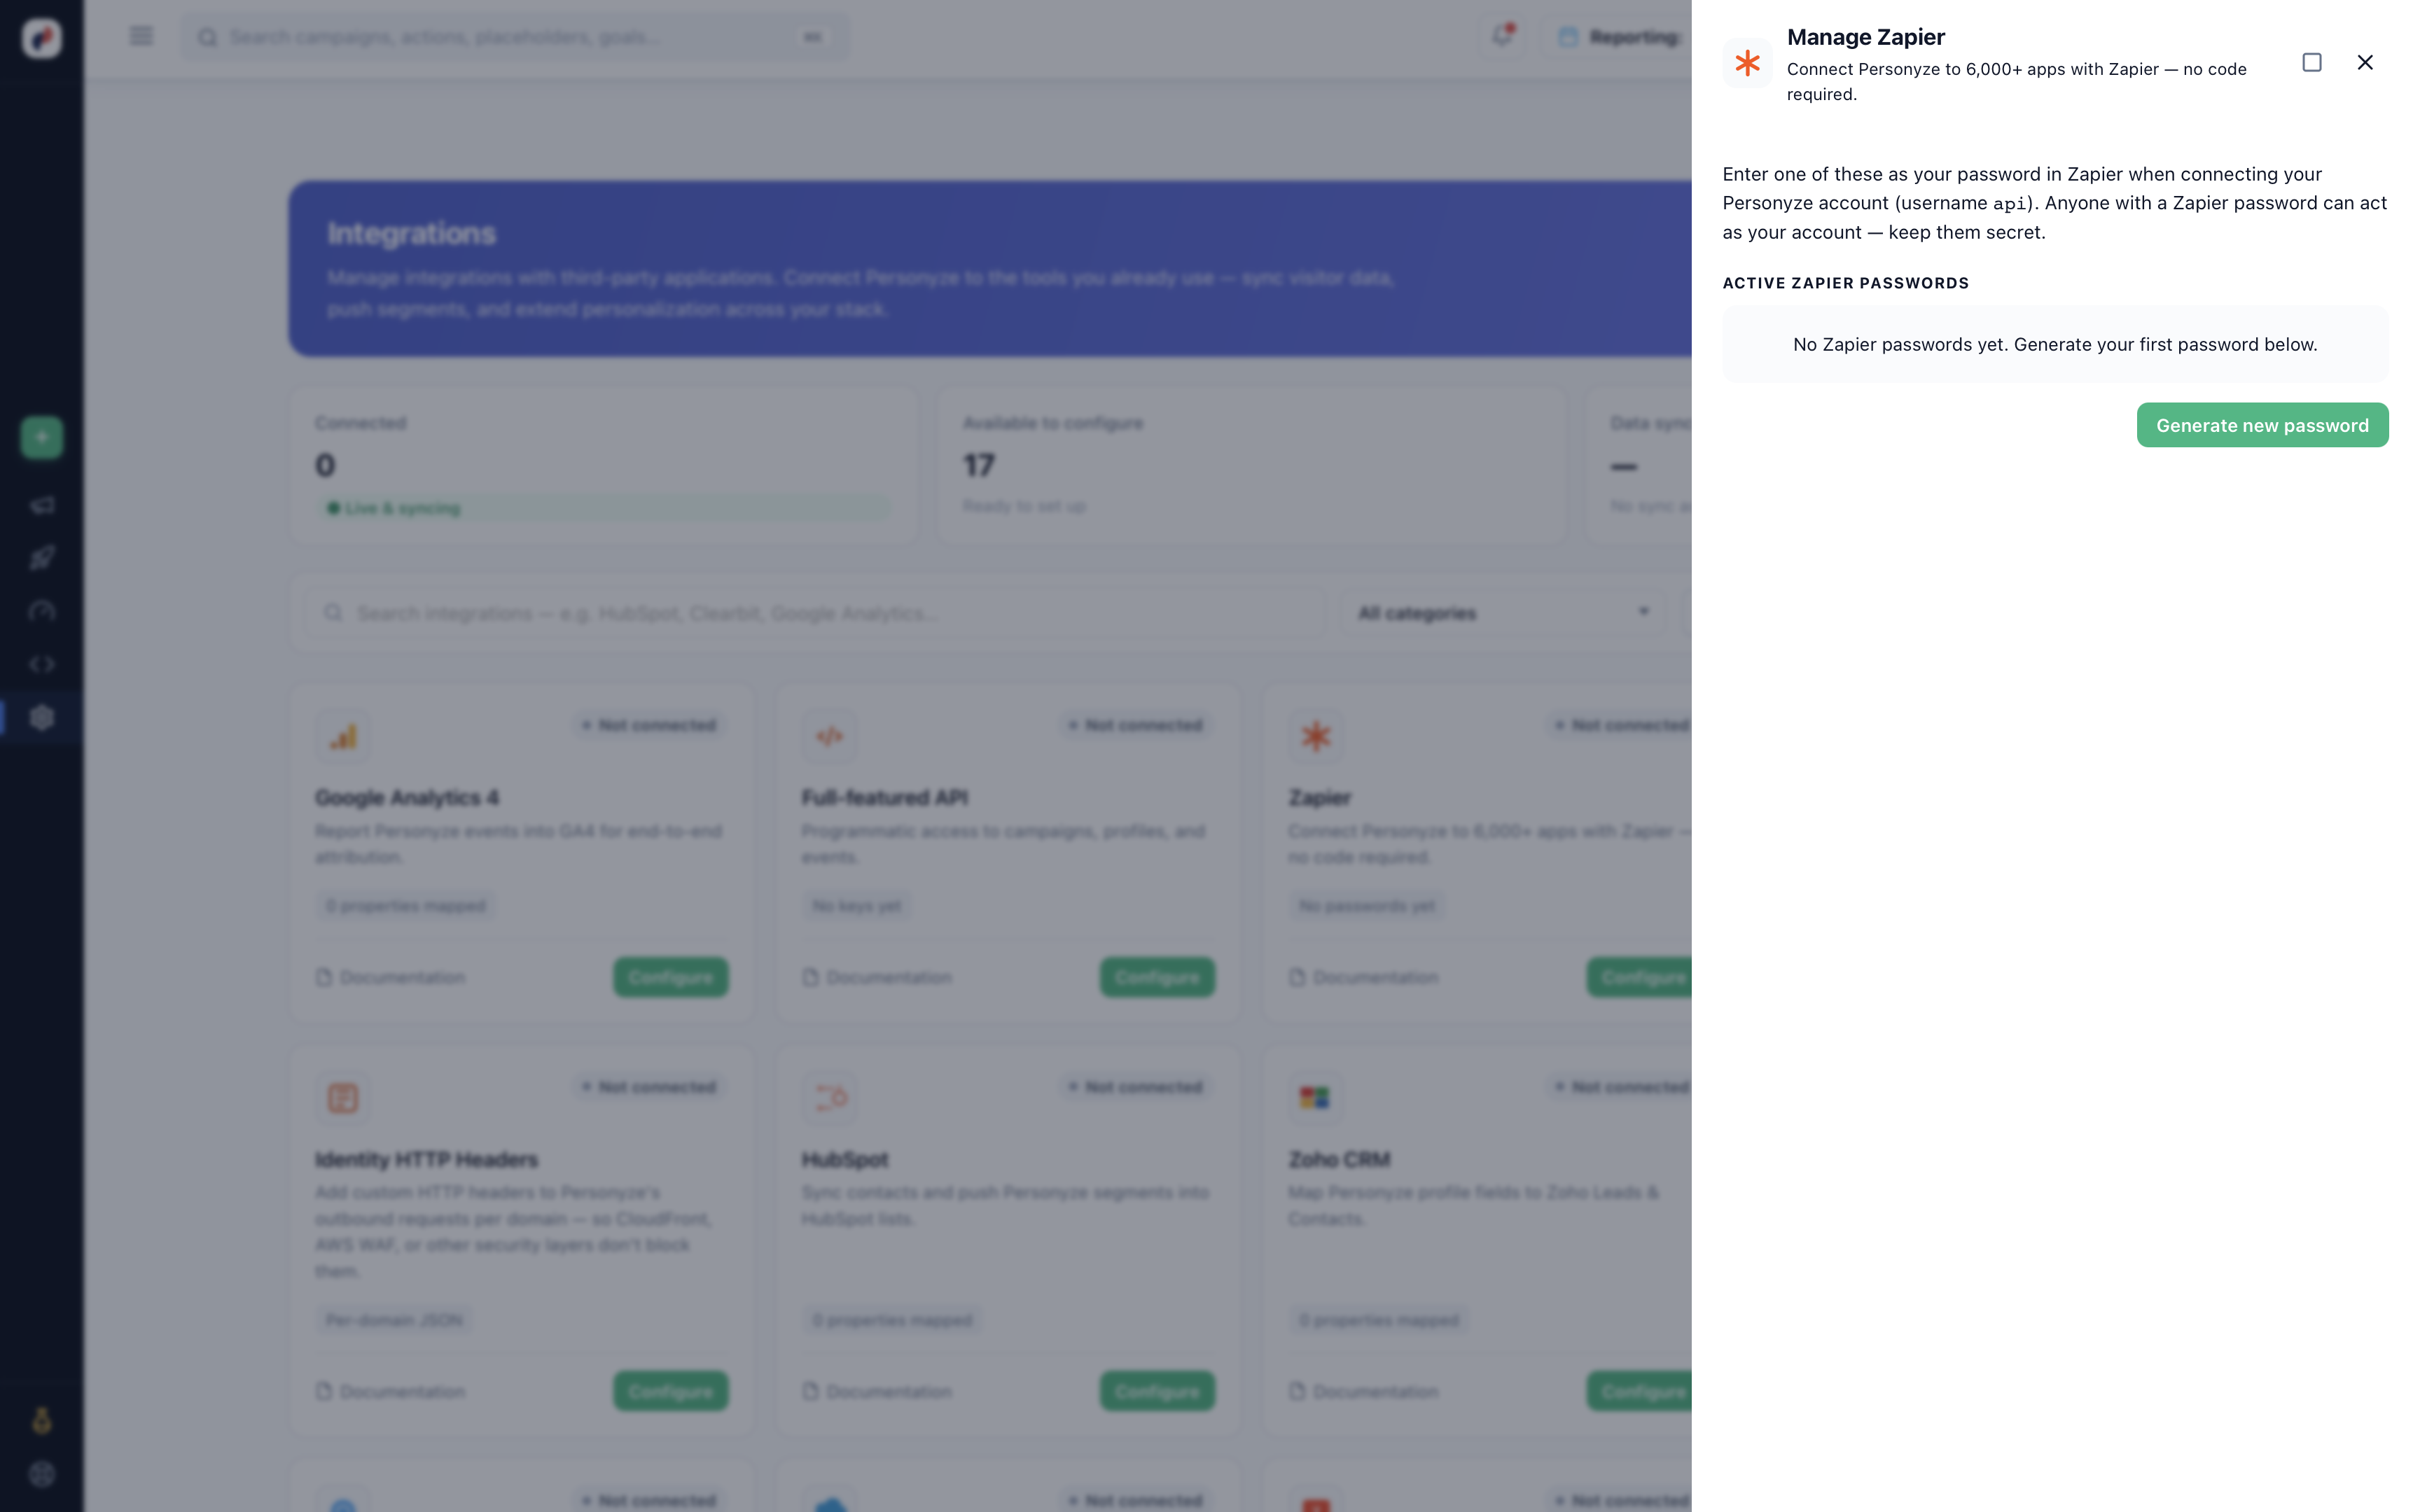
Generate your Zapier password
In the Manage Zapier panel, click Generate new password. This is the key you enter in Zapier — keep it somewhere safe.
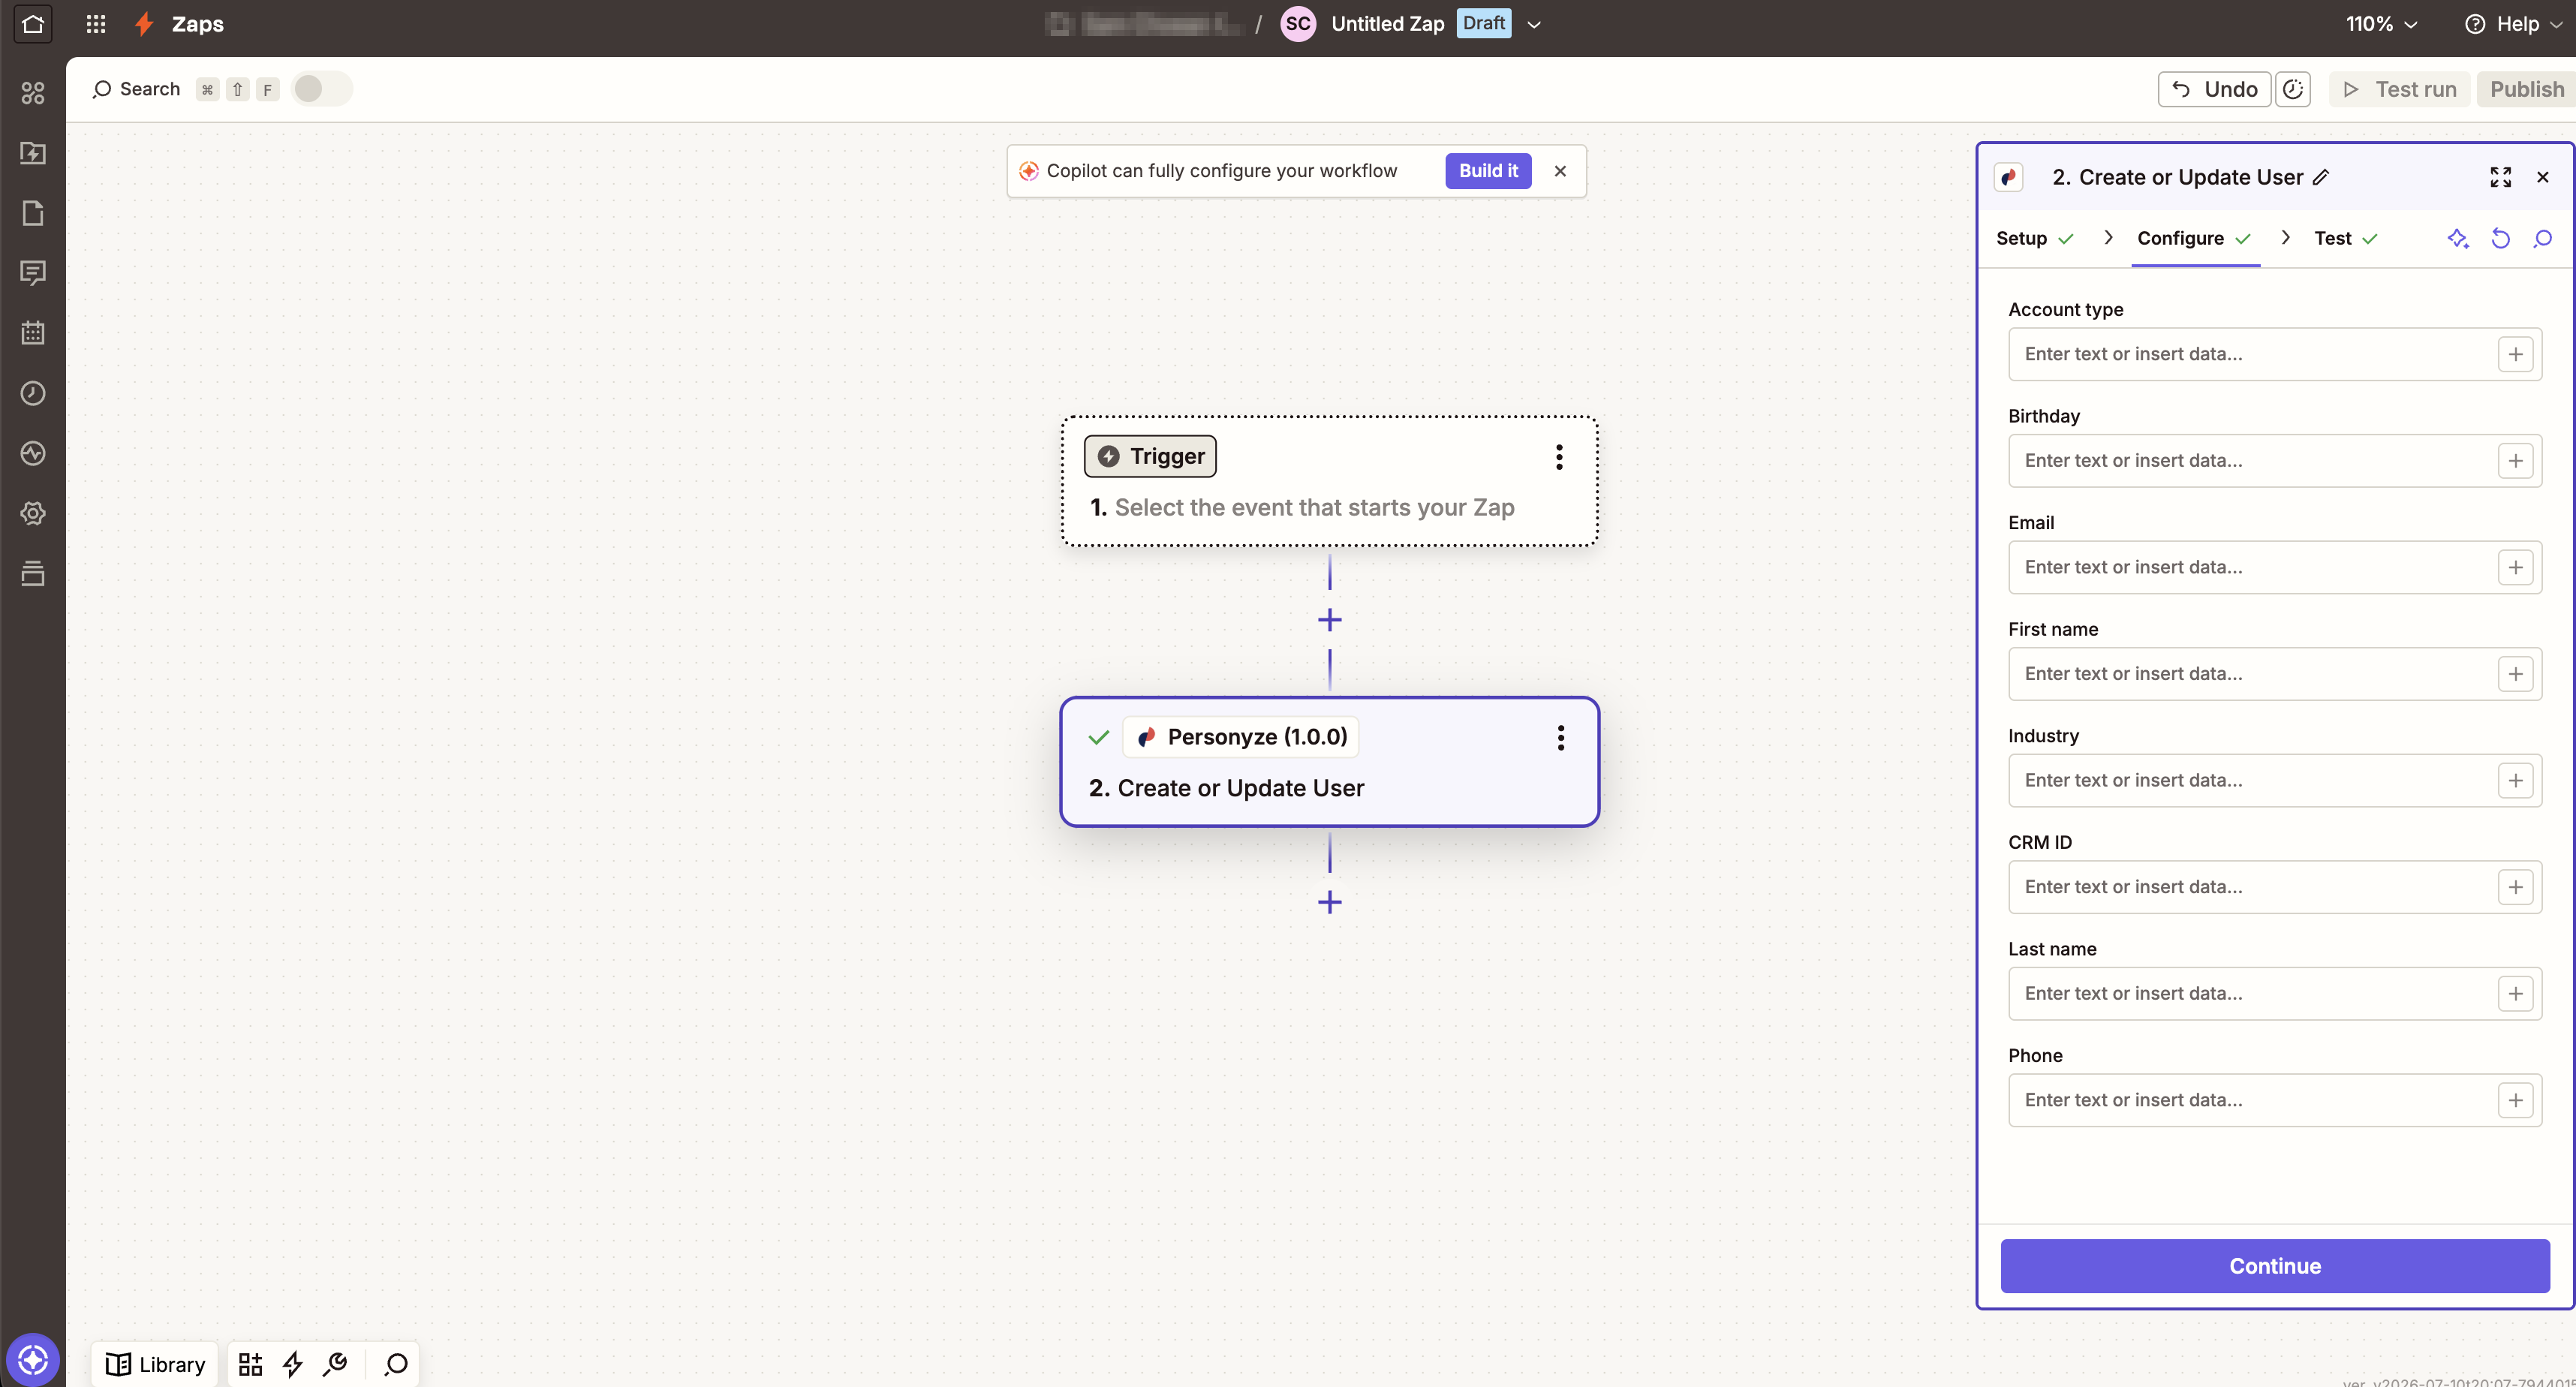
Choose what to push
In Zapier, add Personyze as an app step and set the action to Create or Update User. Map each Personyze field to static text or to a variable from your trigger (Email, First name, Industry, Account type, CRM ID, and more).
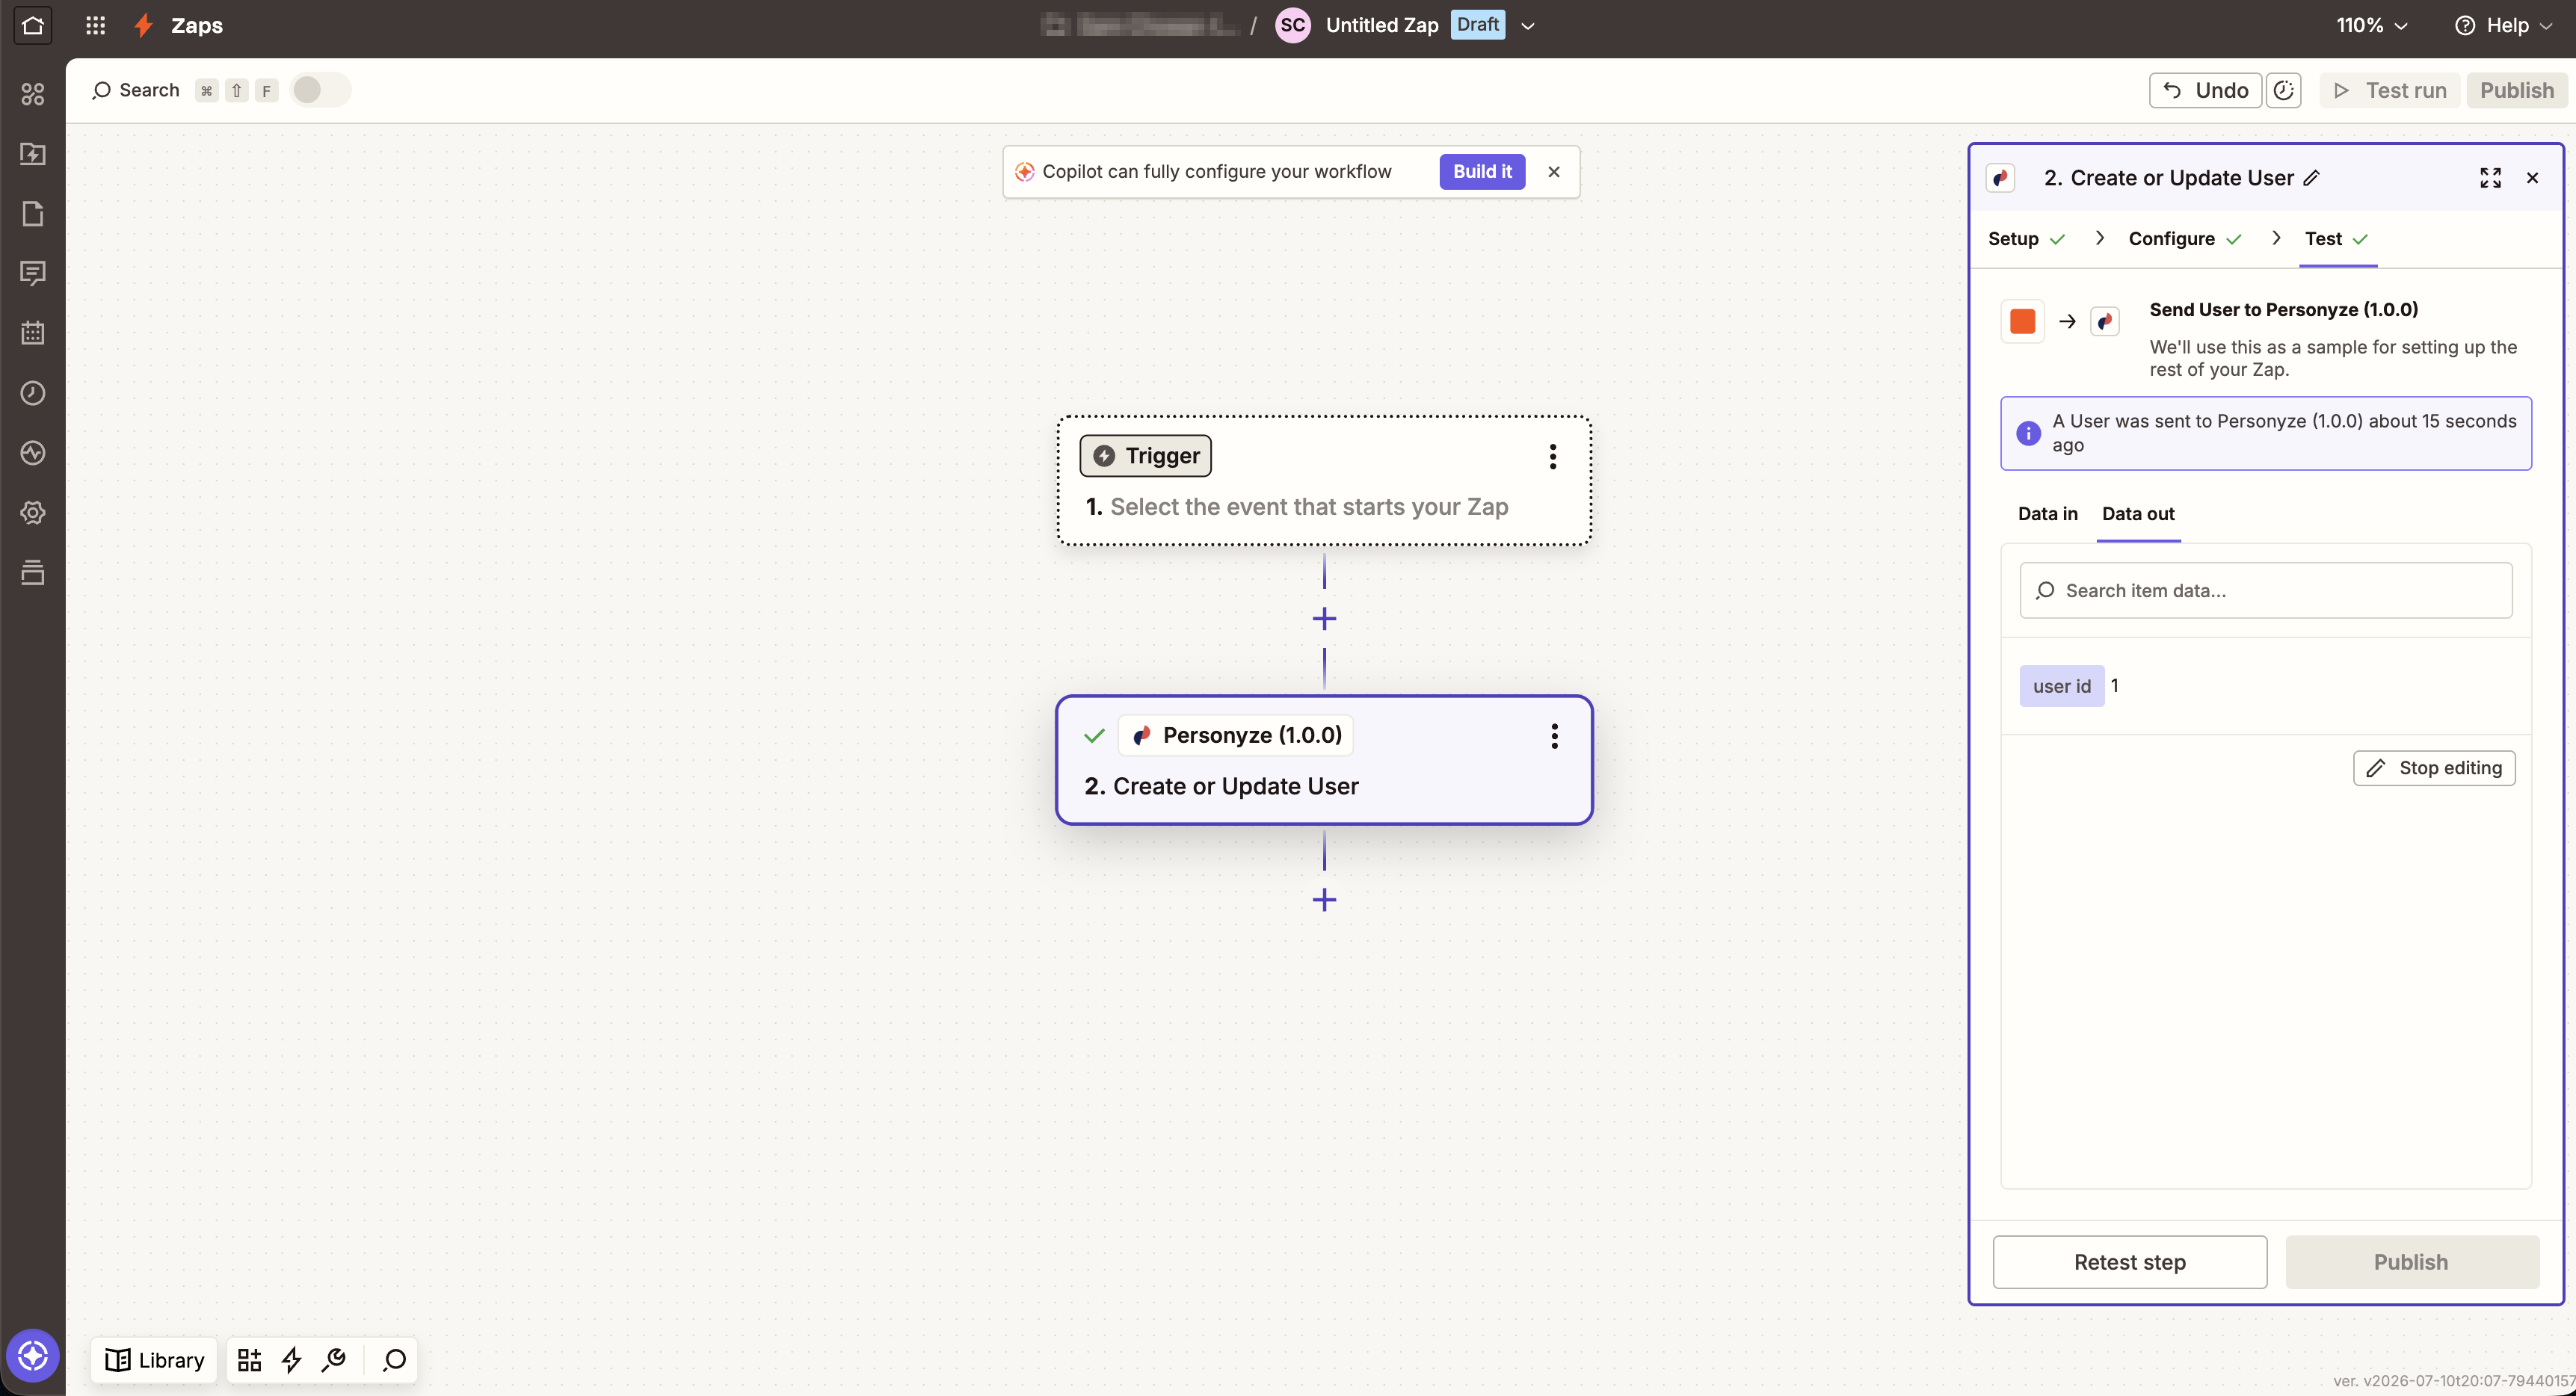
Test the Zap
Run the step test. Zapier sends a sample user to Personyze and confirms it went through. Publish the Zap once the test succeeds.
See the data in Personyze
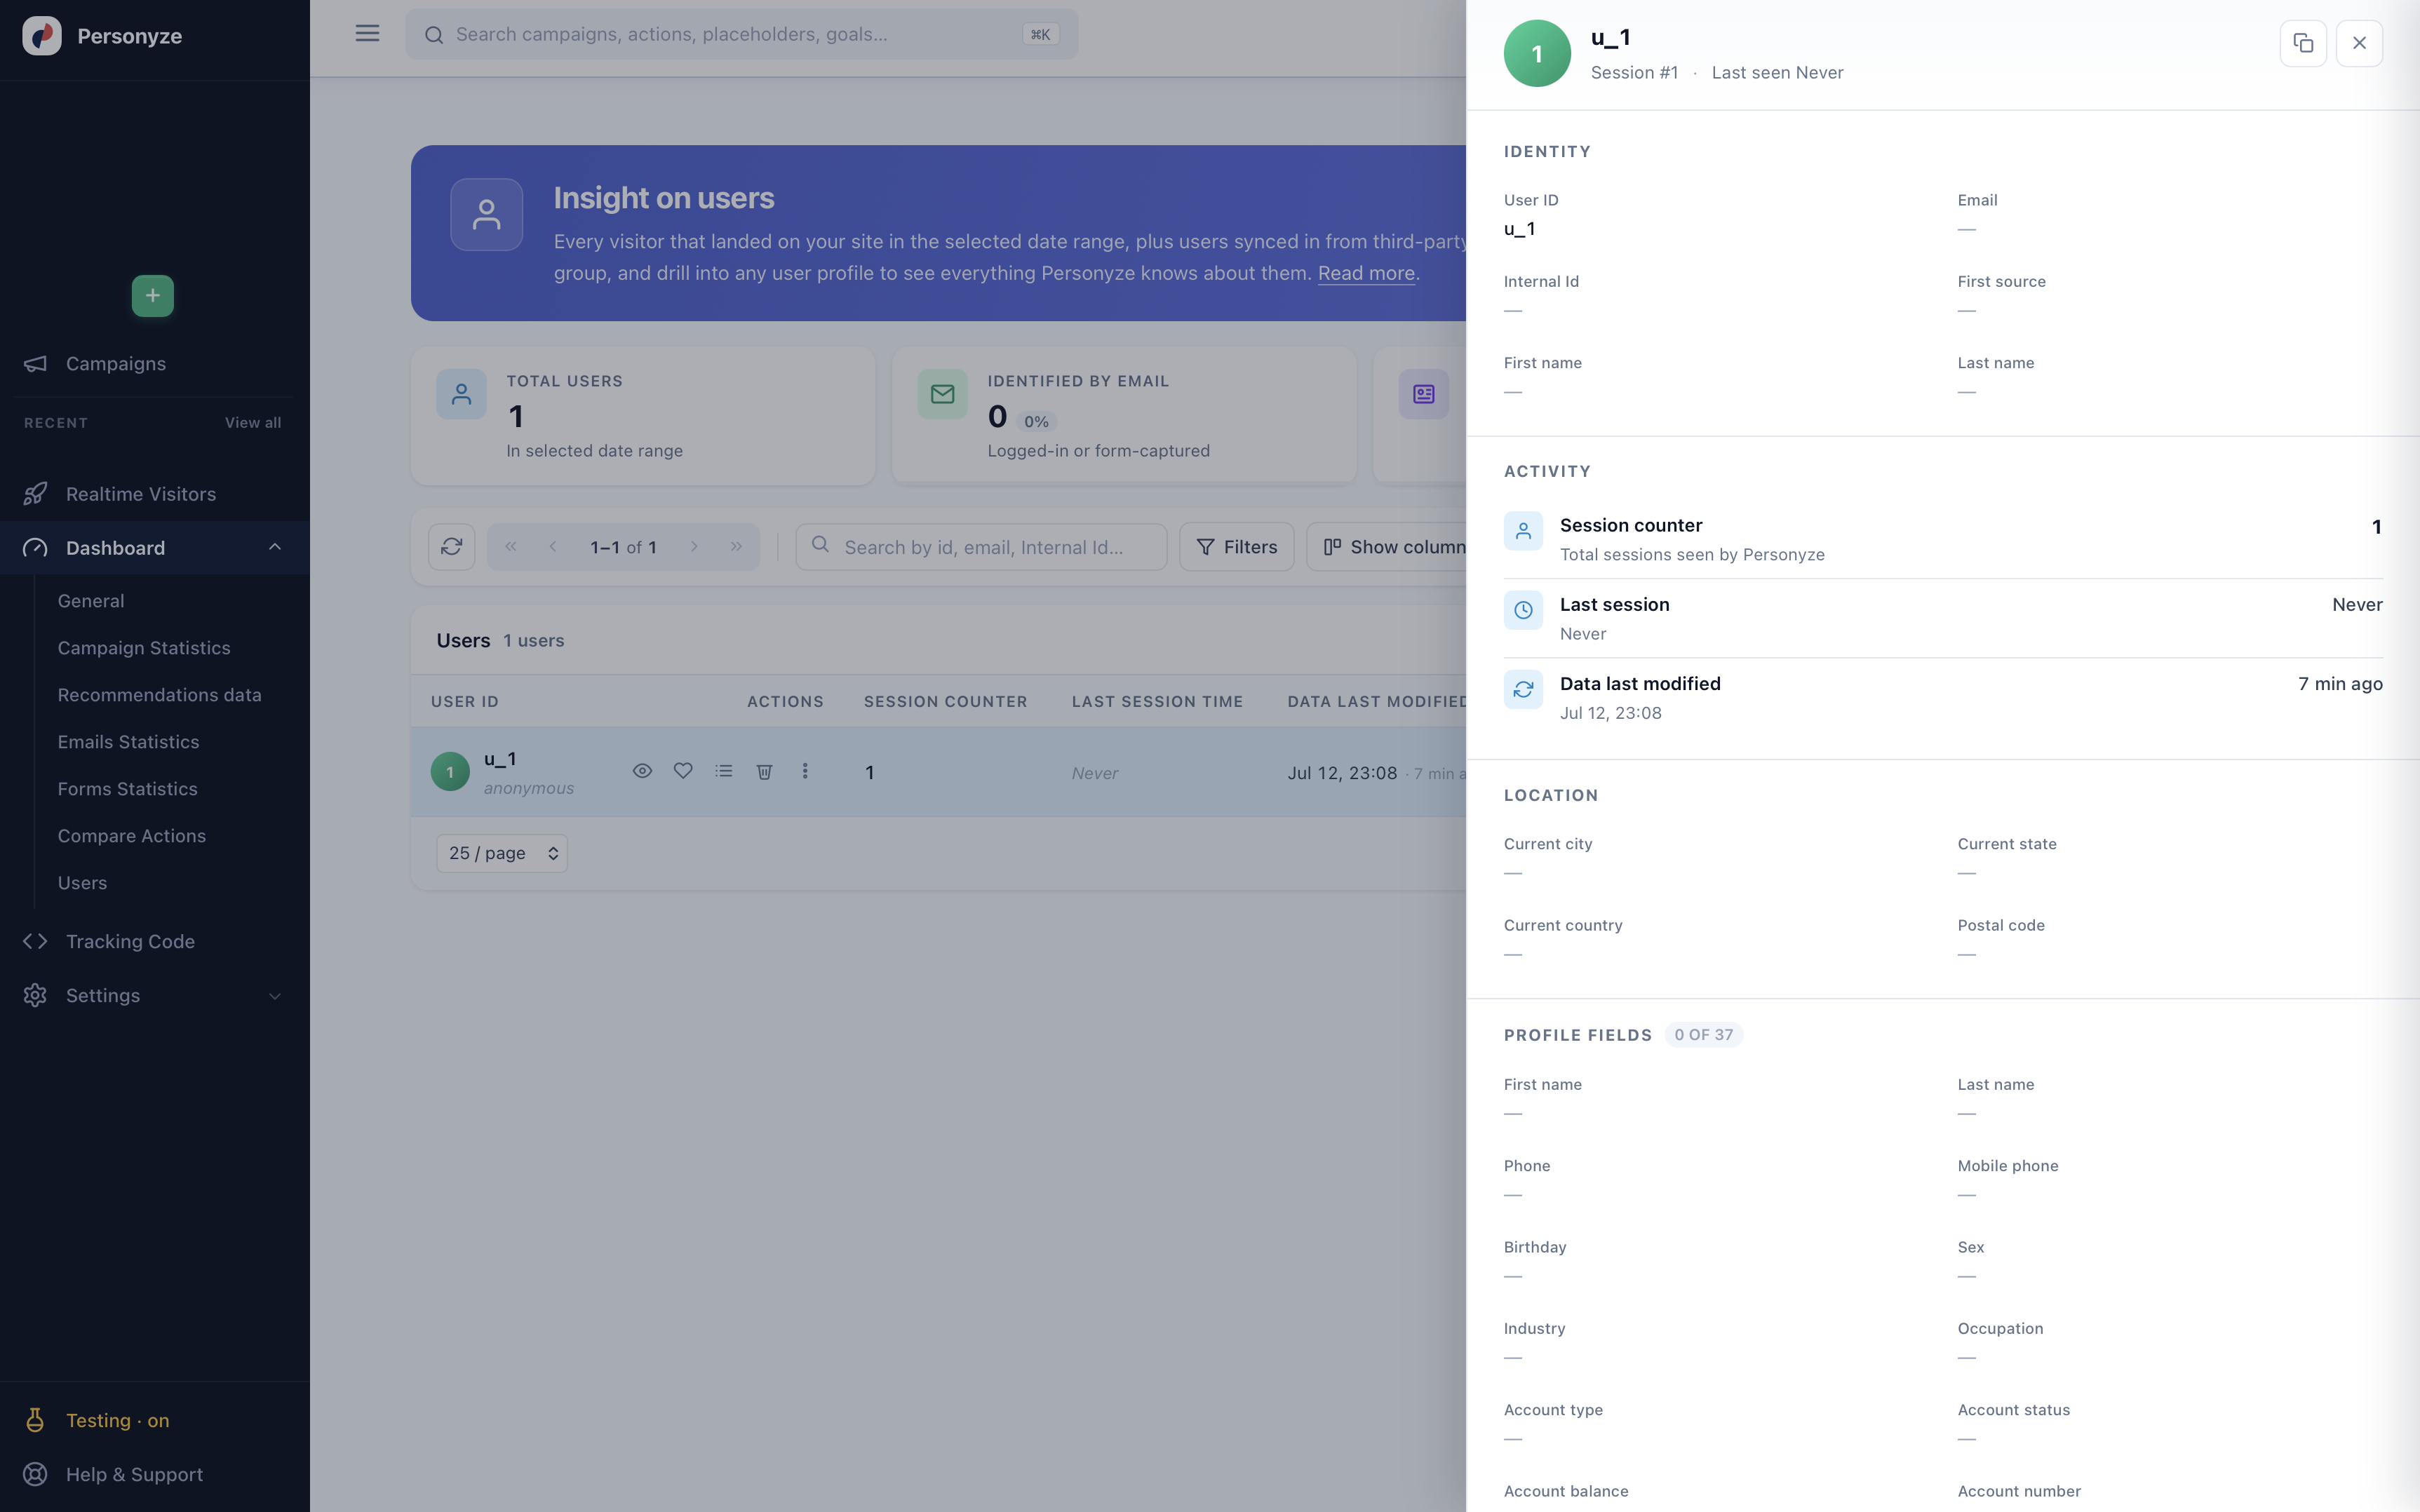
Pushed users appear immediately under Dashboard → Users. Open any profile to see its identity, session activity, and all mapped profile fields.
Activate the integration
In Personyze, go to Settings → Integrations, find the Zapier card, and click Configure.
Generate your Zapier password
In the Manage Zapier panel, click Generate new password. This is the key you enter in Zapier — keep it somewhere safe.
Choose what to push
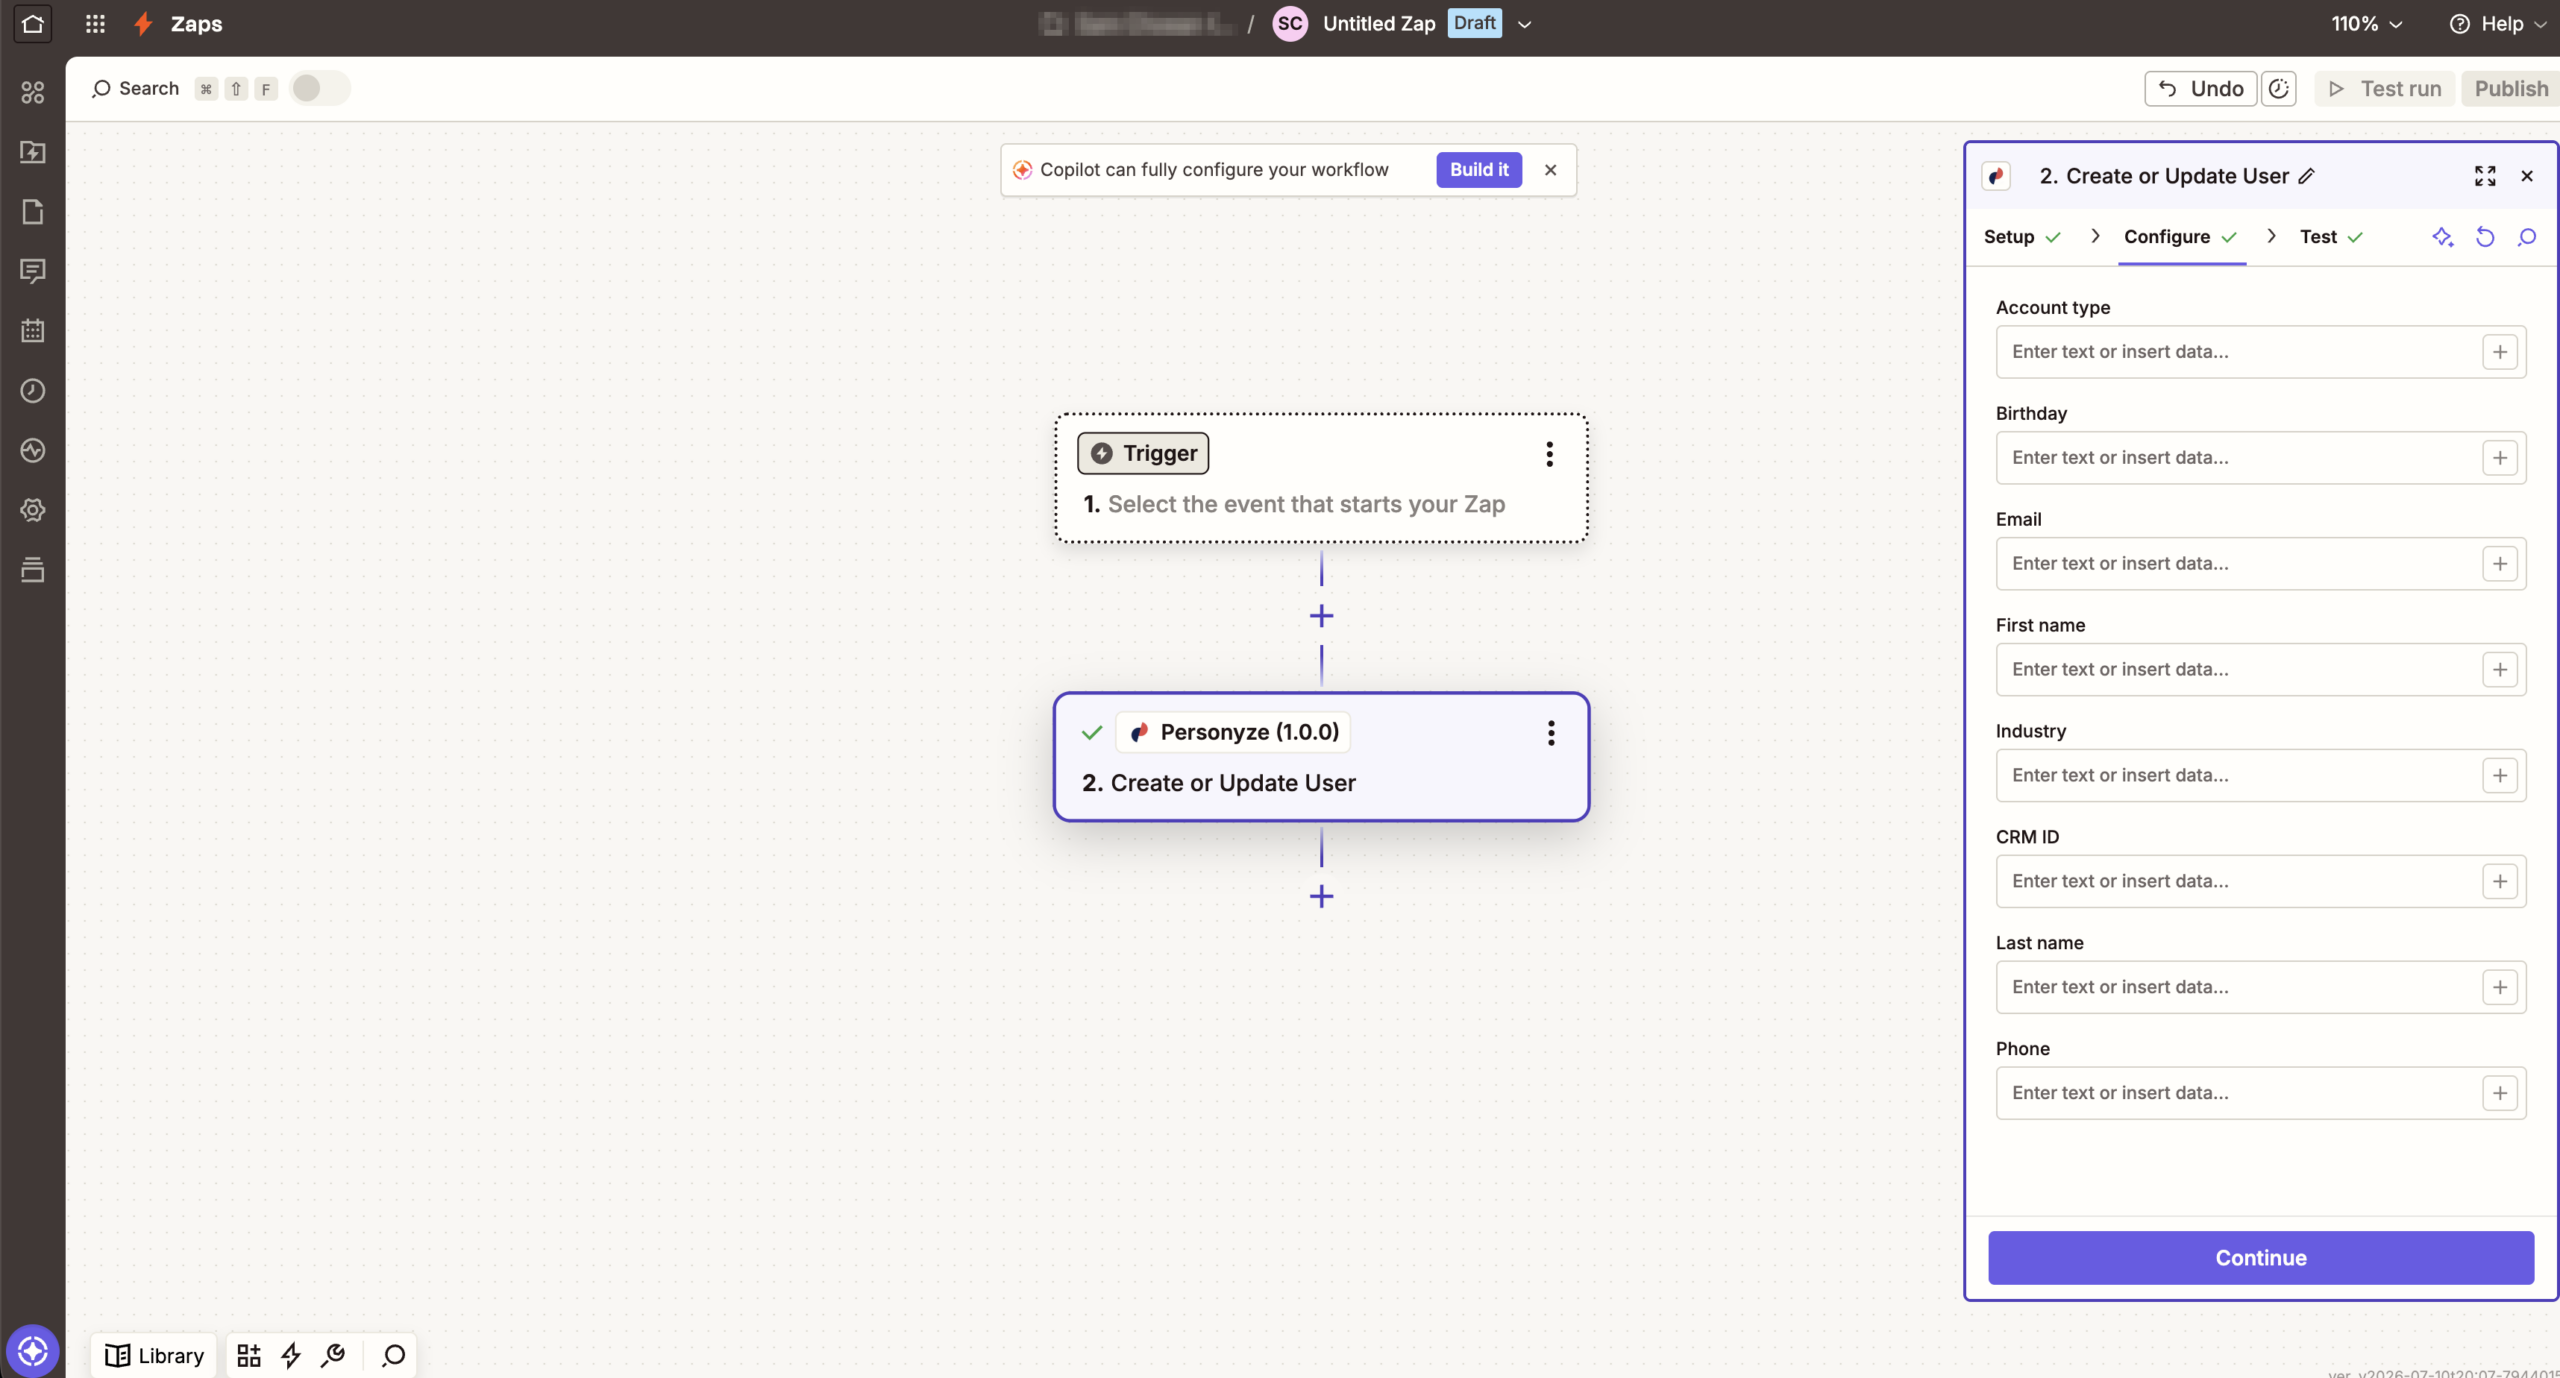
In Zapier, add Personyze as an app step and set the action to Create or Update User. Map each Personyze field to static text or to a variable from your trigger (Email, First name, Industry, Account type, CRM ID, and more).
Test the Zap
Run the step test. Zapier sends a sample user to Personyze and confirms it went through. Publish the Zap once the test succeeds.
See the data in Personyze
Pushed users appear immediately under Dashboard → Users. Open any profile to see its identity, session activity, and all mapped profile fields.
Step 1 — Activate the integration in Personyze
In Personyze, go to Settings → Integrations, find the Zapier card, and click Configure.
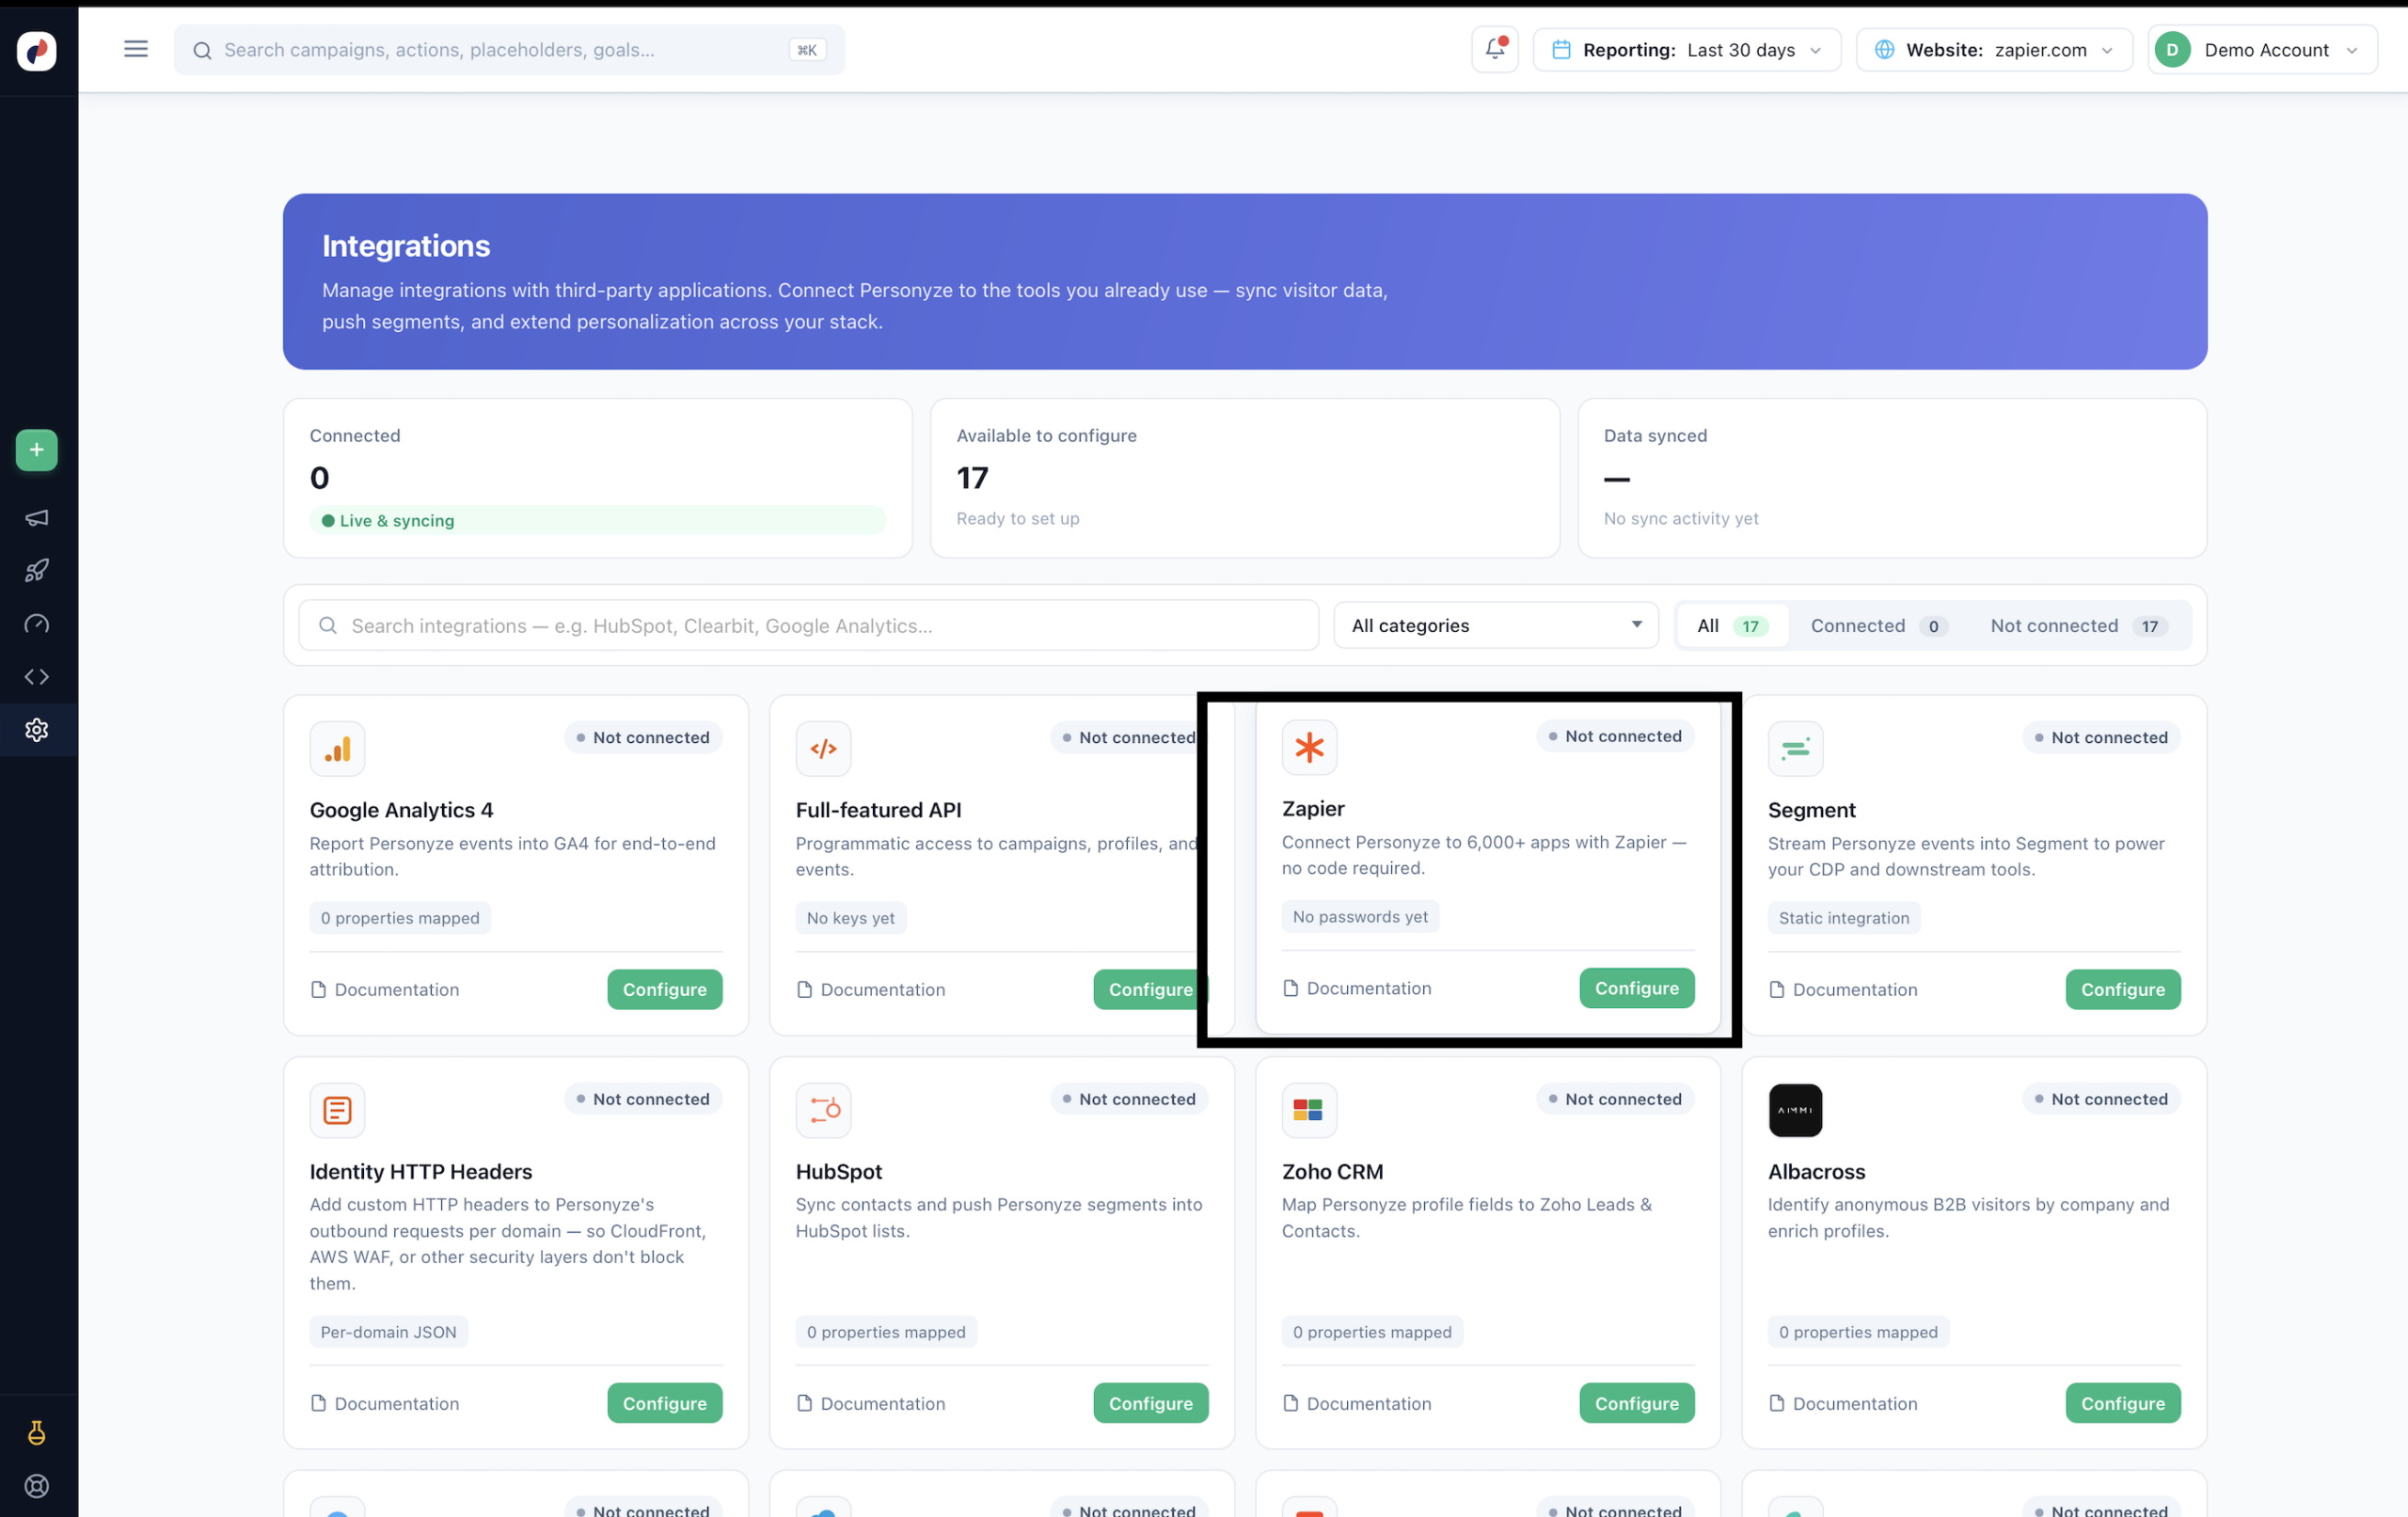
Step 2 — Generate your Zapier password
In the Manage Zapier panel, click Generate new password. This is the key you will enter in Zapier. Keep it somewhere safe — anyone with it can act as your account, so keep it secret.
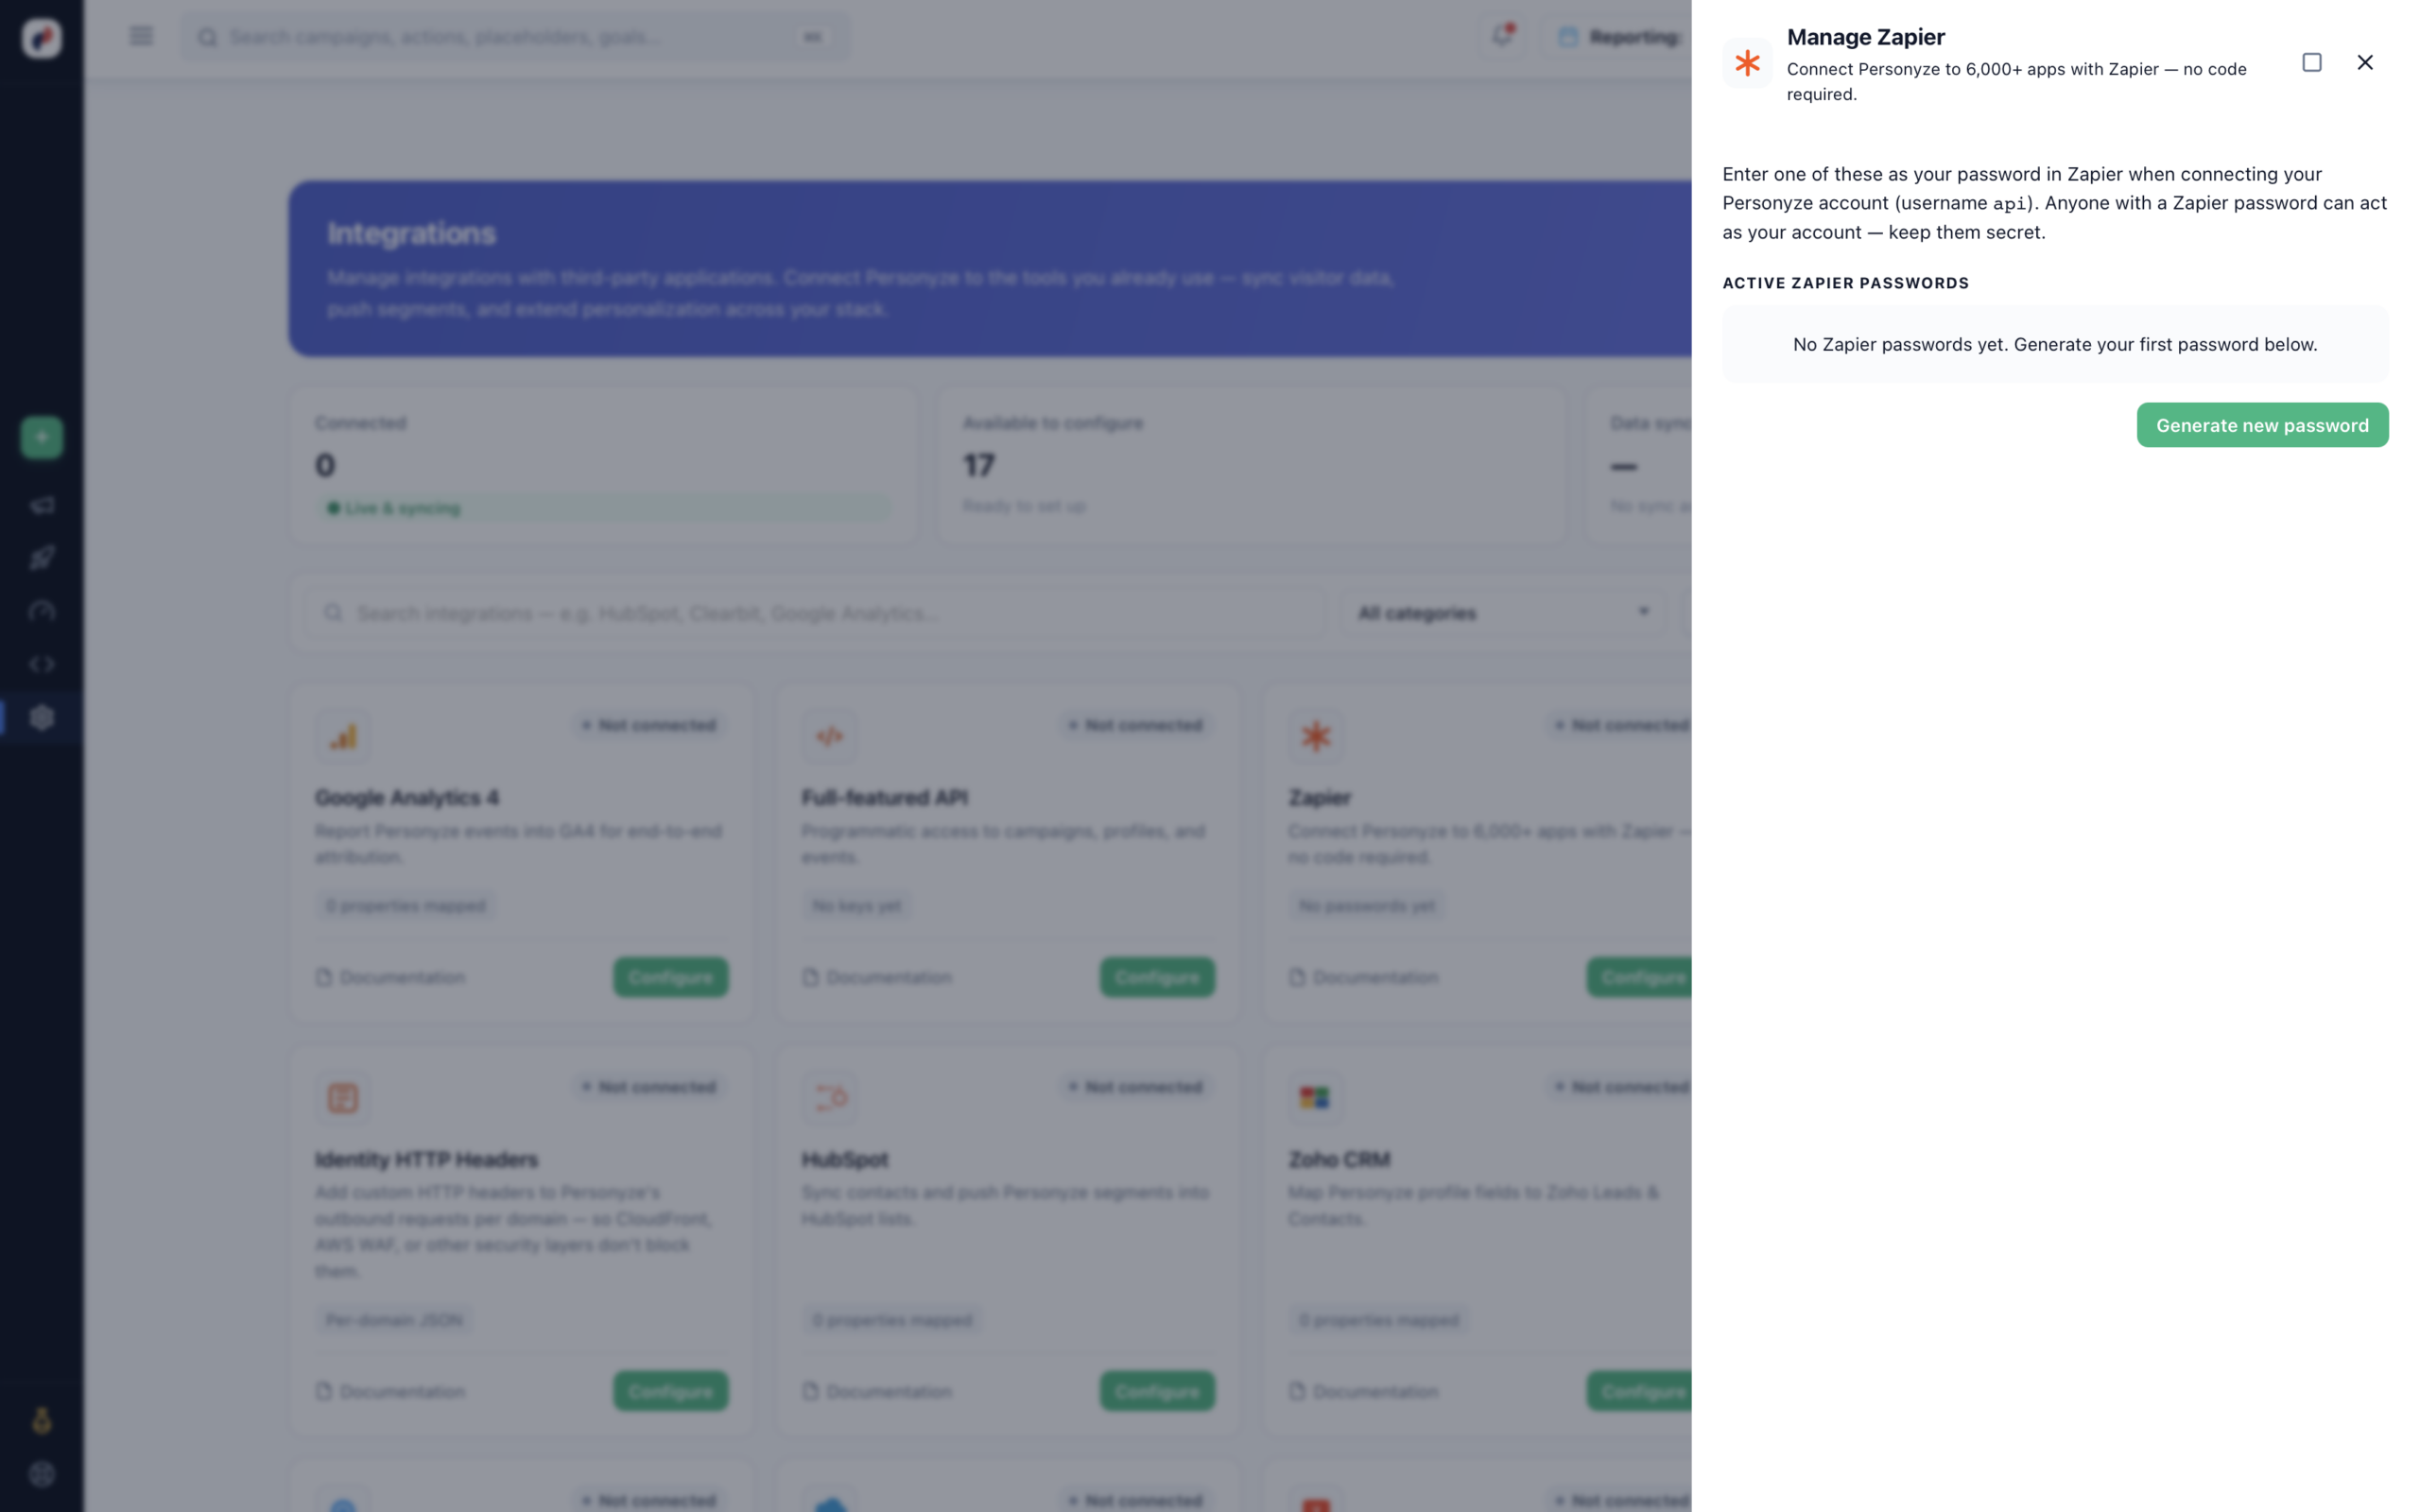
api to connect Personyze in Zapier. You can create several and revoke any of them later from this panel. Click to enlarge.Step 3 — Install and connect the app in Zapier
In Zapier, create a Zap and add Personyze as an app step. When Zapier asks you to connect your Personyze account, enter:
- Username:
api - Password: the Zapier password you generated in Step 2
That authenticates the connection — no other keys needed.
Step 4 — Choose what to push to Personyze
Add a trigger (the event in another app that starts the Zap — a new form submission, a new CRM contact, and so on), then set the Personyze step action to Create or Update User. Map each Personyze field to a value from your trigger — you can type static text or insert variables carried in from the trigger data.
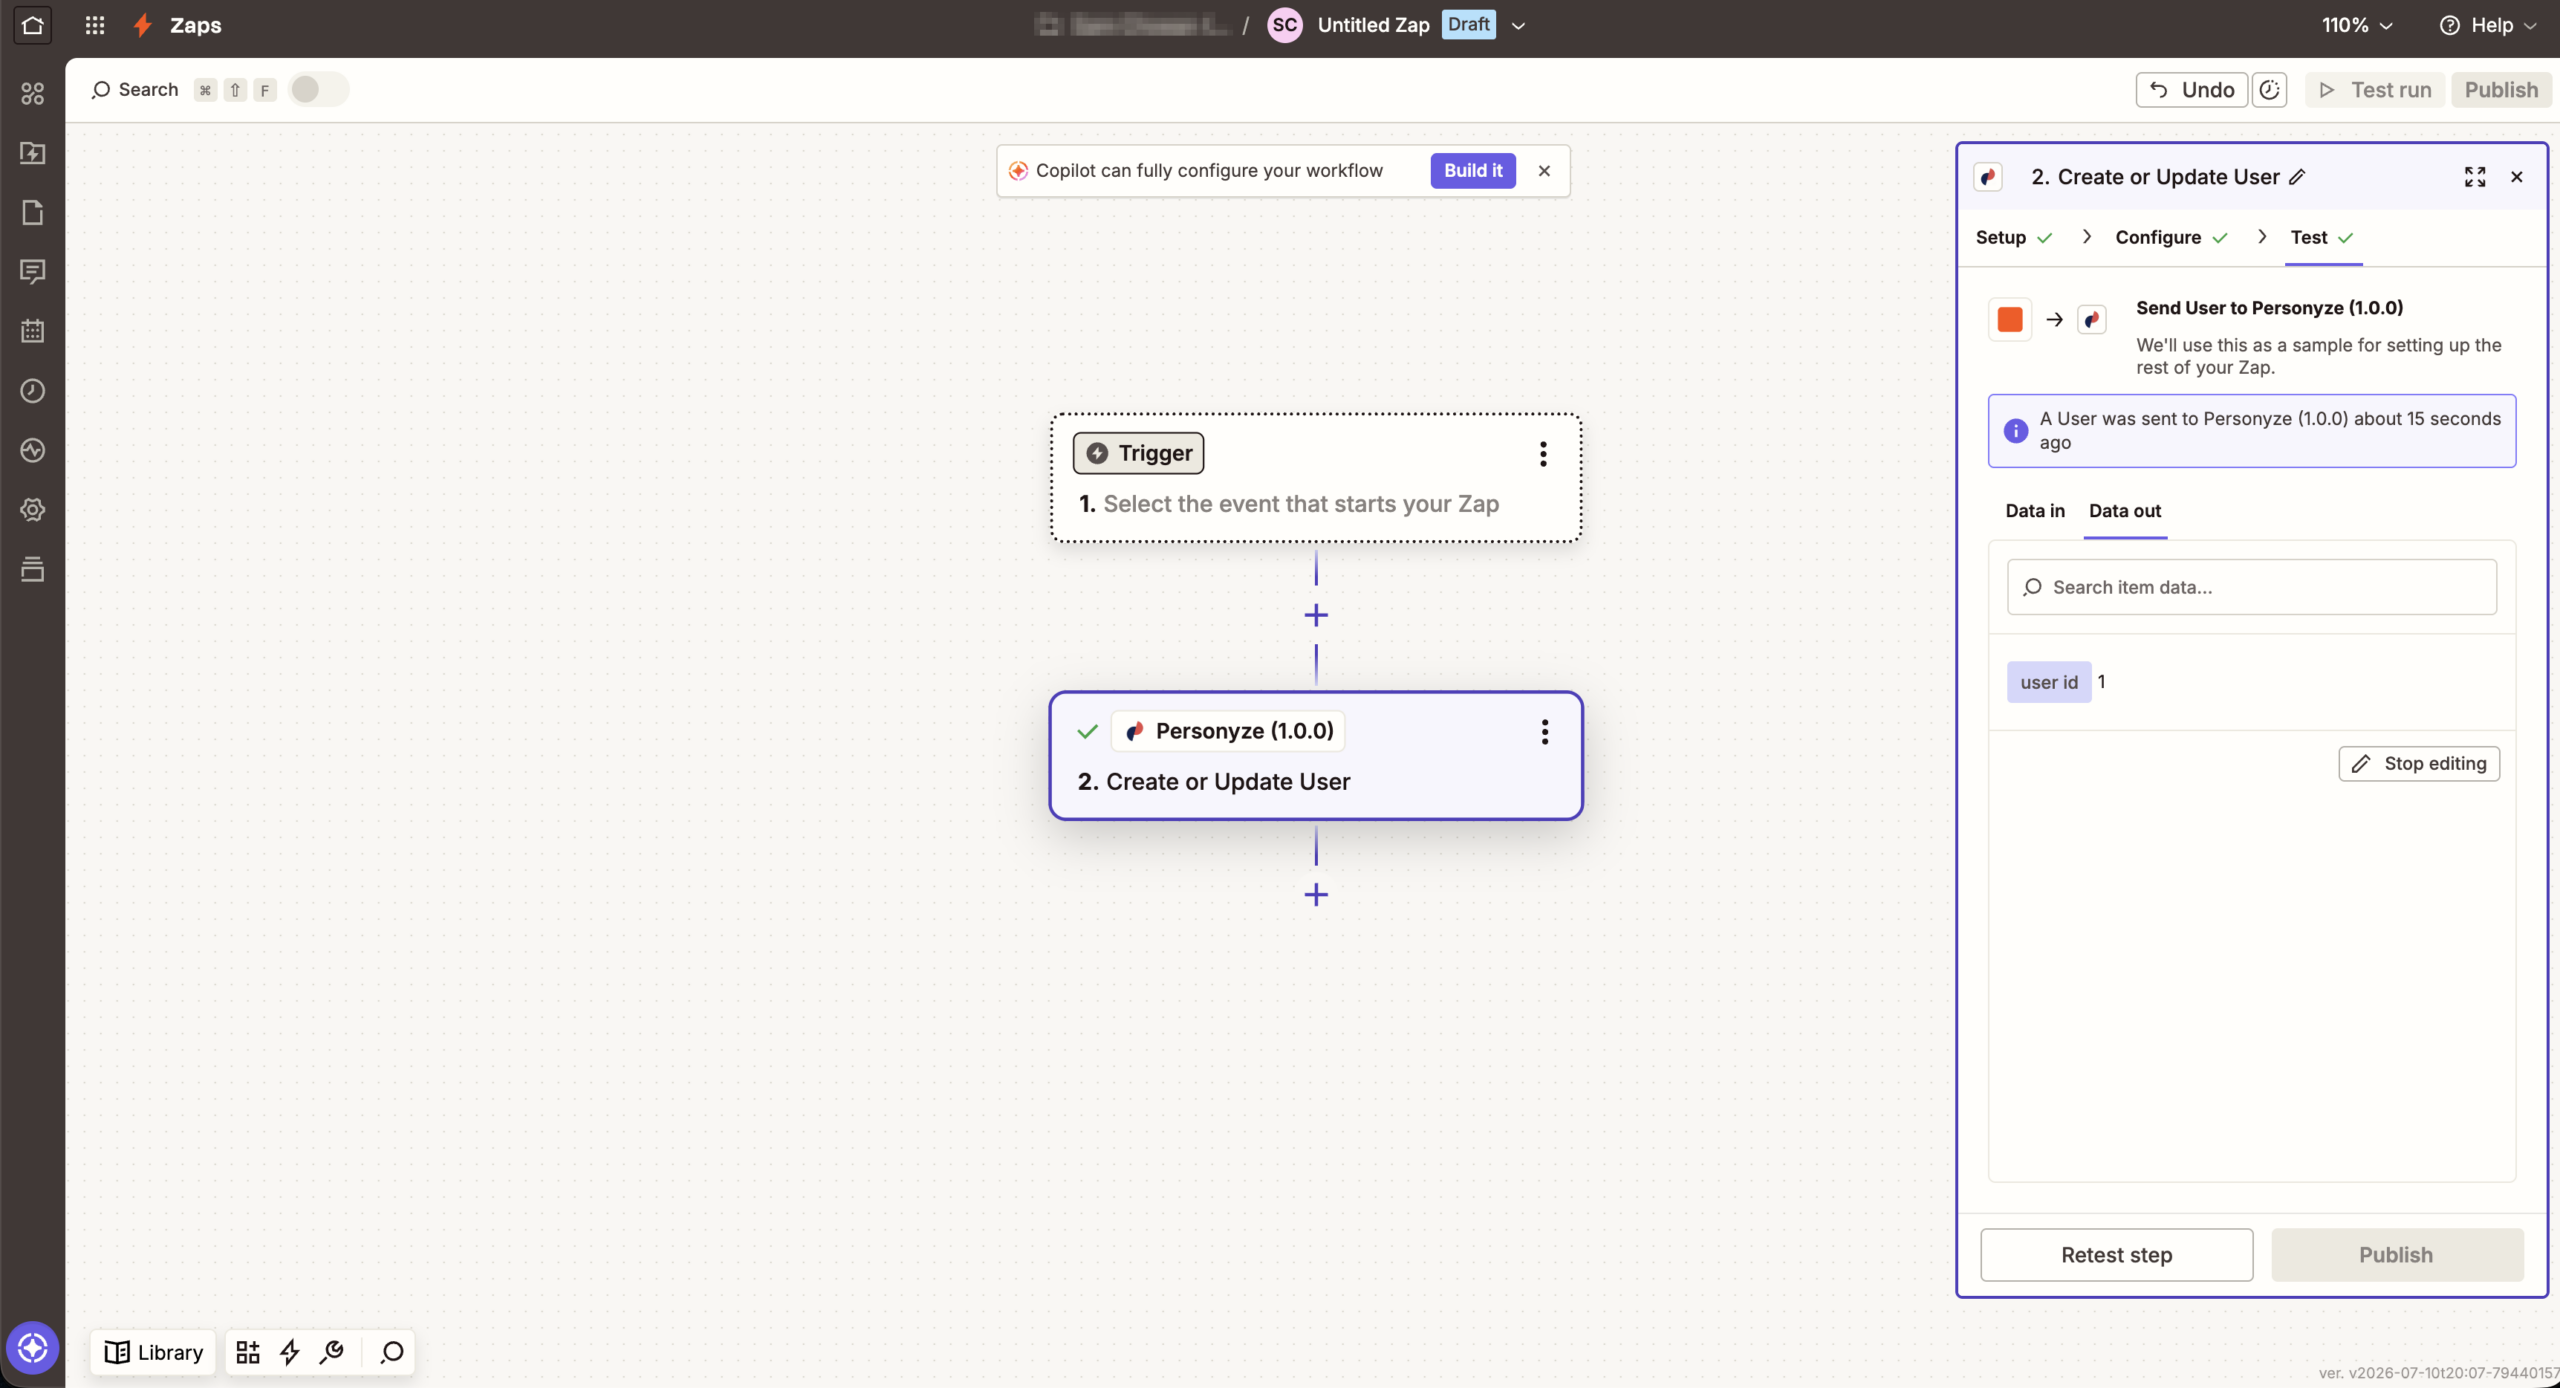
Step 5 — Test the Zap
Run the step test. Zapier sends a sample user to Personyze and confirms it went through.
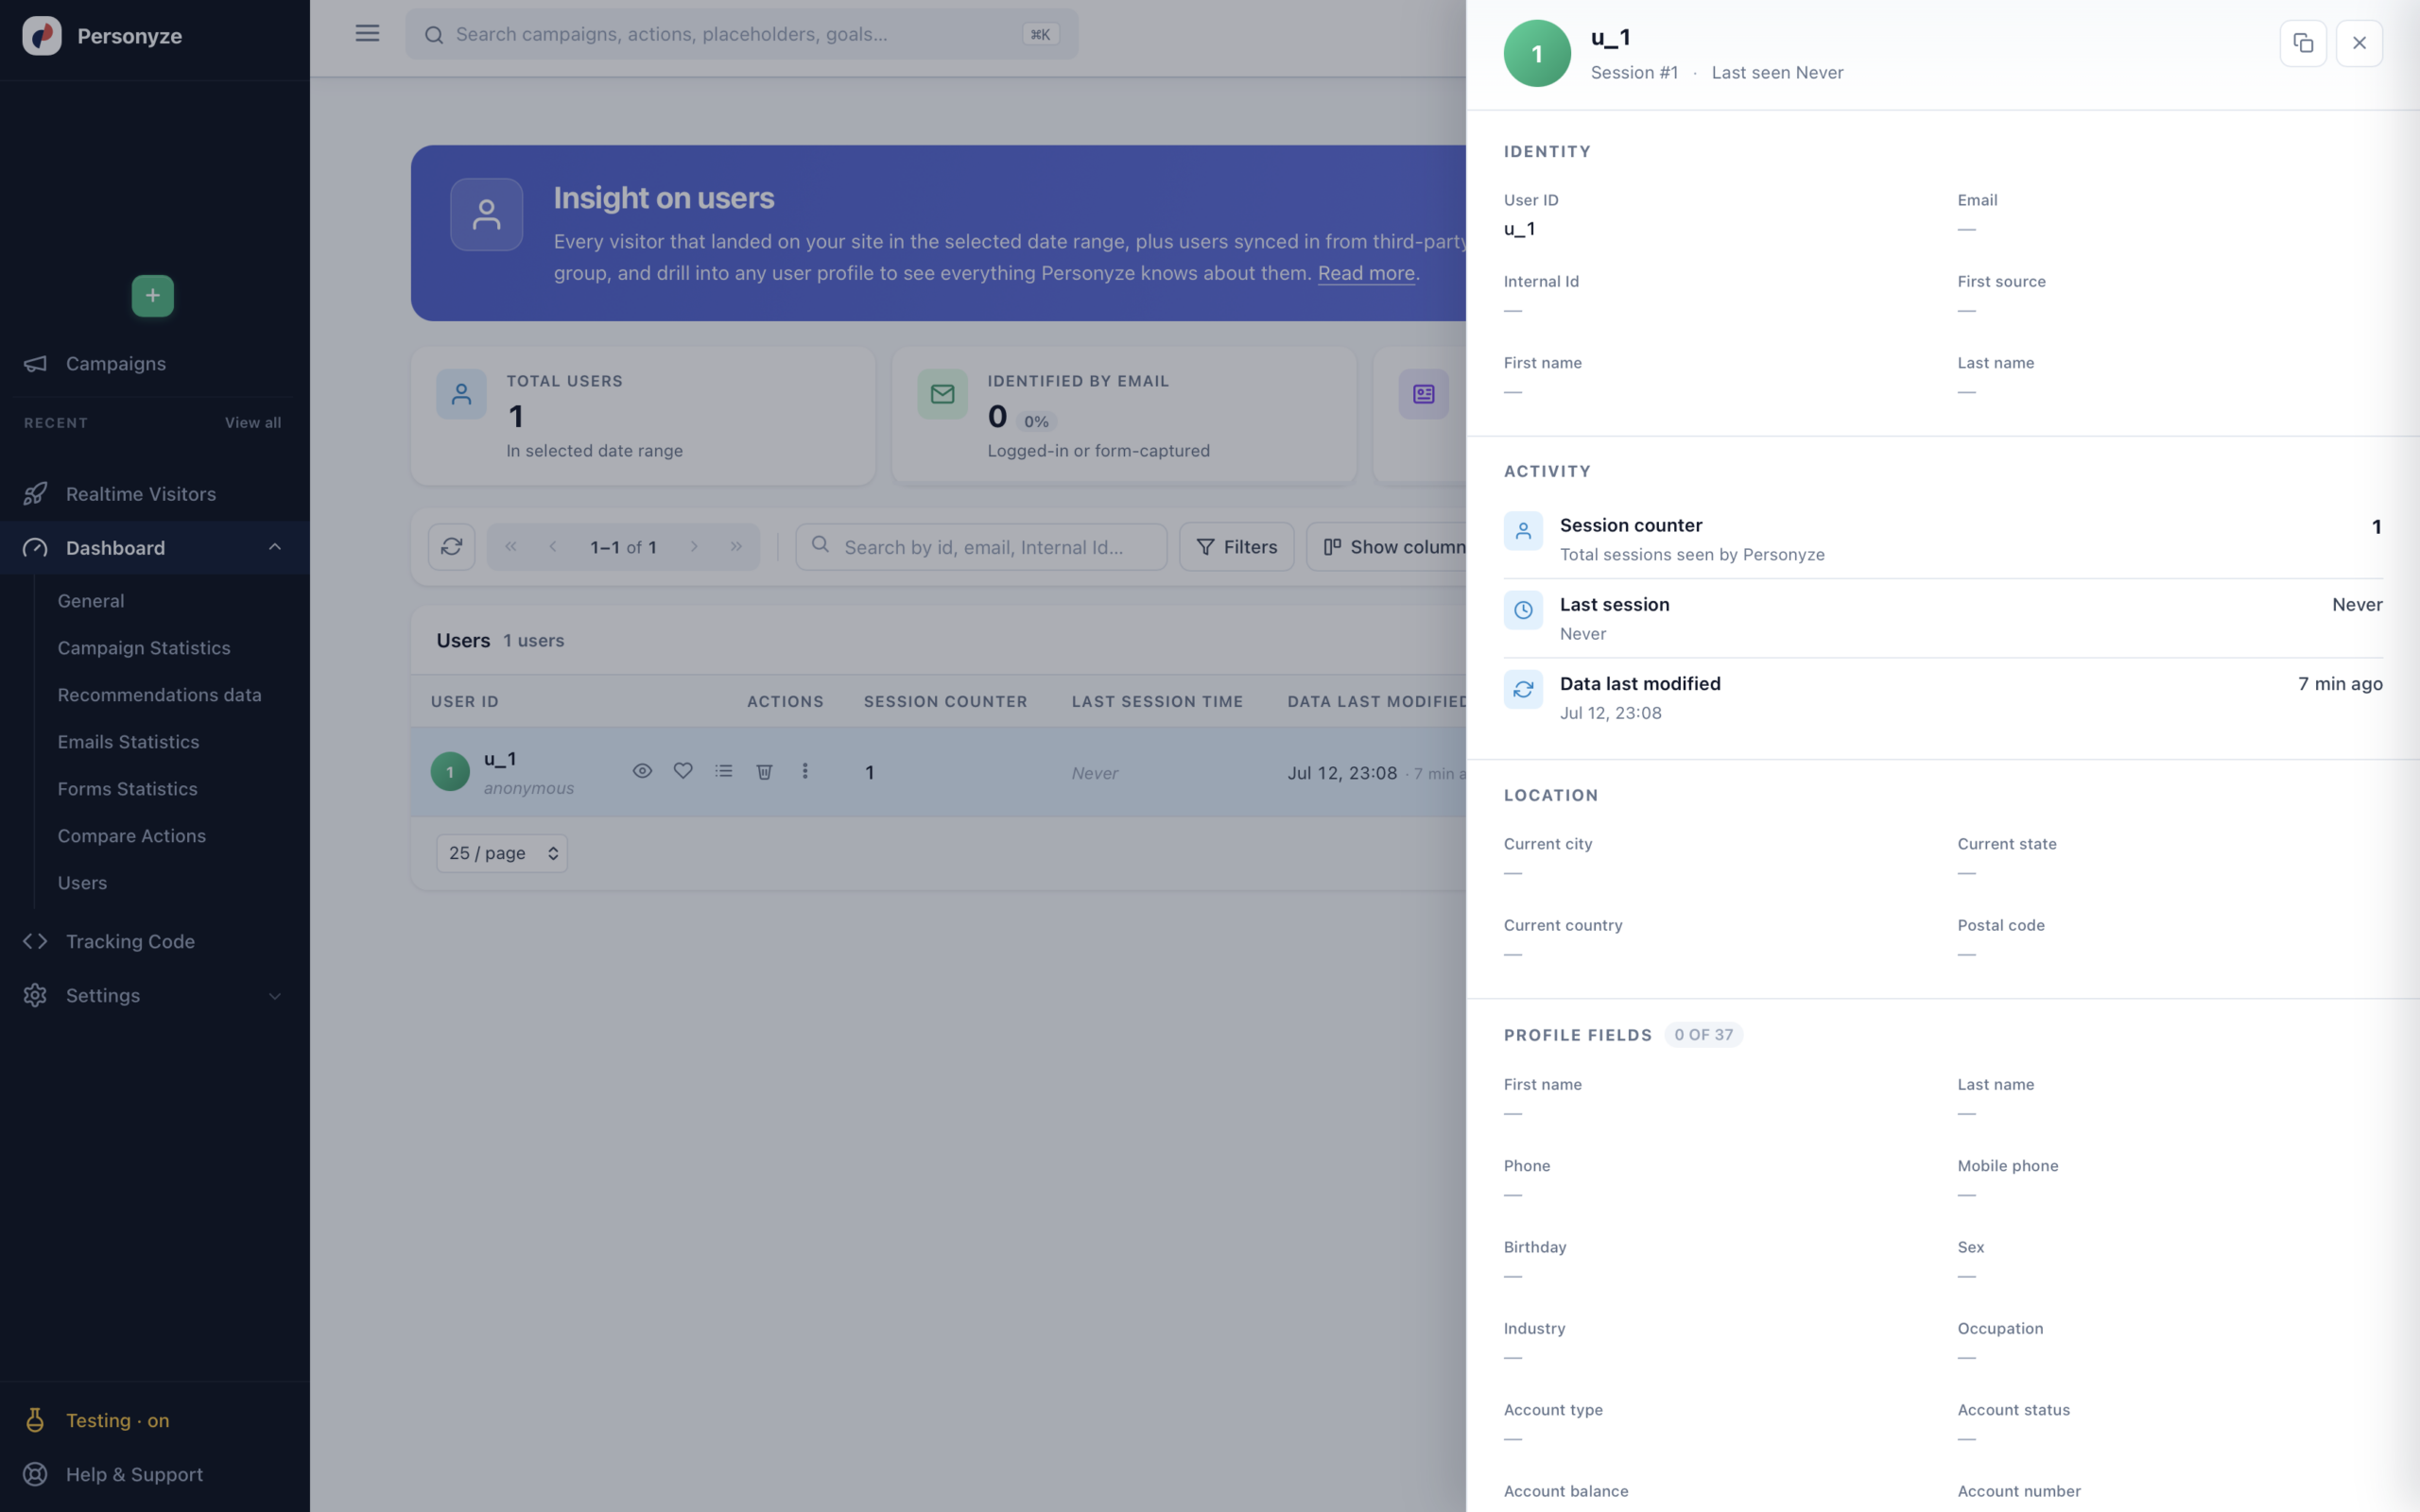
Step 6 — See the data in Personyze
Pushed users appear right away in Personyze under Dashboard → Users. Open any profile to see everything Personyze holds on that user — identity, activity, location, and all mapped profile fields.
Start a Zap when a visitor changes
The Visitor Created or Updated trigger starts a Zap when a visitor profile is created, or when any field on it changes. This is what lets Personyze drive the rest of your stack, rather than only receive from it.
“Only Identified Visitors” — read this before you turn it off
The trigger has an Only Identified Visitors checkbox, and it is on by default. Left on, the Zap fires only for visitors carrying an email address or a CRM ID. Turned off, it fires on every profile change — including anonymous browsers.
That difference is far bigger than it sounds, and Zapier bills you per task. On a real account, of 100 consecutive profile changes only 10 carried an email. The other 90 were anonymous browsers with a city and a lead source attached and nothing a Zap could act on — no address to mail, no record to update.
How merging works — and why blank fields are safe
A Create or Update User step keyed on email merges into the existing profile rather than duplicating it, and returns the same visitor ID both times. That is what makes the step safe to re-run — running the same Zap twice will not litter your account with copies.
Fields you leave blank in the Zap are not sent at all. Mapping only an email and a phone number will not wipe the first and last name already stored on that profile, so a narrow Zap that touches one or two fields is safe to build.
internal_id does not work as a lookup key — a sync keyed on it creates a brand-new visitor on every run. Use the email address, or the Personyze visitor ID, instead. This is the first thing most people reach for when building a CRM sync, which is exactly why it is worth stating plainly. See also the zapier_users endpoint.Adding a visitor to an audience
The Add Visitor to Audience action lists your audiences by name, so nobody has to hunt for a numeric ID. It identifies the person by any one of: Visitor Email, Visitor CRM ID, or Visitor ID.
That CRM ID option matters more than it looks: a Zap fed from your CRM no longer has to carry email addresses just to file people into audiences. If your CRM’s own record ID is already stored on the Personyze profile, that is enough on its own.
The visitor must already exist before this step runs. If there is any doubt, put a Create or Update User step in front of it — that guarantees the profile is there, and hands you the visitor ID to use.
Audiences can be created from the Zap too
The audience no longer has to exist first. Two steps can make one:
| Step | Kind | What it does |
|---|---|---|
| Find or Create Audience | Search + create | Looks up an audience by name, and creates it when there is no match |
| Create Audience | Action | Creates an audience outright |
Name matching ignores capitalisation and surrounding spaces, so " vip customers " finds "VIP customers" — useful when the name is fed from a spreadsheet or a CRM field.
Recipe: route CRM records into audiences named by your own data
This is the pattern most people are really after — segments that build themselves:
- Trigger — a new or updated record in your CRM.
- Create or Update User — map the email. An existing visitor is merged, not duplicated.
- Find or Create Audience — map the audience name from a CRM field, such as lifecycle stage, plan tier, or account owner. The audience is made the first time that value appears.
- Add Visitor to Audience — map the Audience ID from step 3.
Feeding offline activity into personalization
Until now, what Personyze knew about a visitor’s interest in a product came from the tracker watching them on your site. Record Product or Article Interaction changes that: a purchase made anywhere can count — a phone order, a POS sale, a deal closed in your CRM, a subscription renewal billed by Stripe.
That activity then feeds recommendations and behavioural targeting exactly as an on-site view would. For a business whose customers buy offline as well as online, this is the difference between recommendations built on half the picture and recommendations built on all of it.
What you can record
- Products — Viewed, Liked, Unliked, Added to cart, Removed from cart, Purchased, with an optional quantity.
- Articles — Viewed, Liked, Unliked, Commented, Goal.
The person is identified by email, CRM ID, or visitor ID — the same three the audience step takes.
Create or Update Product
Two things make this safe to run on every order:
- The Product ID is the key. Sending the same ID again updates that product rather than adding a second one.
- Blank fields are left alone. A Zap that only knows price and stock can run against products whose titles and descriptions came from somewhere else, without wiping them.
Fields accepted: Product ID, Title, Price, Sale Price, In Stock, Inventory Count, Product Page URL, Add-to-Cart URL, three image URLs, short and long description, SKU, Brand, Manufacturer, Family ID, Size, Color and Rank, plus an Other Fields box for anything else, such as custom_1…custom_10.
Recipe: count offline sales toward on-site personalization
- Trigger — a new order in your shop, POS or CRM.
- Create or Update Product — only if your catalog is not already synced by a feed.
- Record Product or Article Interaction — Product Purchased, identified by the customer’s email or CRM ID, with the quantity.
The next time that person visits your site, recommendations already know what they bought.
Finding visitors and events
Two search steps let a Zap look things up mid-run: Find Visitor (by email or visitor ID) and Find Events (tracked events, optionally narrowed by visitor, container or date).
Using the data
Once a user data is in Personyze, it behaves like any other profile data and can power:
- On-site targeting — build audiences on the pushed fields (account type, industry, CRM ID…). See Targeting Rules.
- Email campaigns — target and trigger emails based on the synced attributes.
- Dynamic variables — insert the values (first name, company, etc.) into personalized content. See Inserting CRM Variables.
Managing and revoking access
All Zapier passwords live in the Manage Zapier panel. If one is exposed or a Zap is retired, revoke it there — Zaps using it will stop authenticating, so generate and swap in a new one if the Zap should keep running.
Frequently asked questions
How do I connect Zapier to Personyze?
In Personyze, go to Settings > Integrations > Zapier and click Configure, then Generate new password. In Zapier, add Personyze as an app step and connect using username api and that generated password.
What username do I use to connect Personyze in Zapier?
The username is always api. The password is the one you generate in Personyze’s Manage Zapier panel.
Does Personyze need an API key for Zapier?
No. Zapier authenticates with a dedicated Zapier password you generate in Personyze (paired with the username api), not an API key.
What can I push into Personyze with Zapier?
Use the Create or Update User action to push user profiles from any Zapier-connected app – fields like email, name, phone, industry, account type, and CRM ID, either as static values or variables from your trigger.
Where does the data appear after a Zap runs?
Pushed users appear immediately in Personyze under Dashboard > Users. Open a profile to see identity, activity, and all mapped fields.
Can I use Zapier-pushed data for targeting?
Yes. Once a user’s data is in Personyze it can power on-site targeting, email campaigns, and dynamic content variables, exactly like any other profile data.