
What Grabbing Data Does
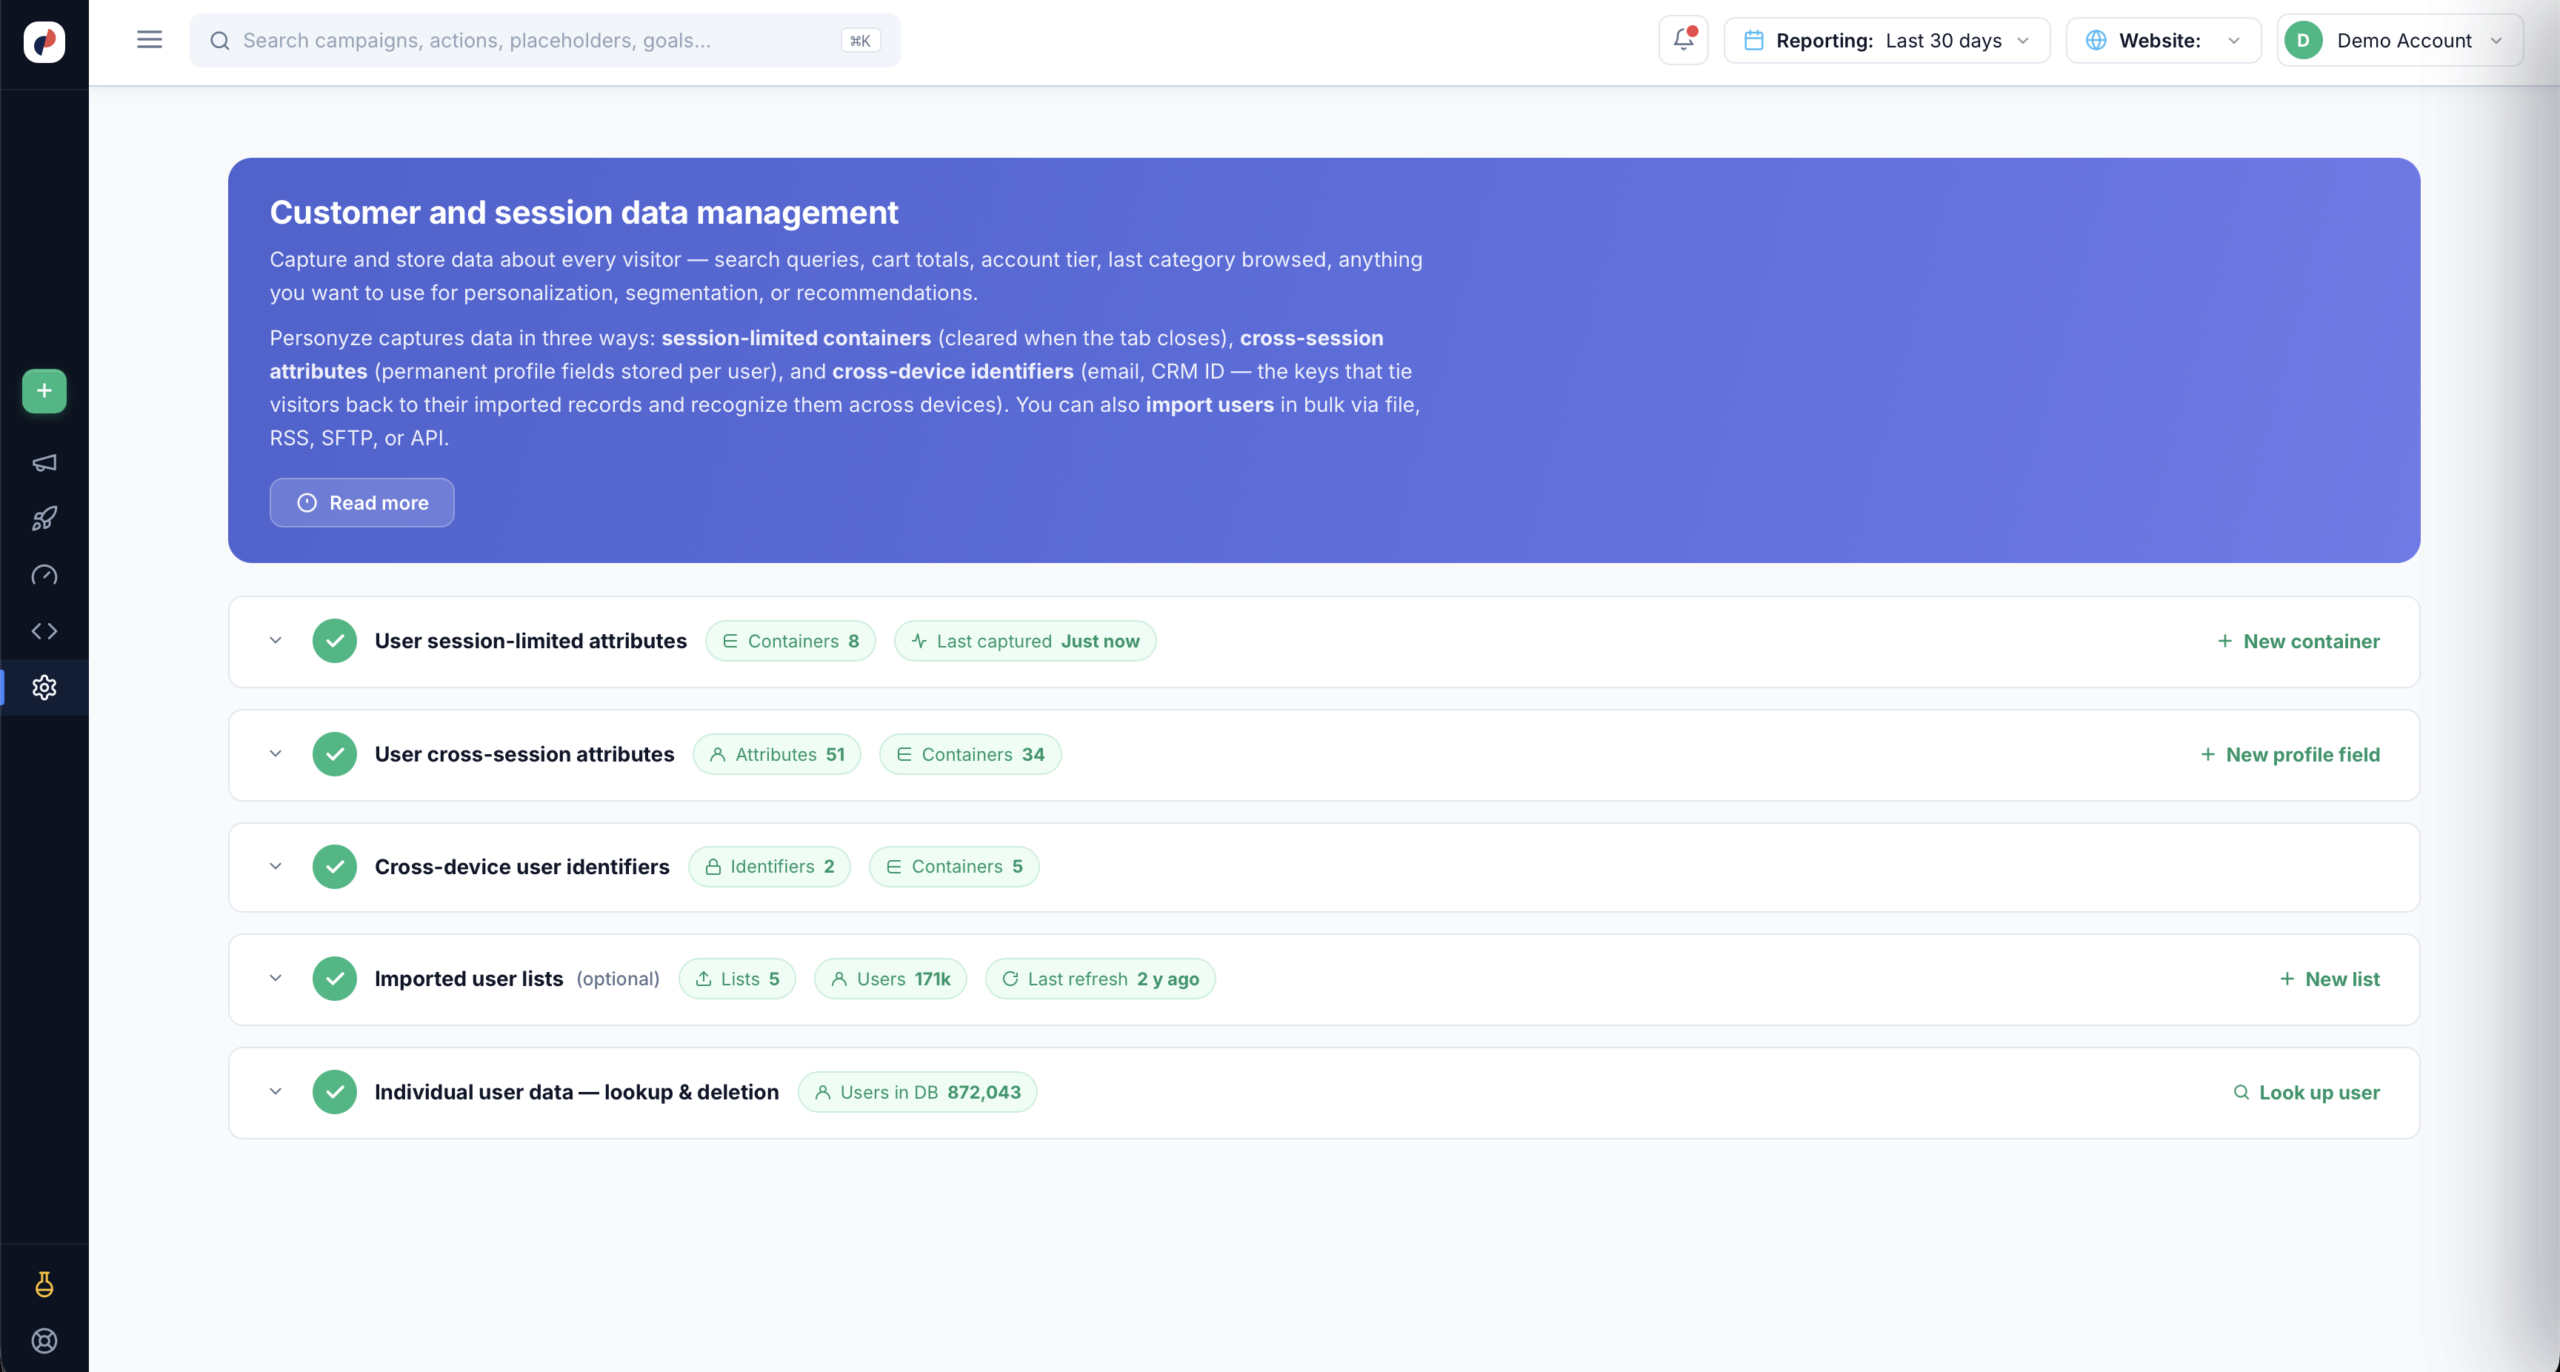
UI path: Settings → Customer and session data management.
Your site already knows things about a visitor that Personyze doesn’t: what’s in their cart, what they typed into a form, which category they’re browsing, whether they’re logged in and who they are. Grabbing is how you hand that to Personyze — you point at where the value lives on the page, and Personyze captures it on every visit.
Once captured, the value behaves like any other visitor attribute. You can use it to:
- Target — show an offer only to visitors whose cart value is over $100, or only to Enterprise-tier accounts.
- Personalize — drop the value straight into content as a dynamic variable, so a popup can greet someone by first name or name the category they were just browsing.
- Build the user profile — store it permanently against the visitor so it’s there on their next visit, from any device.
- Recognize people across devices — grabbing an email or CRM ID ties the anonymous browser to an imported record, so a visitor on their phone is the same person as on their laptop.
- Track conversions — the same capture mechanism powers conversion goals. Grab an order total off the thank-you page and it becomes the revenue attributed to the campaign that drove it.
Three Kinds of Captured Data
The distinction that matters most is how long the value lives — and it’s the first choice you make, because it decides which section of the page you work in.
- Session-limited attributes — captured per visit and cleared when the tab closes. Right for things that are only true right now: current cart total, the search query they just typed, the page they’re on. Managed under User session-limited attributes → New container.
- Cross-session attributes — permanent profile fields stored per user, and still there on the next visit. Right for things that stay true: first name, account tier, industry, role. Managed under User cross-session attributes → New profile field.
- Cross-device identifiers — email, CRM ID, and the like: the keys that tie a visitor back to an imported record and let Personyze recognize them across devices. Managed under Cross-device user identifiers.
Ask yourself: will this still be true next week? Cart contents, no — session. Job title, yes — cross-session. Is it something that identifies who they actually are? Then it’s an identifier.
The same hub also holds Imported user lists (bulk user data via file, RSS, SFTP, or API) and Individual user data — lookup & deletion for GDPR requests.
Creating a Container
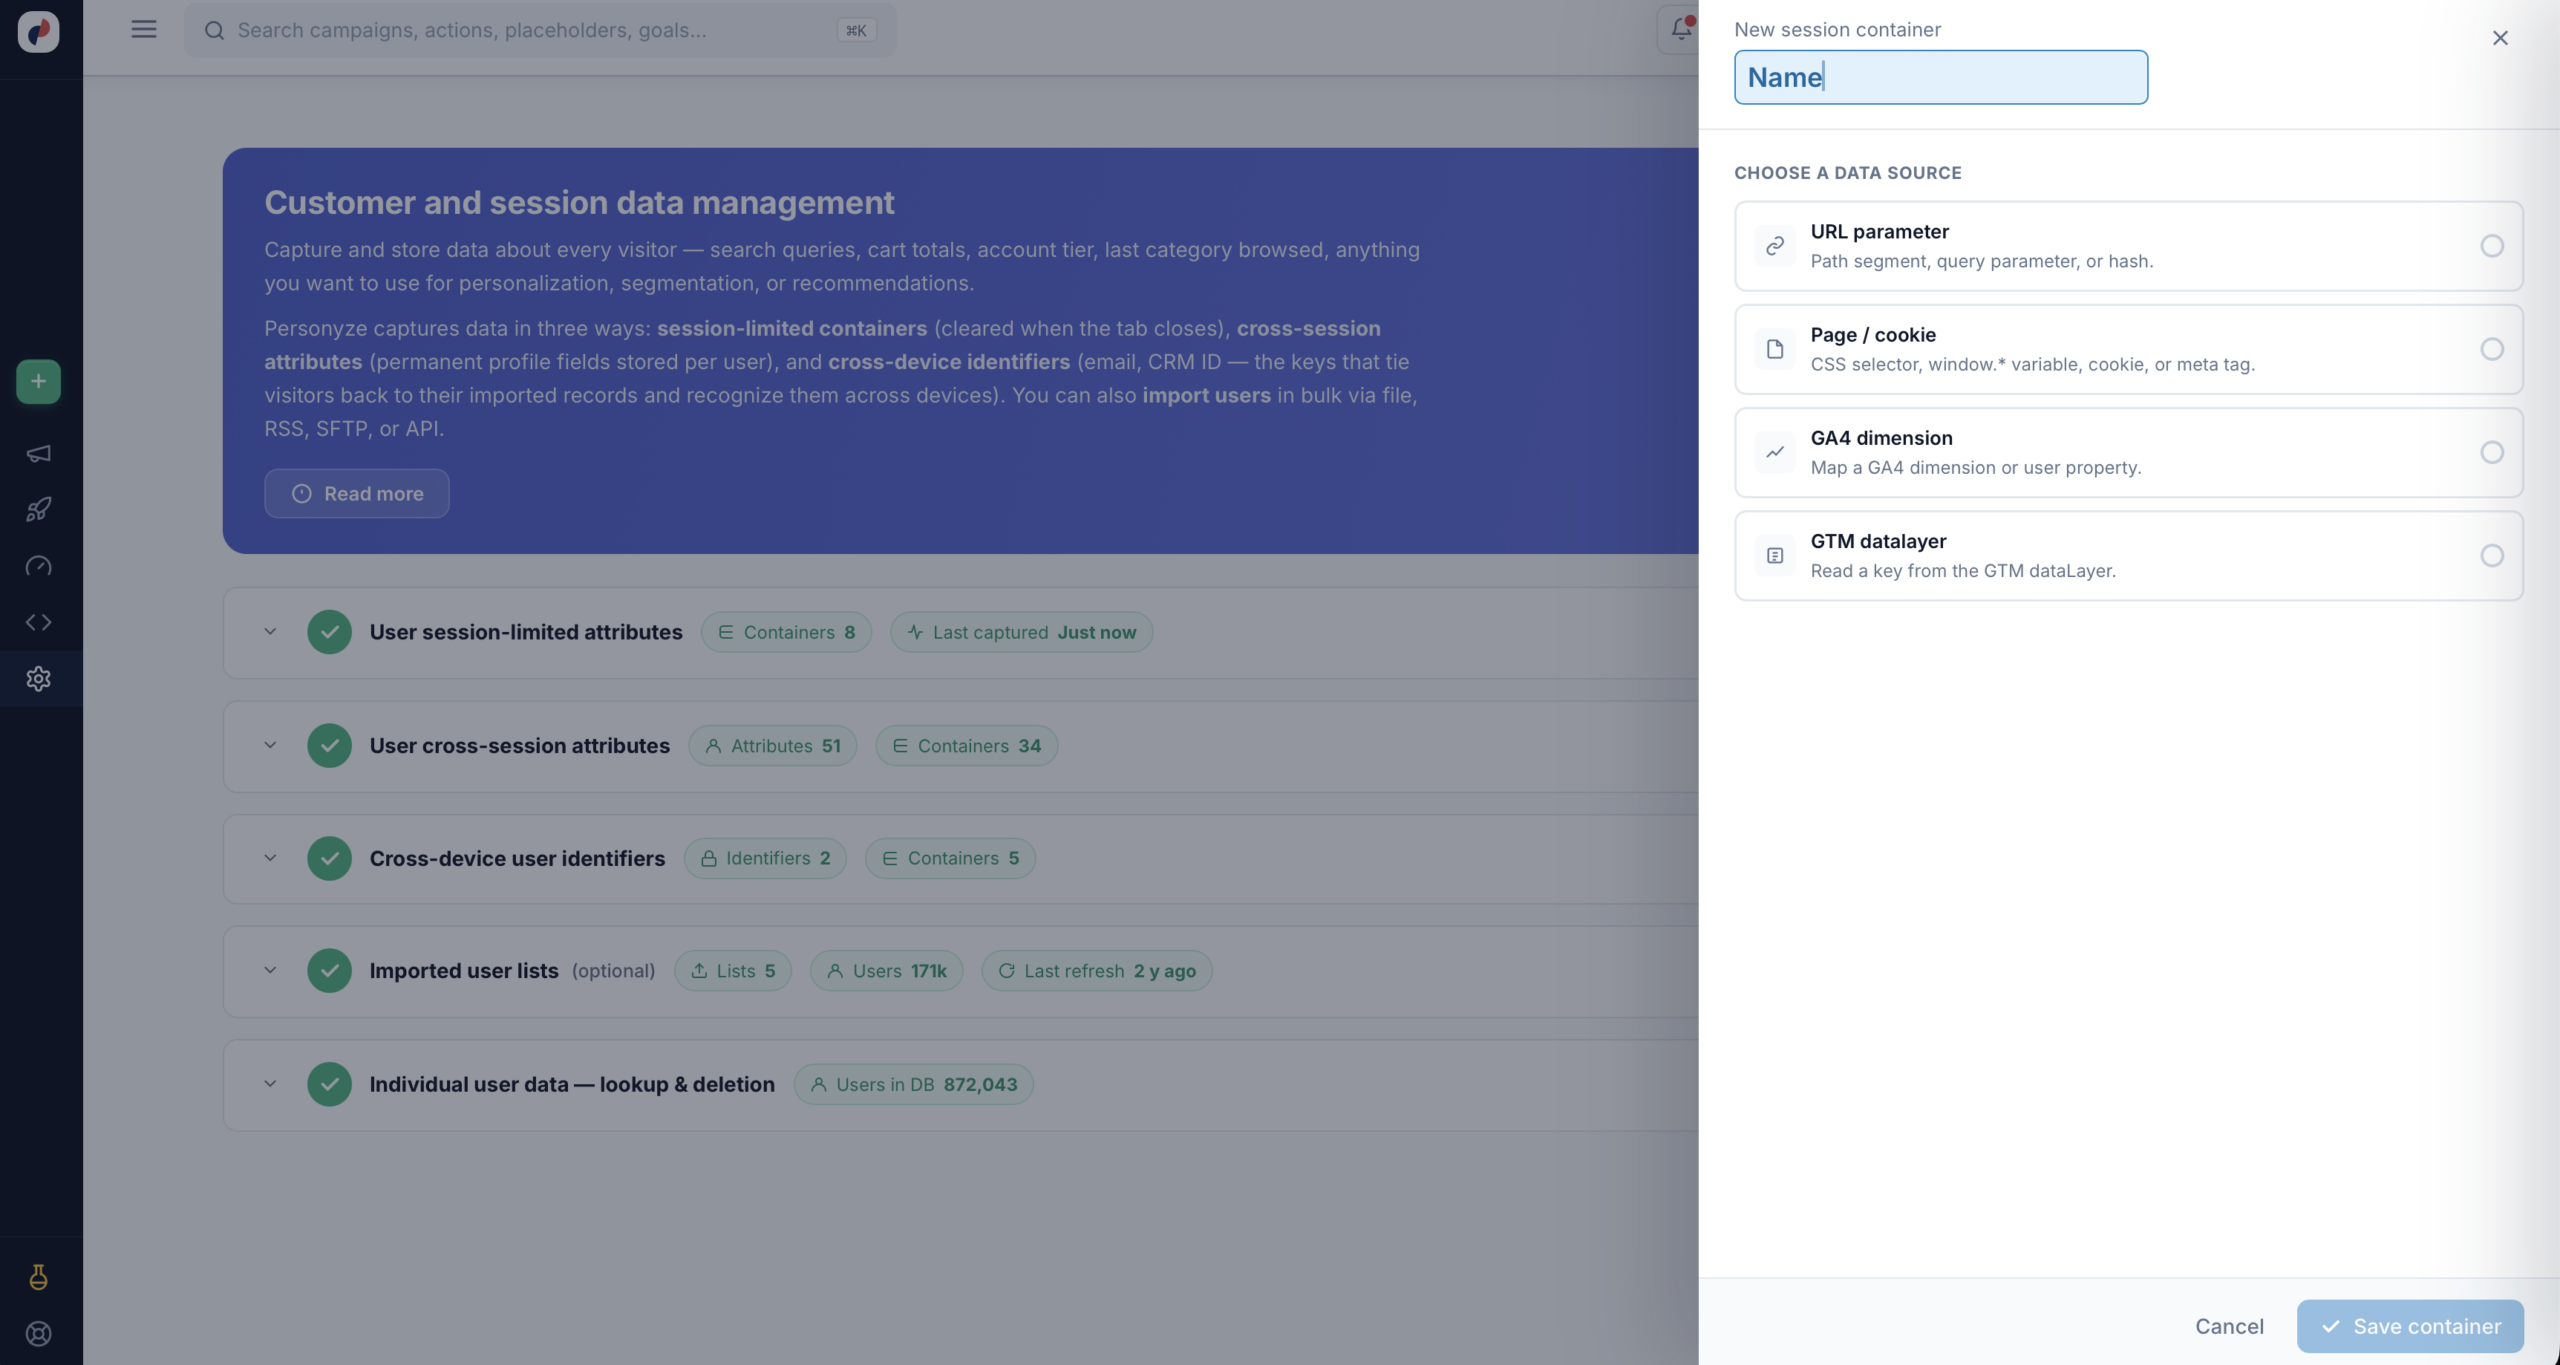
Click New container (or New profile field for a permanent one), give it a name, and choose where the value comes from.
Choose a Data Source
- URL parameter — a path segment, query parameter, or hash. Use it for campaign tracking like
?utm_source=, or a category baked into the path. - Page / cookie — a CSS selector, a
window.*variable, a cookie, or a meta tag. This is the broadest option and the one most grabs use. - GA4 dimension — map a GA4 dimension or user property you already collect.
- GTM datalayer — read a key from the GTM dataLayer. If your dev team already pushes cart value or customer tier into the dataLayer, take it from there rather than scraping the DOM.
Point at the Value
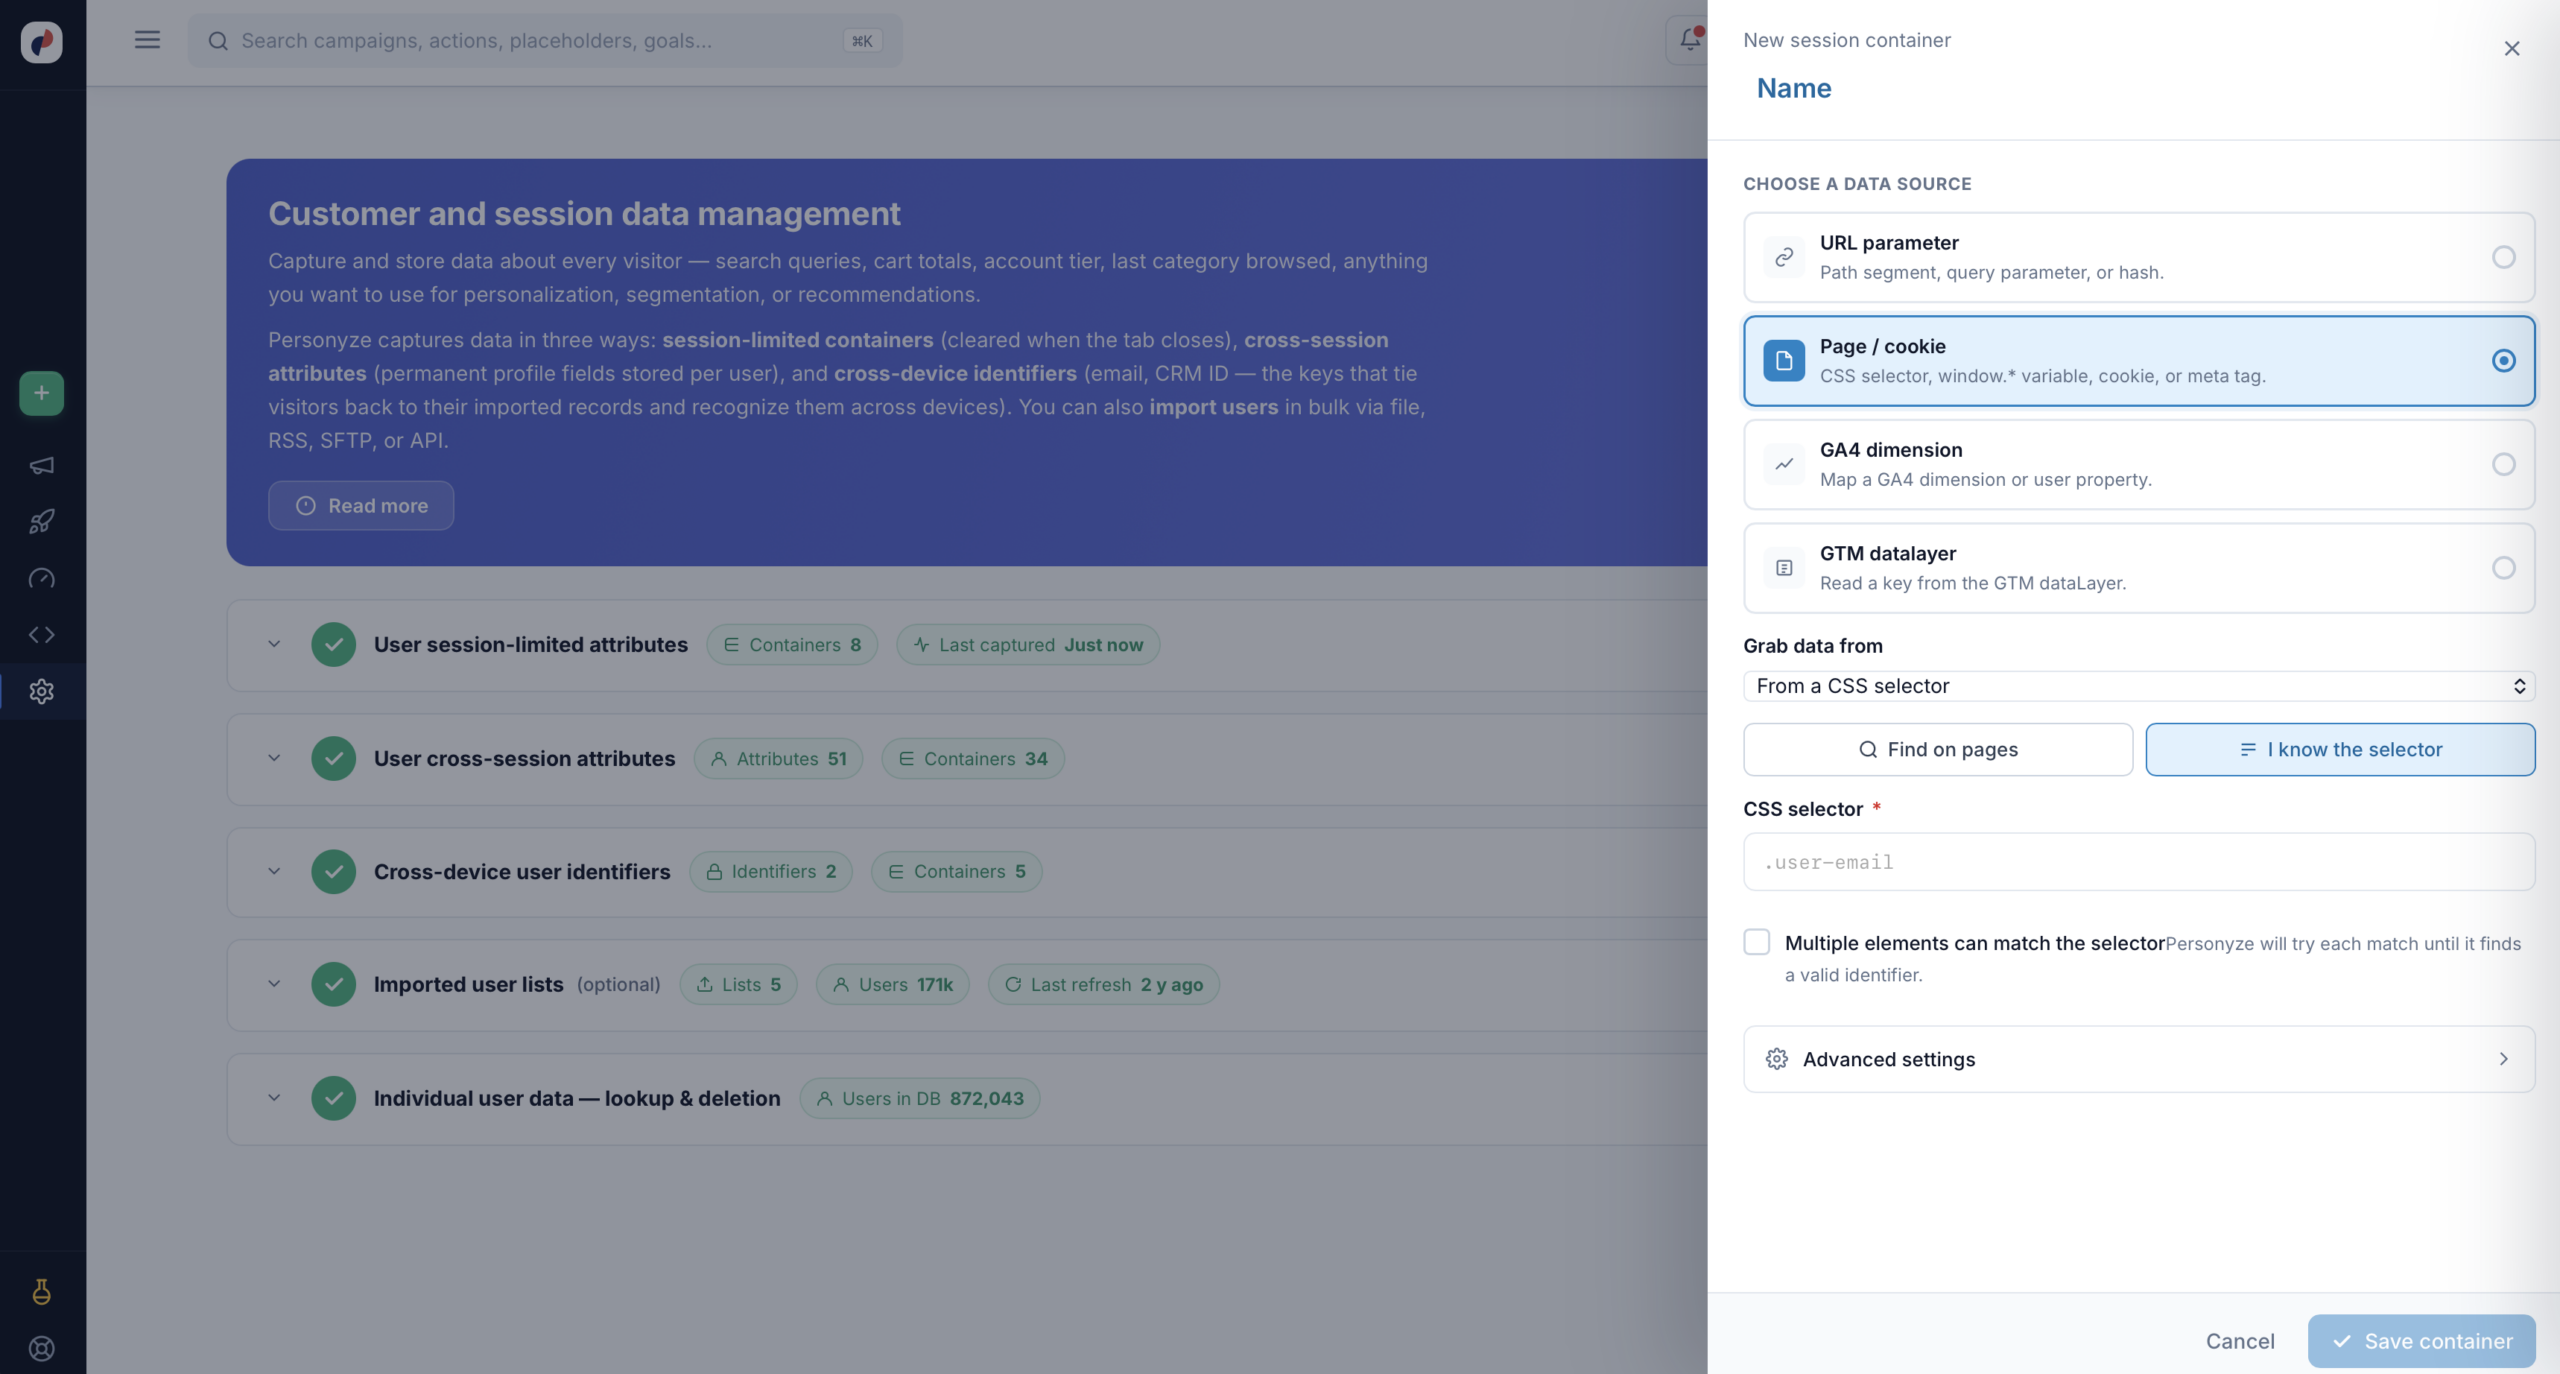
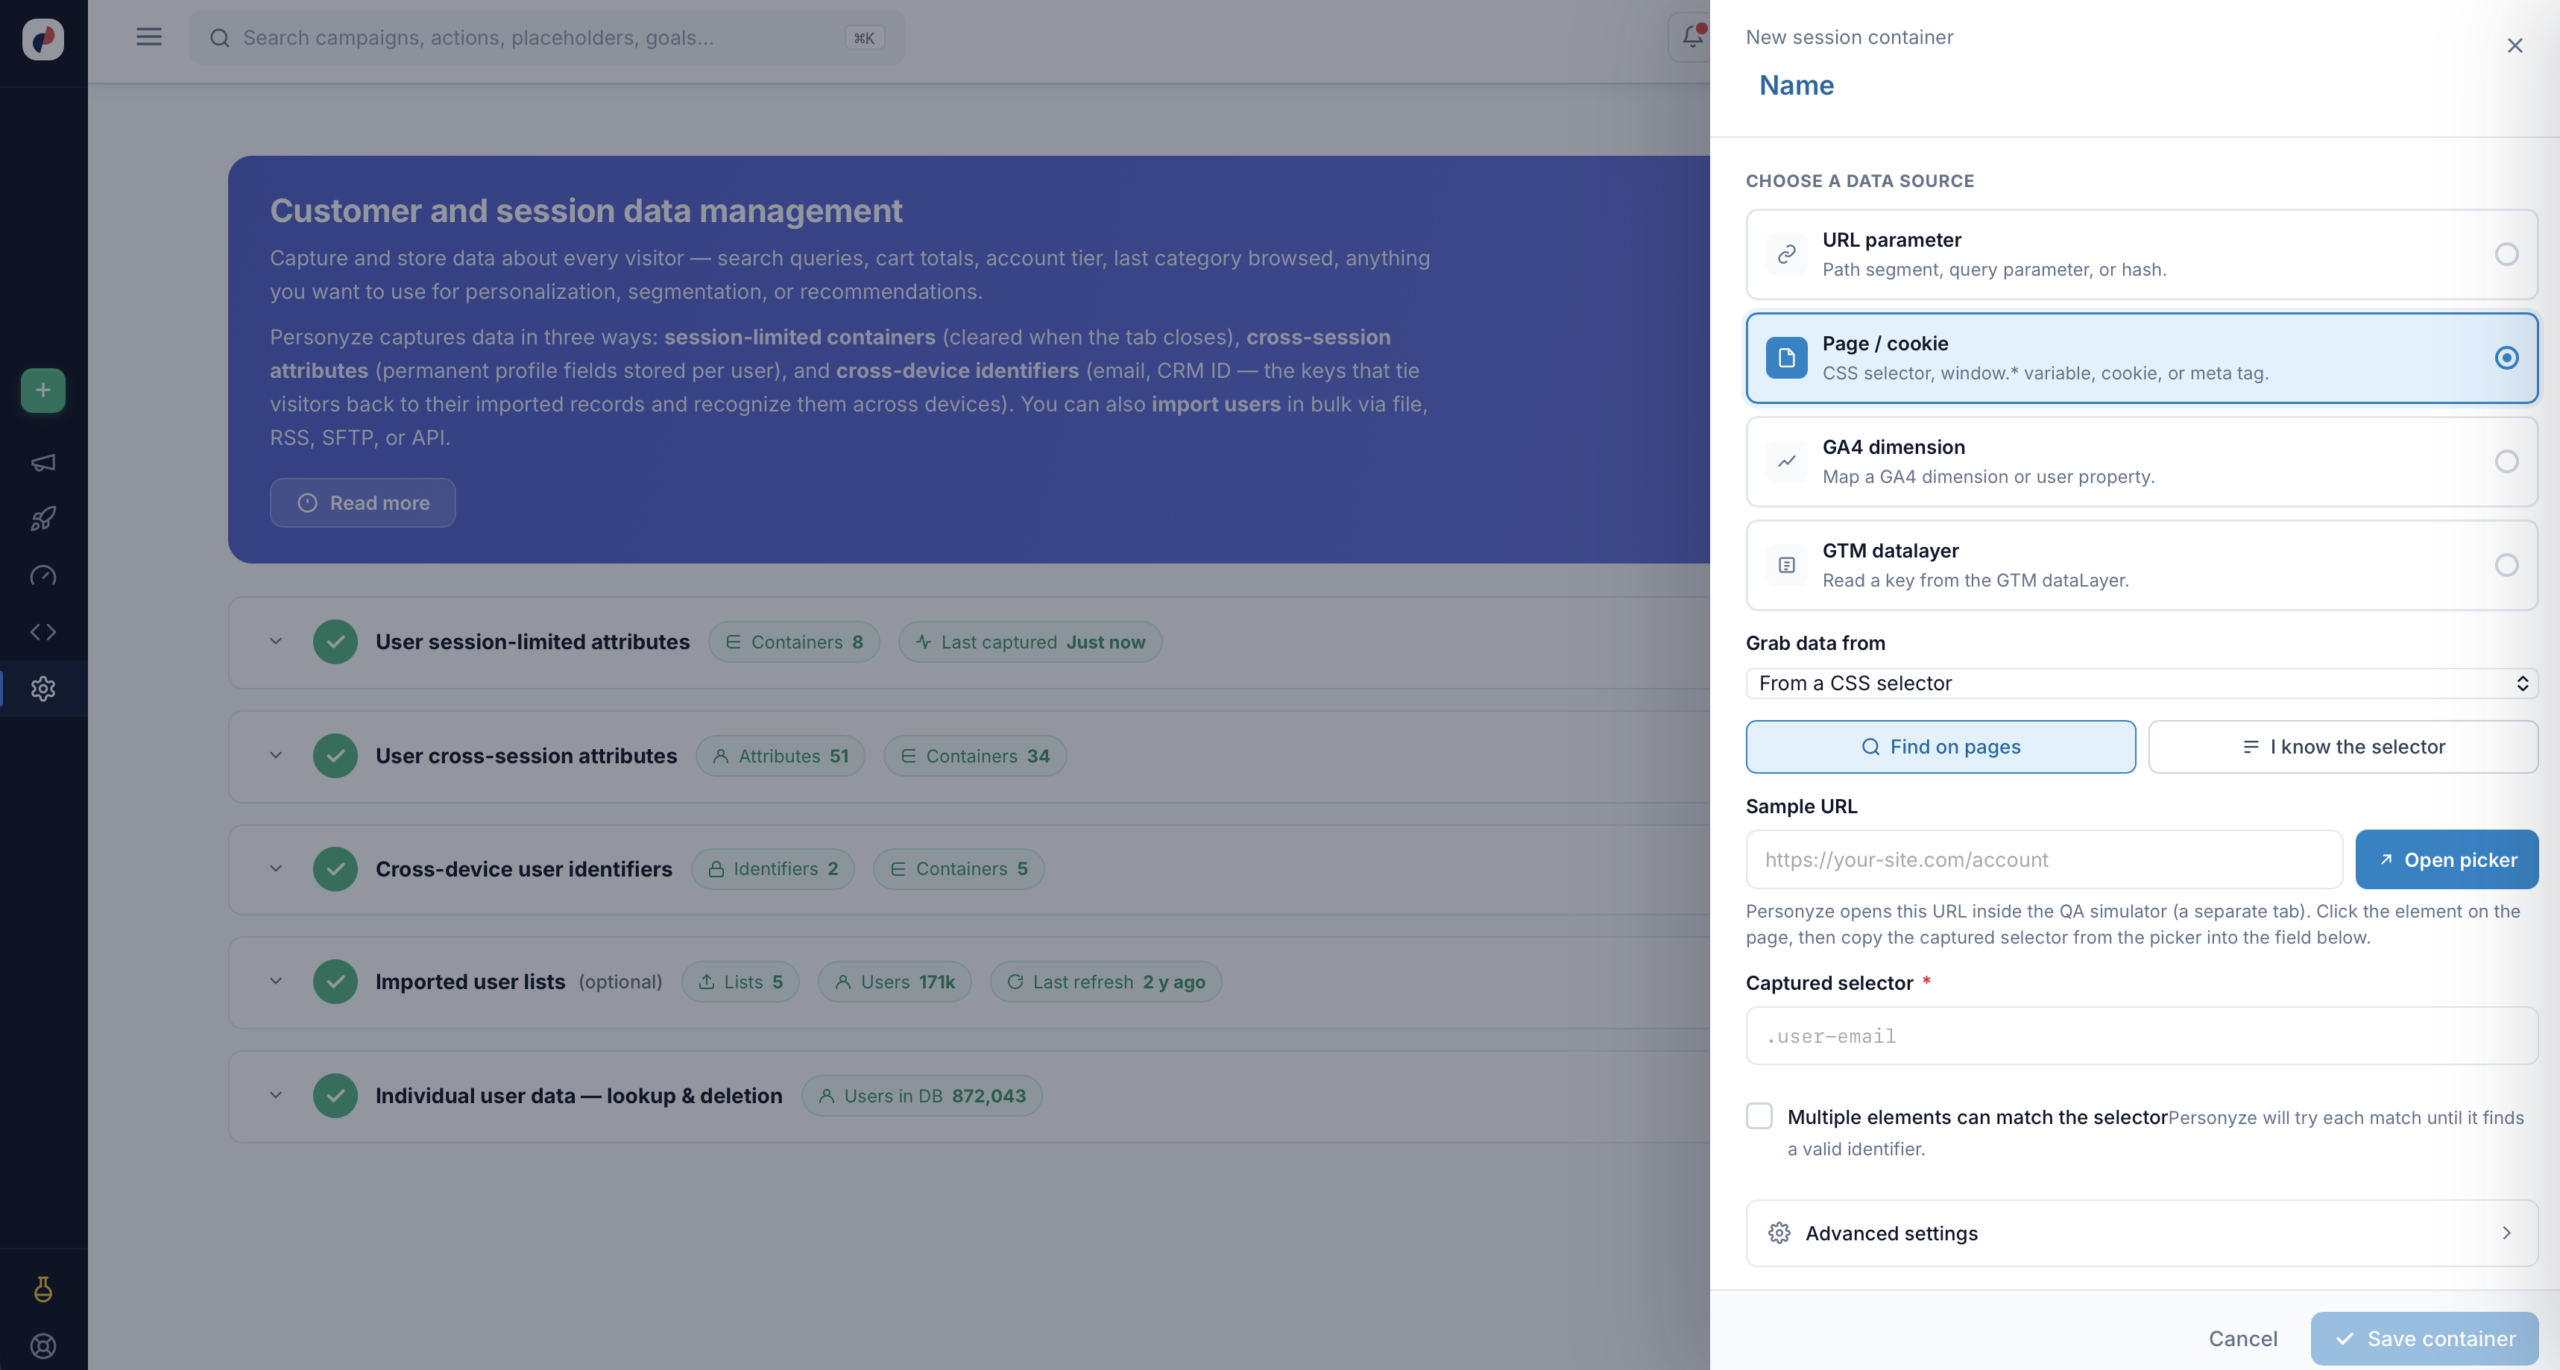
With From a CSS selector chosen, there are two ways to supply it:
- I know the selector — type it directly, e.g.
.user-email. - Find on pages — enter a sample URL and click Open picker. Personyze opens that page inside the QA simulator in a separate tab; click the element and the captured selector comes back into the field.
Multiple elements can match the selector tells Personyze to try each match until it finds a valid value — useful when the same class appears several times and only one instance actually holds the data.
Using the Picker
The picker opens your site with a panel beside it, so you’re grabbing from the real page rather than guessing at markup.
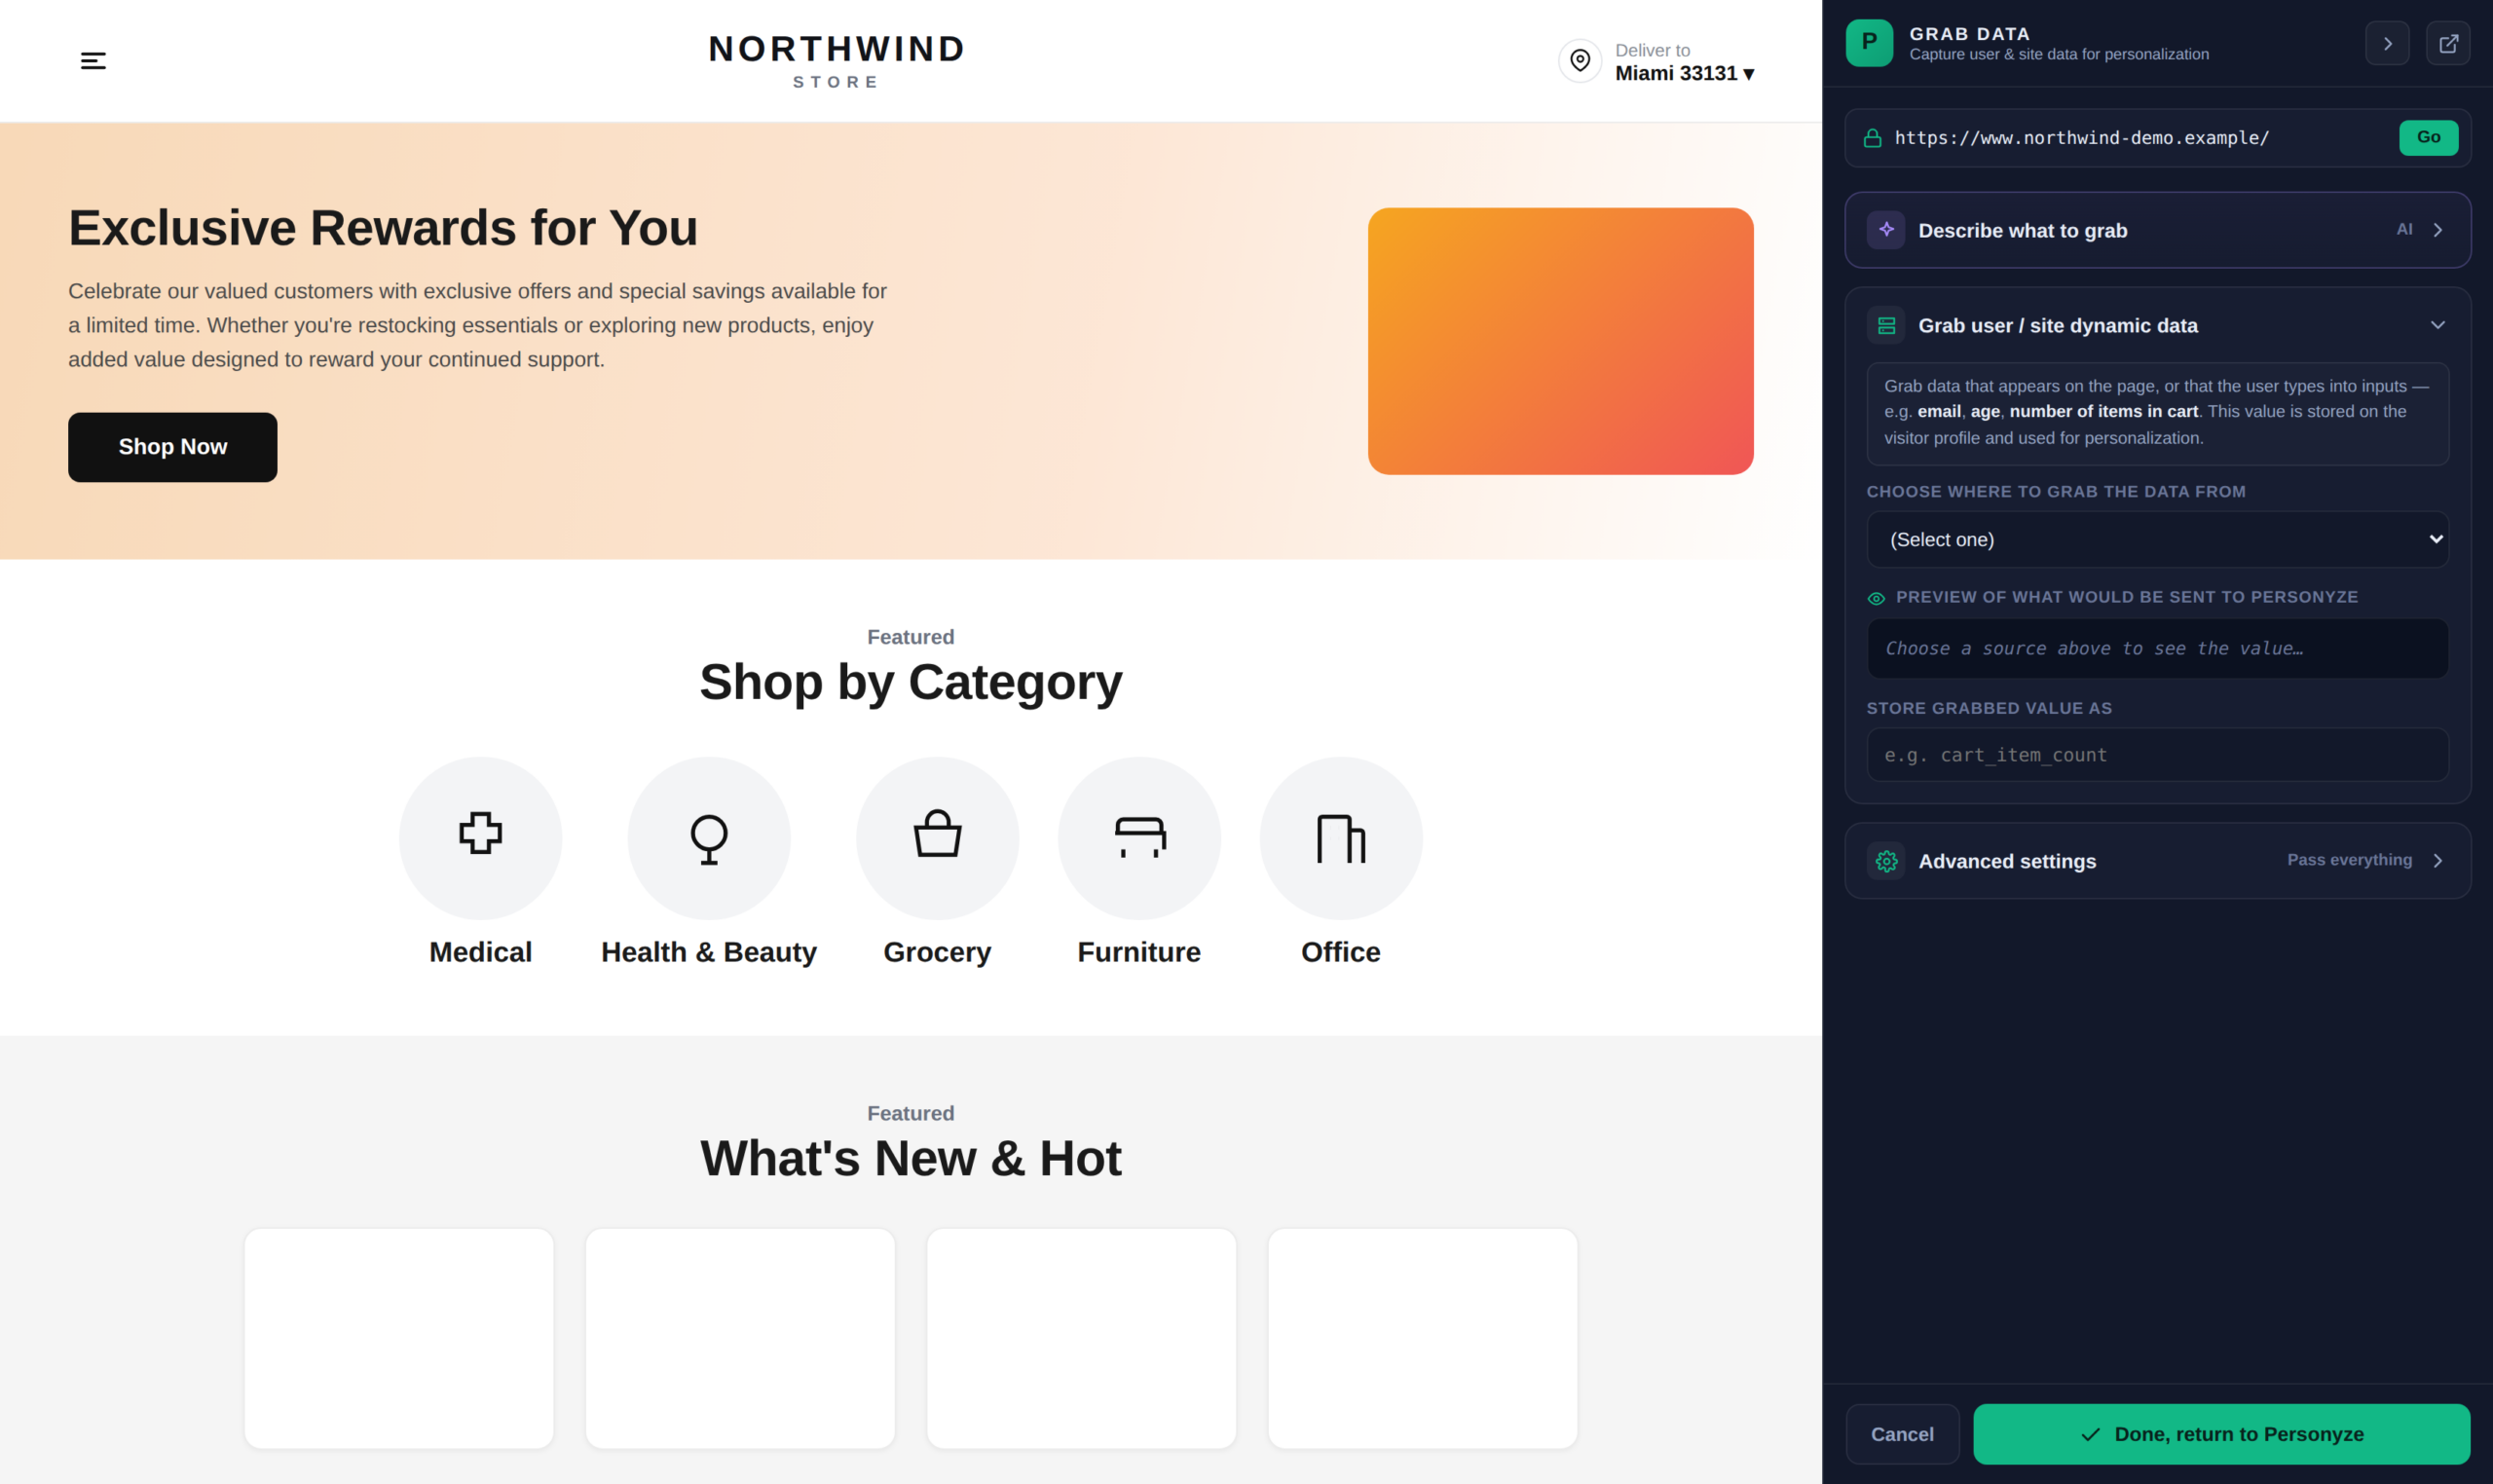
Describe It and Let AI Fill the Form
Rather than working out the source, key, and mask yourself, say what you want in plain words — “the number of items currently in the cart” — and click Suggest with AI. It proposes the source, the key or selector, a mask, and a name to store it as. Apply & fill the form writes all four into the form.
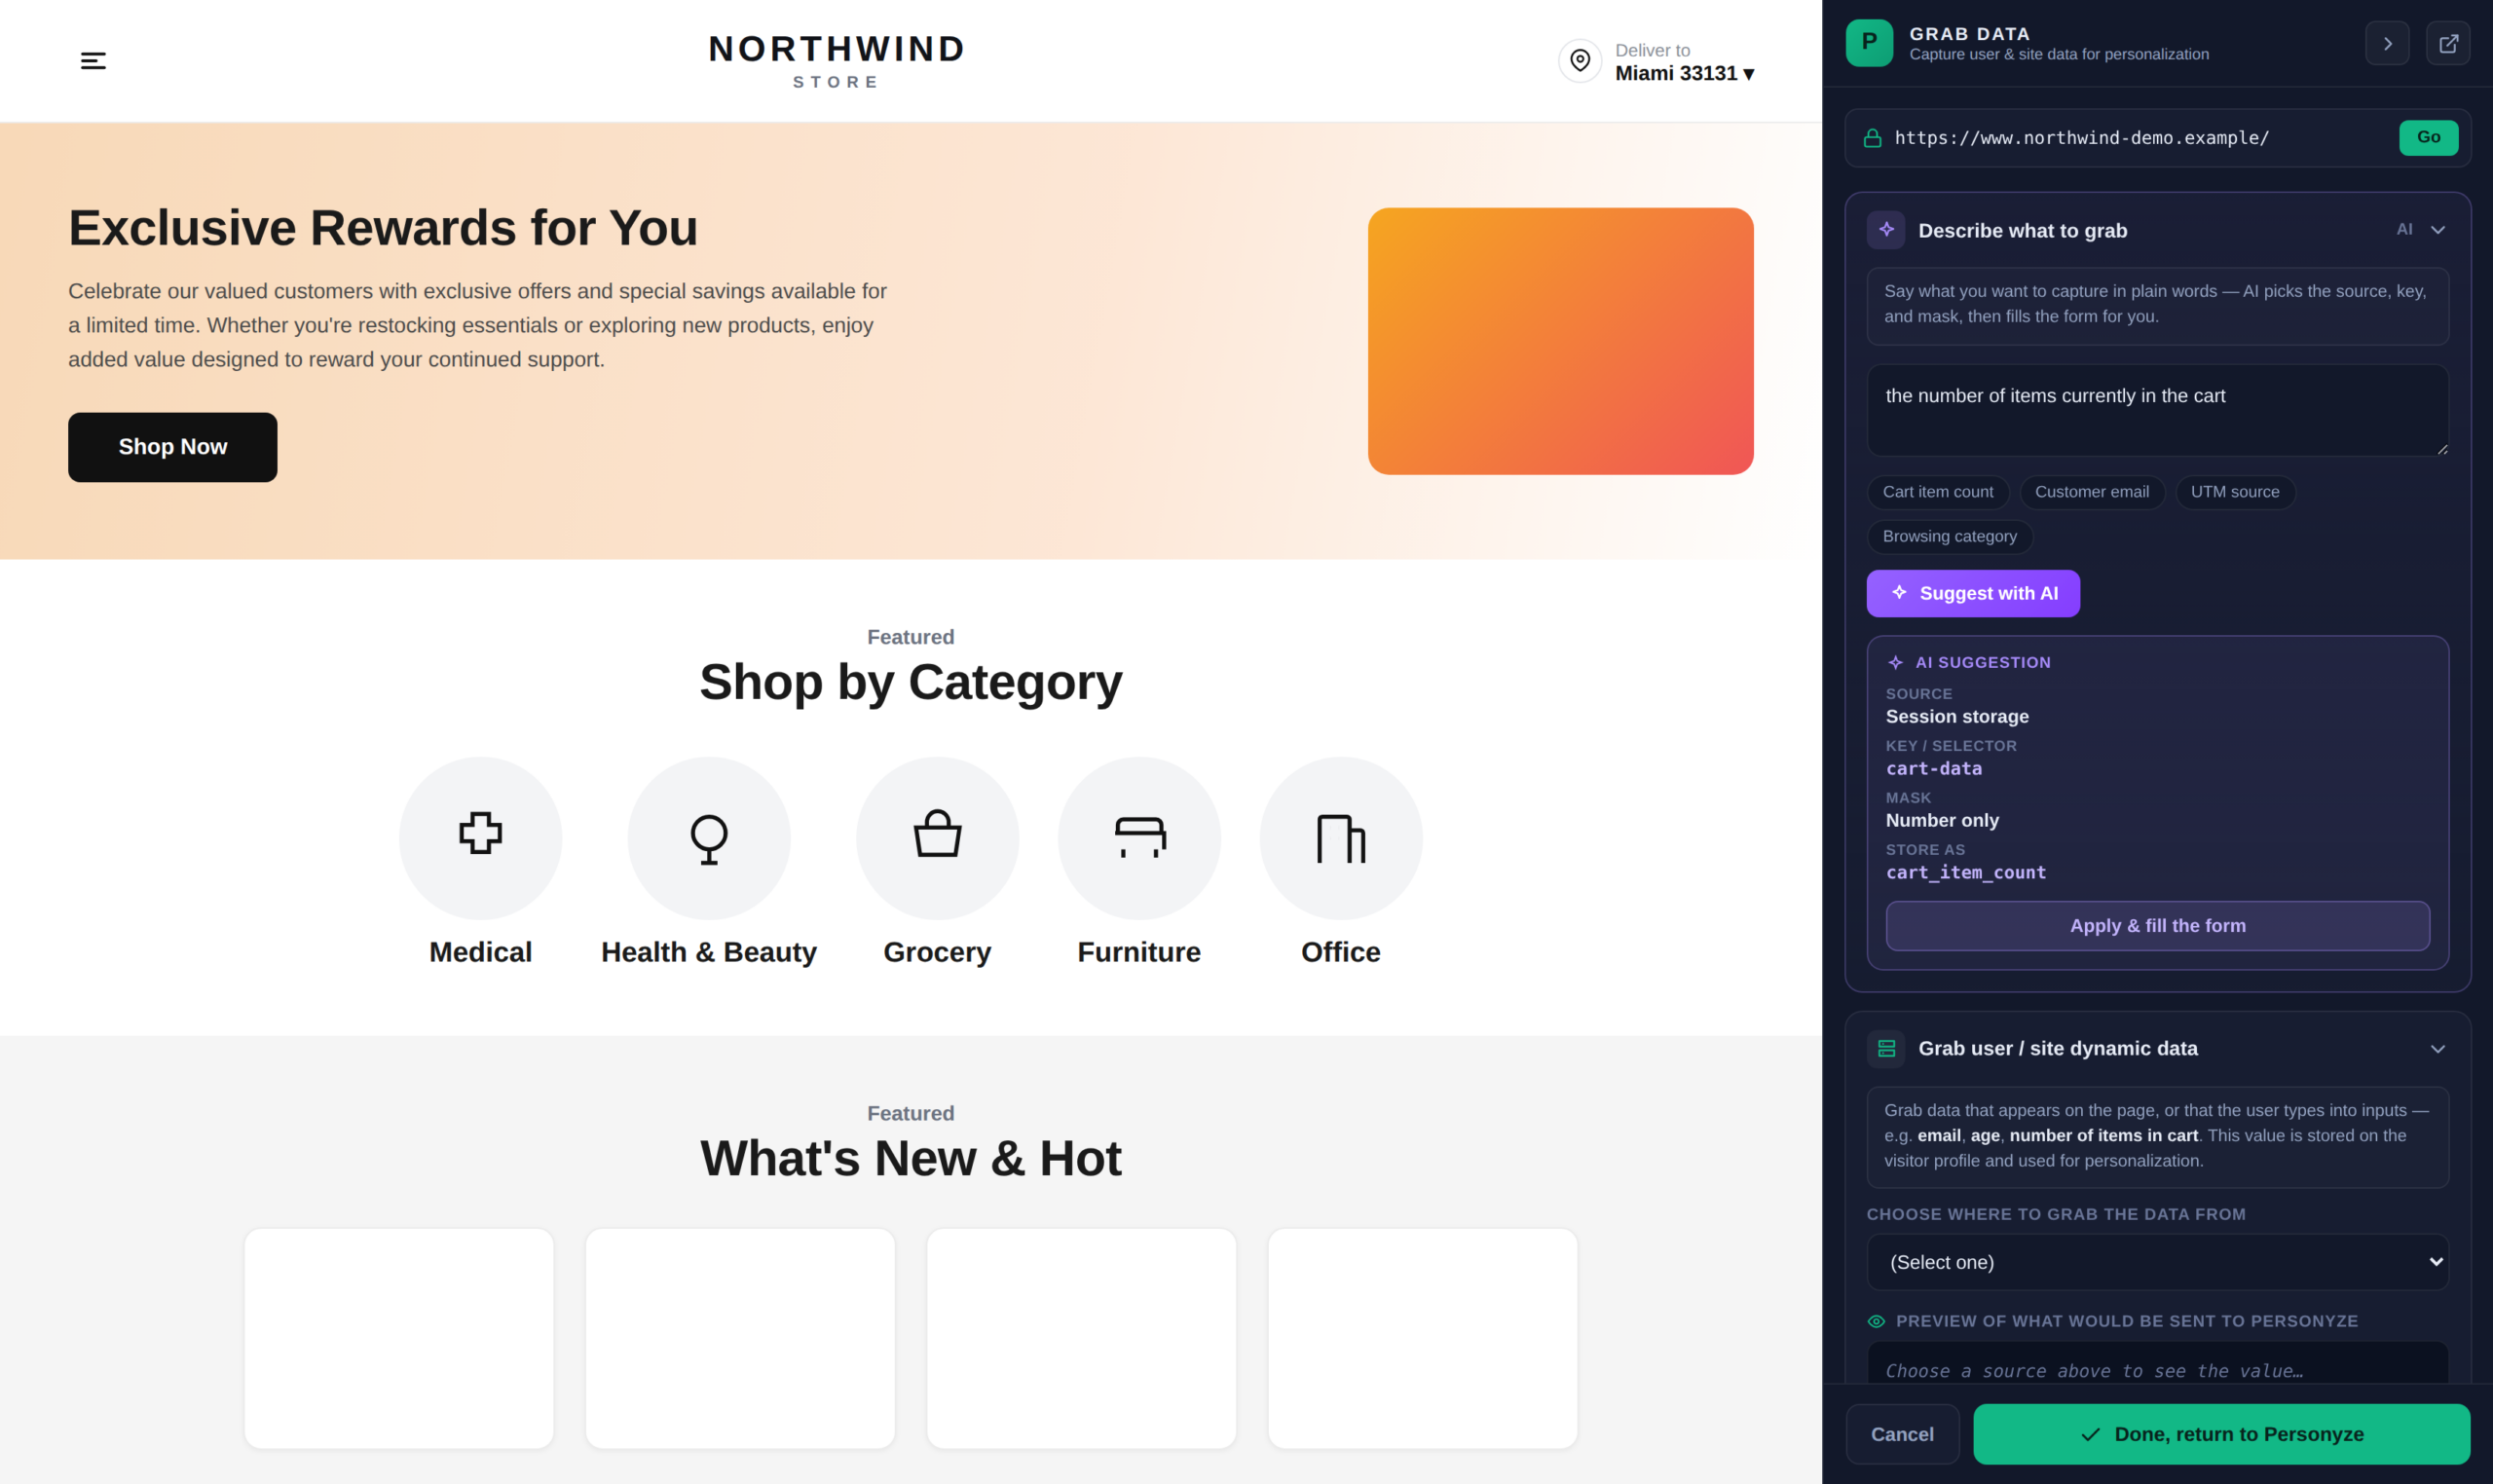
cart-data key, a Number-only mask, and cart_item_count as the name. Apply fills the form.Point and Click
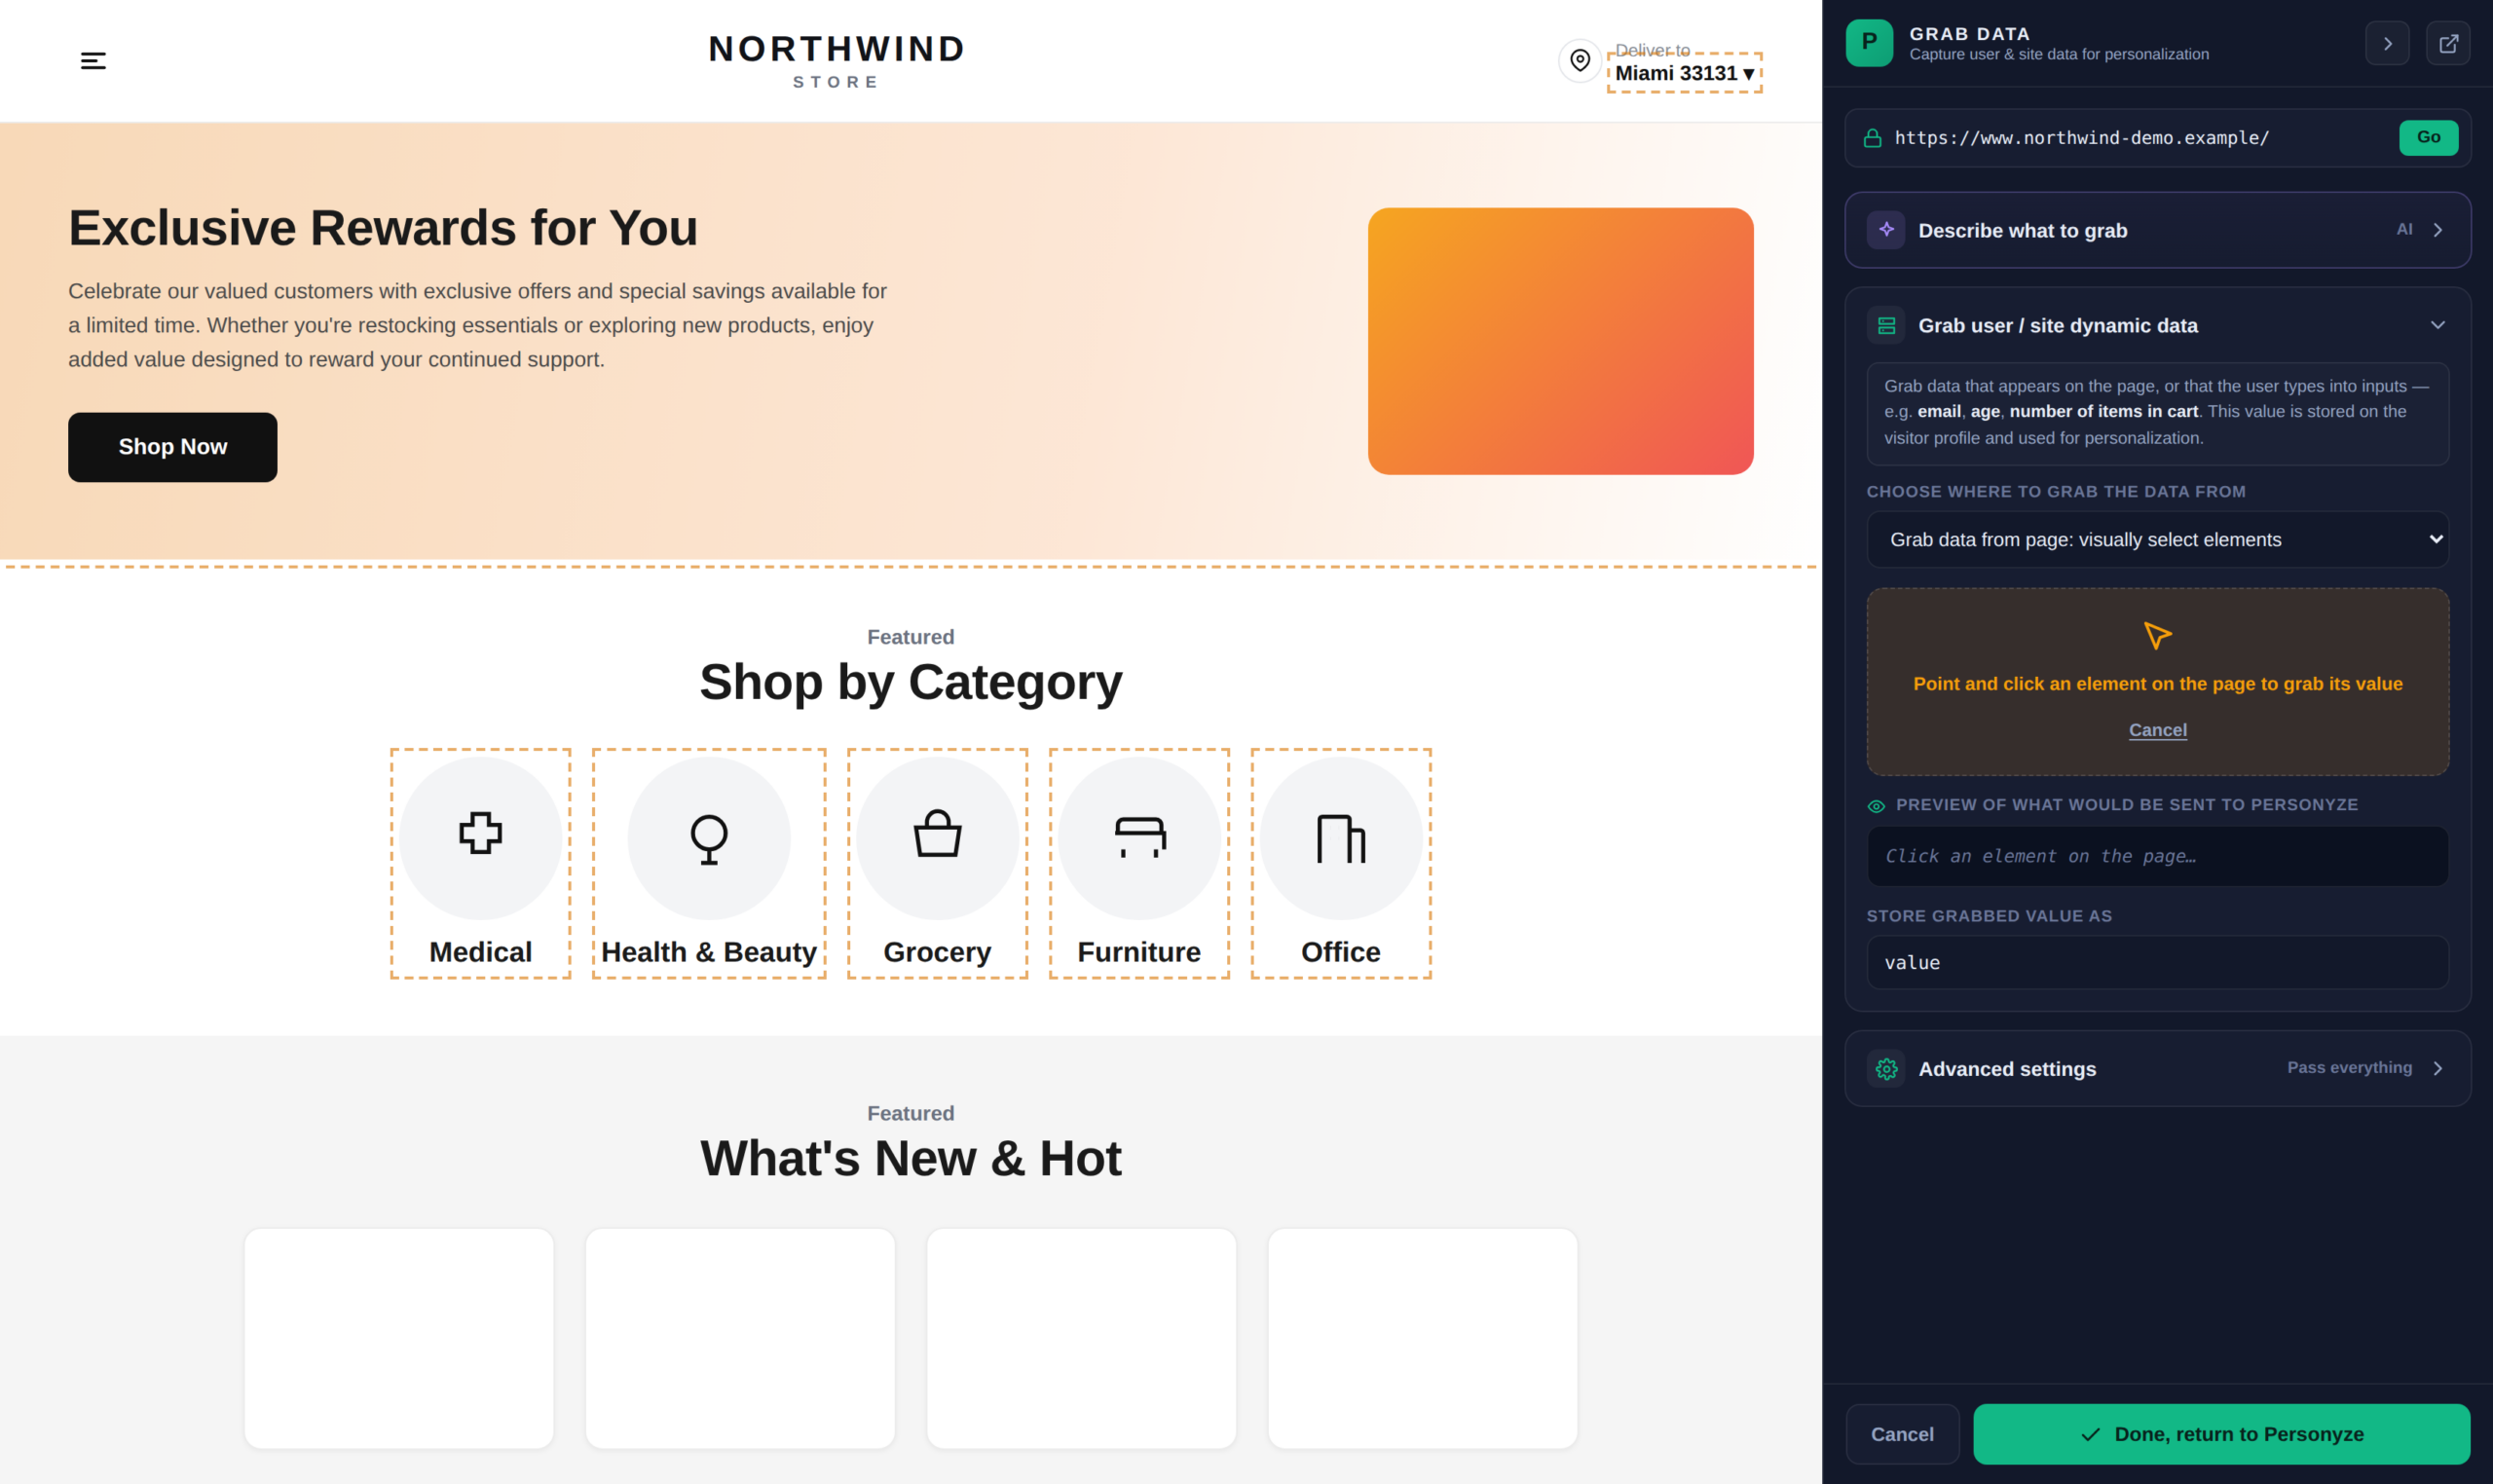
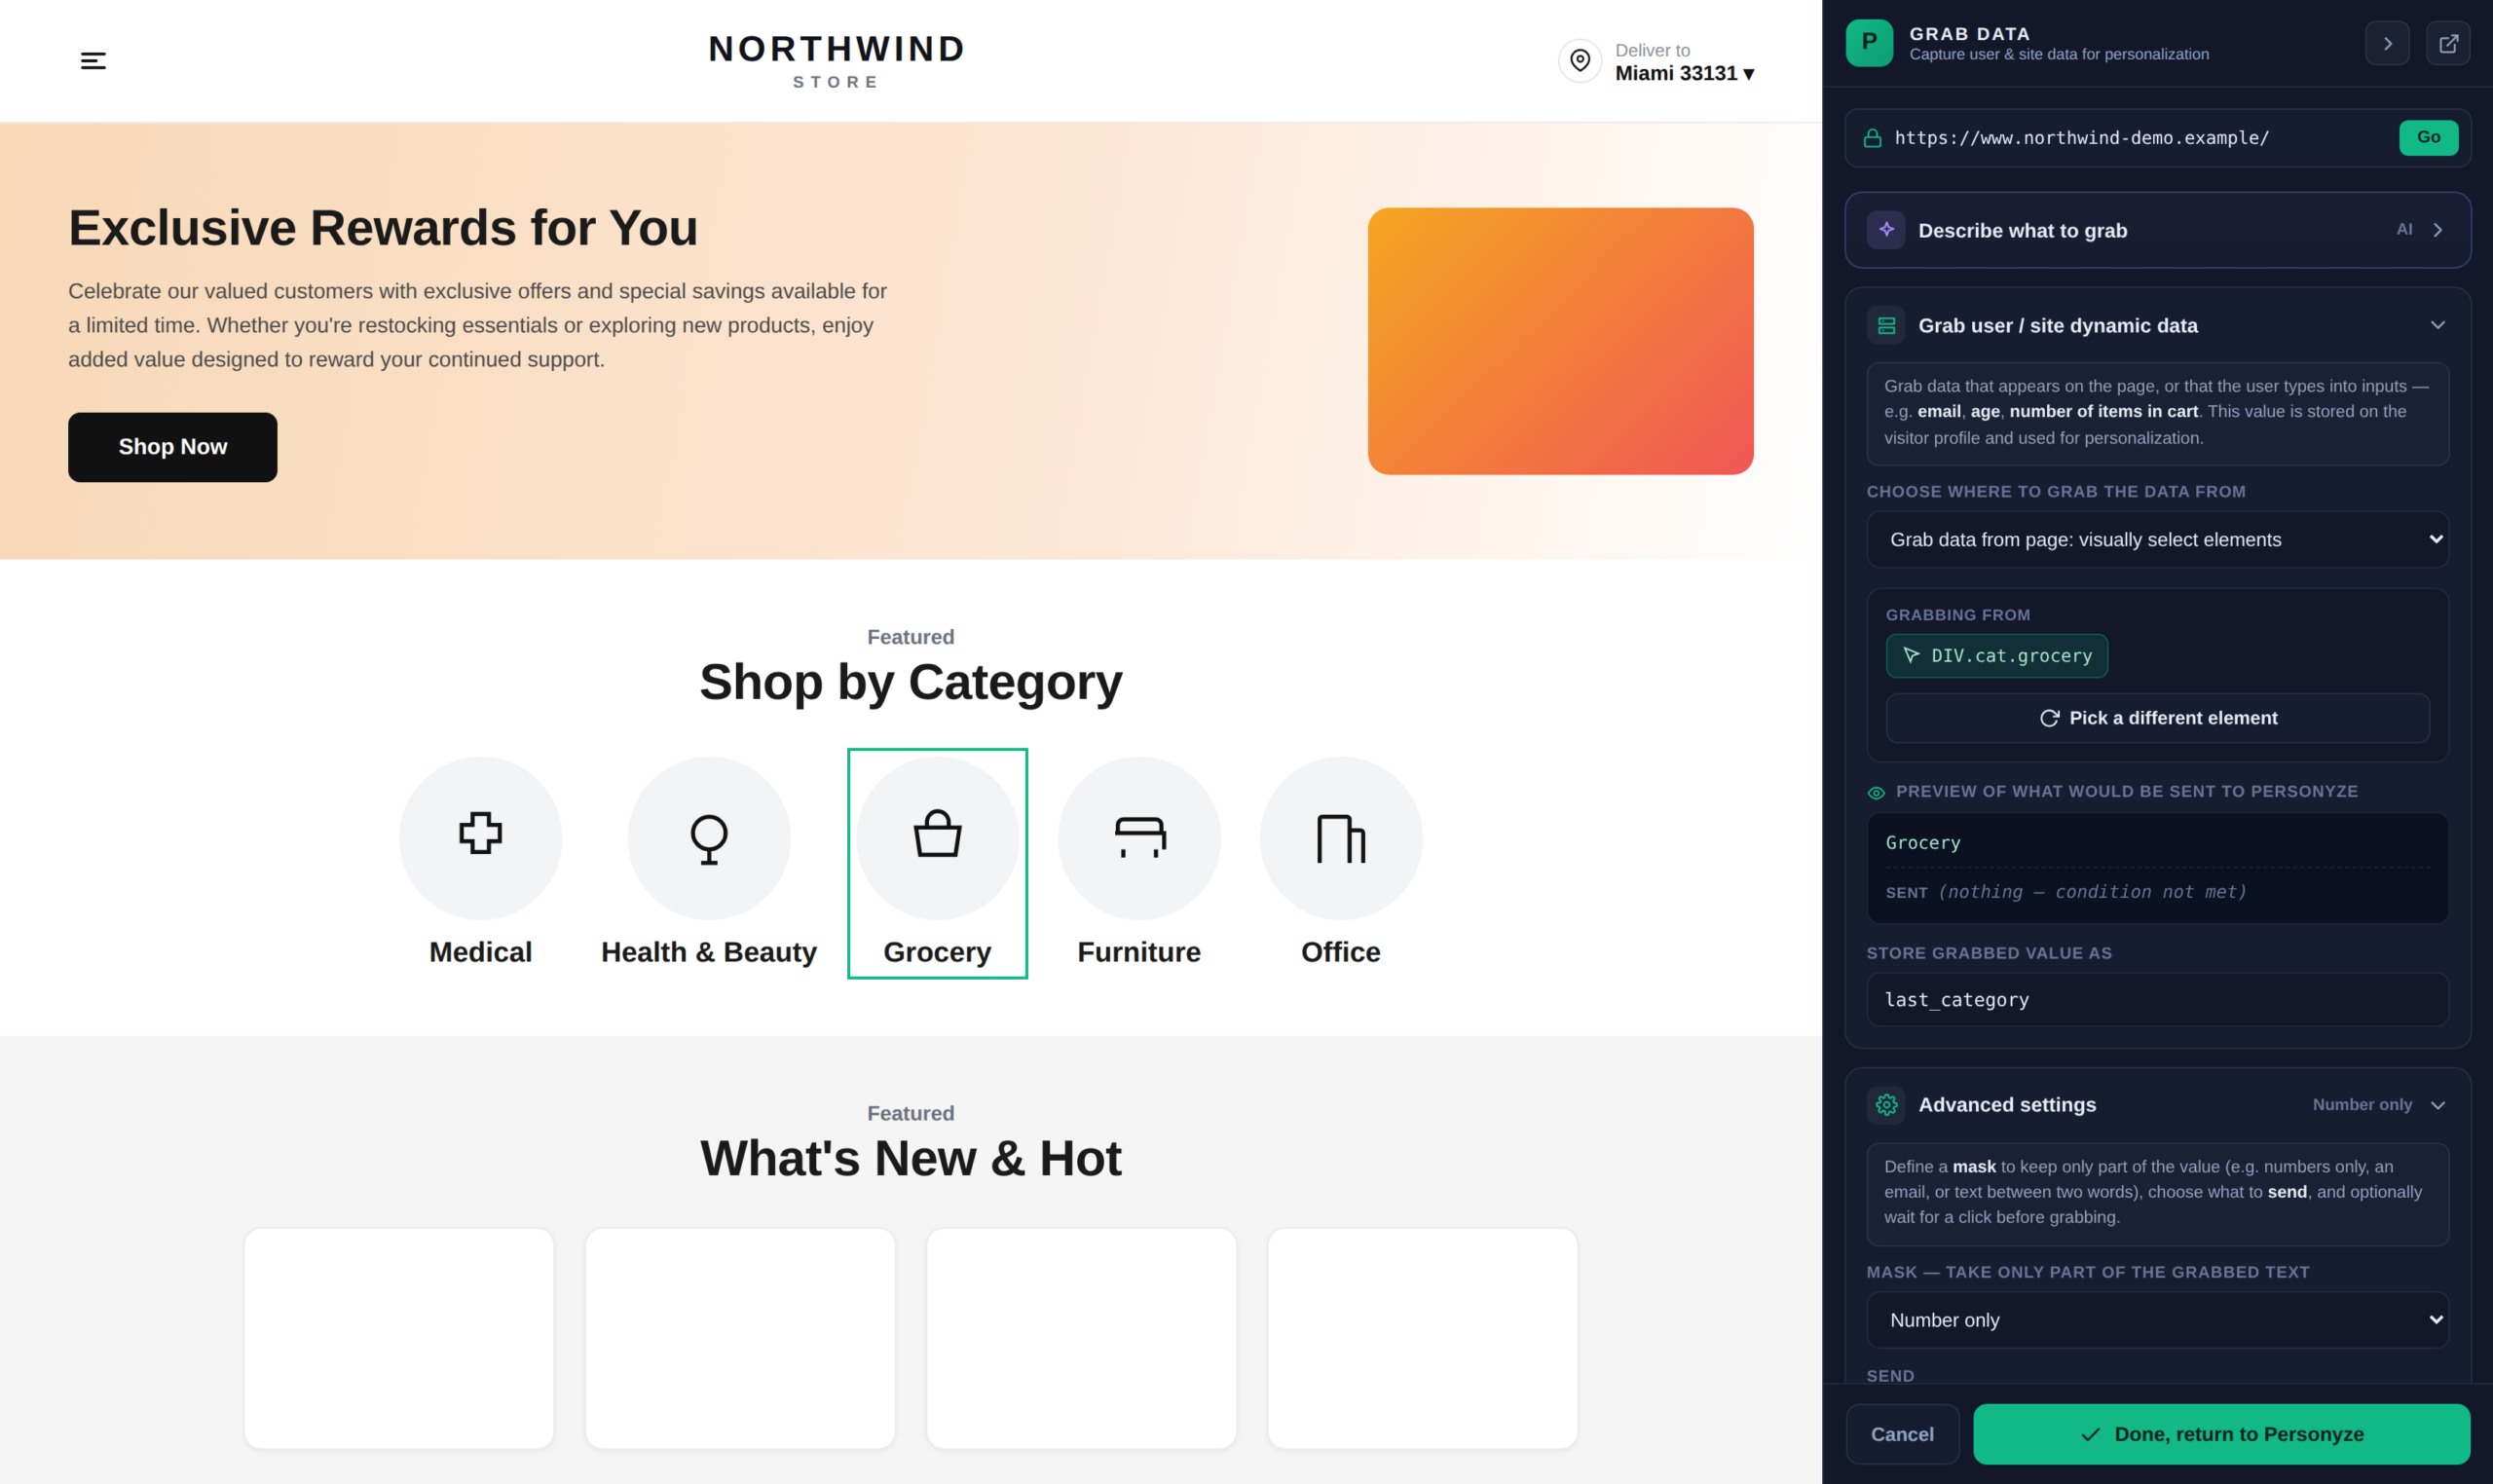
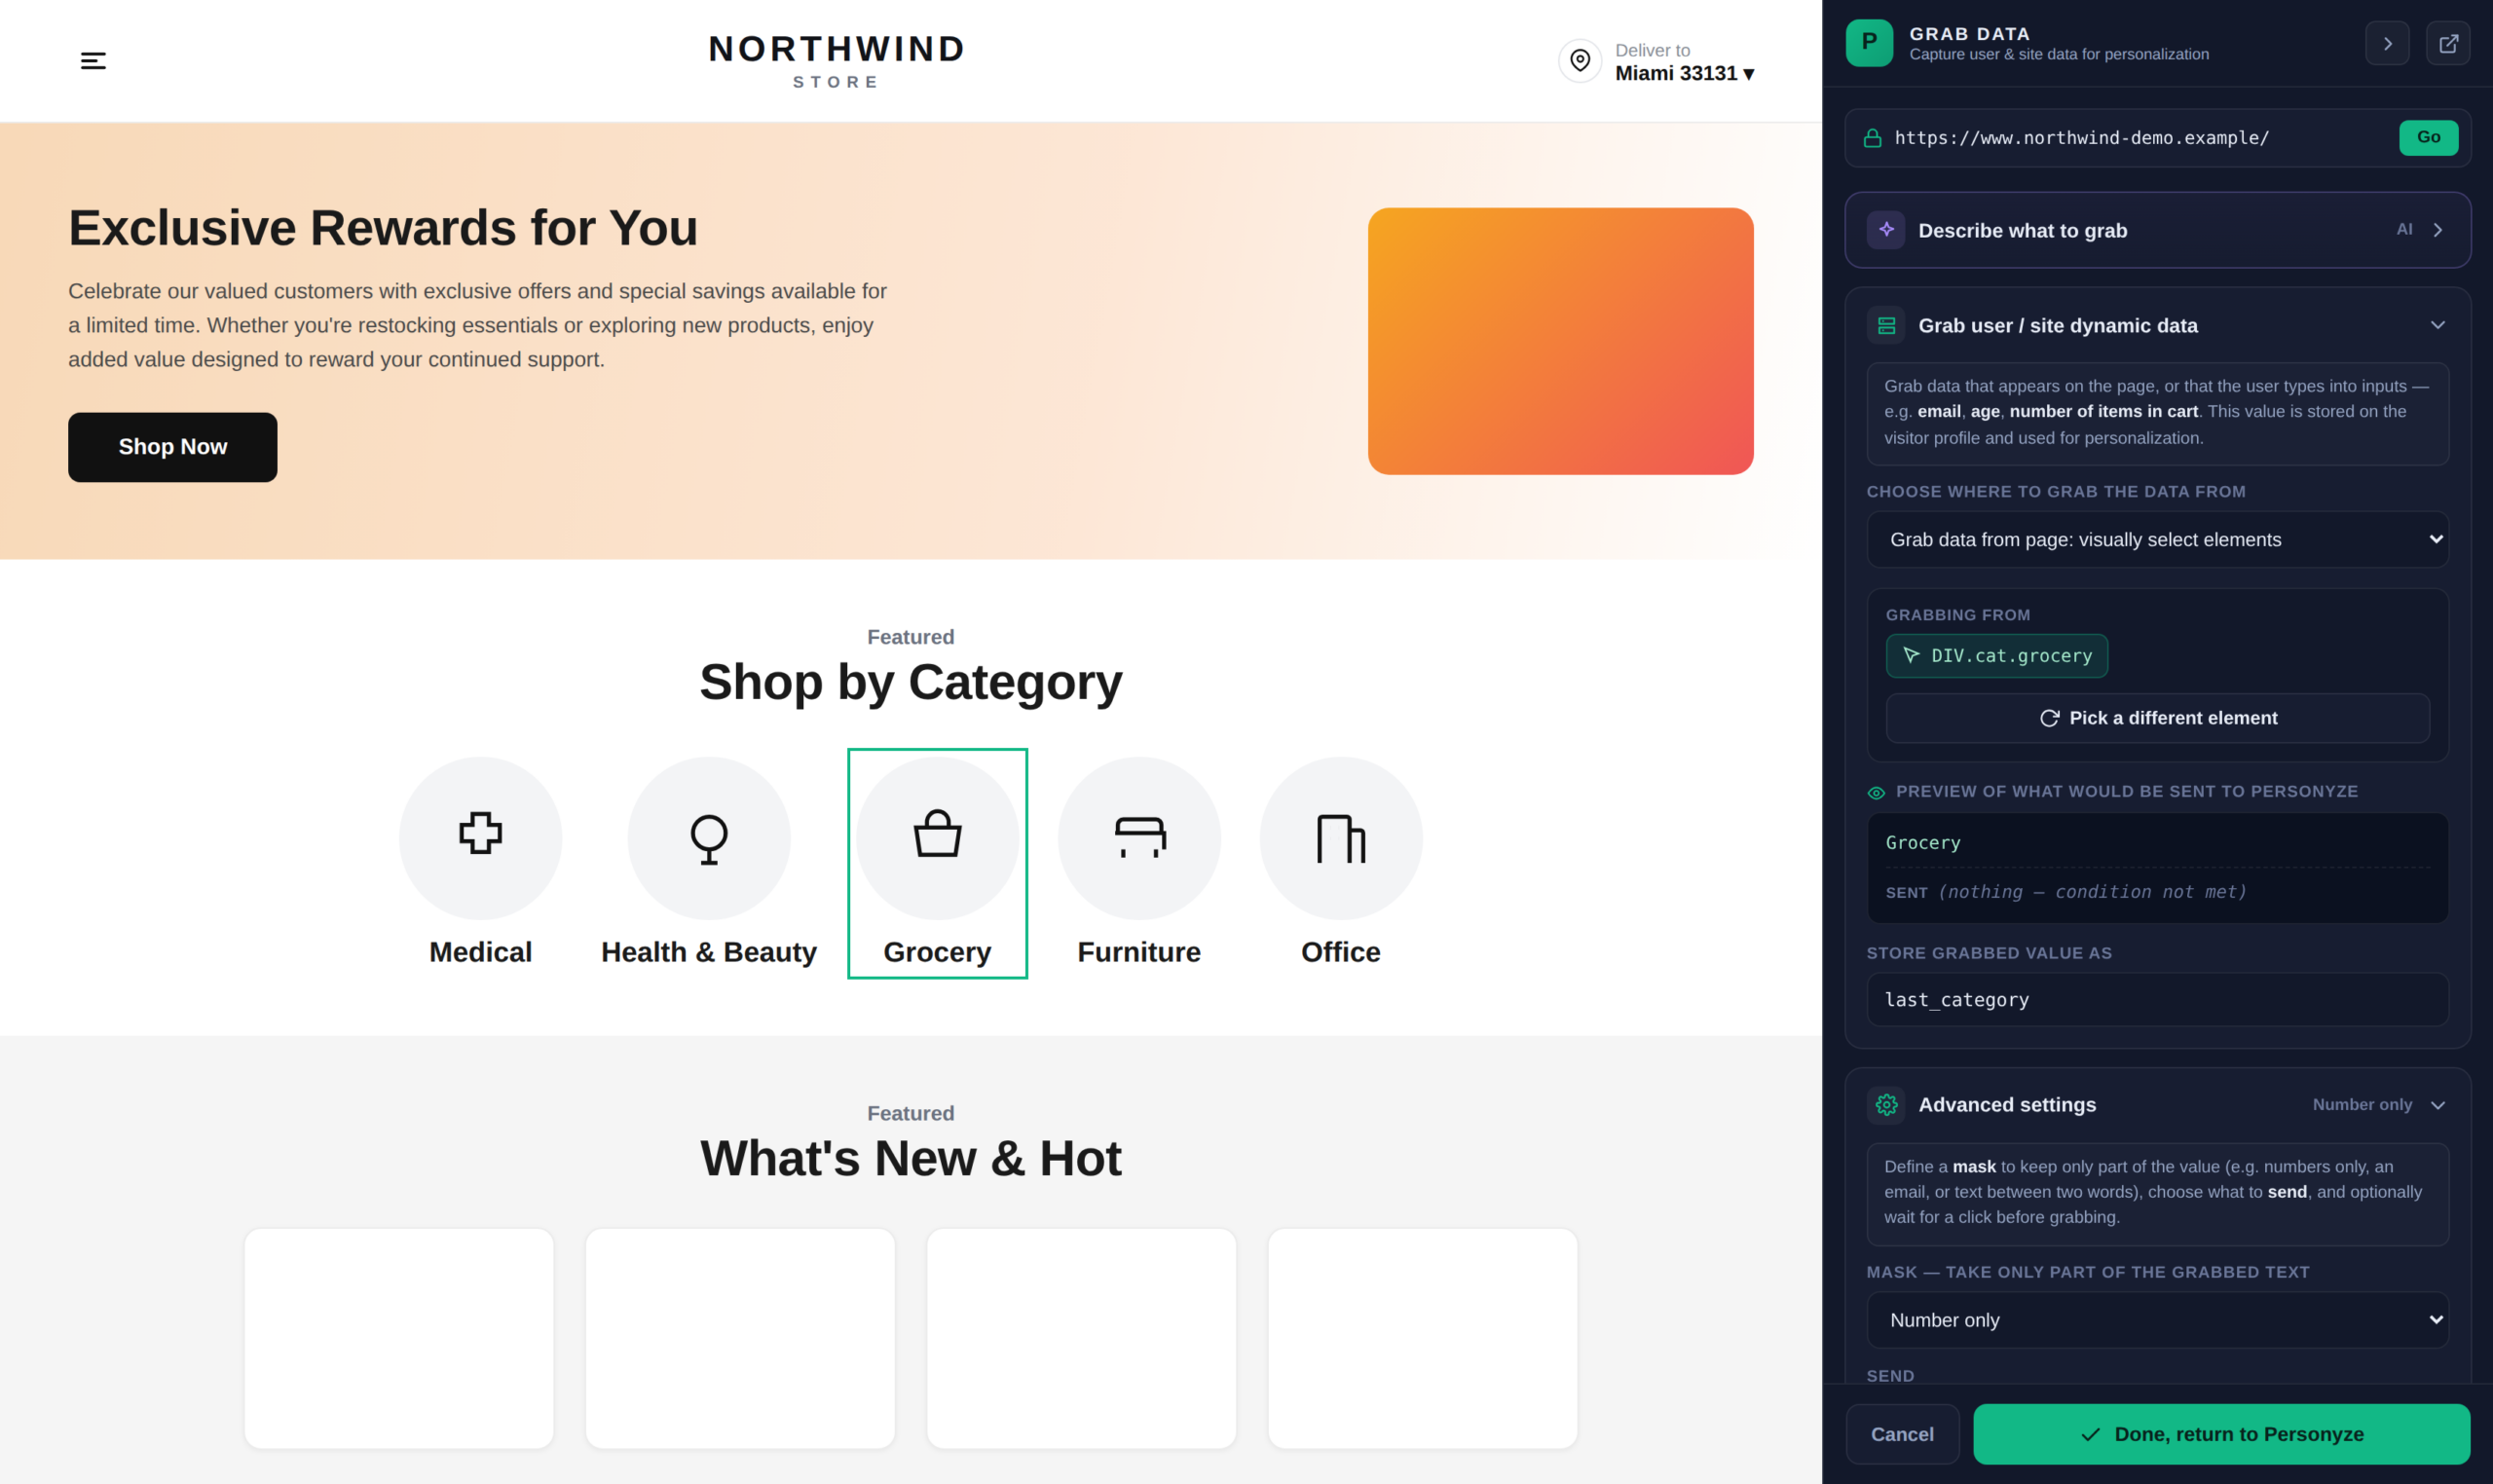
Choose Grab data from page and the panel asks you to click an element. Hover the page and click the value you want.
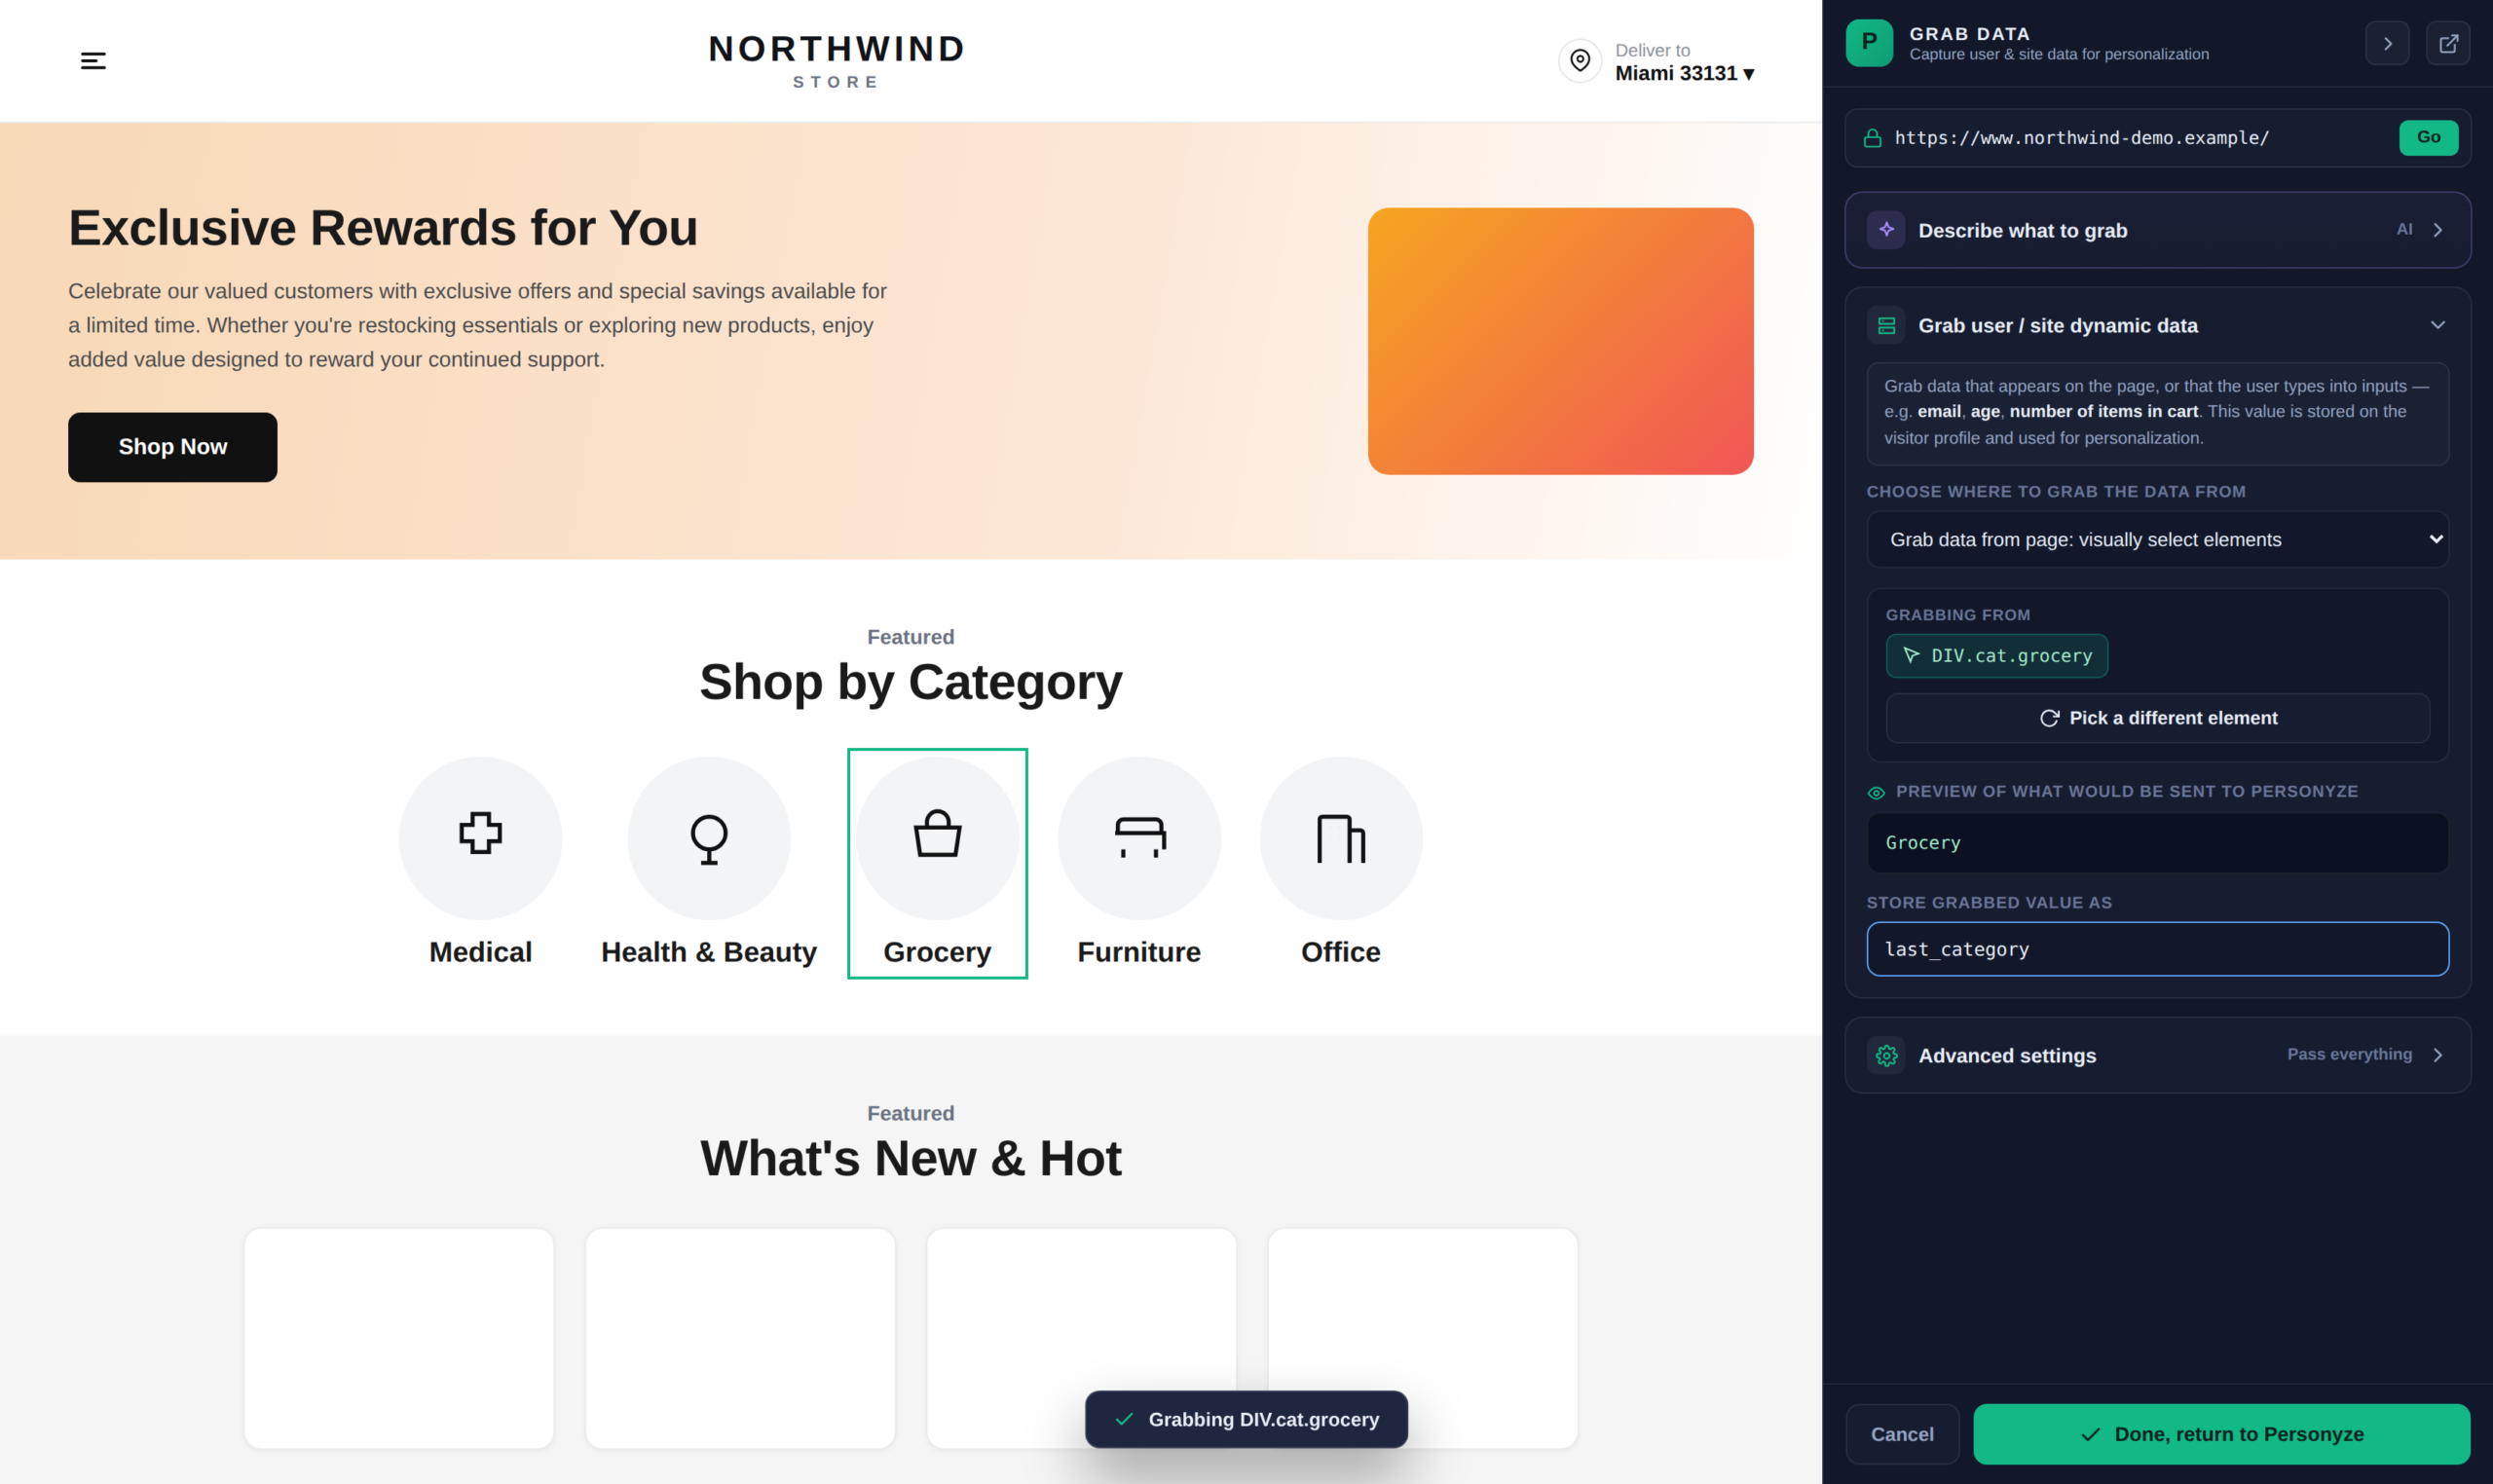
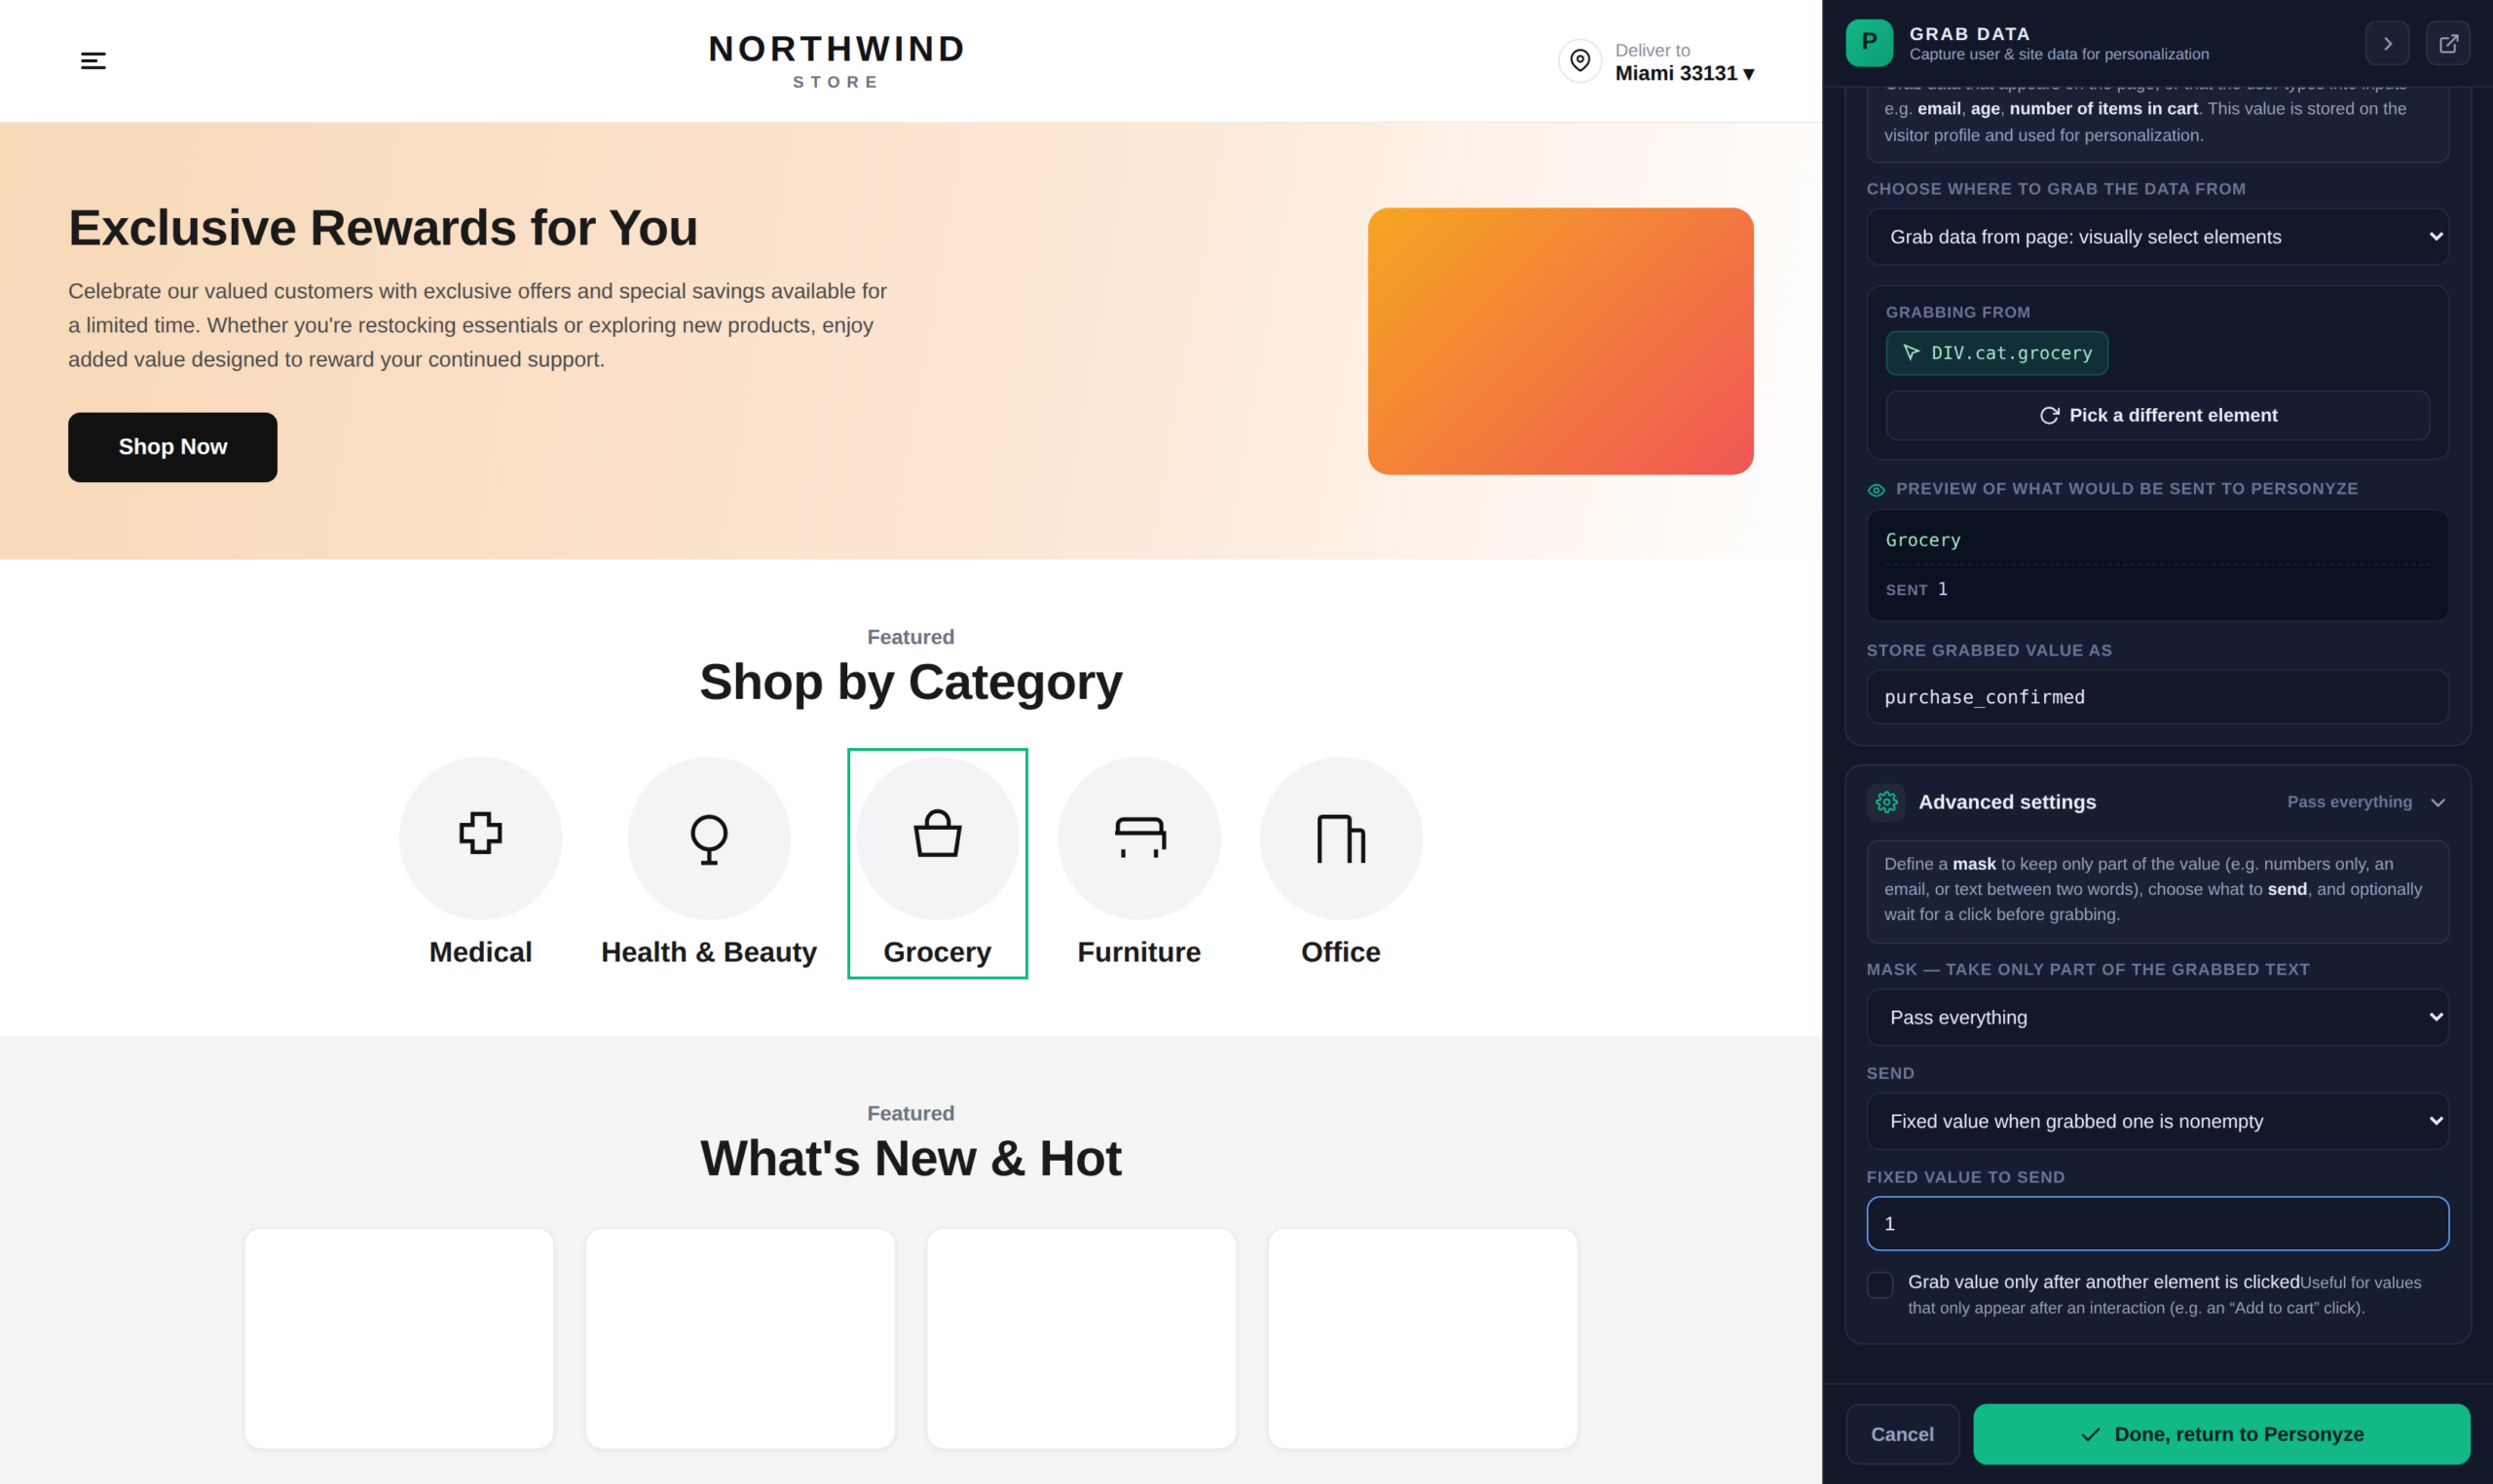
Once picked, the panel shows what it’s grabbing from (the selector it derived), a preview of the value that would be sent, and a Pick a different element link if you landed on the wrong thing. Name the value under Store grabbed value as — that name is what you’ll pick from dropdowns when building audiences and dynamic content, so make it readable: cart_item_count, not c1.
Watch out for dynamic IDs. If your site generates selectors with an ID that changes per visitor or product — div-cart-SS4443 — the grab works for you and nobody else, because that selector doesn’t exist on anyone else’s page. Use select parents to climb to a generic ancestor like div-cart. The rule: the selector has to be consistent across sessions and visitors.
Advanced Settings
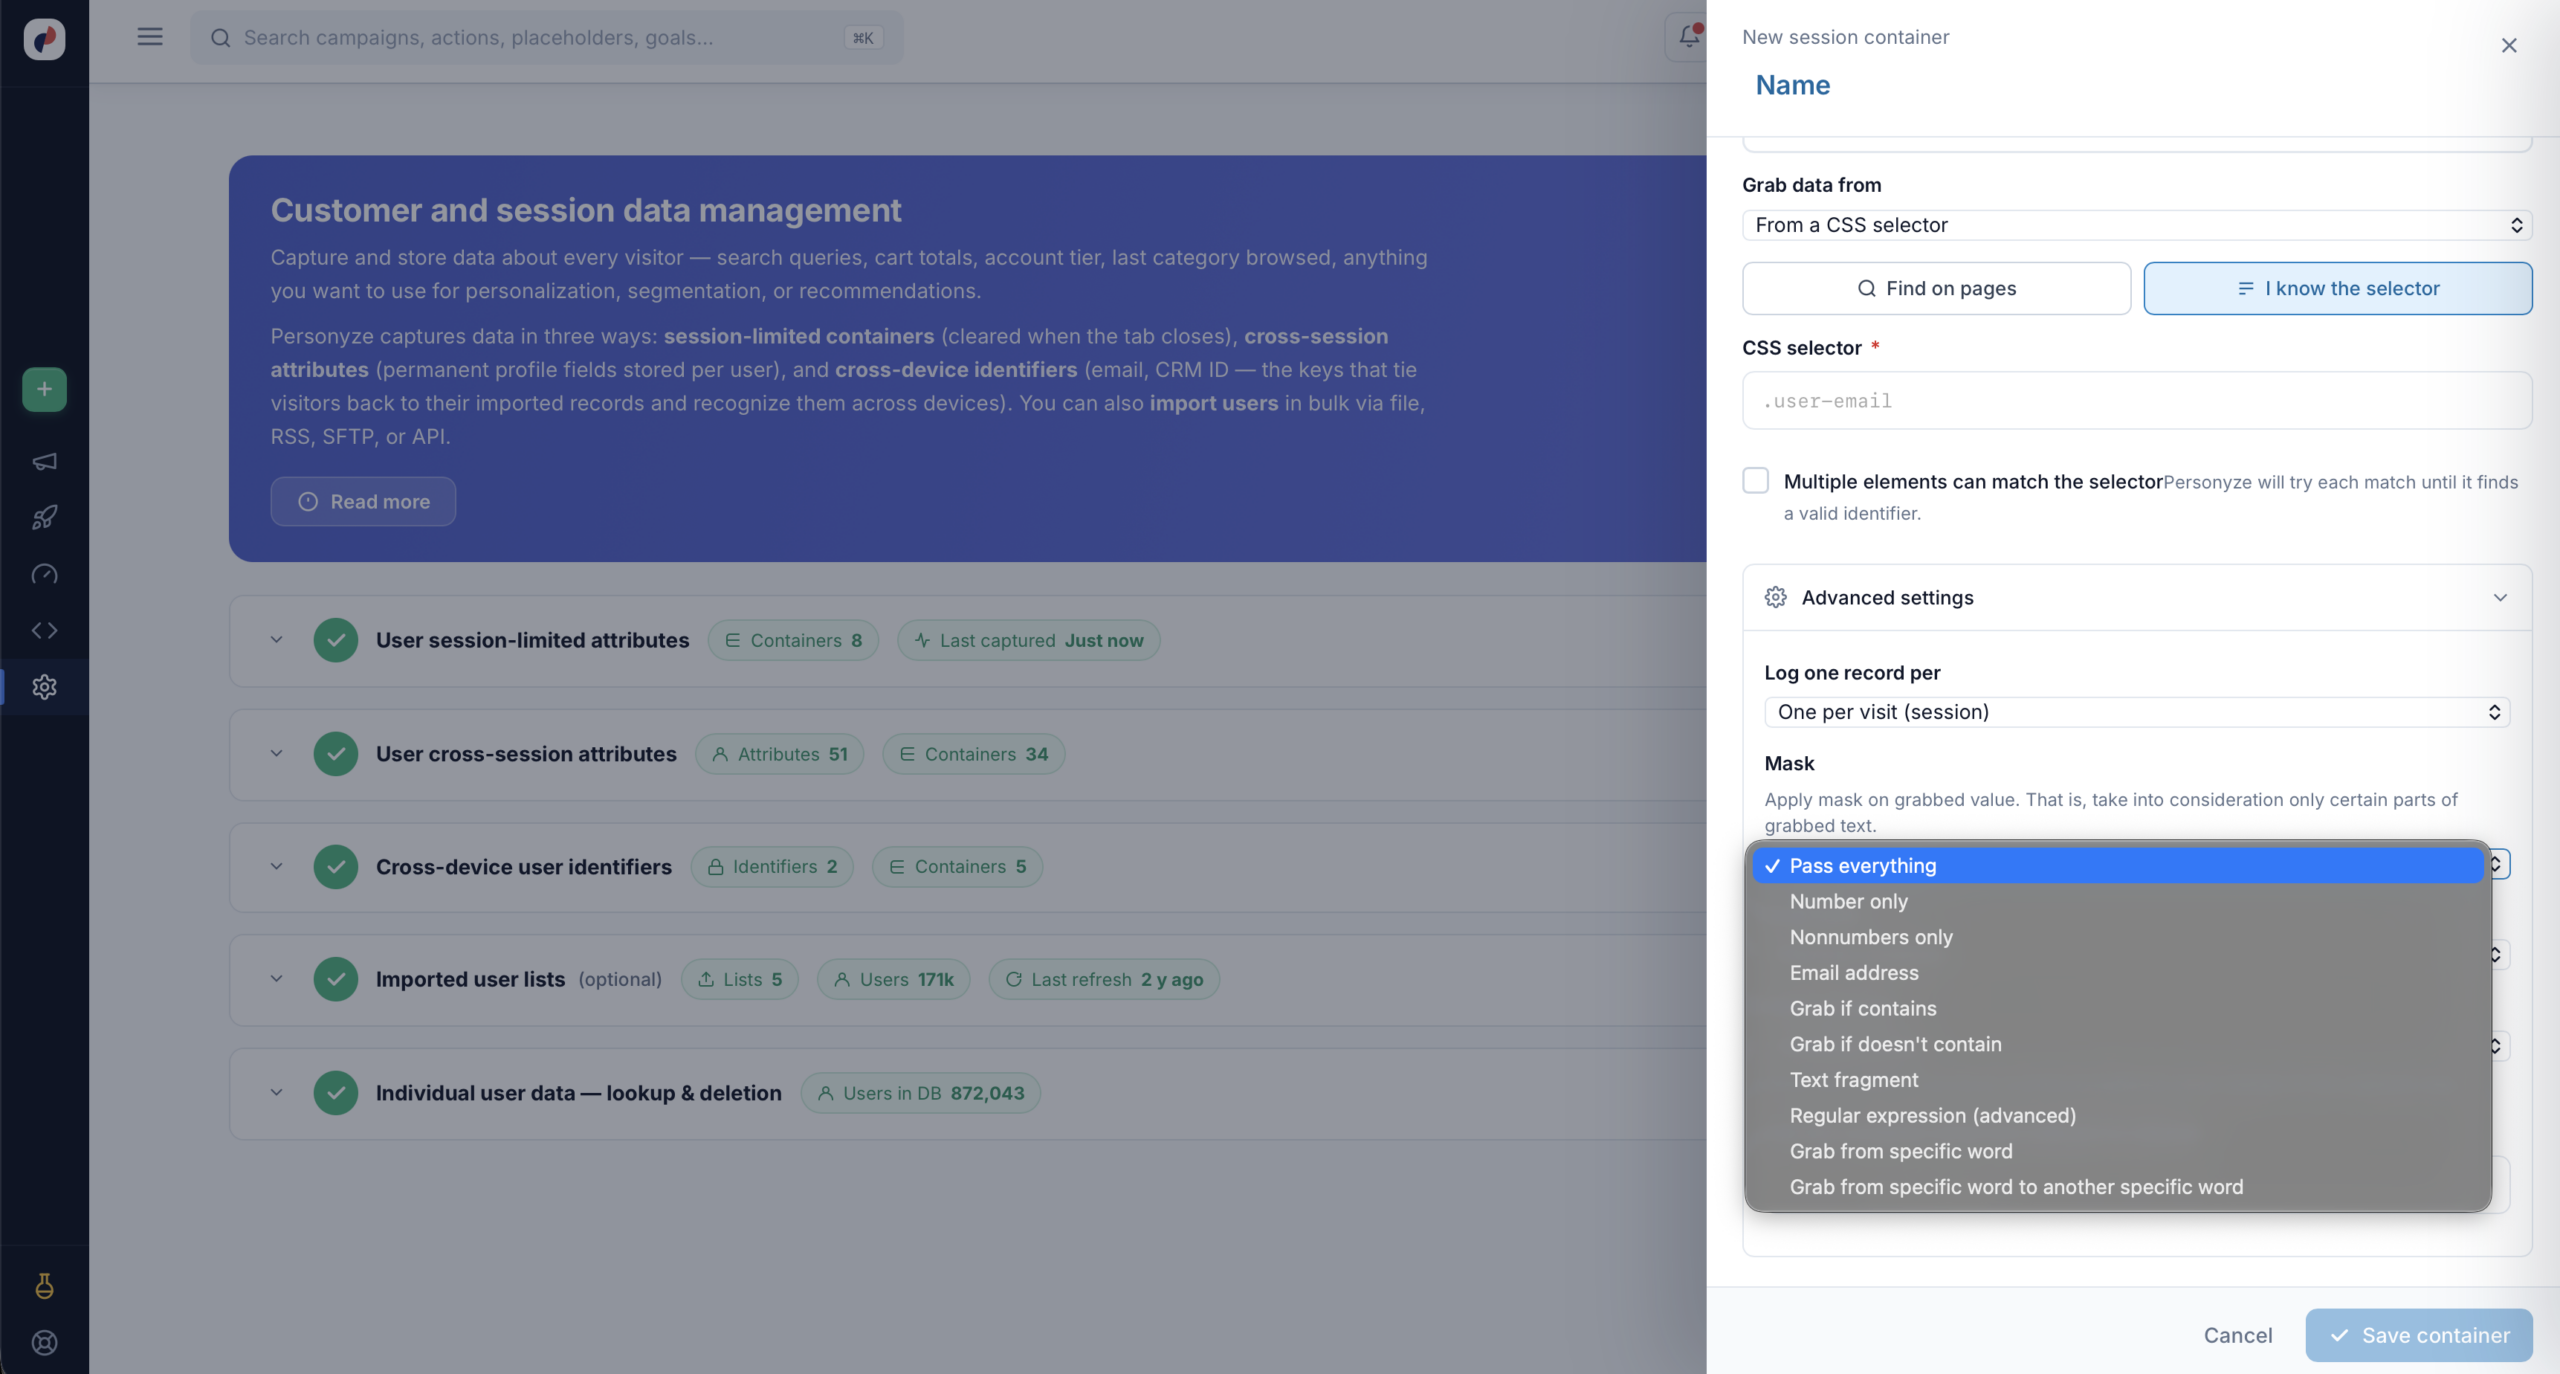
Mask — Keep Only Part of the Value
Raw page text is rarely the value you want. “Cart total: $149.99” is a string; you want 149.99. A mask takes only certain parts of the grabbed text:
- Pass everything — the default, no filtering.
- Number only / Nonnumbers only — strip one or the other. Number only is what turns “$149.99” into something you can compare with “greater than 100”.
- Email address — extract an email from surrounding text.
- Grab if contains / Grab if doesn’t contain — capture conditionally.
- Text fragment, Grab from specific word, Grab from specific word to another specific word — slice out a portion by its surrounding words.
- Regular expression (advanced) — for anything the above can’t express.
If you plan to target numerically — cart value over $100 — you almost certainly need Number only. A value captured as “$149.99” will not match a “greater than” rule.
Log One Record Per
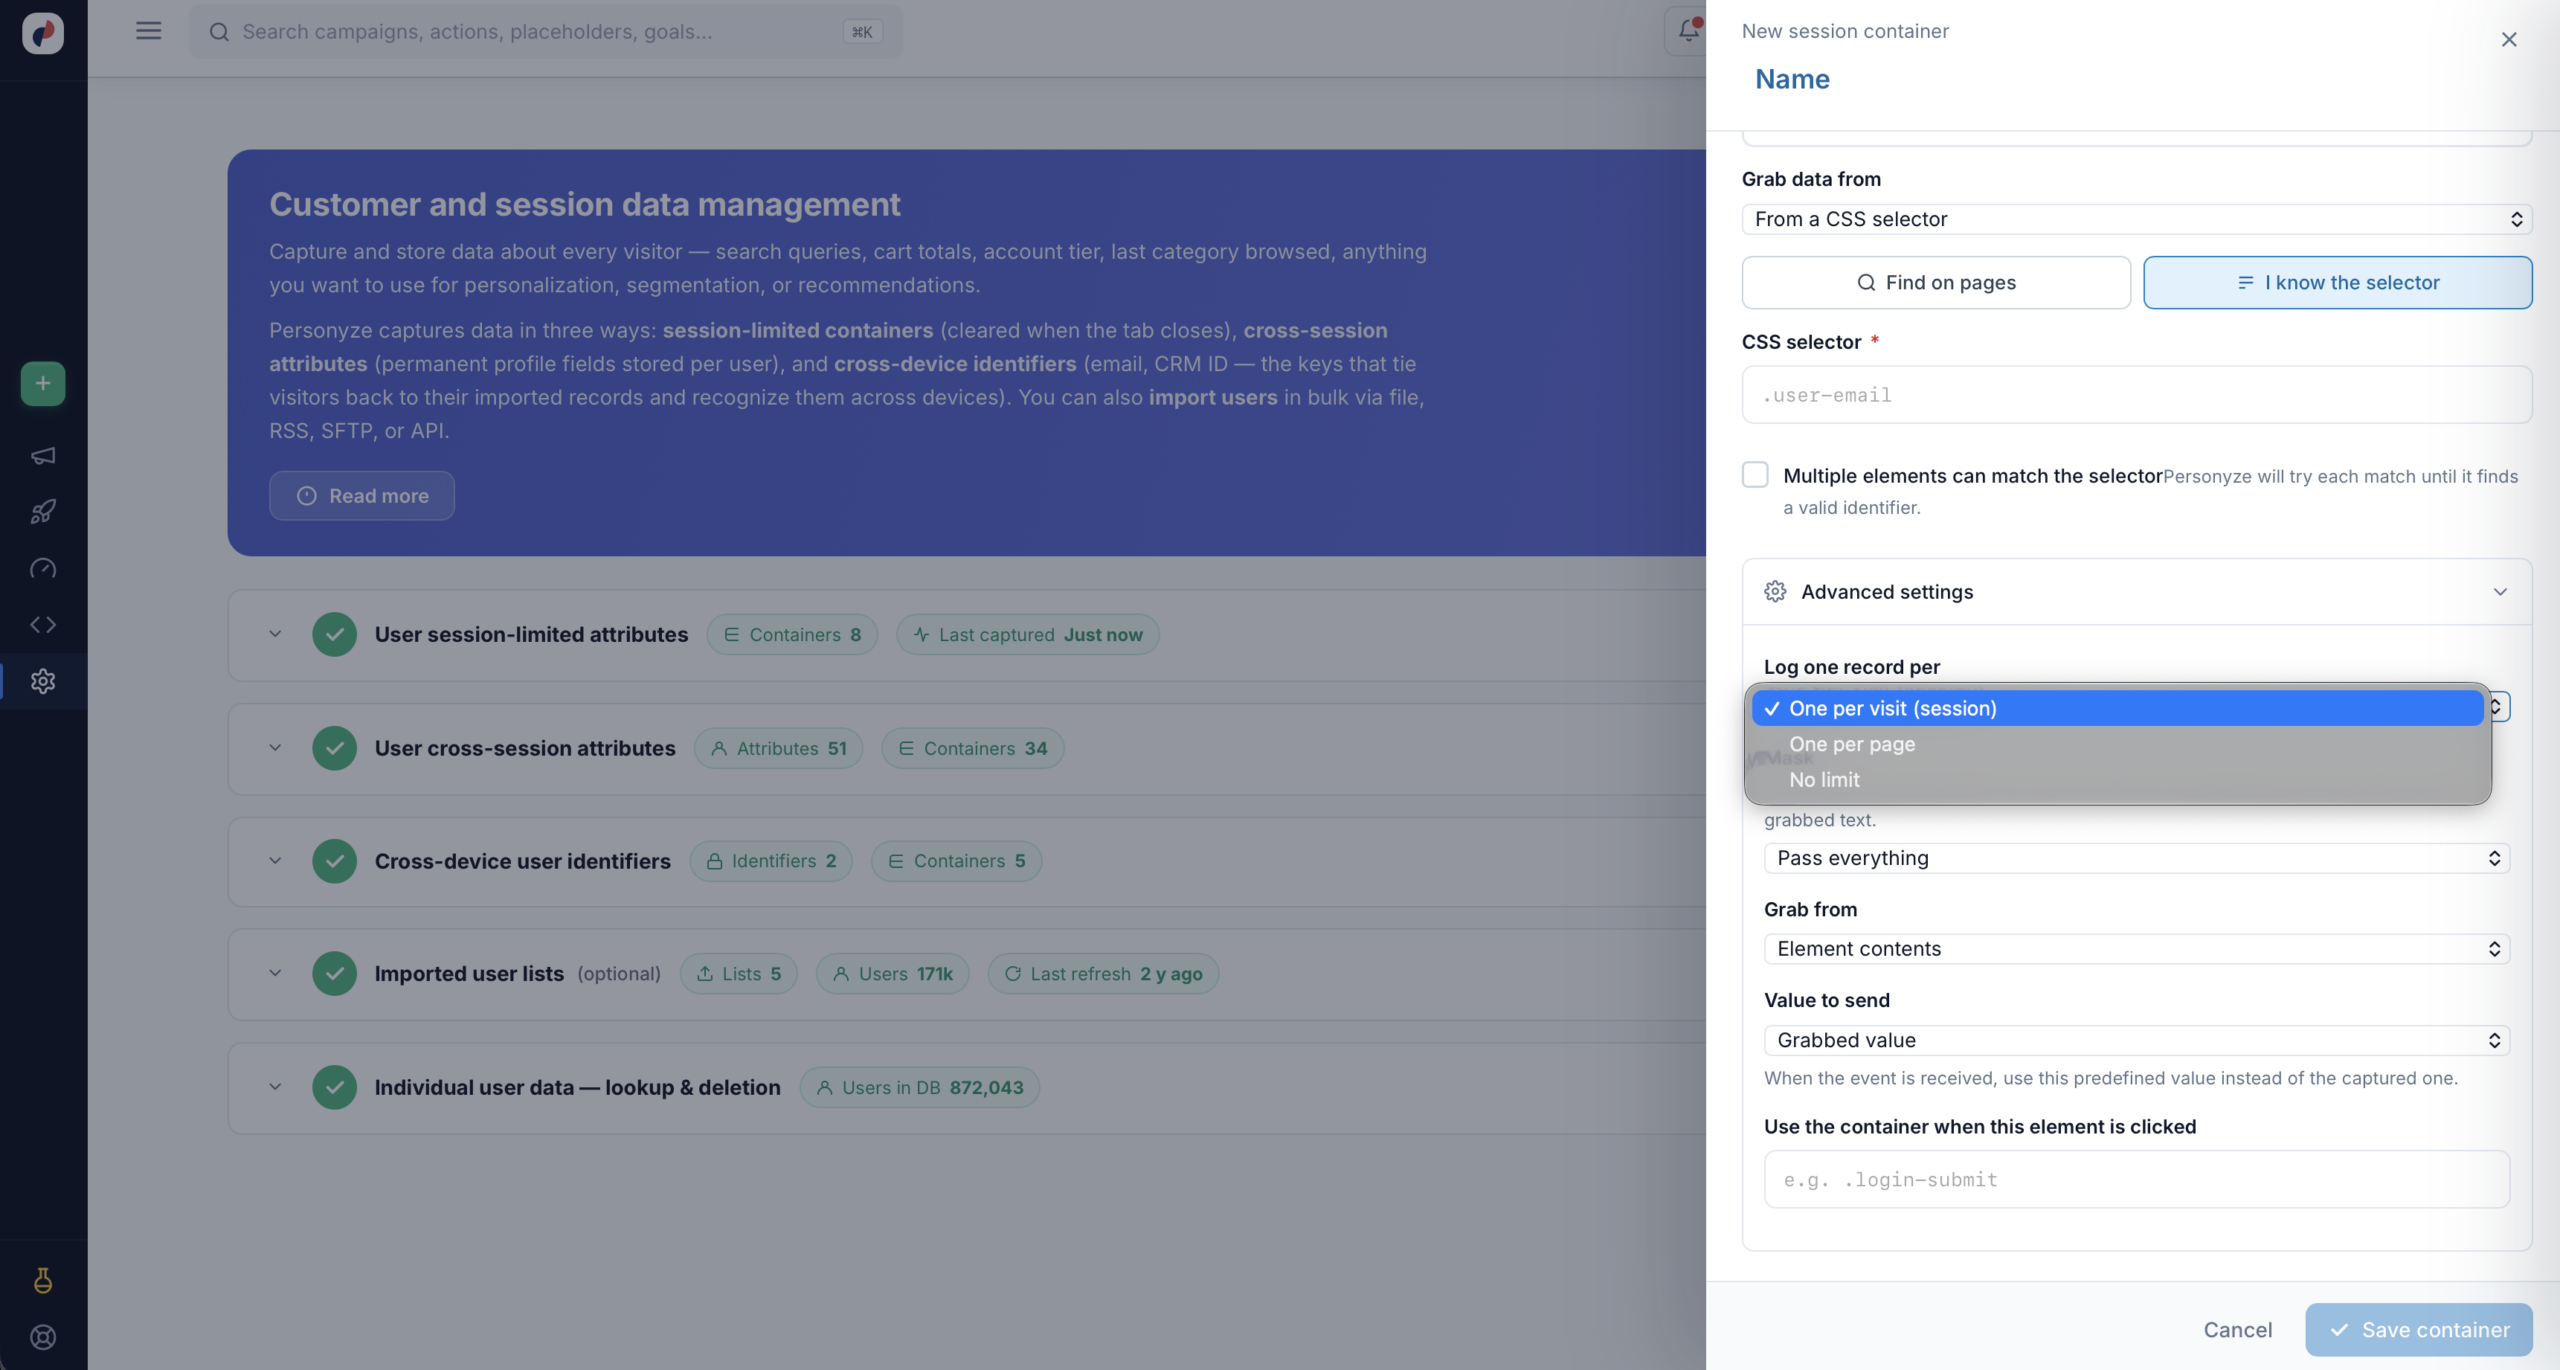
Controls how often the value is recorded:
- One per visit (session) — capture once per session. Right for stable facts like account tier.
- One per page — capture on each page view. Right for a value that changes as they browse, like current category.
- No limit — capture every time it changes, e.g. a cart total updating as items are added.
Grab From, and Value to Send
Grab from chooses what part of the element to read — its contents, or an attribute. Value to send lets you send a fixed value when the grabbed one is nonempty instead of the captured text: useful when the mere presence of an element is the signal (an element exists → send logged_in), rather than its content.
Grab Only After a Click
Some values only appear after an interaction — a total that updates after “Add to cart”, or a form field that isn’t filled until submit. Use the container when this element is clicked (in the picker: Grab value only after another element is clicked) waits for a click on a second element before capturing.
Using a Grab as a Conversion Goal
A conversion goal is set up the same way — same picker, same sources, same masks. The difference is what the captured value means: instead of describing the visitor, it records that something worth measuring happened, and optionally what it was worth.
Two settings matter more for goals than for ordinary attributes:
- Mask → Number only — a goal value has to be a number to be summed as revenue. Grabbing “Order total: $149.99” raw gives you a string Personyze can’t add up.
- Value to send → Fixed value when the grabbed one is nonempty — when the presence of an element is the conversion, not its content. Point at the “Thank you for your order” heading and send a fixed
1: if the element is there, the goal fires; if it isn’t, nothing happens. This is how you track a conversion on a page that shows no useful number.
Frequency matters too: a purchase goal usually wants one per visit so a refreshed confirmation page doesn’t double-count the order. See Setting Conversion Goals Tracking for the full goal setup.
Storing It on the User Profile
A session container is cleared when the tab closes. To keep a value permanently — name, age, industry, role, account type — create it under User cross-session attributes → New profile field instead: name the field, choose its data type (text, numeric, date), and save. It then becomes available to populate via the picker, manual entry, or an integration.
These profile fields are what make ABM and CRM targeting work. For the full setup, see Adding Custom User Profile Data Fields for ABM & CRM Targeting and User Profile Data Setup and Synchronizing.
Verifying It Works
Don’t assume a grab fires just because it saved. Three ways to check:
- The preview in the picker — the fastest check, before you even save.
- The data hub — each section shows Last captured. If it says “Just now”, data is flowing; if it’s hours old on a busy site, something broke.
- Test mode / browser console — with your IP in testing, the console prints everything Personyze gathered about the visitor, including container values. See Personyze Test Mode in Console.
A grab that silently returns nothing is the common failure, and it’s almost always one of three things: the selector doesn’t exist on that page, it contained a dynamic ID, or the value hadn’t rendered yet at capture time (use grab after click).