
Enrich your website targeting with your HubSpot CRM data and build campaigns aimed at your CRM contacts. Any field you hold on a contact — job title, industry, company name, lifecycle stage, and more — becomes available for pinpoint targeting and personalization, so your site can play a deeper role in your ABM efforts.
Connecting HubSpot is a two-part process: first you create a private app in HubSpot to get an access token, then you paste that token into Personyze and map the fields you want to sync.
Prefer to click through it? Use the interactive walkthrough below, then scroll down for the detailed reference.
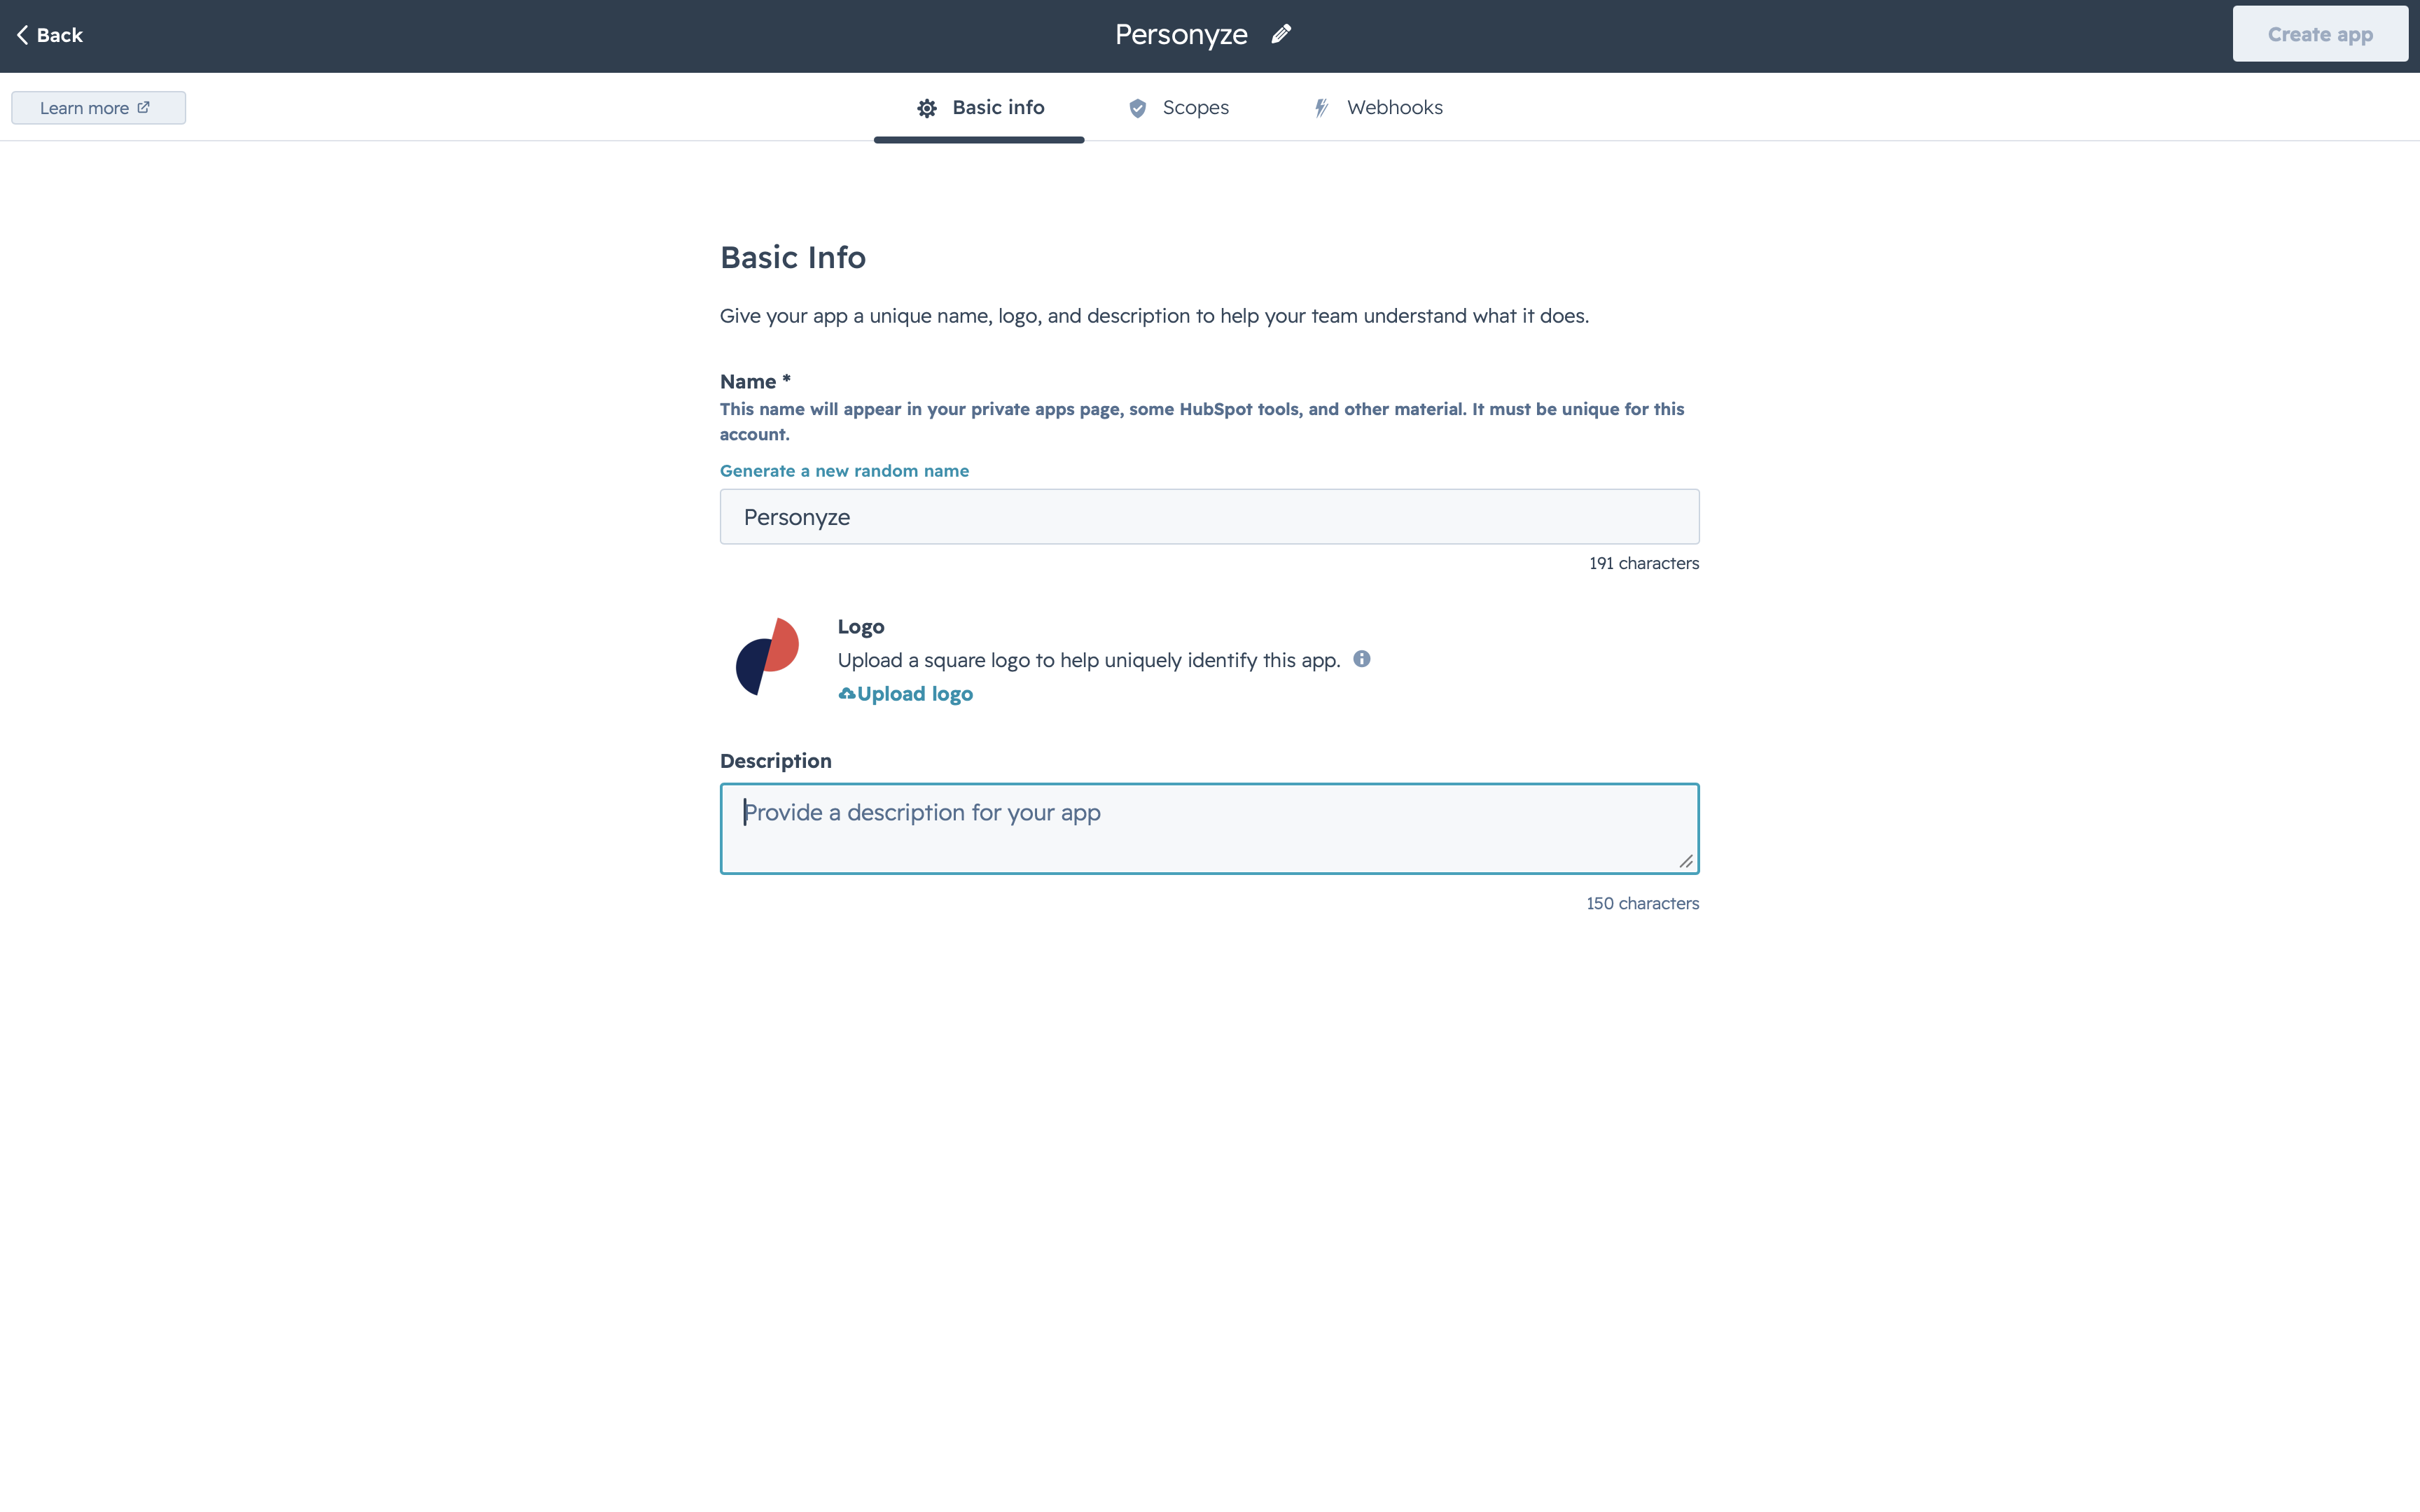
Name your private app
In HubSpot, go to Settings → Integrations → Private Apps and create a new app. On the Basic Info tab, give it a recognizable name like “Personyze.” A logo and description are optional.
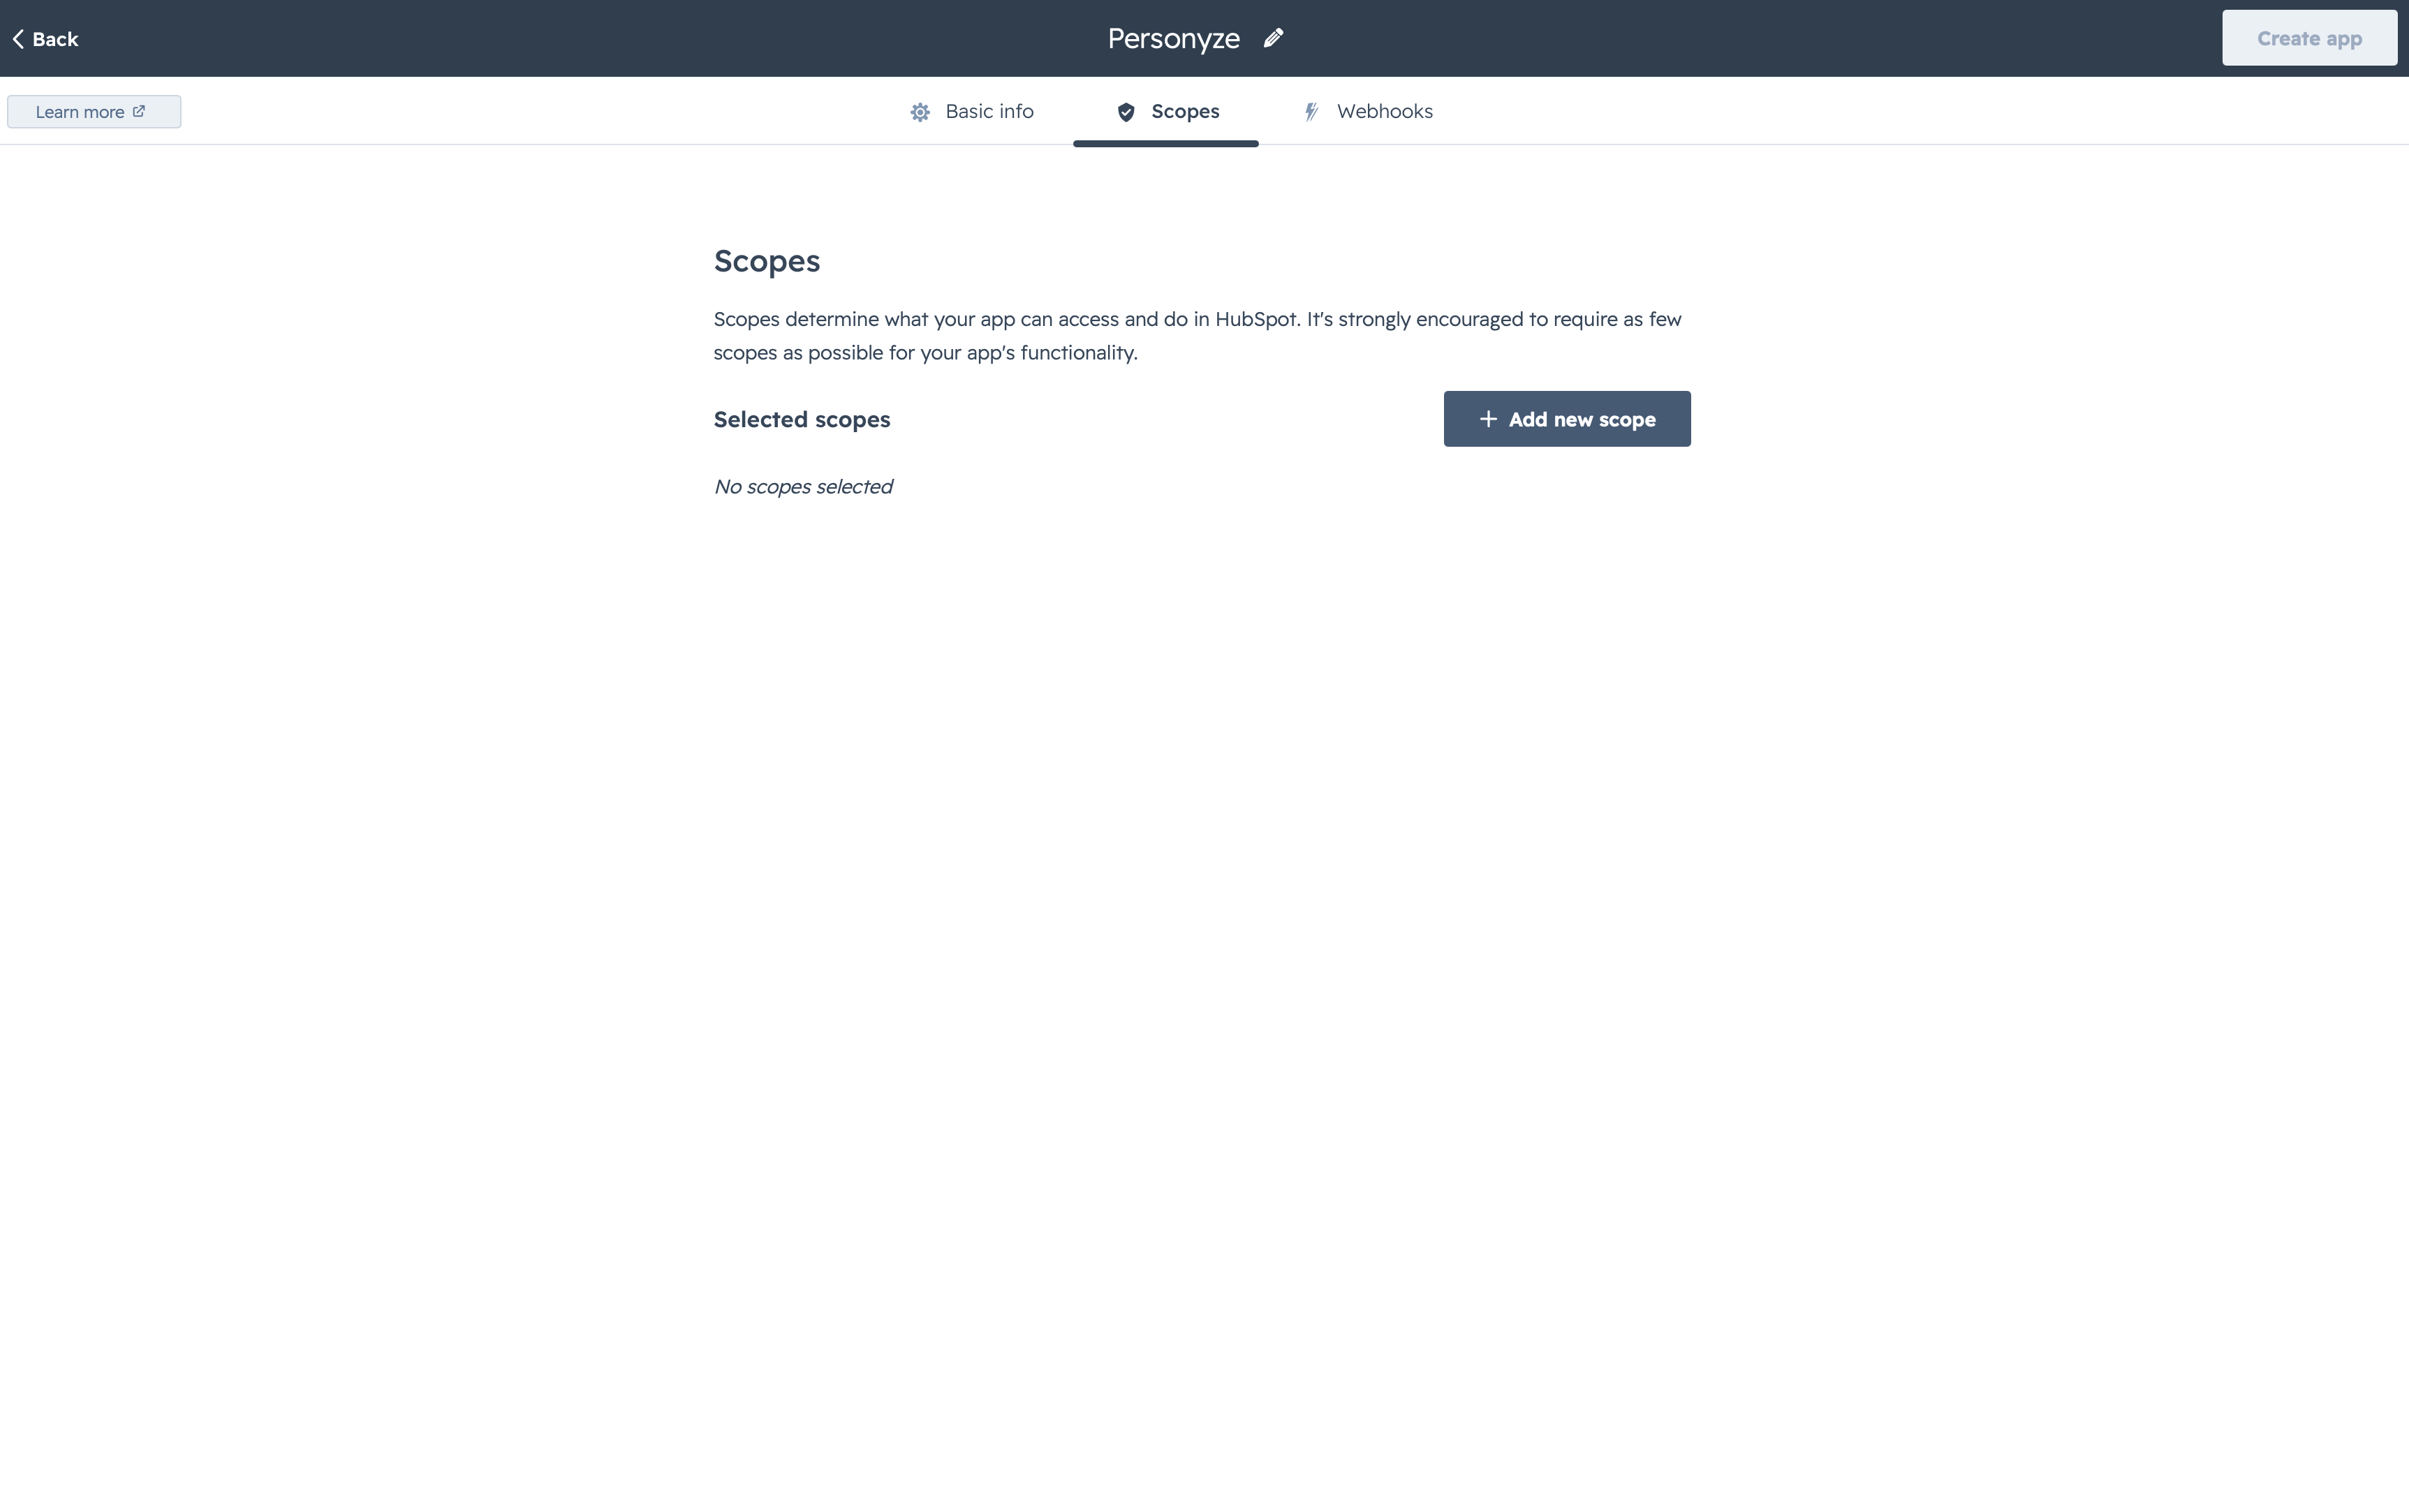
Open the Scopes tab
Switch to the Scopes tab. Scopes control what the app is allowed to read. A brand-new app starts with none — click Add new scope to grant access.
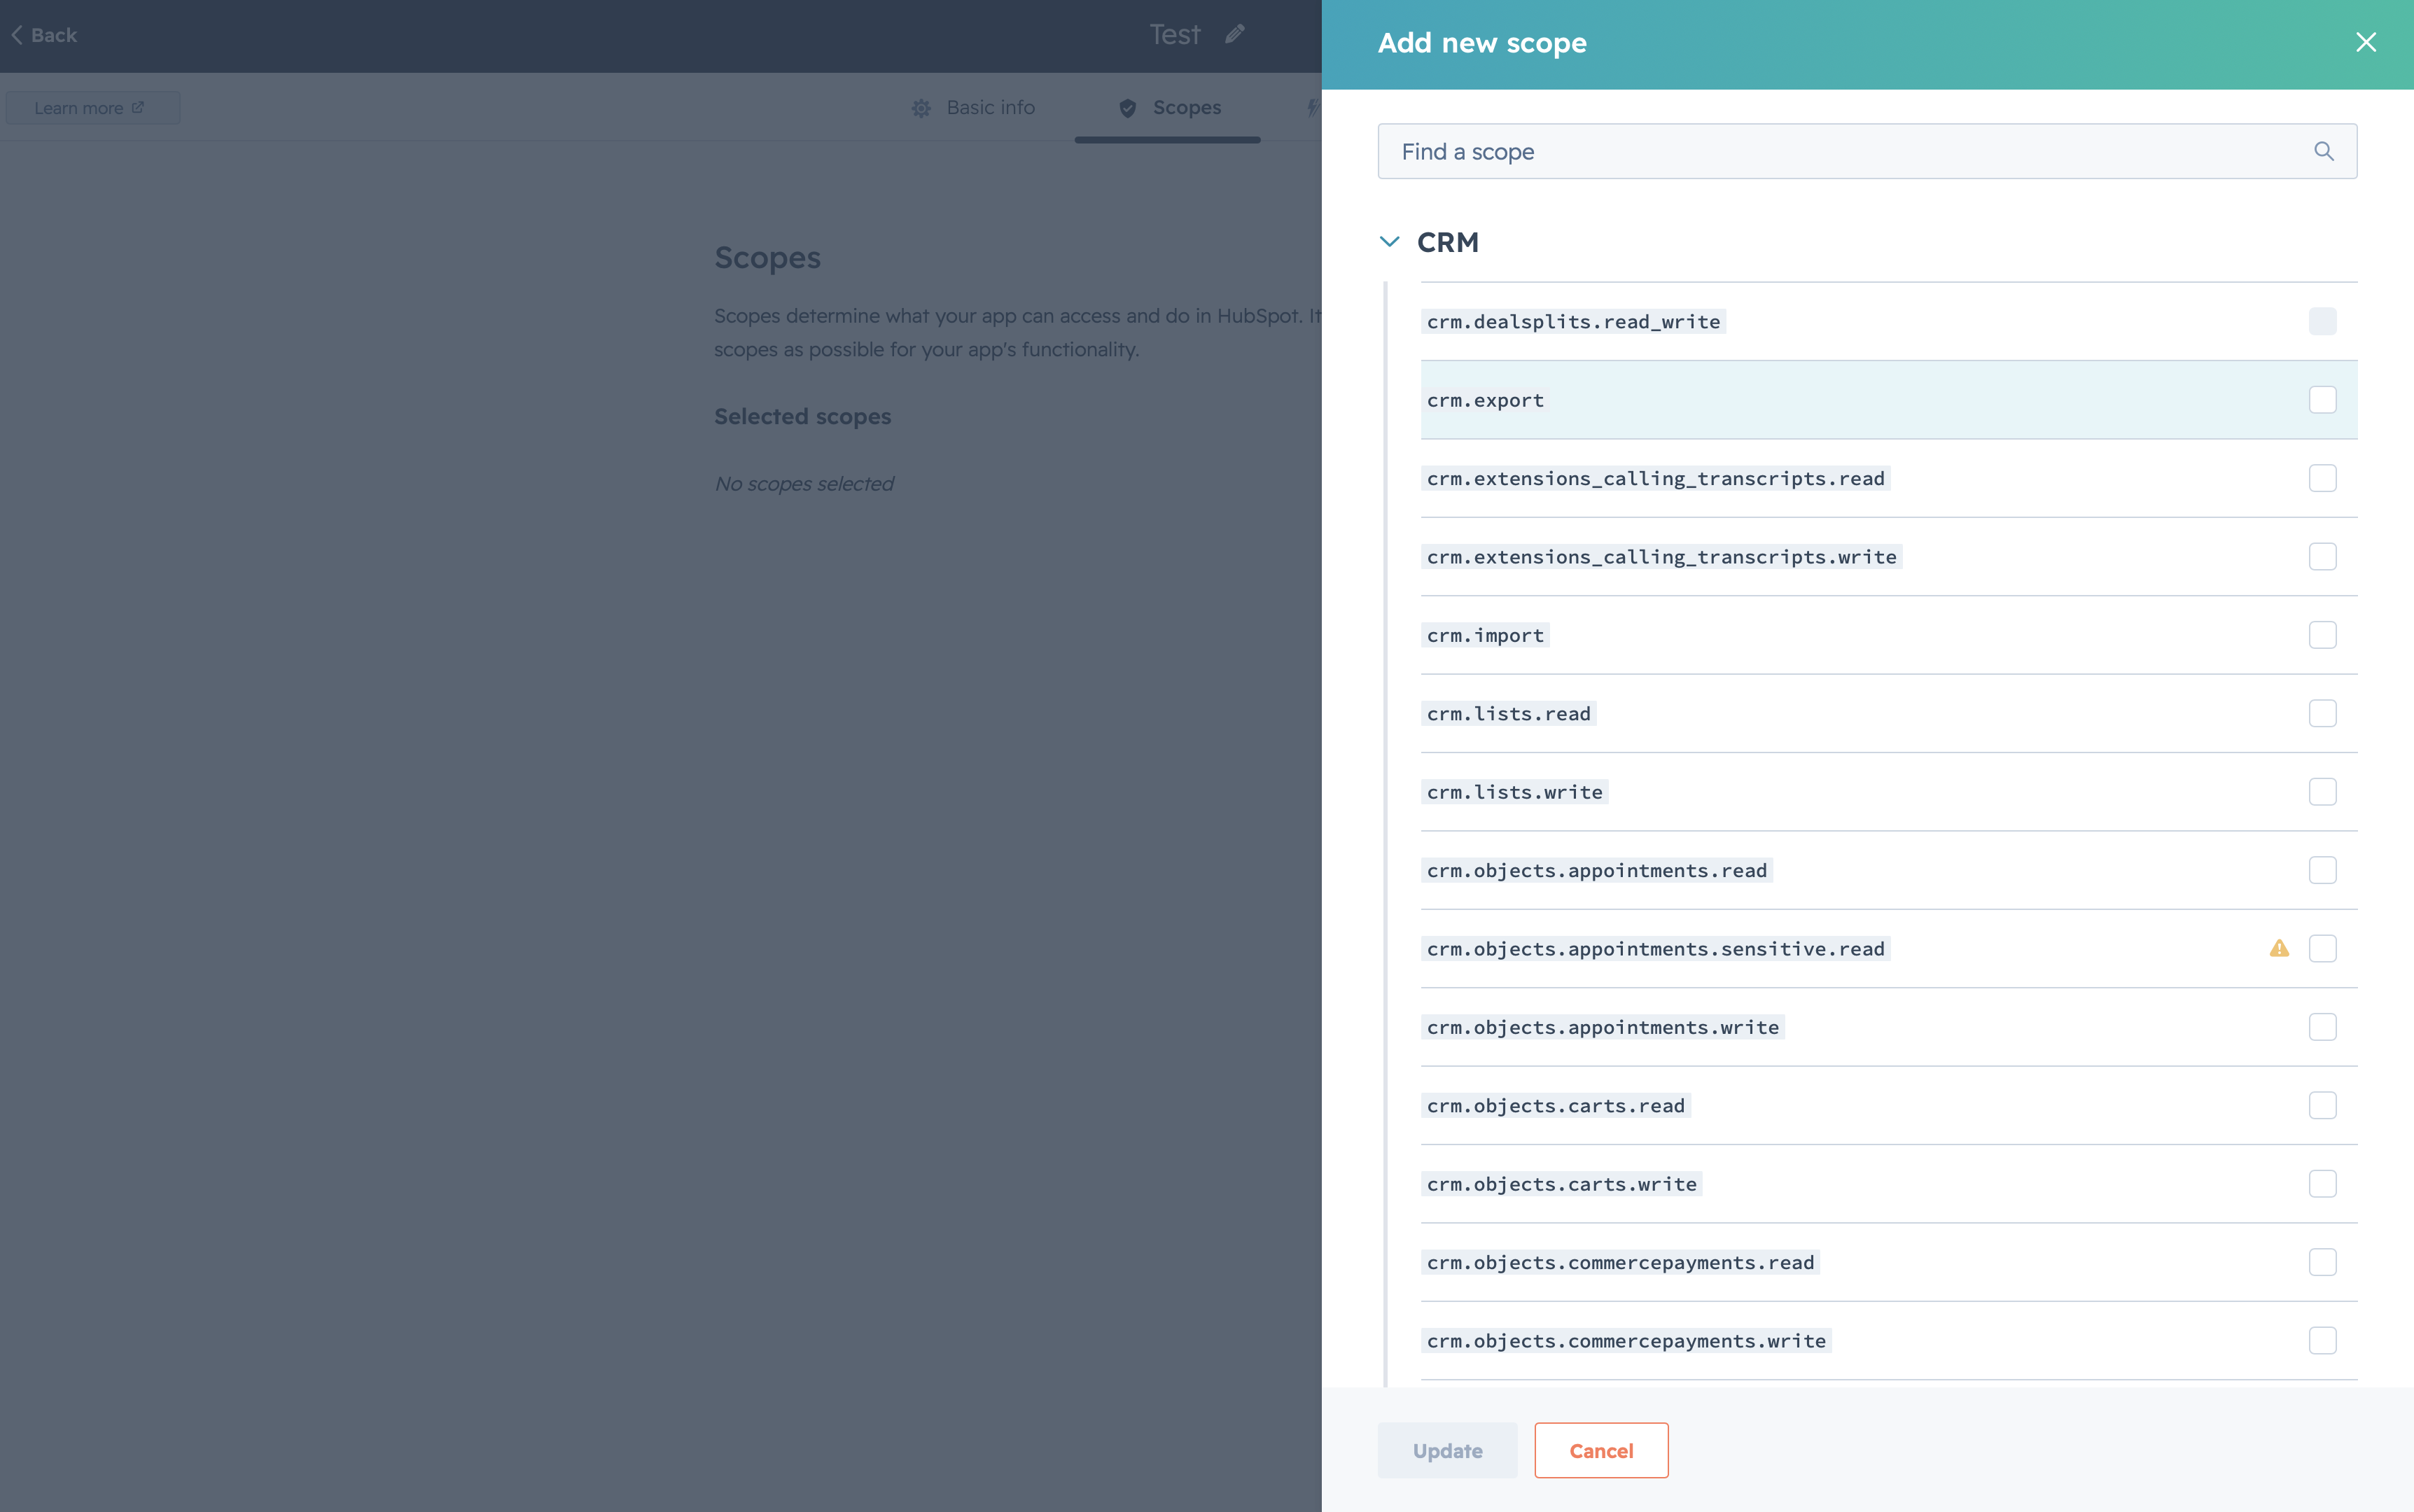
Add the CRM read scopes
Search the CRM group and tick the read scopes you need. Personyze only ever needs read access — never write.
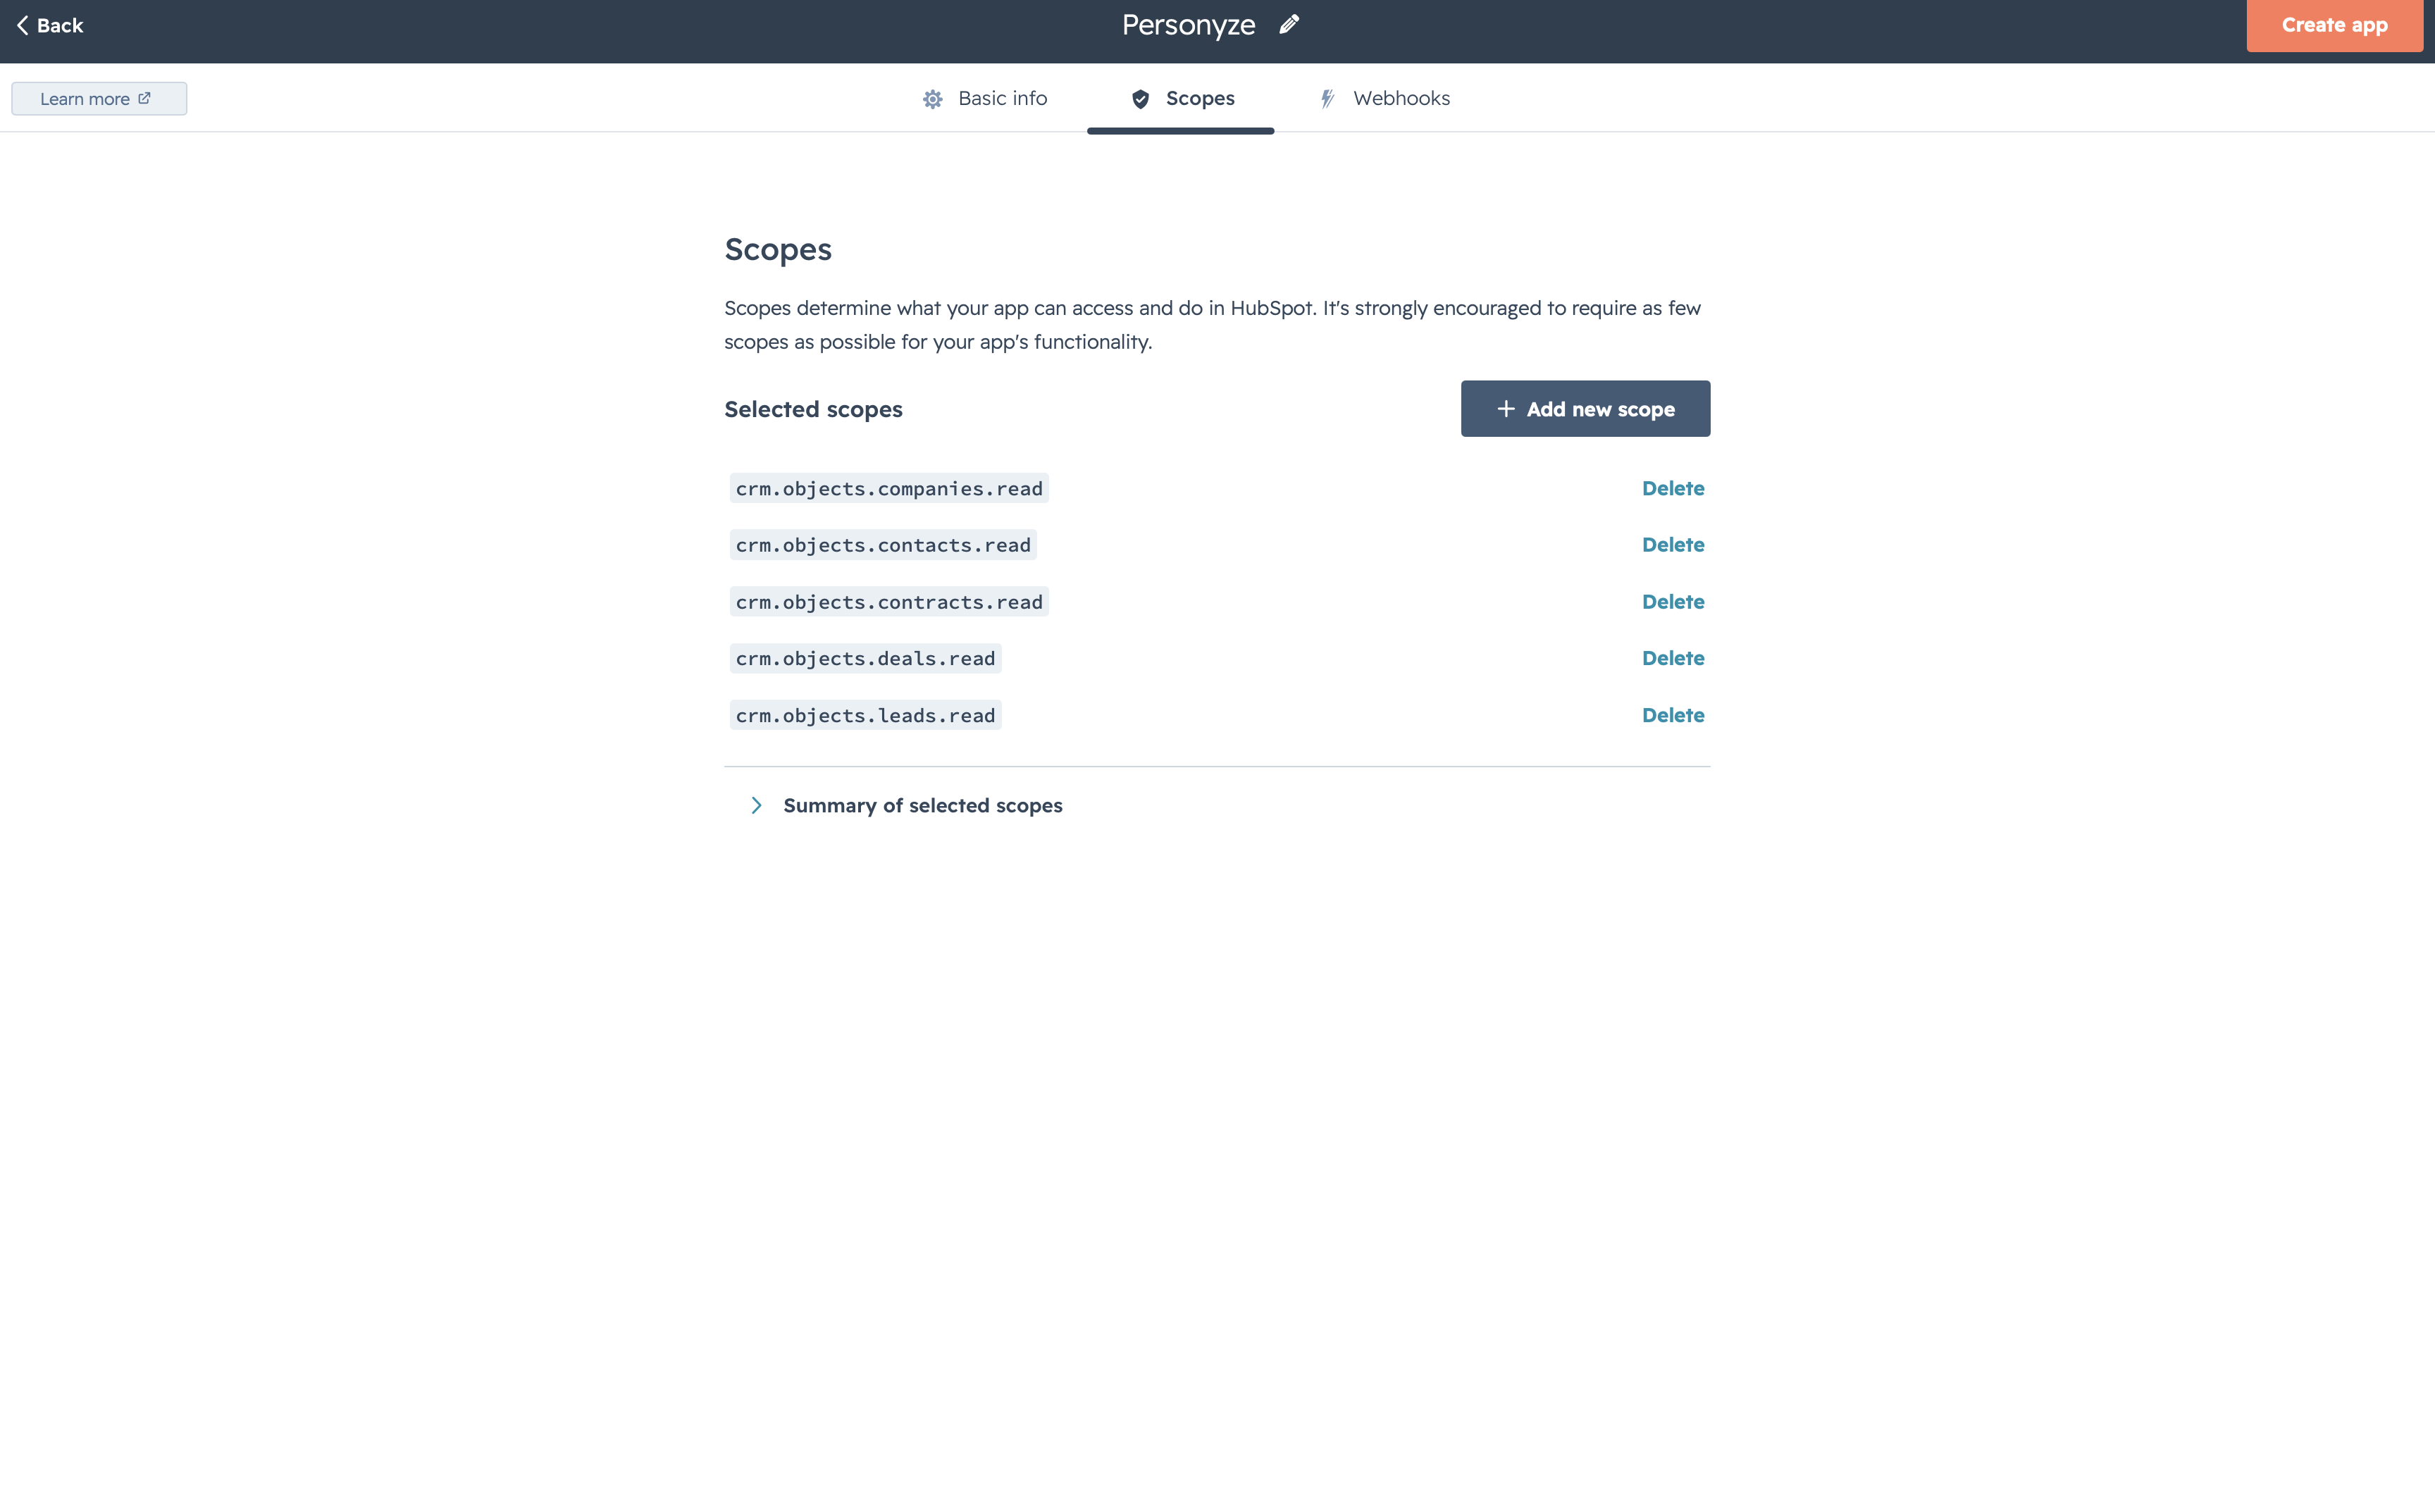
Review selected scopes
Your chosen scopes are listed together. Keep it to the minimum your targeting actually needs — HubSpot recommends granting as few as possible.
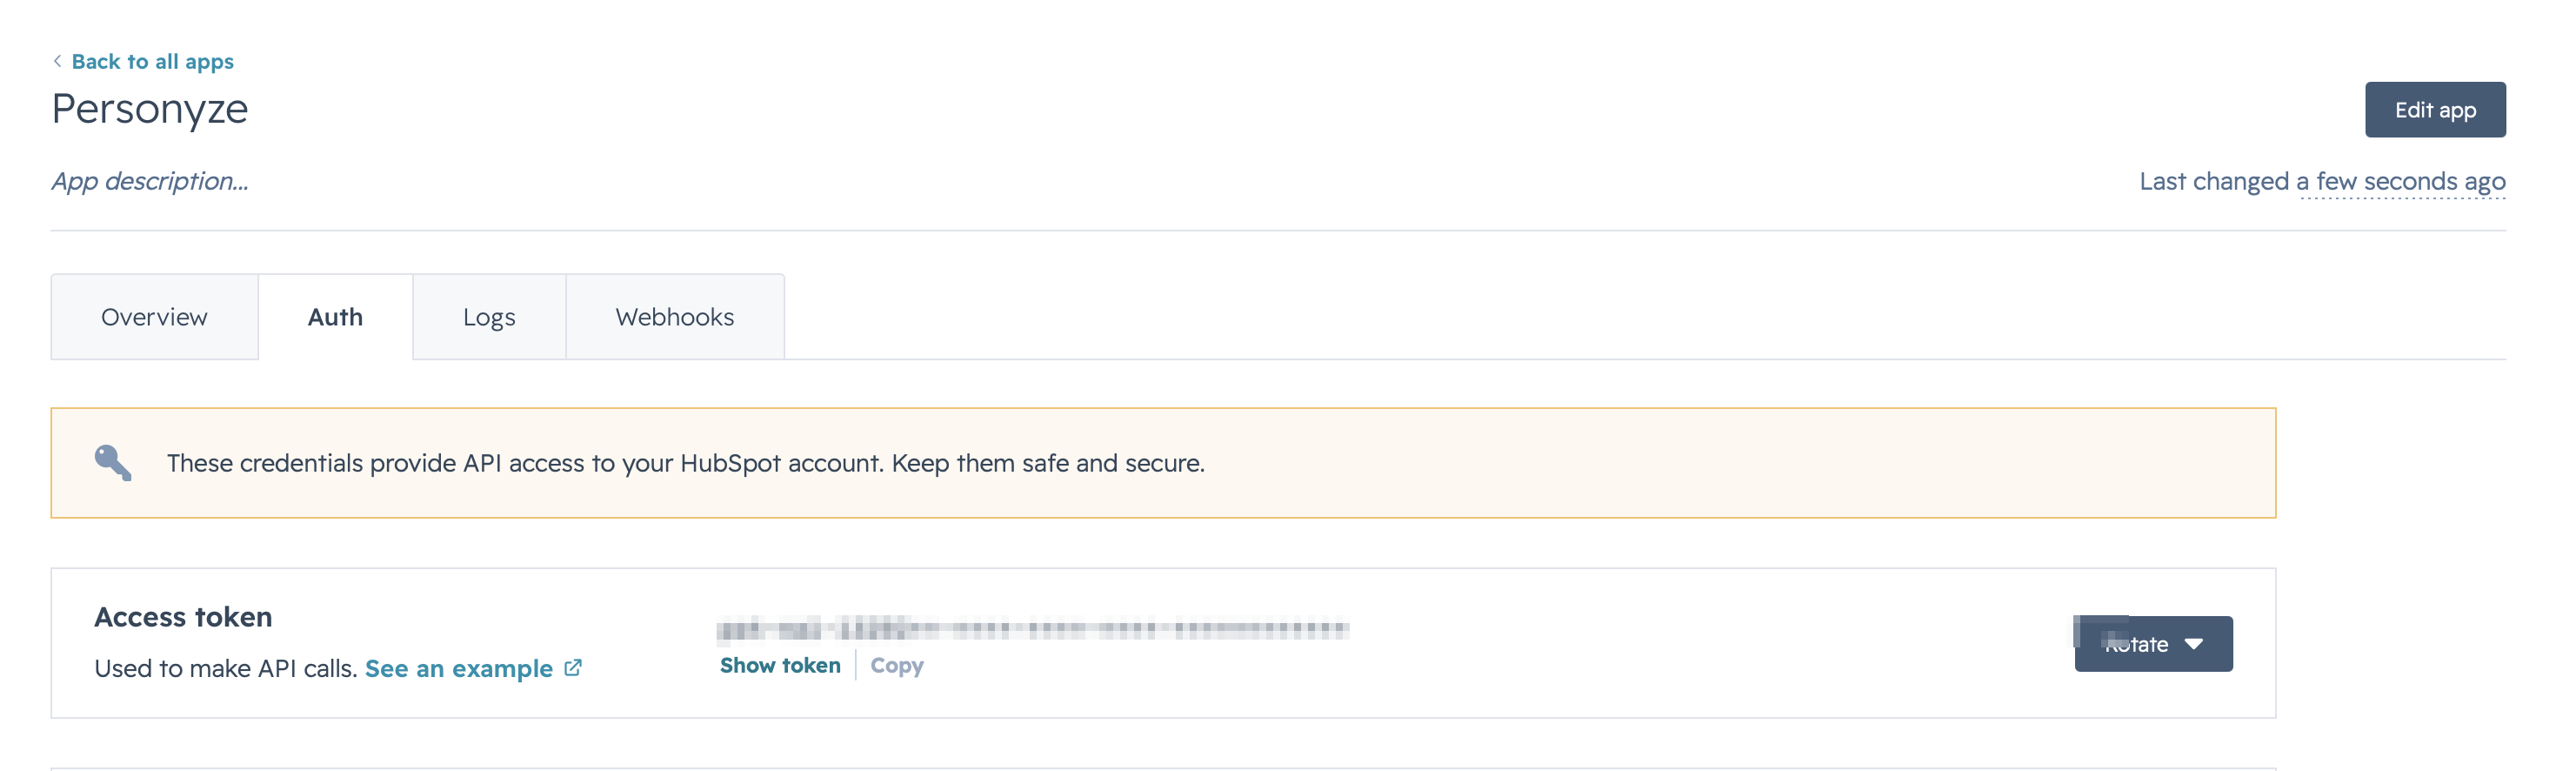
Copy the access token
Create the app, then open its Auth tab. Under Access token, click Show token and copy it. This is the credential Personyze uses to read your CRM.
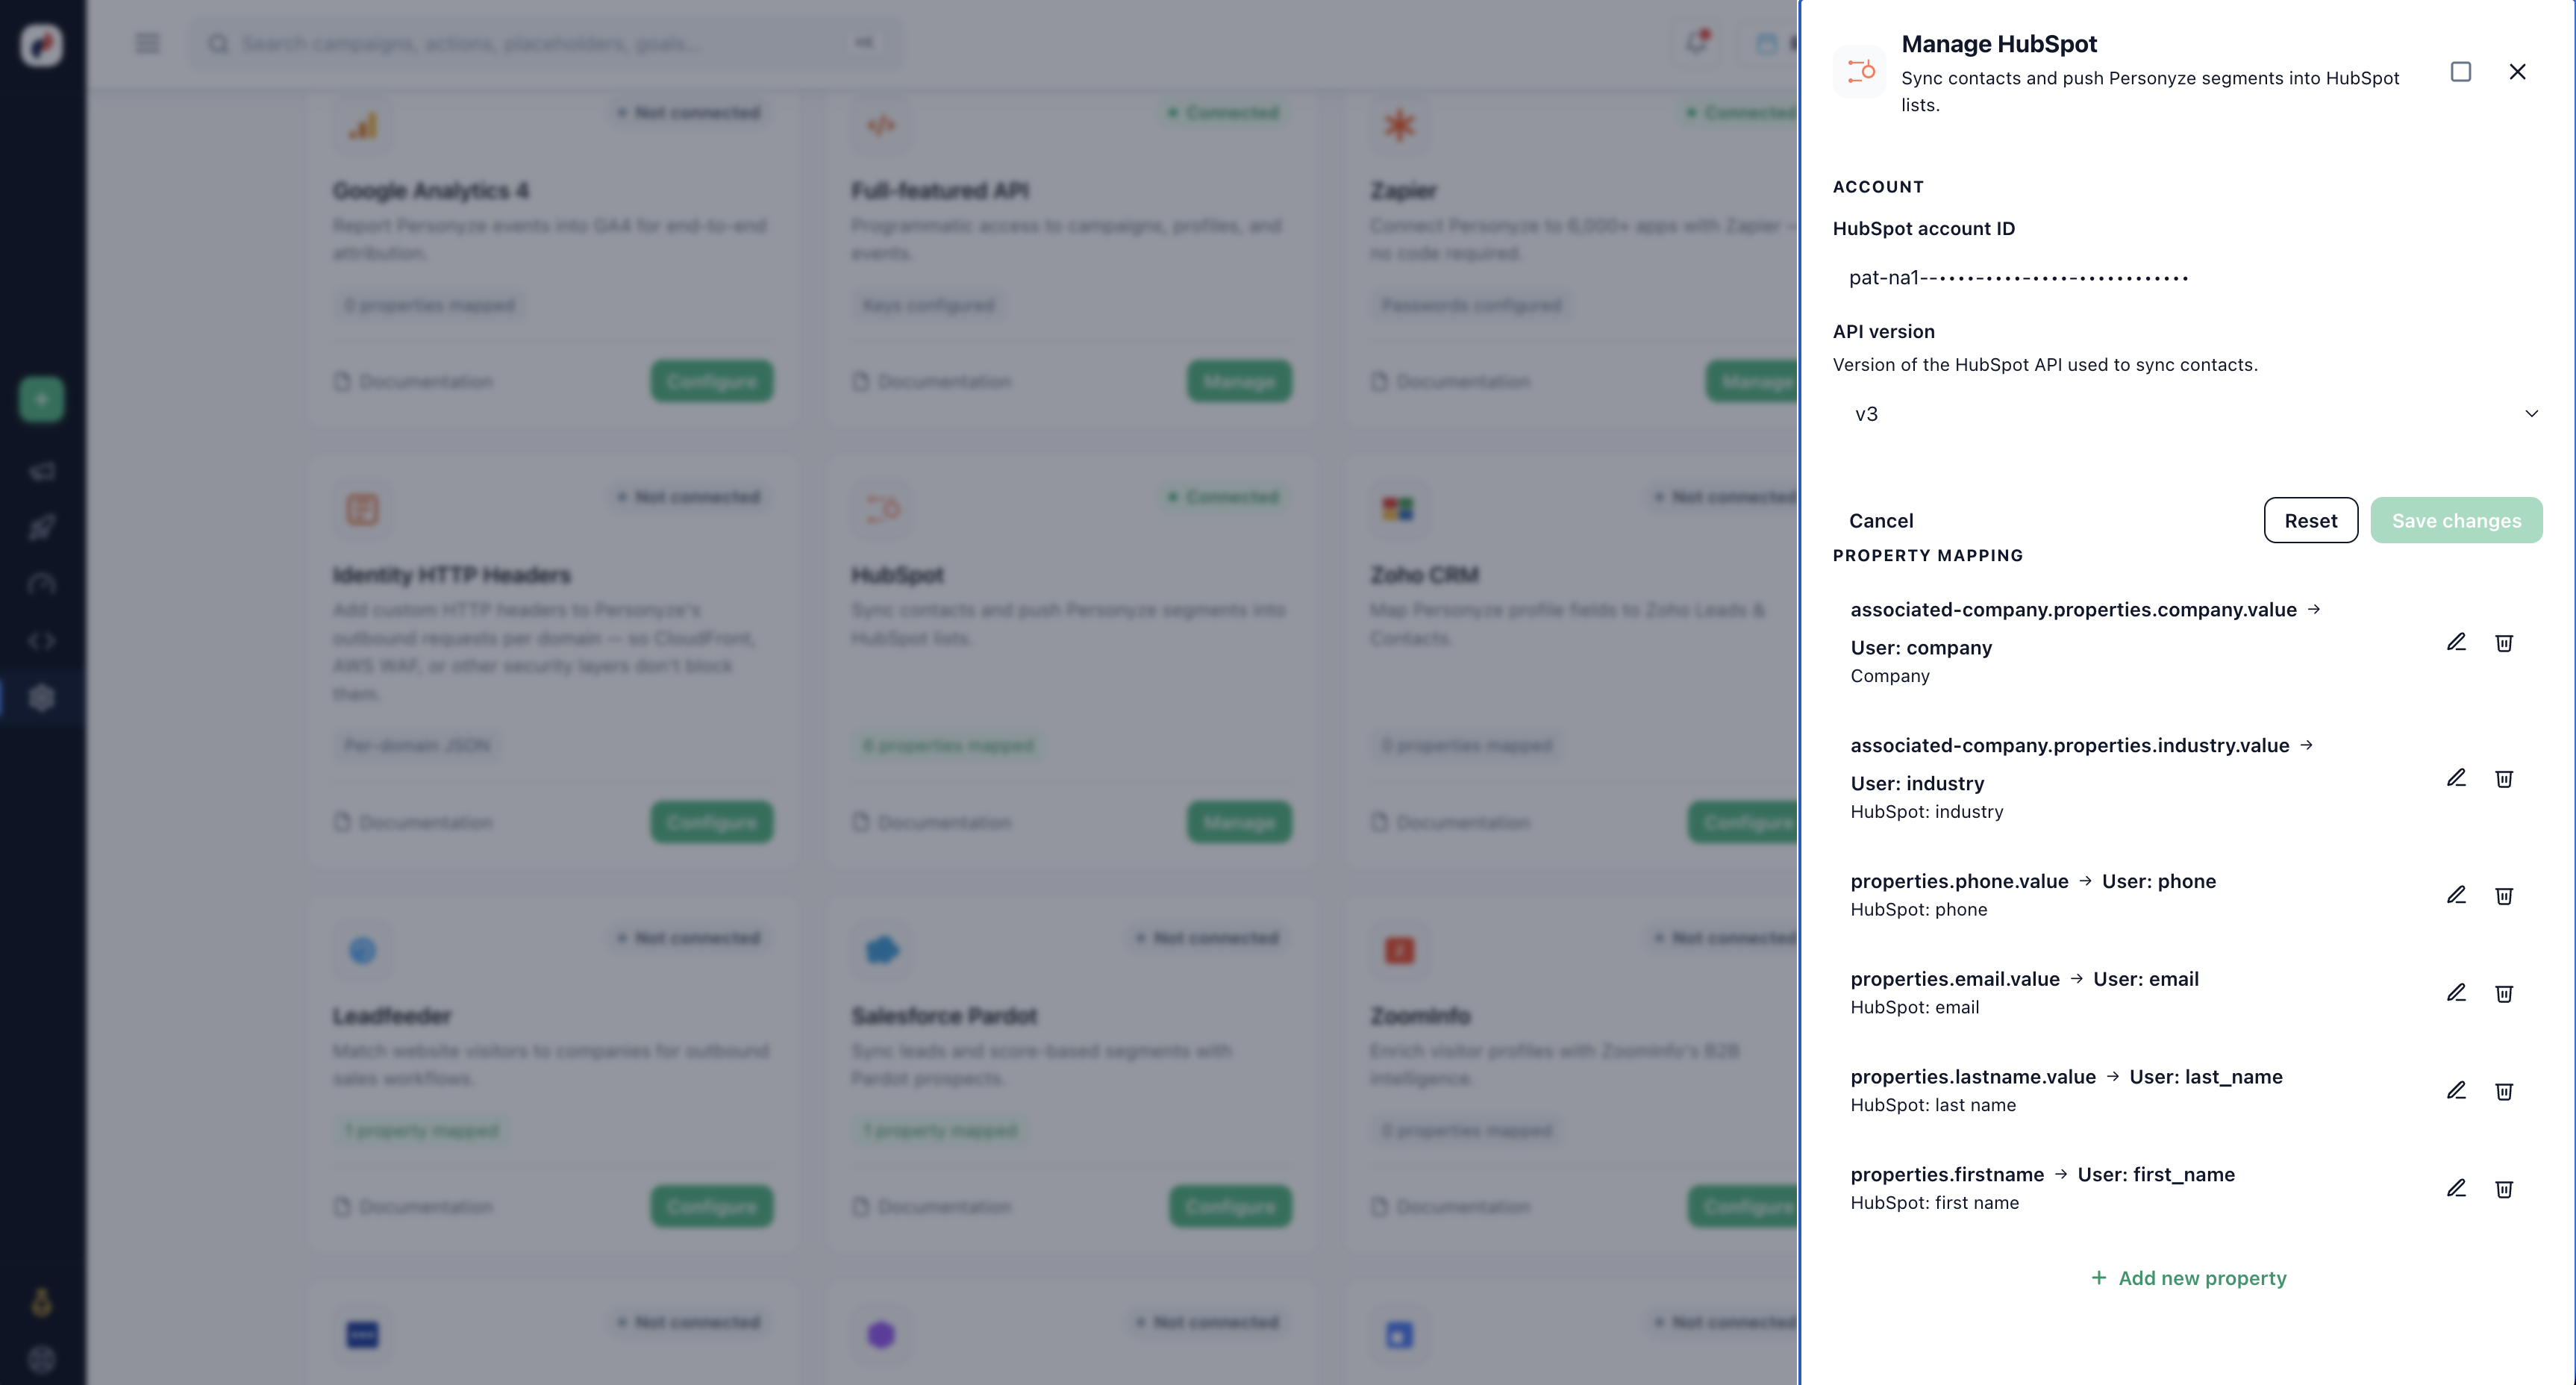
Paste it into Personyze
In Personyze, go to Settings → Integrations, open the HubSpot card, and paste the token into HubSpot account ID. Personyze auto-syncs common fields — company, industry, phone, email, first/last name.
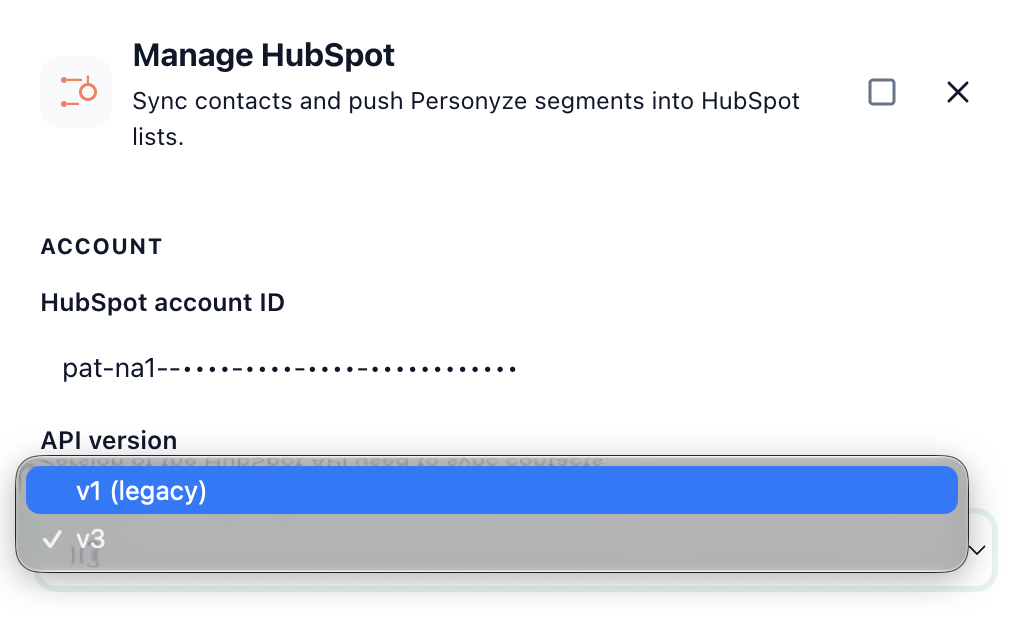
Pick the API version
Choose the API version. v1 (legacy) is required if you rely on cookie (hubspotutk) lookup to identify visitors. v3 is the current API but matches contacts by email instead — it cannot resolve a visitor from the cookie.
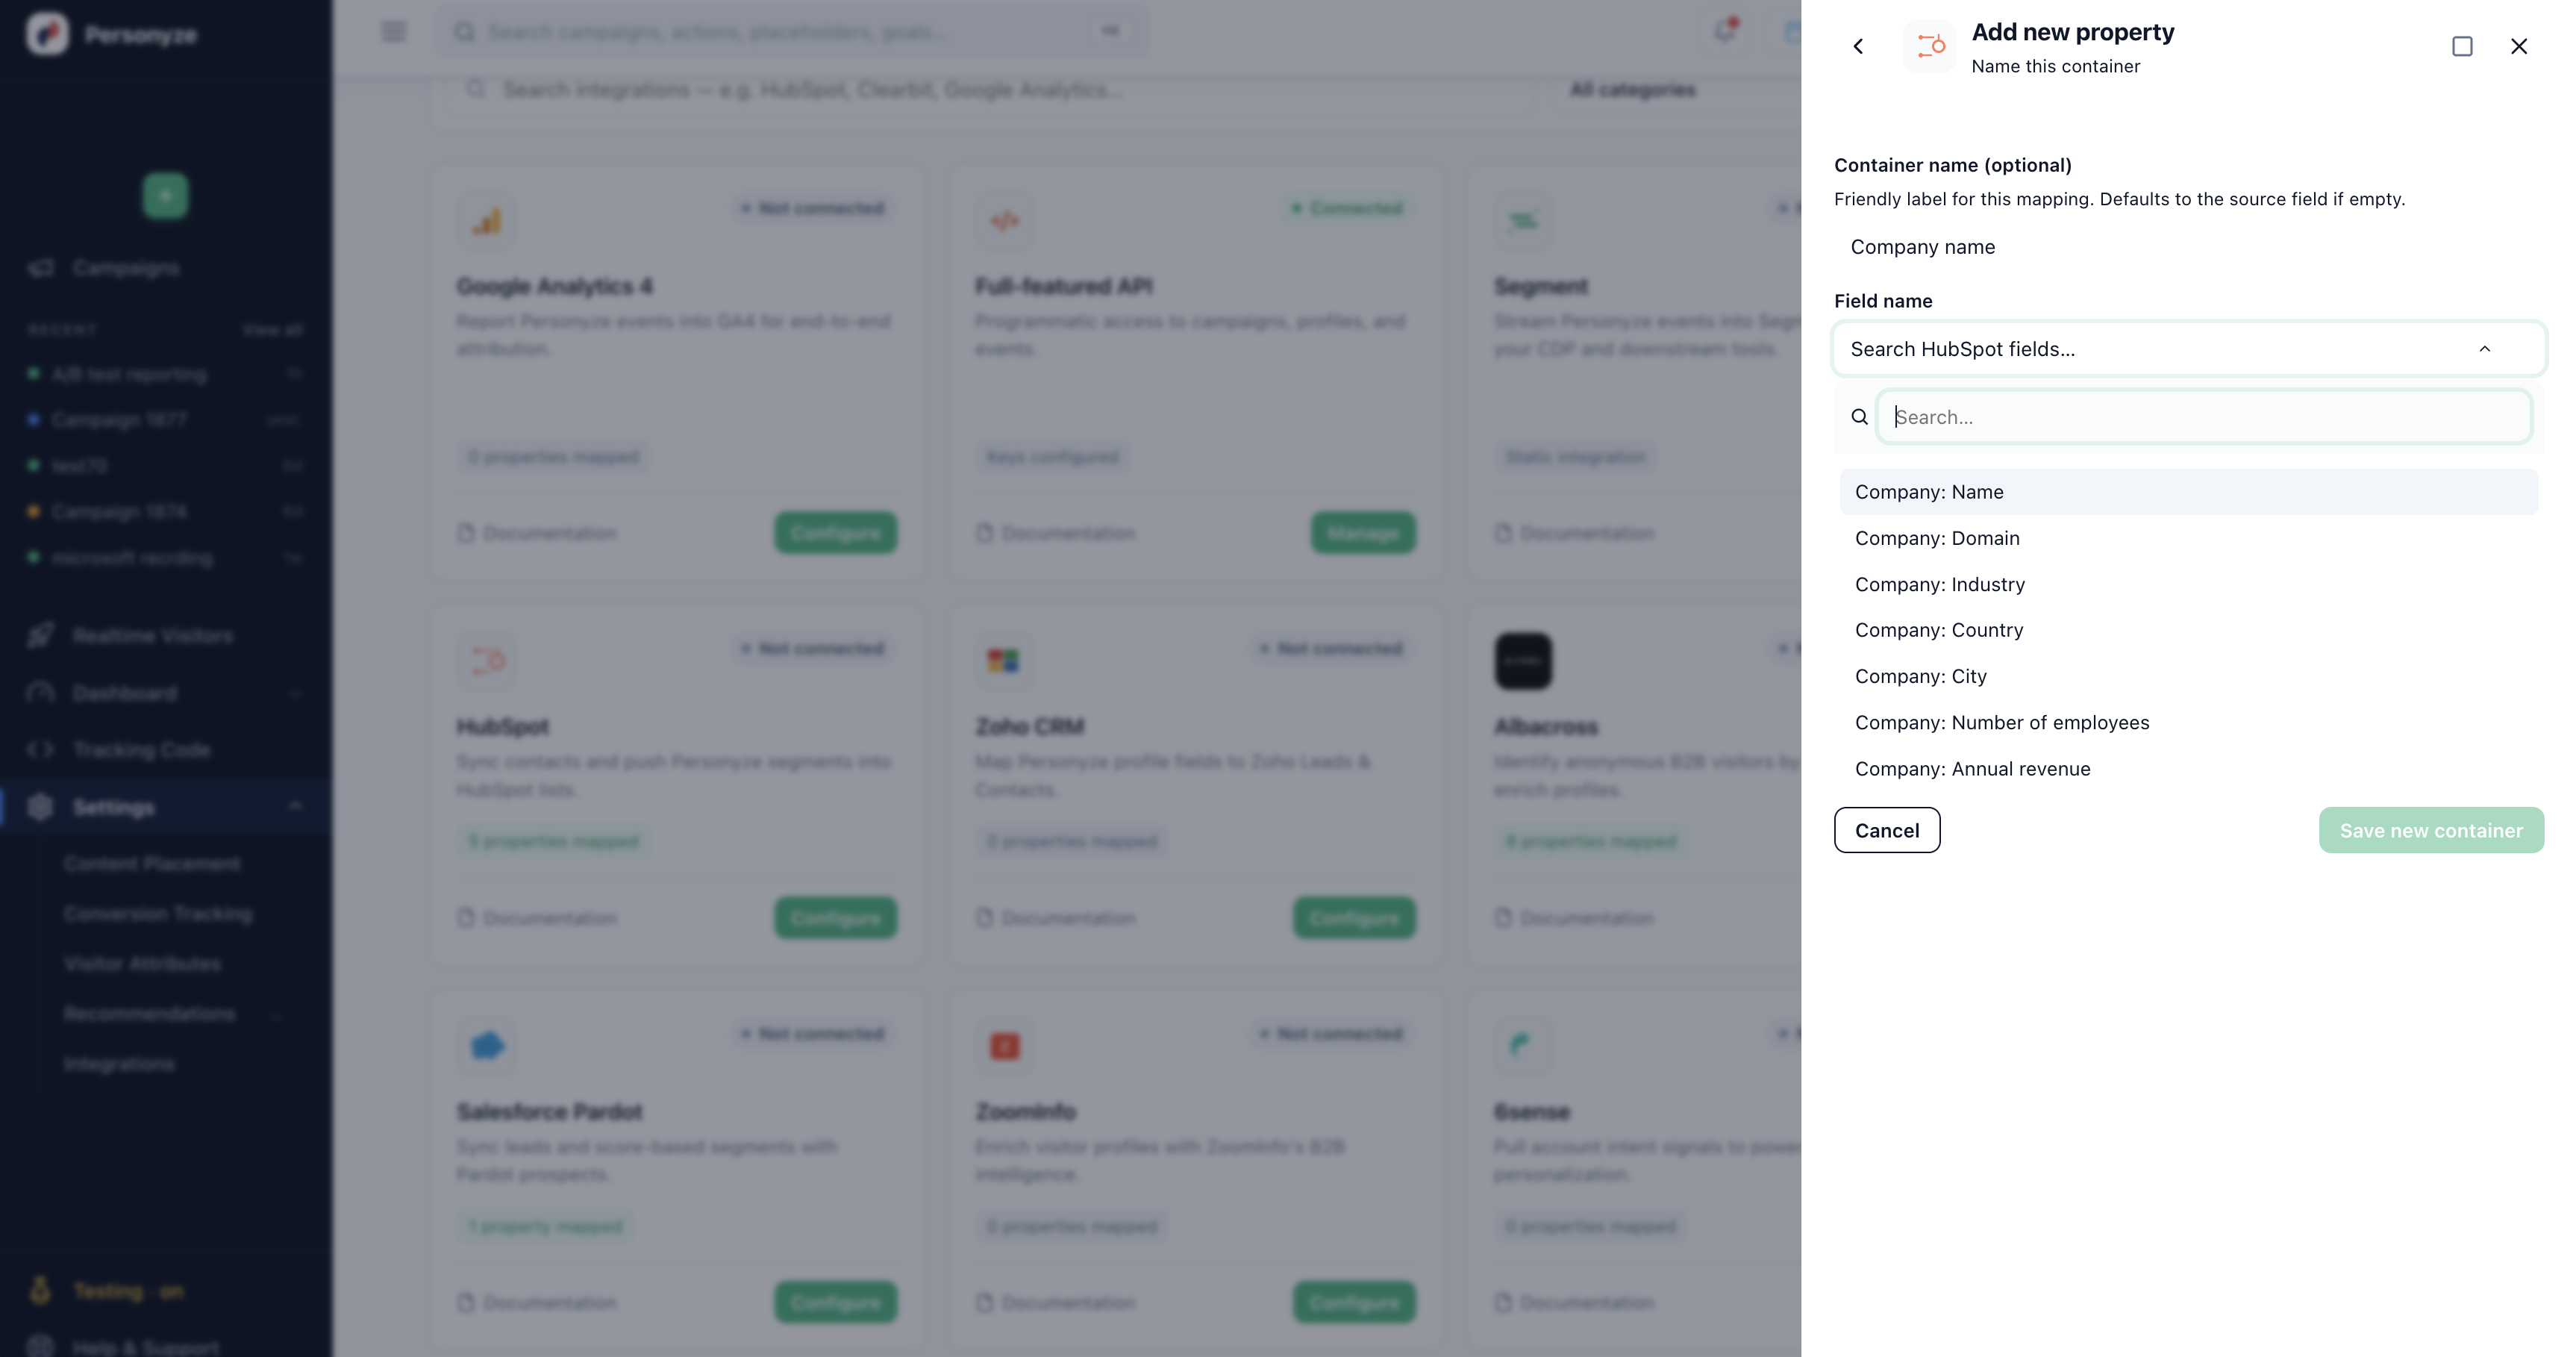
Map additional fields
To sync more fields, click Add new property, name the mapping, and search the HubSpot field list. Save, and the field becomes available for targeting and dynamic content.
Name your private app
In HubSpot, go to Settings → Integrations → Private Apps and create a new app. On the Basic Info tab, give it a recognizable name like “Personyze.” A logo and description are optional.
Open the Scopes tab
Switch to the Scopes tab. Scopes control what the app is allowed to read. A brand-new app starts with none — click Add new scope to grant access.
Add the CRM read scopes
Search the CRM group and tick the read scopes you need. Personyze only ever needs read access — never write.
Review selected scopes
Your chosen scopes are listed together. Keep it to the minimum your targeting actually needs — HubSpot recommends granting as few as possible.
Copy the access token
Create the app, then open its Auth tab. Under Access token, click Show token and copy it. This is the credential Personyze uses to read your CRM.
Paste it into Personyze
In Personyze, go to Settings → Integrations, open the HubSpot card, and paste the token into HubSpot account ID. Personyze auto-syncs common fields — company, industry, phone, email, first/last name.
Pick the API version
Choose the API version. v1 (legacy) is required if you rely on cookie (hubspotutk) lookup to identify visitors. v3 is the current API but matches contacts by email instead — it cannot resolve a visitor from the cookie.
Map additional fields
To sync more fields, click Add new property, name the mapping, and search the HubSpot field list. Save, and the field becomes available for targeting and dynamic content.
Part 1 — Create a private app in HubSpot
In your HubSpot dashboard, go to Settings → Integrations → Private Apps (this is the current replacement for HubSpot’s legacy API keys) and create a new app.
1. Basic info
On the Basic Info tab, give the app a name (e.g. “Personyze”), and optionally a logo and description.
2. Add the CRM scopes
Switch to the Scopes tab. Scopes control what the app is allowed to read. A new app starts with none.
Click Add new scope, search for each CRM scope you need, and tick it.
For CRM targeting, add these read scopes:
crm.objects.contacts.read— contact fields (name, email, job title, lifecycle stage…)crm.objects.companies.read— company/account fields (industry, size, domain…)crm.objects.deals.read— deal datacrm.objects.leads.read— lead datacrm.objects.contracts.read— contract data (optional)
3. Copy the access token
Create the app, then open its Auth tab. Under Access token, click Show token and copy it — this is the credential Personyze uses to read your CRM.
Part 2 — Connect HubSpot in Personyze
4. Paste the access key
In Personyze, go to Settings → Integrations, find the HubSpot card, and click Configure. Paste the token into HubSpot Access Key and save.
Choosing the API version (v1 vs v3)
The API version selector controls which HubSpot API Personyze uses to sync contacts:
- v1 (legacy) — required if you rely on cookie (
hubspotutk) lookup to identify a visitor. Only the legacy v1 endpoint can resolve a HubSpot contact from the browser cookie. - v3 — the current API for standard contact syncing. It does not support
hubspotutkcookie lookup; instead it matches contacts by email, so the visitor’s email must be known to Personyze (via a form, login, or the tracking API) for the sync to resolve.
If your setup identifies visitors by their HubSpot cookie, keep the legacy v1 endpoint selected. Otherwise, v3 is fine.
As soon as it connects, Personyze auto-syncs the most common fields — first name, last name, email, phone, industry — as shown in the mapping list.
5. Map additional fields
To sync more fields, click Add new property. Give the mapping a friendly name, then search the HubSpot field list and pick the source field.
Save the mapping. Personyze uploads that field for matching contacts, and it becomes available in your targeting rules and dynamic content.
Targeting on HubSpot data
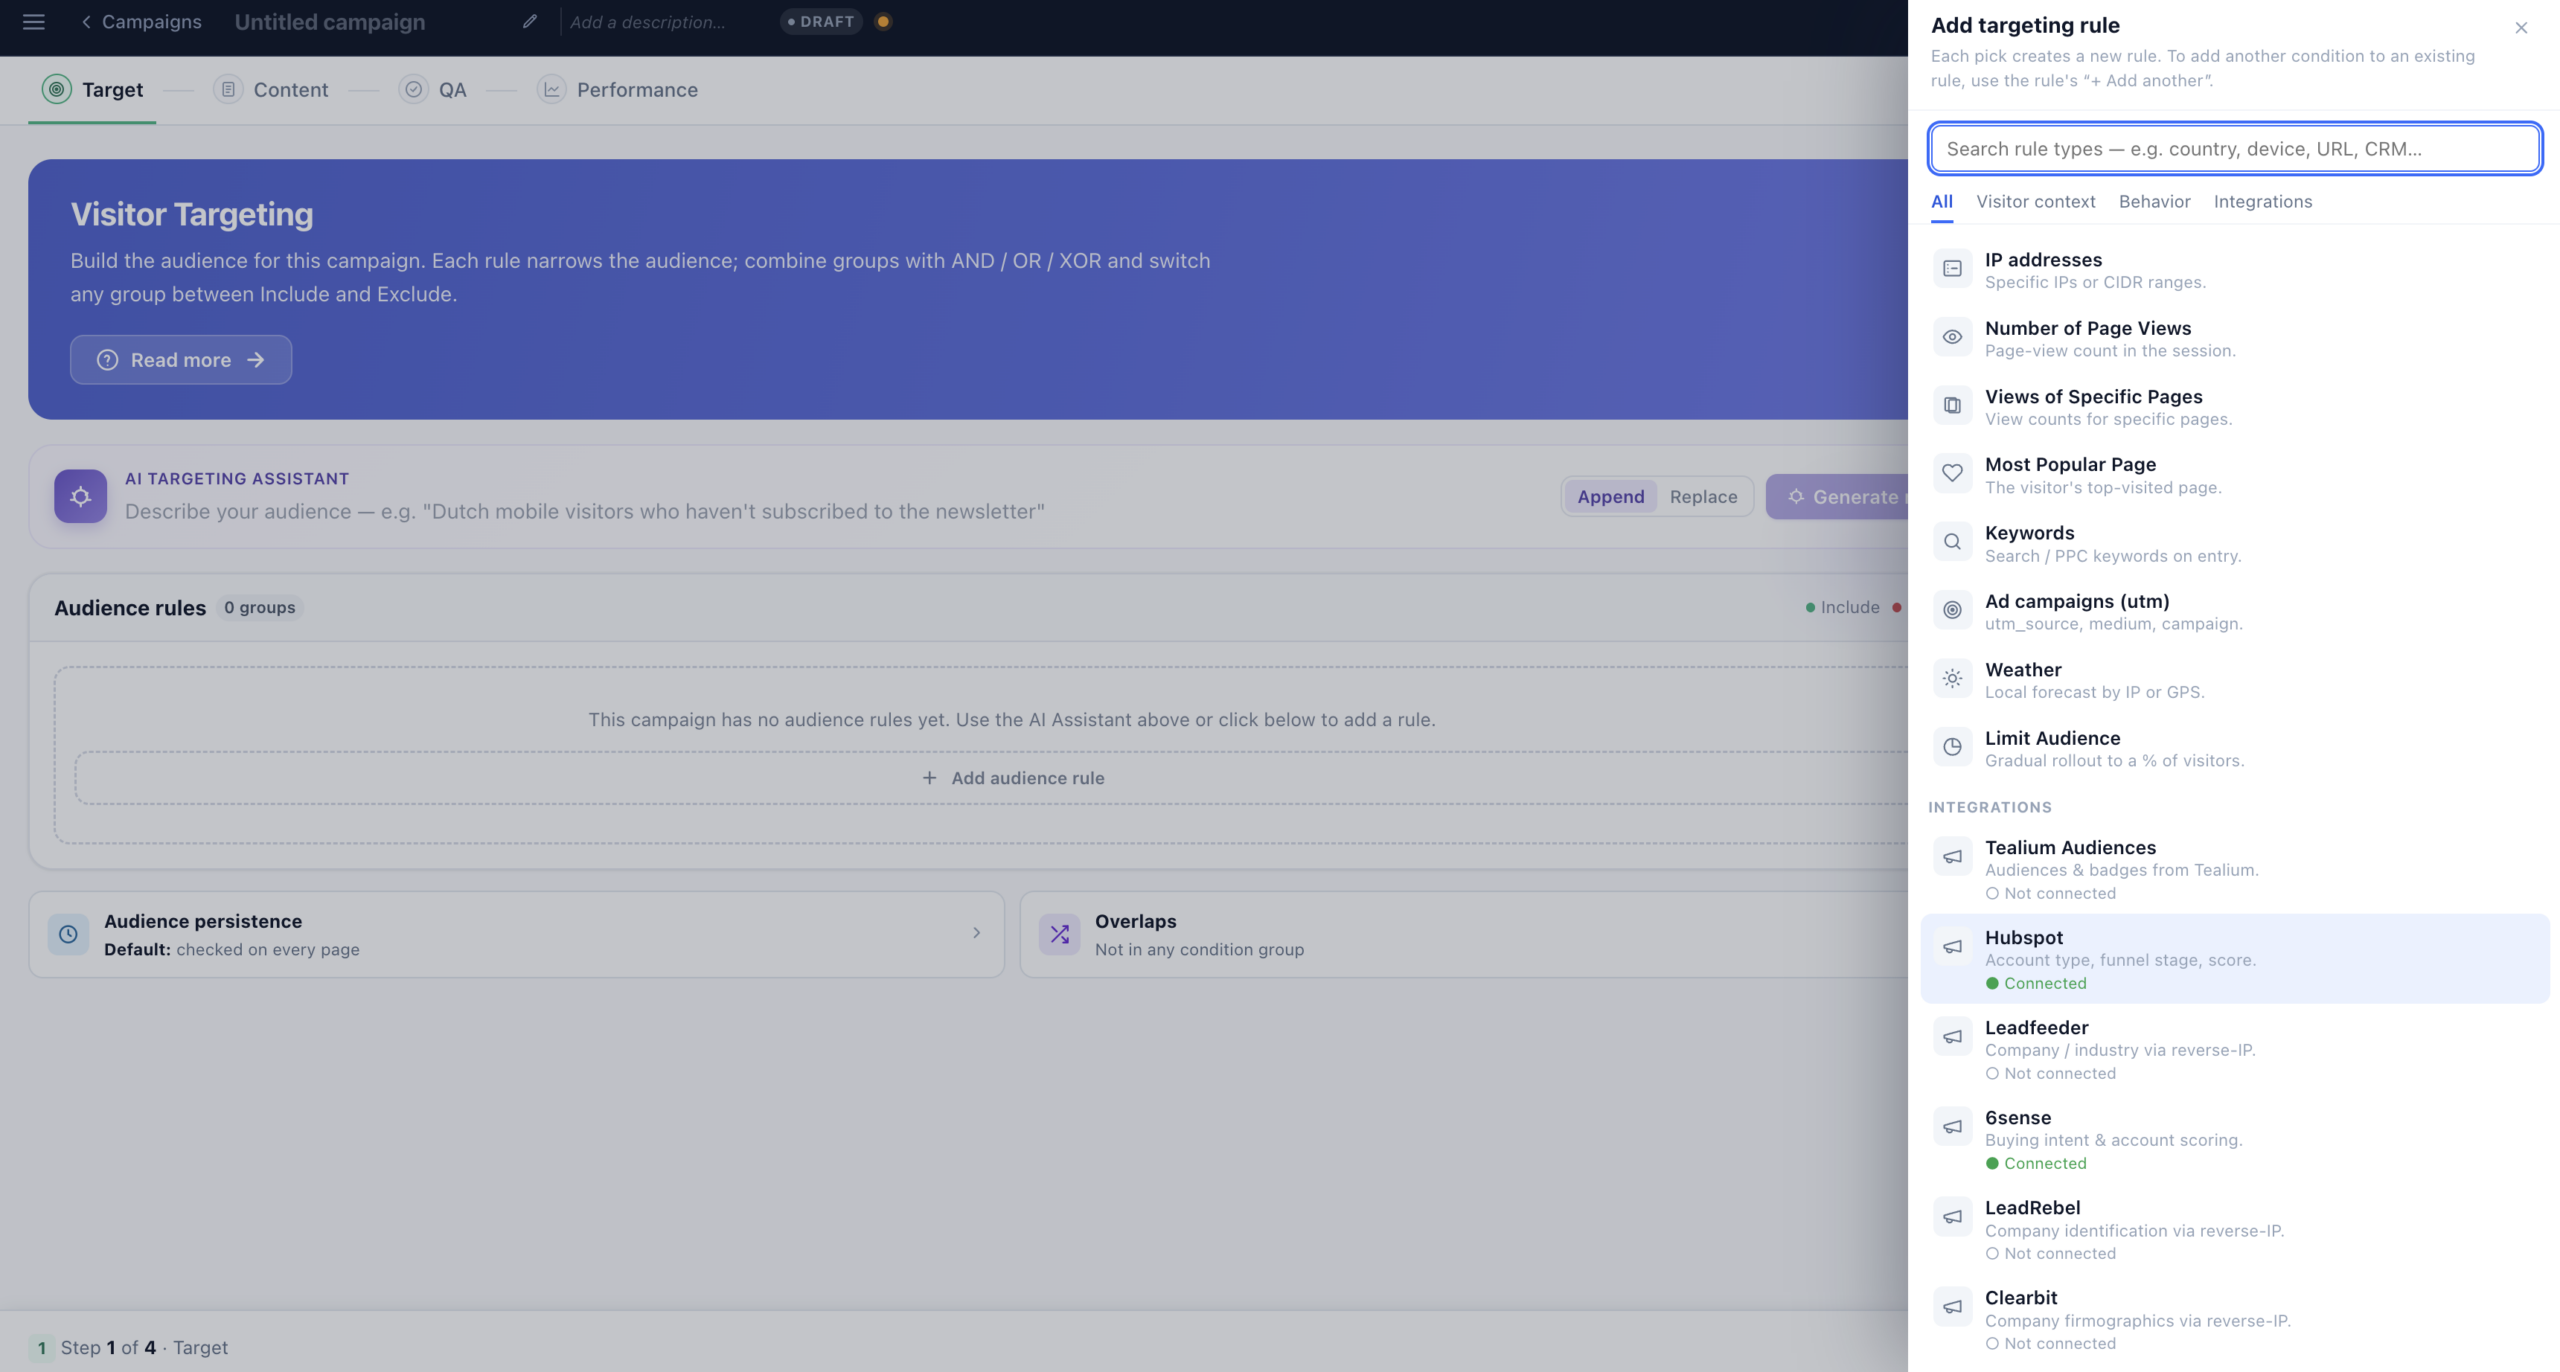
Once fields are syncing, you target on them right inside a campaign. On the Target step, click Add audience rule and choose HubSpot from the Integrations group (it shows as “Connected” once the token is in place).
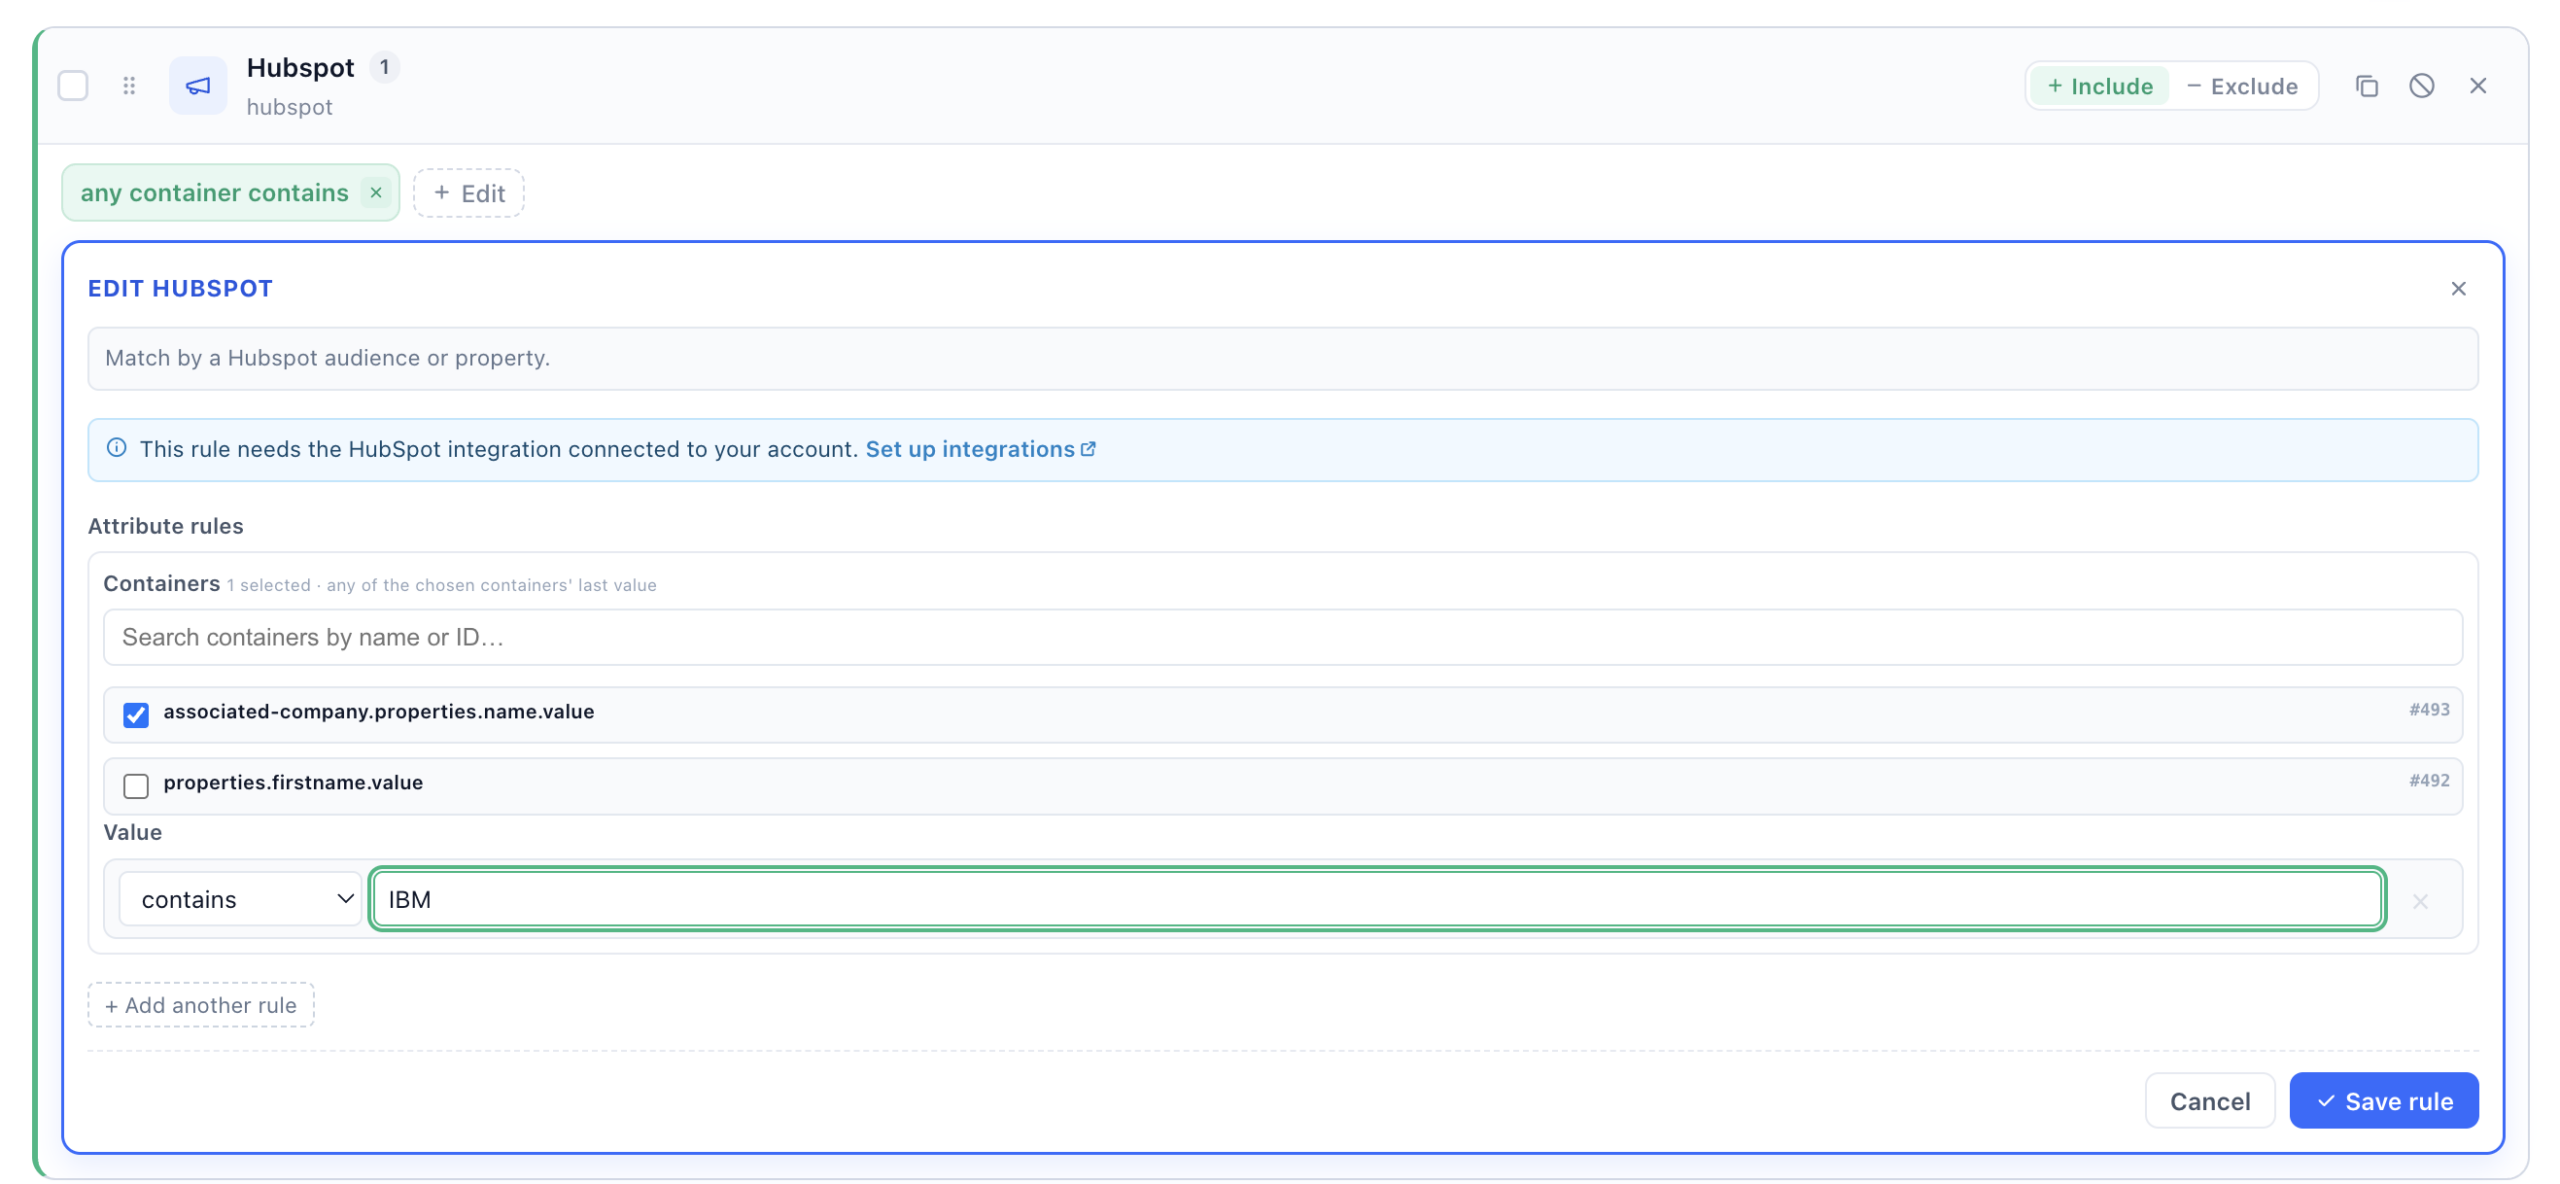
In the HubSpot rule editor, pick the container (the mapped property, e.g. associated-company.properties.name.value), choose an operator (contains, equals, and so on), and enter a value. You can add more conditions with Add another rule, and switch the whole group between Include and Exclude.
Because HubSpot rules combine with every other targeting rule, you can build precise ABM audiences — for example, company industry is “Finance” AND on the pricing page AND not an existing customer. See Targeting Rules for how rule groups and AND/OR/XOR logic work.
Using HubSpot data in campaigns
Once synced, HubSpot fields appear alongside Personyze’s own visitor attributes:
- Targeting — build audiences on CRM values (e.g. industry is “Finance”, lifecycle stage is “SQL”, company size > 500). See Targeting Rules.
- Dynamic content — insert CRM values as variables (first name, company name) into popups, banners, and emails. See Inserting CRM Variables.
How contacts are matched
Personyze links a visitor to a HubSpot contact by a shared key — typically the email captured on your site (via a form, login, or the tracking API), or a HubSpot ID passed through. When a match is found, that contact’s mapped fields are attached to the visitor’s Personyze profile and kept in sync.
Frequently asked questions
How do I connect HubSpot to Personyze?
Create a private app in HubSpot (Settings → Integrations → Private Apps), add the CRM read scopes, and copy its access token. In Personyze, go to Settings → Integrations → HubSpot, paste the token into HubSpot account ID, choose the API version, and map the fields you want to sync.
Does Personyze still use a HubSpot API key?
No. HubSpot deprecated API keys in favor of private apps. Personyze authenticates with the private app’s access token instead. If you have an older key-based setup, recreate it as a private app.
What HubSpot scopes does Personyze need?
Read-only CRM scopes: crm.objects.contacts.read, crm.objects.companies.read, crm.objects.deals.read, crm.objects.leads.read, and optionally crm.objects.contracts.read. Personyze never needs write access.
Should I use HubSpot API v1 or v3 in Personyze?
Use v1 (legacy) if you identify visitors by the HubSpot cookie (hubspotutk) — only v1 can resolve a contact from that cookie. Use v3 for standard syncing; it matches contacts by email, so the visitor’s email must be known to Personyze.
How are website visitors matched to HubSpot contacts?
By a shared key — usually the email captured on your site (form, login, or tracking API), or the HubSpot cookie when using v1. When a match is found, the contact’s mapped fields attach to the visitor’s Personyze profile.
What can I do with HubSpot data in Personyze?
Once synced, HubSpot fields power on-site targeting (build audiences on industry, lifecycle stage, company size, etc.), email campaigns, and dynamic content variables like first name or company name.