
If your site already uses Google Tag Manager, GTM is the cleanest place to load the Personyze tracking tag — no template editing, deploy and rollback through GTM versioning, no developer push. There are two ways to get the tag in: connect Google Tag Manager and Personyze adds the tag to your container for you, or add the Personyze Tracking template by hand. Either way you end up with the same tag, and it does more than install tracking: it can translate your existing GA4 ecommerce dataLayer into Personyze product interactions, report specific interactions, write visitor profile attributes from GTM variables, and respect Google Consent Mode.
Connect Google Tag Manager (recommended)
No account number to look up, no template to find, nothing to copy: Personyze signs in to Tag Manager with your permission and stages the tag for you. It never publishes — you review the change and publish it in GTM, as with any other tag.
- In Personyze, open Tracking code → Tracker settings and click Get tracking code. Under Use Google Tag Manager?, click Connect Google Tag Manager. (The same option appears on the install step when you sign up, as the Connect GTM tab.)
- Sign in to Google and allow access. Personyze asks for one permission — to edit your Tag Manager containers. It has no permission to publish.
- Choose a container. Every container your Google account can reach is listed with its account name and ID (GTM-XXXXXX). Domains the tag may run on is prefilled from your Personyze account — edit it if this container serves other sites — then click Add tag here.
- Personyze creates a workspace called Personyze setup in that container and adds the Personyze tag with a Personyze – All Pages trigger. You see “Tag added — one step left”.
- Open Google Tag Manager, switch to the Personyze setup workspace, review the change and click Submit to publish it. Nothing reaches your site until you do.
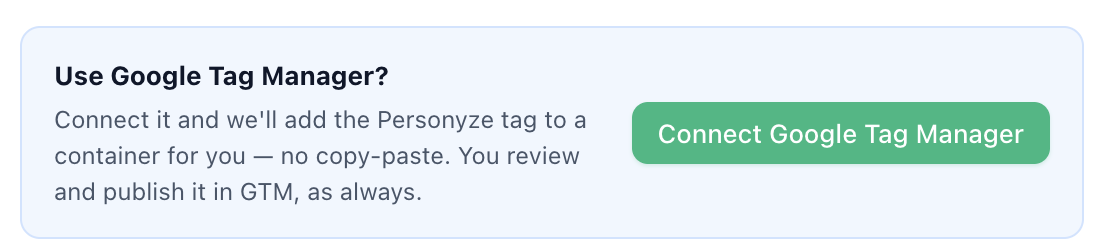
Once connected, the box turns green and the button becomes Add to another container — for a second site or a staging container. Tracker settings shows Tag Manager connected, and each domain installed this way is marked Added via GTM, or Added to GTM — publish it while no traffic has arrived from it.
- Running it again is safe. If the container already has the Personyze tag, template or trigger — from an earlier run, or from a copy you installed by hand — Personyze reuses it instead of adding a duplicate.
- To disconnect, click Connect Google Tag Manager again and choose Disconnect Google. Tags already added stay in your container; remove them in Tag Manager if you no longer want them.
Or install the tag by hand
If you would rather not give Personyze access to your container, or your Google account has no API access to it, add the Personyze Tracking template yourself — search “Personyze” in GTM’s Tag Templates gallery. You need your Personyze account number: the number in your panel URL (e.g. /panel2/id/8110/), also shown in Settings → Site profile.
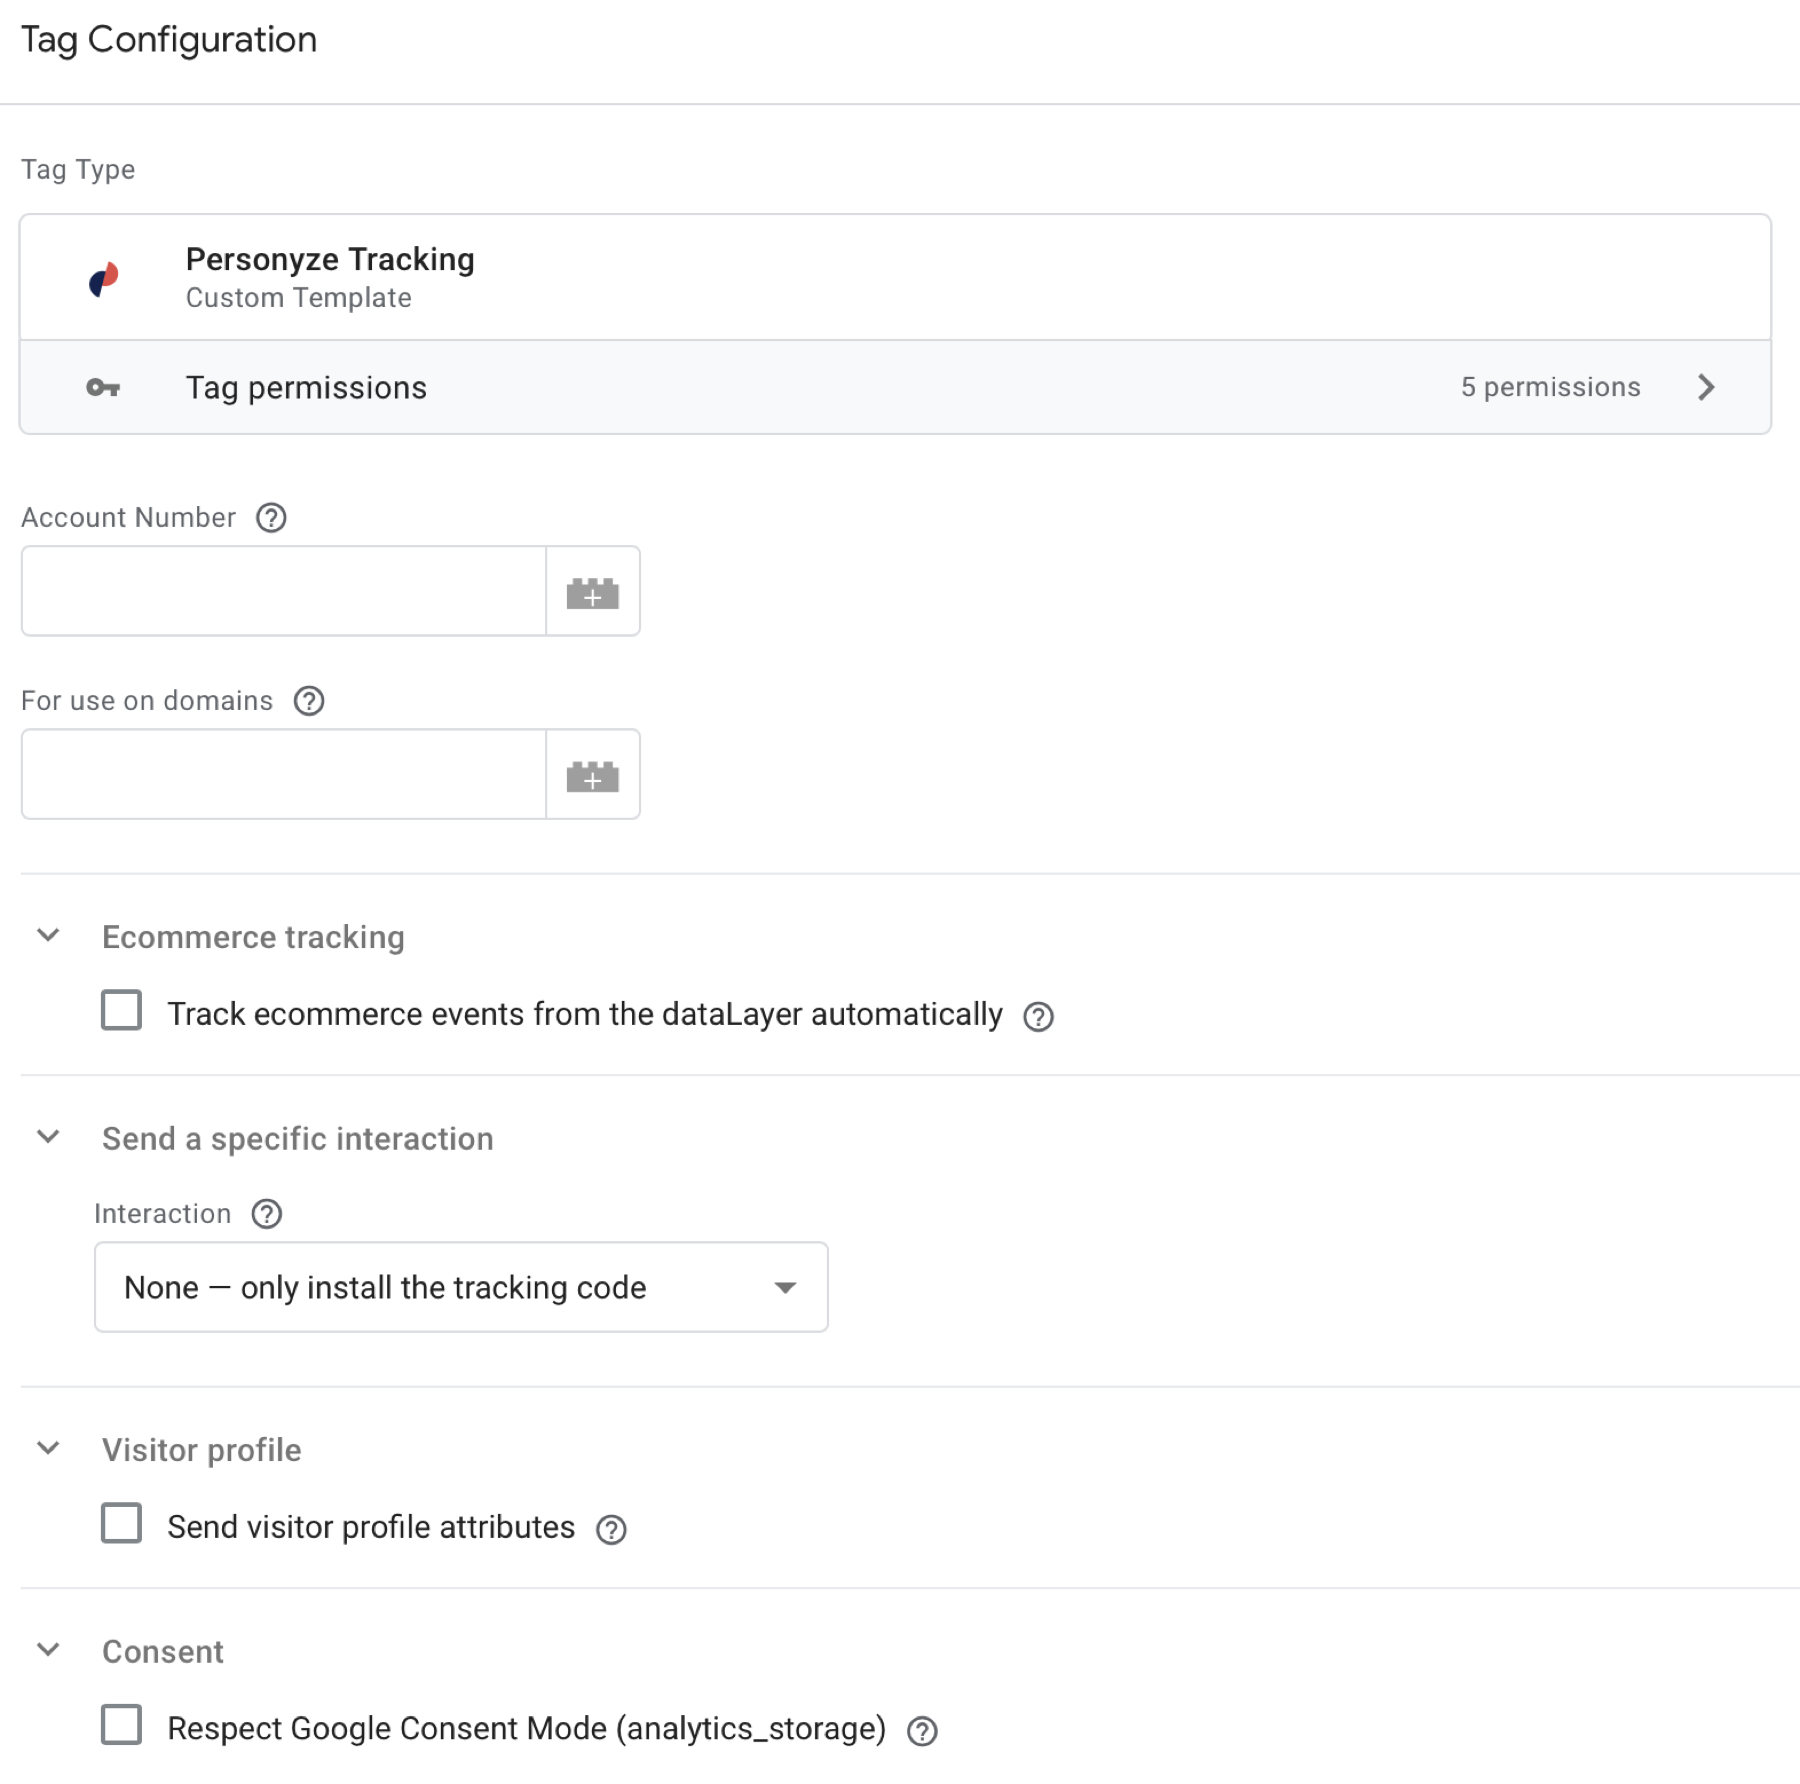
- In your GTM workspace: Tags → New, click the tag-config area and pick Personyze Tracking.
- Account Number — your Personyze account number.
- For use on domains — a space-separated list of the domains to track, like
example.com shop.example.com. - Trigger: All Pages (Page View). Fire Personyze as early as possible — earlier firing means more time to identify the visitor, resolve audiences and render personalization before the visitor starts scrolling; late firing shows a flash of original content.
- Submit a new GTM version.
Tag options
Connecting installs a plain page-view tag. To turn on any of the options below, open the Personyze tag in GTM, edit it, and submit a new version — the same tag, whichever way it was installed.
Ecommerce tracking — reuse your GA4 dataLayer
Tick Track ecommerce events from the dataLayer automatically and the tag translates standard GA4 ecommerce pushes — view_item, add_to_cart, remove_from_cart, add_to_wishlist, purchase — into Personyze product interactions. If your site already reports ecommerce to GA4, this replaces any separate interaction setup.
- Trigger setup: attach the tag to a Custom Event trigger with Use regex matching enabled and the event name
view_item|add_to_cart|remove_from_cart|add_to_wishlist|purchase
— in addition to (or instead of) the All Pages trigger. - Match products by — which column of your Personyze product catalog the reported IDs match: Internal ID or SKU. The IDs in your dataLayer must exist in the catalog, or the interactions won’t attach to products.
Send a specific interaction
The Interaction dropdown sends one Personyze interaction each time the tag fires (on top of installing the tracking code). Fill its fields with GTM variables (e.g. {{Ecommerce item id}}):
- Product Viewed / Added to cart / Removed from cart / Purchased / Liked (wishlist) — takes Product ID and, where relevant, Quantity.
- Order completed — all cart items purchased.
- Article Viewed — takes Article ID, for content recommendations.
- Category viewed — logs visitor interest; one or more category names, comma-separated.
- SPA route change — re-runs targeting on a single-page-app navigation. Attach this one to a History Change trigger.
Visitor profile attributes
Tick Send visitor profile attributes to write values onto the visitor’s Personyze profile — where they become usable in every targeting rule, dynamic content variable and report. Click Add attribute, pick the field, and supply the value as a GTM variable.
Available fields: Email, First/Last name, Phone, Mobile phone, Gender, Birthday, Postal code, City, State, Country, Occupation, Industry, Website, Interests, Subscription type, Lead score, Sale state, Account type, Account balance, Account ID number, Opted in (email, sms) — plus generic slots: Custom text 1–6, Custom integer 1–4, Custom float 1–2, Custom date 1–2.
Consent Mode
Tick Respect Google Consent Mode (analytics_storage) and the Personyze tracker is not loaded — and no cookies are set — until analytics_storage consent is granted. If the visitor grants consent later on the same page, the tracker loads at that moment. Pair it with your CMP’s standard Consent Mode integration; no extra wiring needed.
Verifying the tag fires
- In Personyze, Tracking code → Tracker settings shows the domain’s last visit. A domain installed through Connect that shows Added to GTM — publish it has no traffic yet — almost always because the Personyze setup workspace was not submitted.
- In GTM, click Preview — Tag Assistant opens with your site. Personyze Tracking should list under “Tags Fired”.
- Dev tools → Network → filter
counter.personyze.com— a request should fire on every page load. - In the panel, the visit appears in Live visits within seconds; with ecommerce tracking on, product events show under the campaign’s Interactions step.
Common issues
- “This Google account has no Tag Manager containers” — you signed in with a Google account that has no access to your container. Create a container at tagmanager.google.com, or ask its owner to add your account, then connect again.
- Tag added, but no visits arrive — the change is still sitting in the Personyze setup workspace. Open it in GTM and click Submit.
- “Access not granted” — the Google permission was declined. Connect again and allow access to Tag Manager.
- Tag fires but no events in Personyze — usually a wrong account number, or the current domain missing from For use on domains.
- Personalization doesn’t render / flashes — tag firing too late; fire on Page View and before interfering tags.
- Ecommerce interactions don’t attach to products — the dataLayer item IDs don’t match the catalog column chosen under Match products by.
- SPA pages tracked twice — the base tag is on a History Change trigger; move it to Page View and use the SPA route change interaction instead.
Related
- Google Analytics integration — the other direction: reporting Personyze events into GA4.
- Product interaction tracking — all the ways to report interactions.
- One-page applications.