
Use what Demandbase knows about the company behind each anonymous B2B visit — its name, industry, size, and whether it is one of your target accounts — to personalize your website for it in Personyze.
What it does
Demandbase identifies the company behind a visit from the visitor’s network, and tells you which of your Demandbase audiences it belongs to. If you use Demandbase, its tag is already on your website and does this lookup on every visit. Personyze reads the tag’s answer in the visitor’s browser and stores each field on the visitor’s profile:
- Company — the company’s name.
- Website — its domain.
- Industry and Sub-industry.
- Employee range and Revenue range — its size.
- Audience and Audience segment — your Demandbase audiences, for example your target account list.
- Any other field in Demandbase’s answer, added by name — including the Account Connector fields your Demandbase admin chose to share with your website: segments, scores, journey stages, CRM fields.
Then, for example: show a banner to your target accounts only, swap the hero image by industry, or lead companies in a given journey stage to a demo page.
What you need
- A Demandbase subscription, with the Demandbase tag on your website — the script from
tag.demandbase.comthat Demandbase gives you. Installing it through Google Tag Manager works too. Personyze does not install it for you. - The Personyze tag on the same pages.
There is no key to enter in Personyze: the Demandbase tag carries your Demandbase key, and Personyze only reads what the tag has already fetched.
Set it up
- In Personyze, go to Settings → Integrations and open Demandbase (under Lead Intelligence).
- Click Turn on Demandbase.
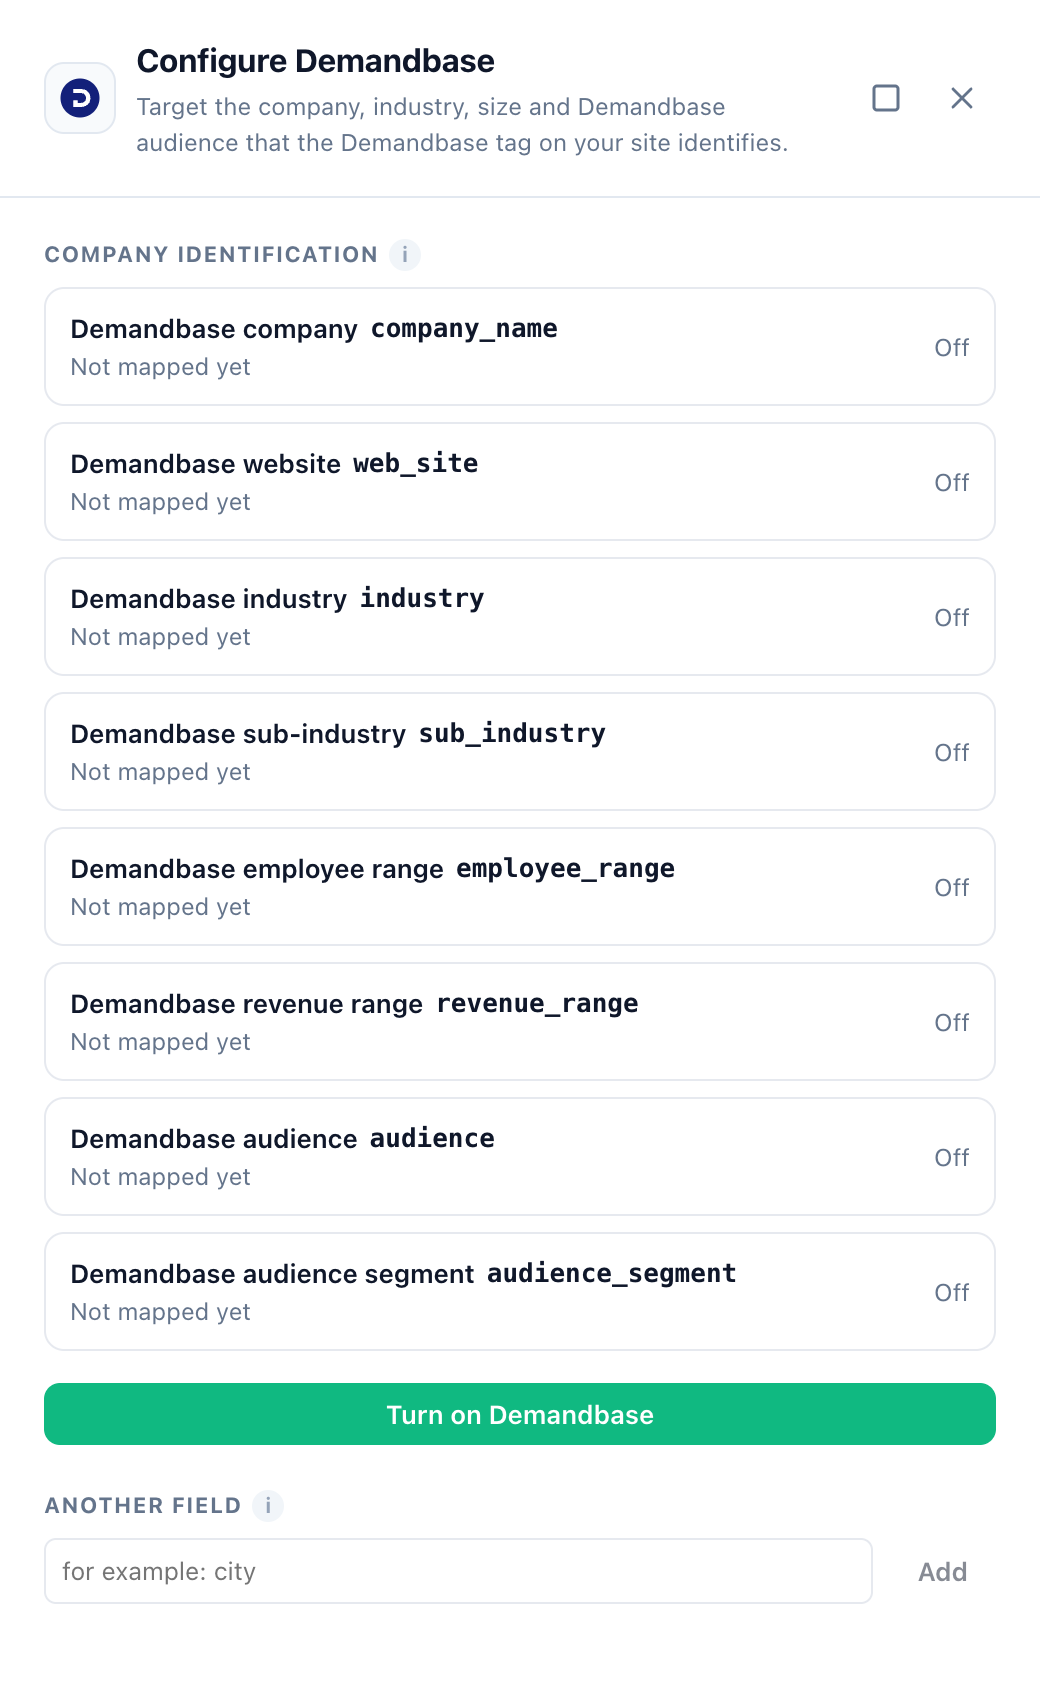
That is all. Personyze creates eight visitor attributes — Demandbase company, Demandbase website, Demandbase industry, Demandbase sub-industry, Demandbase employee range, Demandbase revenue range, Demandbase audience and Demandbase audience segment — and the containers that fill them. Each row in the drawer then shows a check and reads “Capturing into demandbase_…”, the drawer says All set., and the Demandbase card reads Configured. The attributes are ordinary ones: you find them under Settings → Visitor Attributes, and can pause or edit them there like any other.
Add more fields
Demandbase’s answer has many more fields than these eight. To add one:
- Open a page of your own website, open the browser’s developer console, and type
Demandbase.IP.CompanyProfile. You see every field Demandbase returned for your own visit, by name. - In the Demandbase drawer in Personyze, type the field’s name under Another field (for example
city) and click Add.
The new attribute is named “Demandbase” and the field’s name — for example Demandbase city.
Account Connector fields appear in the console as custom_fields_ followed by the field’s label, spaces included — for example custom_fields_Journey Stage. Add them exactly as written.
A field name starts with a letter or an underscore, and may contain letters, digits, spaces, hyphens and underscores — no dots, brackets or quotes. Anything else is refused with “Use the field name as it appears in the Demandbase response — no dots, brackets or quotes.”
Use it in a campaign
The Demandbase fields appear in the User CRM/ABM/Profile rule in any campaign’s audience, alongside your other profile fields. For example:
- Demandbase audience contains “Target Accounts” — content for your target account list only.
- Demandbase industry is “Software” — a hero image and case study for that industry.
- Demandbase custom_fields_Journey Stage is a stage — lead companies at that stage to a demo page.
You can also print a field in your content with dynamic variables — give each one a fallback, because many visitors have no company. For the whole account-based playbook, see Target visitors from specific companies (ABM).
Good to know
- It arrives a moment into the visit. The Demandbase tag looks the company up while the page loads. Personyze keeps watching the page and records each field as soon as it appears, so it is normally available within the first page view — but not in its very first instant.
- Many visitors record nothing, and that is correct. Home and mobile connections often do not resolve to a company, and a field Demandbase leaves empty records nothing.
- Personyze does not call Demandbase. It reads the answer the Demandbase tag already gave your page, in the visitor’s browser.
Troubleshooting
The attributes stay empty
Check that the Demandbase tag runs on the page: in the browser console, Demandbase.IP.CompanyProfile should show an object. If it is undefined, the tag is missing or blocked — for example by a consent tool until the visitor accepts. From a home connection, an empty answer is normal: test from an office network that Demandbase recognizes.
An added field stays empty
Check the name against the console exactly, including capitals and the spaces in Account Connector fields.
A row reads “Not mapped yet” again
Someone paused or removed its attribute under Settings → Visitor Attributes. Click Turn on Demandbase again: it switches back on what was paused and leaves the rest as it is.
Related
- Integrations — every other connection.
- Target visitors from specific companies (ABM)
- Targeting rules — targeting on the Demandbase fields.
- Leadinfo and Snitcher — the other company-identification tools read in the visitor’s browser.
- 6sense · ZoomInfo · Clearbit