
The form action collects leads — email sign-ups, demo requests, gated-content unlocks, anything you need a visitor to fill in — and everything about it is controlled from the action menu: the layout, the fields, what’s pre-filled, and exactly what happens when someone submits. This guide covers all three.
Watch the 1:17 walkthrough: starting from a template, editing the fields on the preview, and where the answers go.
Choose a form type
Every form is a full action you can restyle to your brand. Start from any of these:
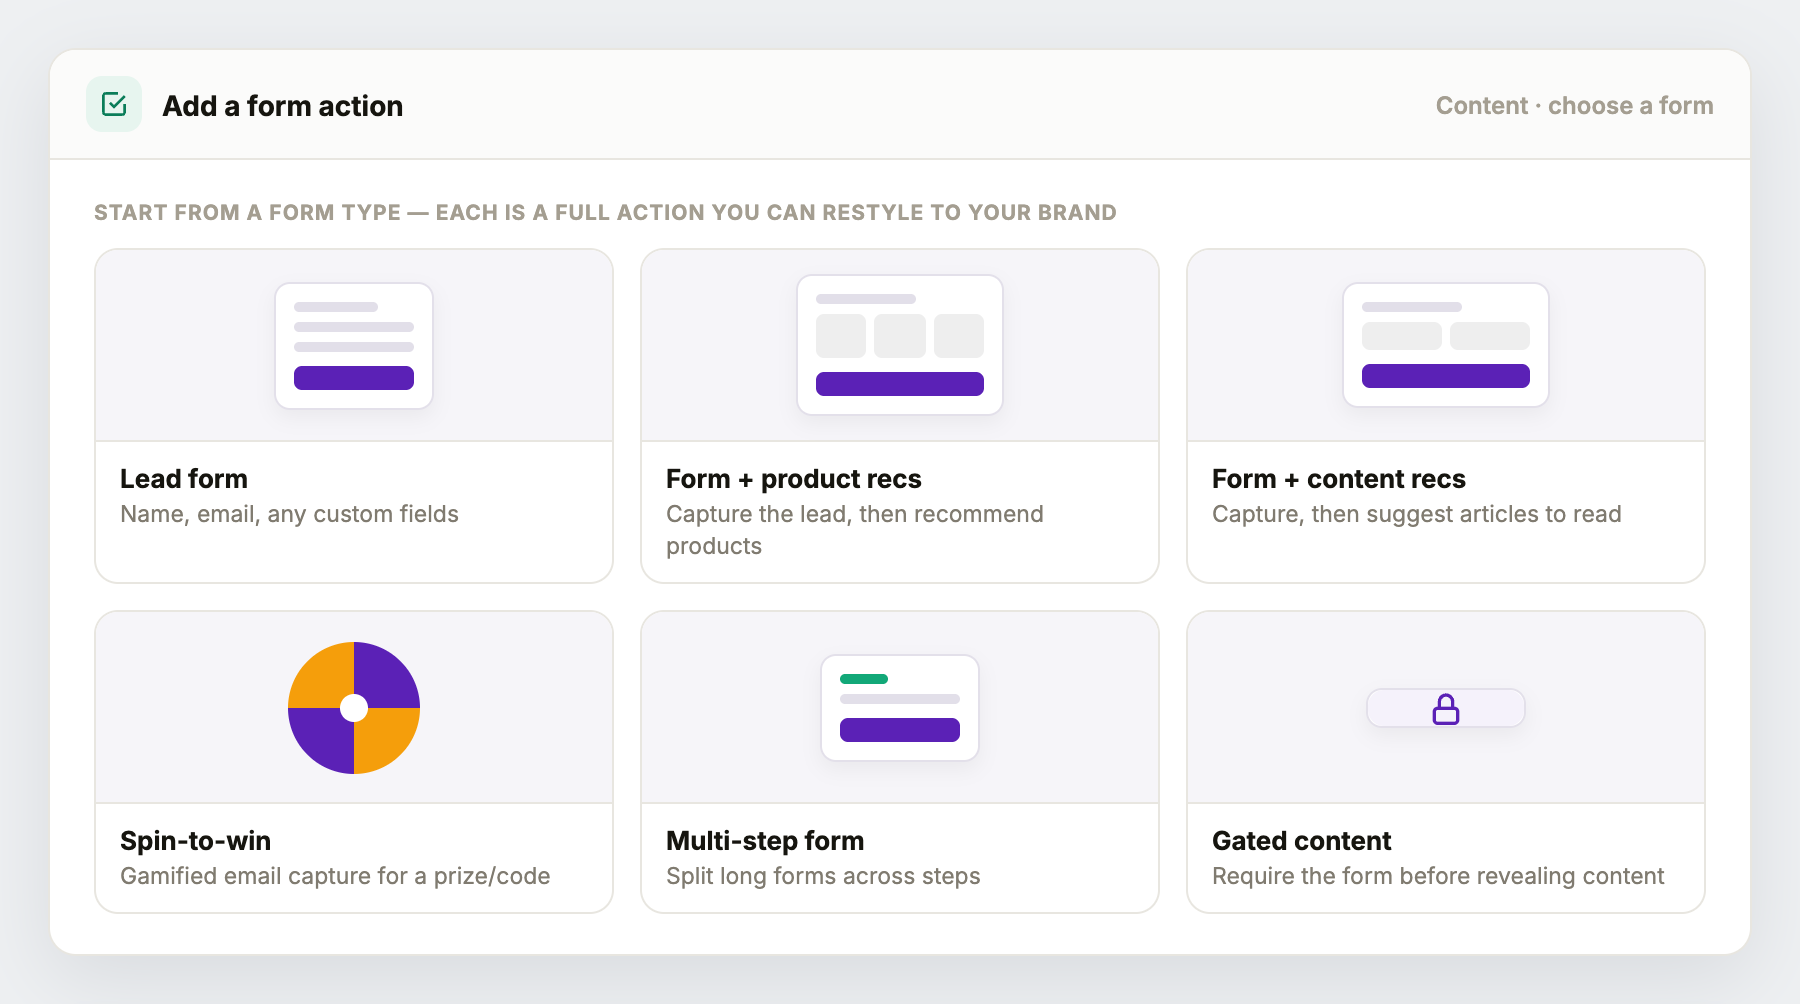
- Lead form — the classic: name, email, and any custom fields. See the Lead Form template.
- Form + product recommendations — capture the lead, then show personalized product recs in the same action — turn a sign-up into a shopping moment.
- Form + content recommendations — capture, then suggest the most relevant articles or resources to read next.
- Spin-to-win — gamified email capture for a code or prize. See the Spin Wheel template.
- Multi-step form — split a longer form across steps so it doesn’t feel heavy.
- Gated content — require the form before revealing a whitepaper, pricing, or a video.
Fields, dynamic values & pre-fill
Add whatever fields you need, then make the form feel like it already knows the visitor. Any field can carry a dynamic value — insert a variable and Personyze fills it from the visitor’s profile, your CRM, or a custom attribute.
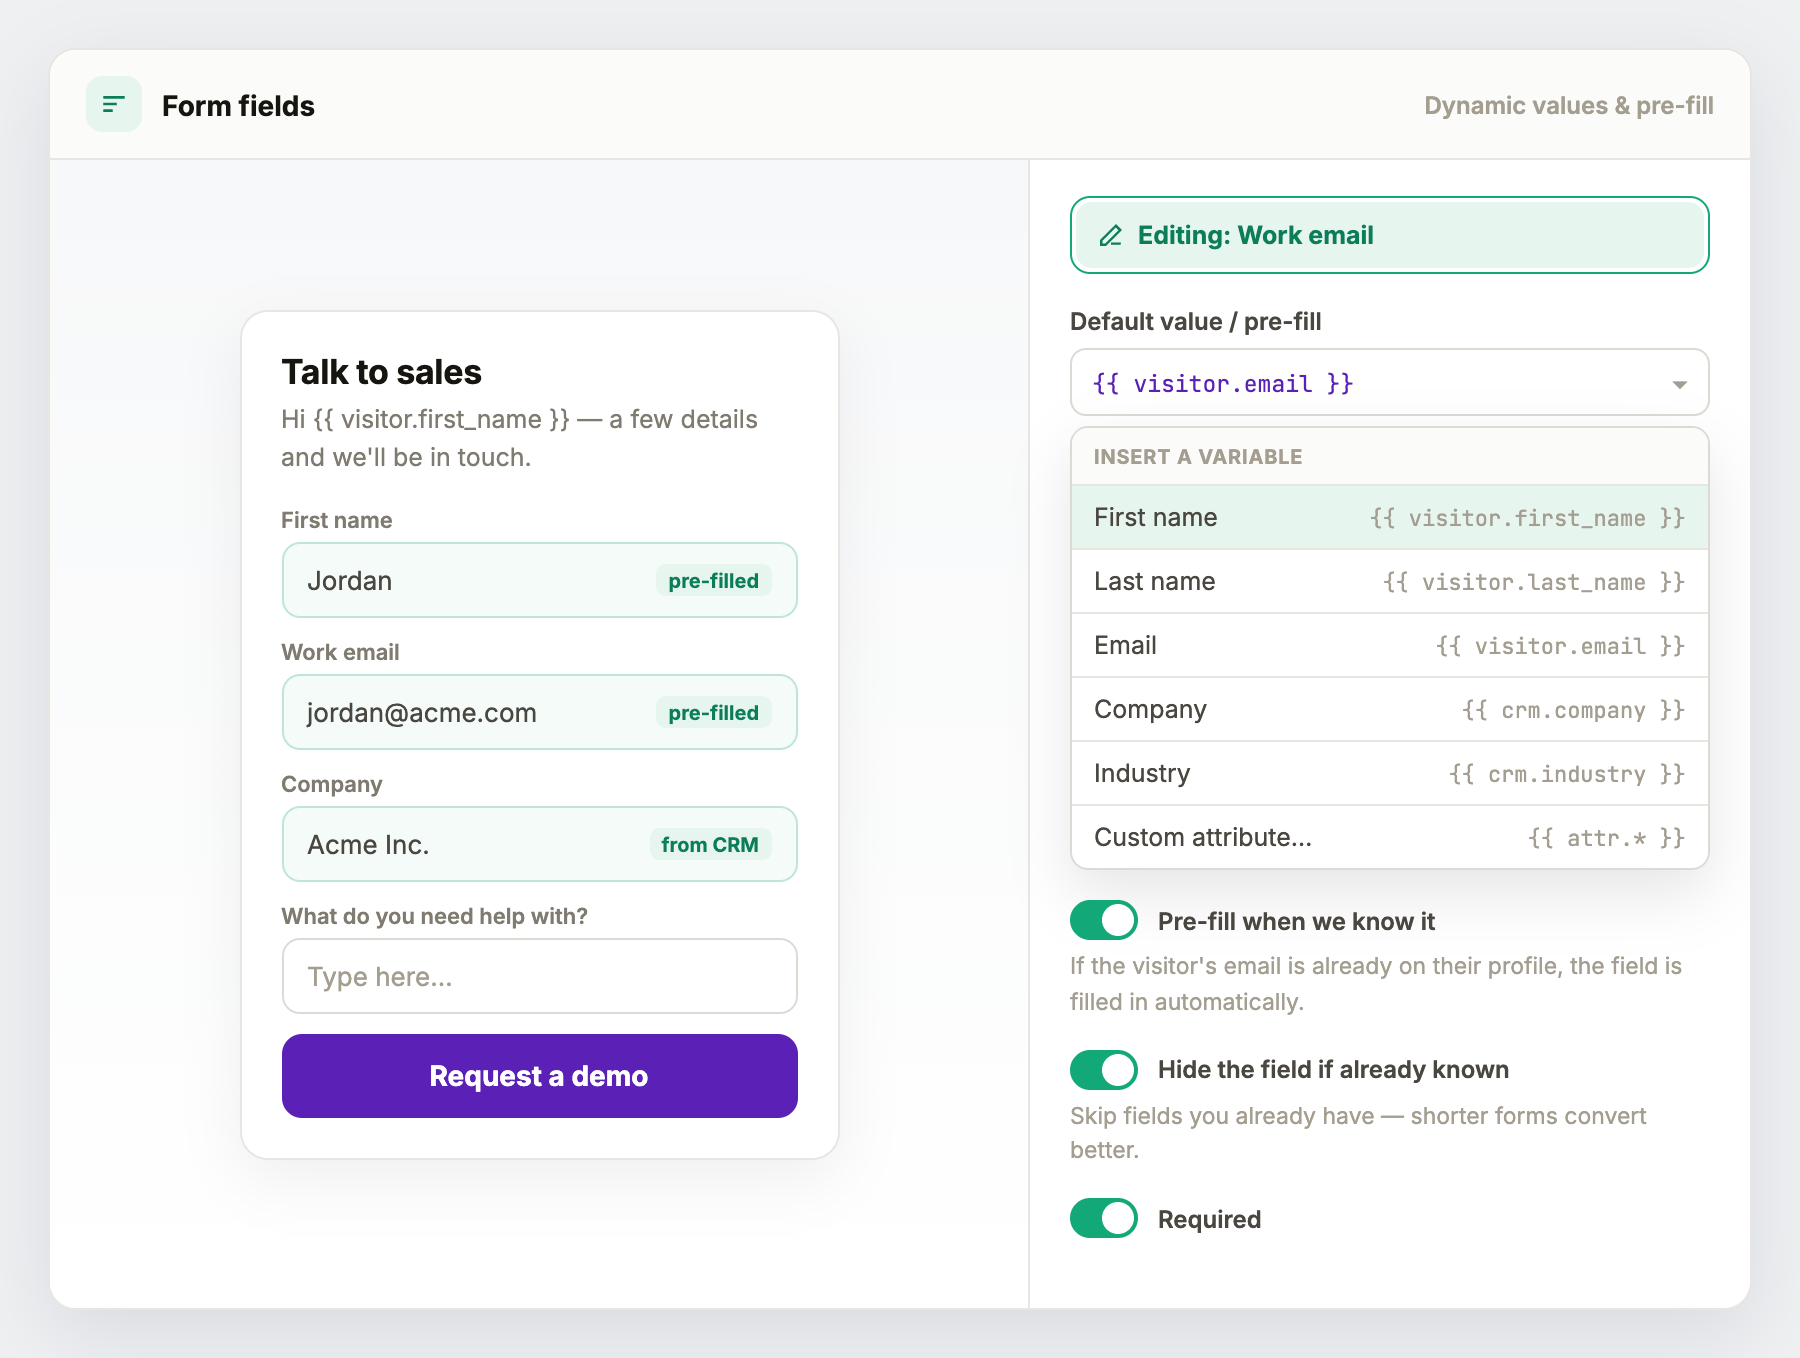
- Insert a variable —
{{ visitor.first_name }},{{ visitor.email }},{{ crm.company }},{{ crm.industry }}, or any custom attribute. Use them in field values and in the copy (e.g. a headline that greets the visitor by name). - Pre-fill when known — if the value is already on the visitor’s profile, the field is filled in automatically. A returning visitor sees their email already there.
- Hide the field if already known — skip what you already have. Shorter forms convert better, and if you already know the email you can drop the field entirely — even auto-submit-style flows where the visitor barely types.
- Required / validation — mark fields required and validate format (email, phone) before the form can be sent.
What happens when the form is submitted
This is where a form becomes useful. On submit you can do any of the following — several at once:
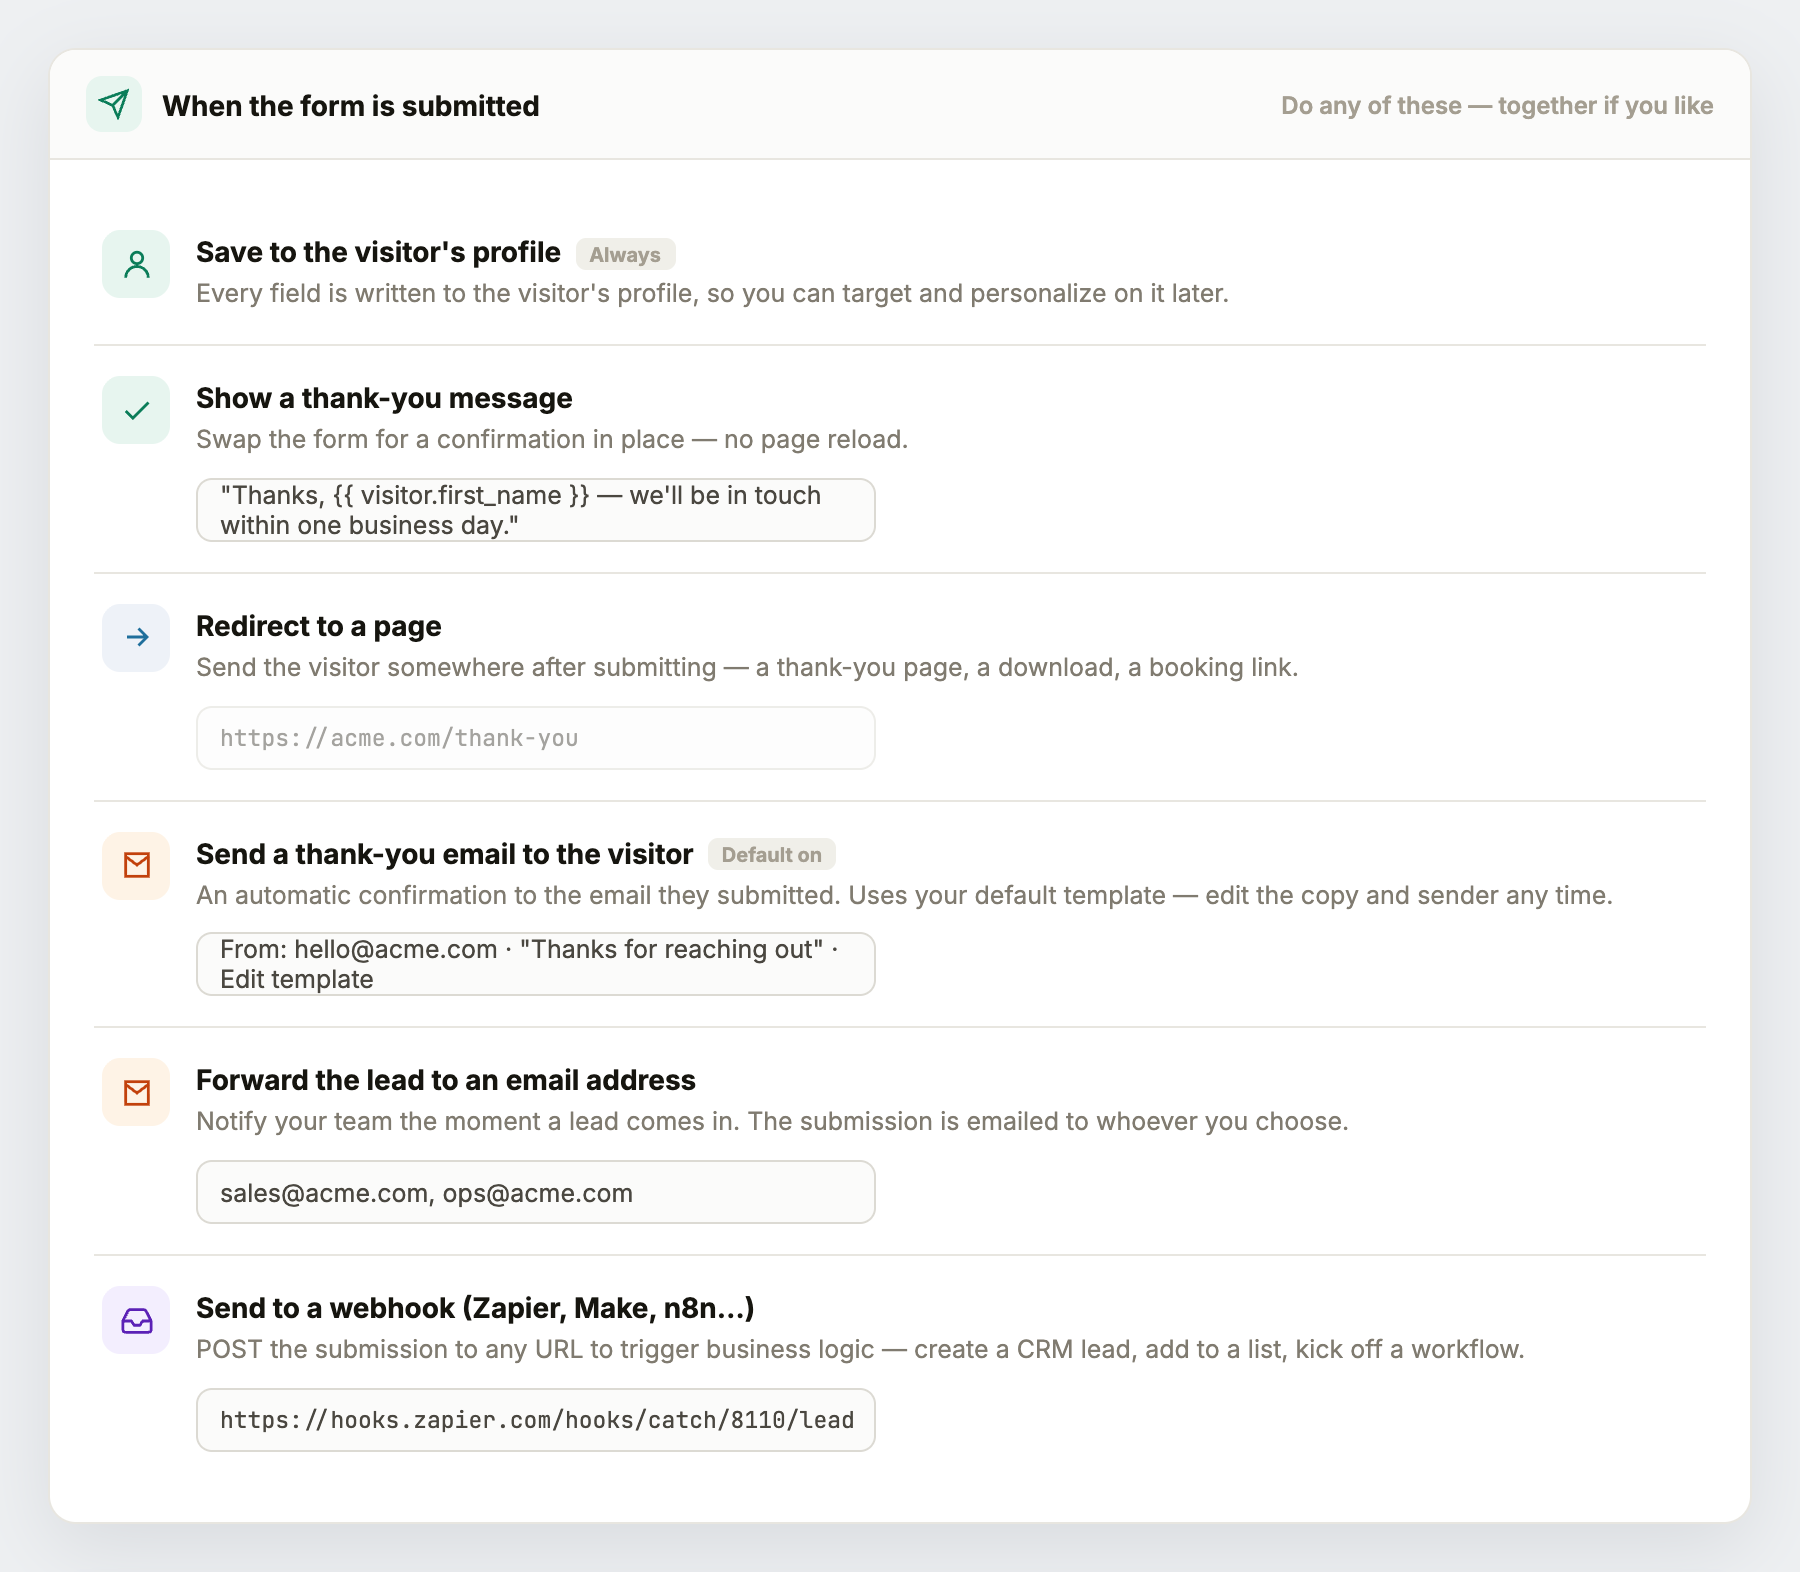
- Save to the visitor’s profile (always) — every field is written to the profile, so you can target and personalize on it afterward (e.g. “has requested a demo”).
- Show a thank-you message — swap the form for a confirmation in place, no page reload. The message can use variables too (“Thanks, {{ visitor.first_name }}”).
- Redirect to a page — send the visitor to a thank-you page, a download, or a booking link after they submit.
- Send a thank-you email to the visitor (on by default) — an automatic confirmation to the address they entered, using your default template. Edit the copy and sender any time.
- Forward the lead to an email address — email the submission to your team the moment it arrives (one or more addresses), so sales can act immediately.
- Send to a webhook — POST the submission to any URL to trigger business logic elsewhere: a webhook into Zapier, Make, n8n, or straight into your CRM. This is how you create a CRM lead, add to a list, or start a workflow. See also the Klaviyo integration for list/event sync.
These aren’t either/or. A common setup: show a thank-you message + send the visitor a confirmation email + forward the lead to sales + fire a webhook into the CRM — all from one submit.
Measure it
Add a form-submit conversion goal so the form’s completion rate shows up in campaign performance, and you can compare variations with an A/B test.
Reading the numbers: Forms on the Performance Metrics page explains every figure on this screen and how to read it.
Privacy
Collect only what you need, mark consent fields required where you must, and honor opt-outs — see GDPR & opt-out.
Tips
- Pre-fill and hide known fields — the shortest form that still gets what you need always wins.
- Keep the thank-you email on; it sets expectations and lifts trust even when a human follows up.
- Use the webhook for anything Personyze doesn’t do natively — it’s the universal escape hatch to your stack.
For a personalized, routed example end-to-end, see the ABM lead-form case study.