
The countdown templates put a live timer in front of your visitors to create urgency around a deadline — a sale that ends, a price that rises, or an event that starts. There are three of them. They share the same timer engine and almost all the same settings, so once you know one you know all three; pick the shape that fits where you want it to appear.
Video: Social proof and countdown timers (1:51) — it plays at the top of Set Social Proof Widget.
The three templates
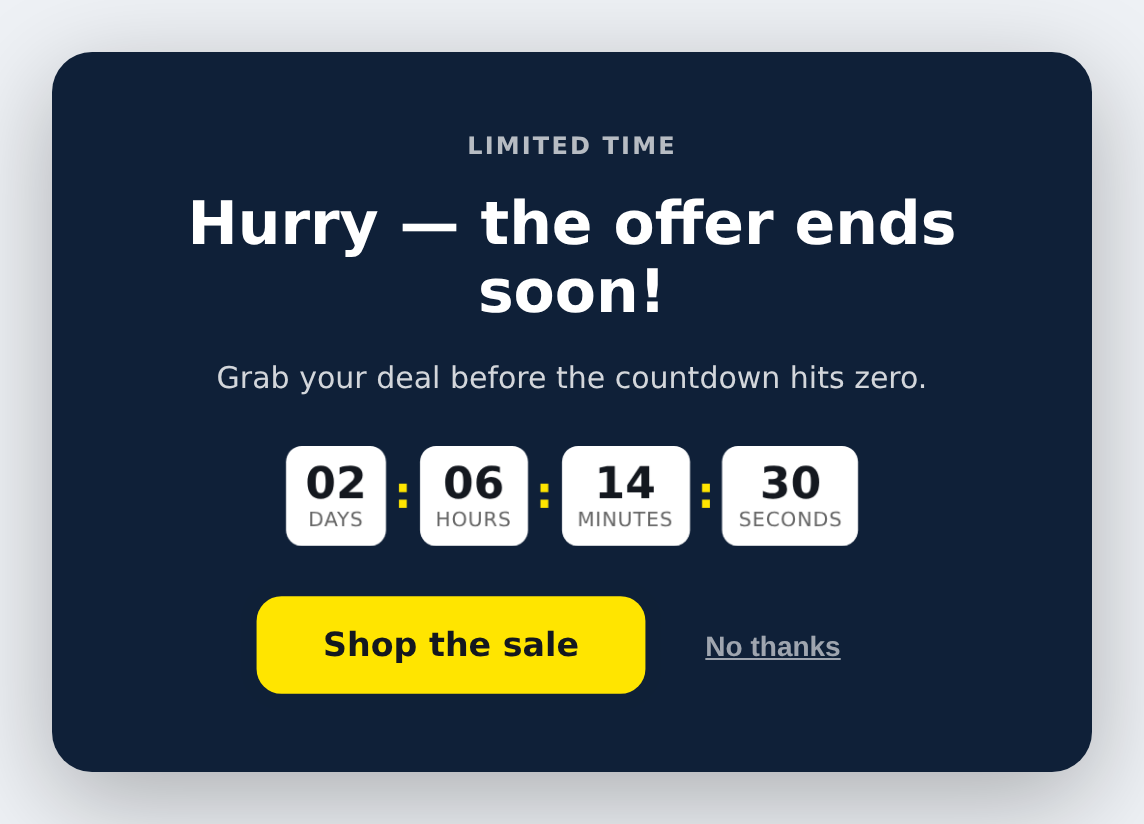
- Countdown Timer Card — a card with the headline, timer and button. Use it inline in a page, pair it with the action’s modal backdrop to make it a popup, or switch it to full-screen takeover. It can be stacked (everything centred) or side-by-side (text one side, timer the other).
- Countdown Timer Bar — a full-width strip pinned to the top or bottom of the screen, like an announcement bar with a live timer. It can also sit inline in the page.
- Event Countdown Bar — the same strip, set up for webinars, launches and live events. It adds an event icon, icons on the buttons, and a second link for “Add to calendar”.


Everything below applies to all three unless stated.
Setting the countdown
Open the Timer section and use Countdown logic. You have two ways to count down:
- A fixed date and time — everyone sees the same deadline. Use this for a real event or a sale that genuinely ends at a set moment.
- A per-visitor countdown — each visitor gets their own window (for example one hour from their first view), stored in their browser. Use this for evergreen offers. You can also let it restart after a chosen period.
Out of the box the templates are set to a per-visitor countdown of one hour, so a timer runs the moment you drop the template in. Change it to your real deadline before going live.
Choosing which units to show
The timer shows Days, Hours, Minutes and Seconds. To hide a unit, clear its label in the Timer section — emptying “Days Label” removes the whole days box, not just the caption. That is the way to show, say, only hours and minutes.
You can also change the labels to your own wording, and set the Separator Between Boxes (the : character) or clear it for no separator at all.
Styling the timer
Each part of the timer has its own style setting: the box behind each number, the number itself, the caption underneath, the separator, and the container around the whole thing. The defaults give you white boxes with dark numbers and a coloured separator.
One thing to know: the box style is applied to the separators as well as the number boxes, so if you give the boxes a background it will appear behind the separator too unless the separator style overrides it. The supplied defaults already handle this.
Text around the timer
Besides the eyebrow, title and subtext, you can turn on a short line above and below the timer — for example “Offer ends in” above and “Seats are limited” below. Both are off by default; switch them on in the Timer section and set your own wording. They travel with the timer wherever you position it.
When the timer reaches zero
In the Timer section you can set a message to show when the countdown finishes. When Timer Ends controls what happens to the rest of the content:
- Yes (default) — the message replaces everything, so the visitor sees a single clear statement such as “This offer has ended”.
- No — only the timer itself is replaced and the headline and buttons stay.
Where it appears
Card: inline places it in the page where the action is placed — combine it with the action’s modal backdrop setting if you want a classic popup. fullscreen turns the whole screen into the background, in a solid colour or your own image, with the content centred.
Bars: top or bottom pins the strip to that edge of the screen so it stays visible as the visitor scrolls; inline leaves it in the page flow.
Look and feel
- Preset — dark, light or brand colours.
- Size — compact, default or spacious.
- Corner Radius and Shadow — from square and flat through to round and strong. On a pinned bar the corners stay square so it sits flush against the edge.
- Background Image — off by default. Switch it on, pick an image, and use Background Overlay to darken it so your text stays readable.
- Decorative Shapes — optional subtle circles, corners or rings in the background. They pick up the preset colour automatically.
- Logo — off by default; switch it on and choose your image.
- Button Animation — a gentle pulse, a soft glow, or none.
- Timer Urgency Pulse — a subtle recurring pulse on the timer itself.
Buttons
All three have a main call-to-action with your own text and link, plus an optional “No thanks” button that simply dismisses it.
The Event Countdown Bar adds a second link next to the main button, set up by default as “Add to calendar”. Point it at your Google Calendar link, Outlook link or an .ics file. It also lets you put an icon inside each button, and an event icon beside the text — a calendar, video camera, microphone, ticket and so on.
Closing it, and an important testing note
The Close section controls the X button: whether it shows, how it looks, and whether it is always visible or only on hover. The close button also stops the action being shown again for a while.
Please read this before you test: once the action has been dismissed, it will stop appearing for you as well for the number of sessions set on the action. That can easily look like the template is broken when it is working exactly as configured. So:
- Finish your testing and QA first, and turn the hide-after behaviour on afterwards.
- If it has already stopped appearing and you need to see it again, clear the cookies and site data for your site, or open it in an incognito / private window.
- How many sessions it stays hidden is set on the action itself, under Placement / Trigger, not in the template.
A note about the editor preview
Two things only happen on your real site, not inside the editor panel:
- The timer only counts in the live preview and on your site. Inside the editor it renders as a static set of boxes.
- Full-screen and pinned bars do not float in the editor. They deliberately render as an ordinary block so they cannot cover the editing toolbar. Use the live preview to see them properly.
This is expected behaviour, not a fault.
Technical notes
- Who sees the countdown, where, and how often is set on the action, not in the template. The template controls only its appearance and behaviour.
- All three templates use Personyze’s built-in countdown engine, so time zones and the per-visitor cookie logic are handled for you.
- The timer stays on a single line at every size, including on phones, where the boxes shrink rather than wrap.
- On narrow screens the bars stack their content into a column automatically.
Further reading
- Website popup templates — all 16 templates, and how to pick the right format.
- Gamification marketing — the mechanics behind interactive templates and where they fit.