
The goal: when someone from one of your target accounts lands on your site, they see content meant for them — their industry’s case study, their logo-tier pricing, a banner that greets their company — and your team knows they visited. Here are your options at every stage, from identifying the company to measuring the outcome.
Watch the 4:40 walkthrough: one account-based campaign built end to end — choosing the accounts you want, recognising them when they arrive, and showing each one its own content.
1. Identify the company behind the visit
Pick one (or combine):
| Route | How it works | Setup |
|---|---|---|
| Reverse-IP integrations | Albacross, Clearbit, ZoomInfo, 6sense, Leadfeeder or leadREBEL resolve the visitor’s IP to a company and write firmographics (company, domain, industry, size, revenue, country) onto the visitor profile — no login or form needed. | One key in Settings → Integrations + one-click field mapping. E.g. Albacross, Clearbit, ZoomInfo, 6sense. |
| Demandbase | If the Demandbase tag is on your site, Personyze reads its answer off the page: company, industry, size, and your Demandbase audiences such as your target account list — plus any Account Connector field you add. | No key: one click in Settings → Integrations. See Demandbase. |
| Known users from your CRM | Import your contacts/target-account list; visitors are recognized when they identify (login, form, email click) and carry their CRM fields. | CRM / User-List Targeting + identity keys. Salesforce Accounts reach anonymous visitors by their company’s domain; HubSpot/Zoho/Segment sync: see integrations. |
| Intent data | 6sense adds buying-stage and intent scores on top of identification, so you can target “in-market” accounts differently from cold ones. | 6sense integration. |
2. Build the audience
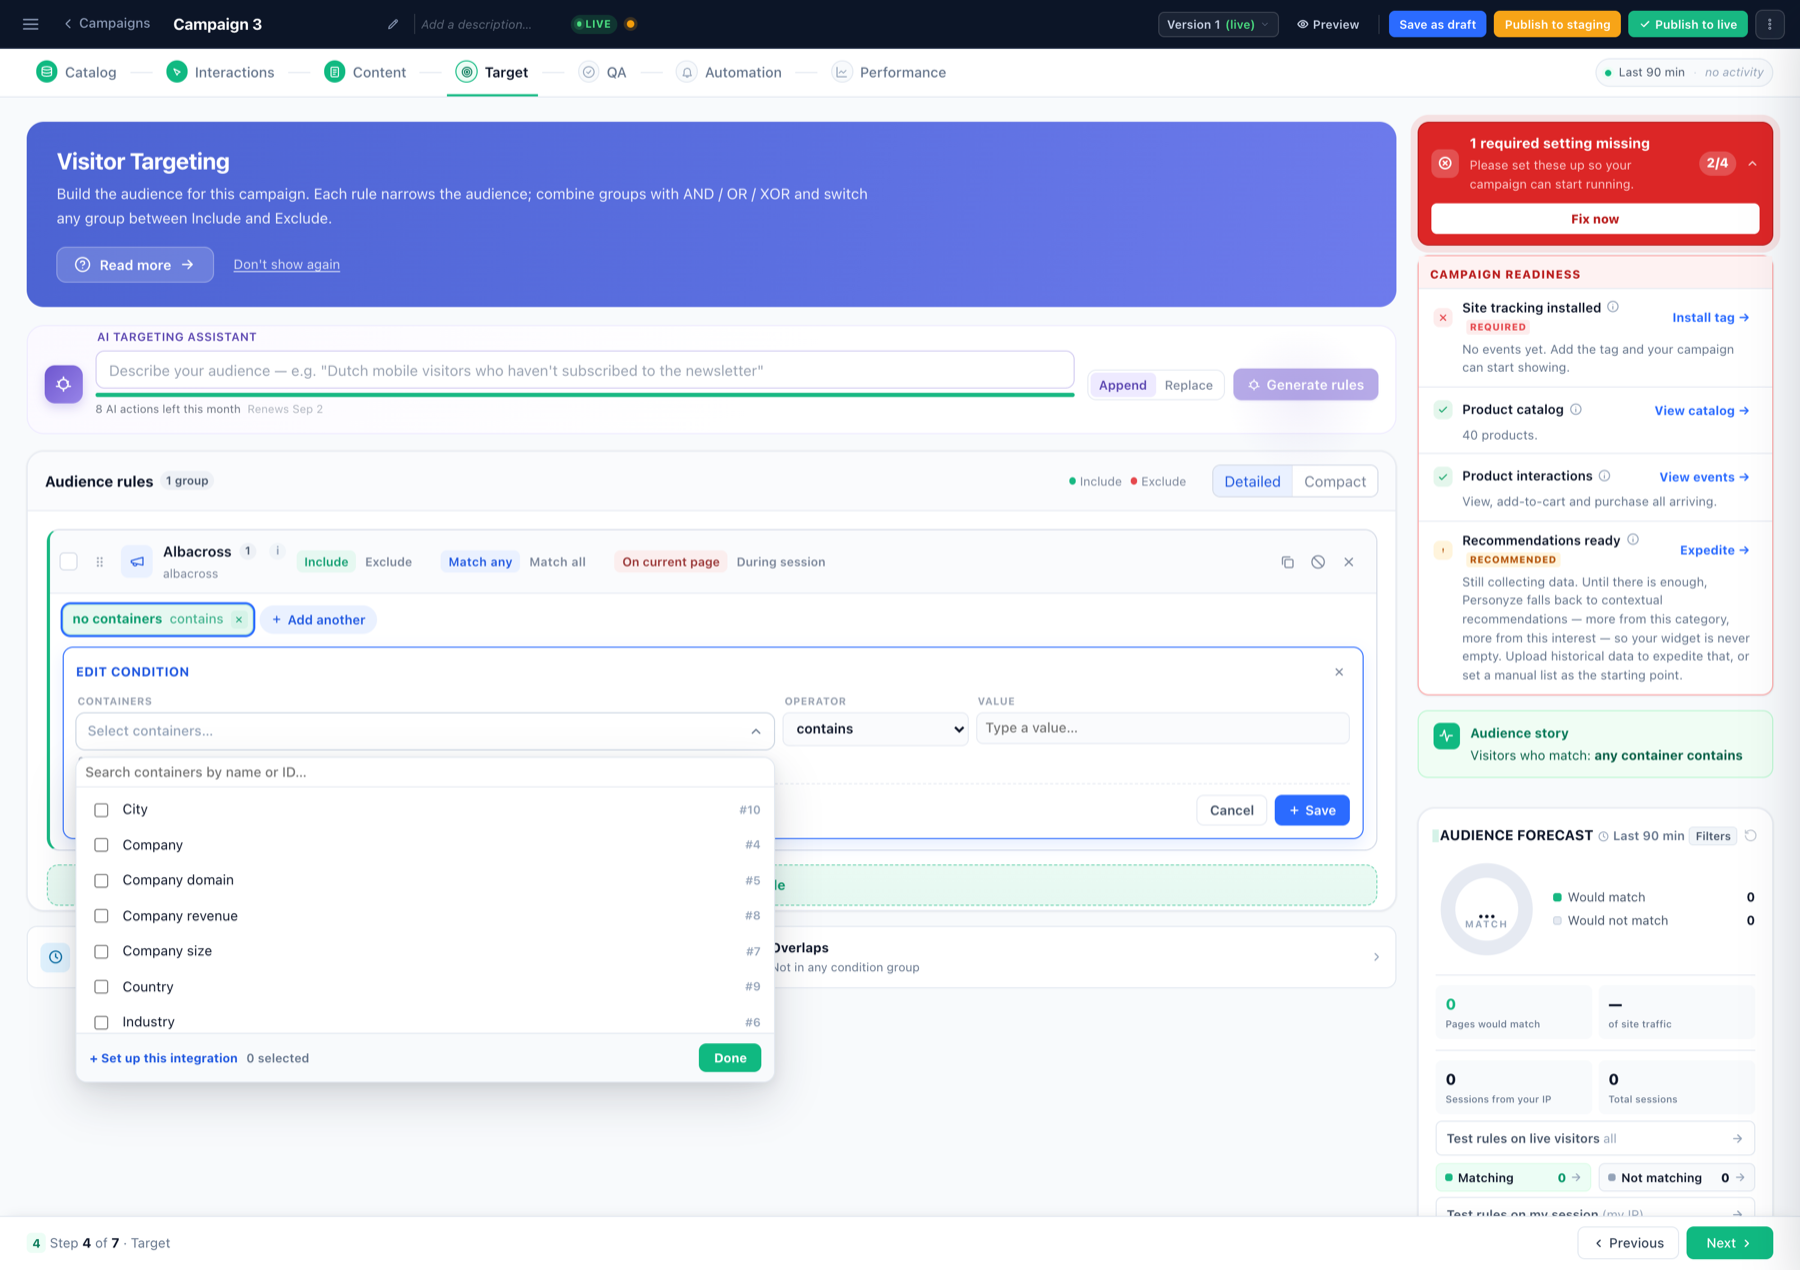
In the campaign’s Target step, click Add audience rule → Integrations and pick your provider — the mapped fields (Company, Industry, Company size…) appear as rule conditions. Match a named-account list with is one of (list, file) and paste or upload your target domains; or match by firmographics (“industry is software AND company size > 200”). Combine with behaviour — pages seen, visits count — with AND/OR, or describe the whole thing to the AI Targeting Assistant.
3. Personalize what they see
- Edit the page for the segment — WYSIWYG editor: swap the hero headline, testimonials, case-study logos per industry or account tier.
- Greet them — a banner or popup with dynamic variables: “Welcome, {company} — see how teams in {industry} use us.”
- Route them — a redirect to the dedicated landing page for that account tier.
- Per-audience variations — one action, different values per segment via each setting’s ⚡ Variations.
4. Tell your team — and your stack
- Capture the lead in context — a lead form shown only to target accounts, feeding Zapier/Slack/HubSpot/Klaviyo via the form’s destinations.
- Send events out — the Send Event to Analytics action reports the audience match to GA4, Segment, Tealium or Klaviyo, so scoring and sequences react to the visit.
- Watch it live — Live visits shows identified companies as they browse.
5. Measure
The campaign’s Performance step shows who matched, what they saw and what it converted; A/B test the personalized experience against control to prove the lift. Check audience overlaps if several ABM campaigns could match the same visitor.
Watch-outs
- Reverse-IP coverage is partial — remote workers and small companies often resolve to ISPs. Personalize additively (a better default stays for everyone else) rather than gating content.
- Map fields before targeting — rules list the fields you mapped in the drawer; if the list is empty, activate the integration’s recommended setup first.
- Exclude your own traffic — your company resolves to itself; add an exclude rule so your team doesn’t skew results.